
Chapter 12
LINQ to XML
WHAT YOU WILL LEARN IN THIS CHAPTER:
- What LINQ is and how it is used
- Why you need LINQ to XML
- The basic LINQ to XML process
- More advanced features of LINQ to XML
- XML Literals in .NET
So far you’ve seen a number of ways that you can read, process, and create XML. You can use the document object model (DOM), which loads the whole document into memory, or one of the streaming methods covered in the previous chapter, such as Microsoft’s XmlReader or the SAX interface. This chapter presents yet another option, which unifies the task of interacting with XML with one of Microsoft’s core programming technologies, LINQ.
WHAT IS LINQ?
One aim of most programming languages is to be consistent. One area in which most languages fail in this respect is querying. The codes to query a database, a collection of objects, and an XML file are radically different. Microsoft has tried to abstract the querying process so that these, and other data sources, can be treated in a similar fashion. To this end, Microsoft invented Language Integrated Query, or LINQ.
LINQ is loosely based on SQL (the standard way to query a relational database), but gives you two ways to specify your query. The first, and some would say easier of the two because it tries to imitate natural language, takes the following form:
from <range variable> in <collection>
where <predicate>
select <something using the range variable>
Here, range variable is a standard identifier that is used to refer to the items selected, collection is a collection of objects to be queried, and predicate is an expression that yields true or false to determine whether to include the objects in the final results. It’s not essential to have a predicate, and you can also incorporate ordering, grouping, and all the standard operations you may need. For a concrete example, take the simple task of extracting the even numbers from an array (these examples are in C#, although there’s little difference from VB.NET or other .NET languages):
// Define an array of integers
int[] numbers = new int[10] { 0, 1, 2, 3, 4, 5, 6, 7, 8, 9};

var evenNumbers =
                   from num in numbers
                   where (num % 2) == 0
                   select num;
Here the range variable is num, the collection is an array of numbers named numbers, and the predicate is (num % 2) == 0. (The remainder after dividing by two is zero; in other words, the number is even.)
With LINQ, the query isn’t executed immediately. For now, evenNumbers holds the details of the query, not the actual results. The query will actually run when the results are used as shown in the following snippet:
// Define an array of integers
int[] numbers = new int[10] { 0, 1, 2, 3, 4, 5, 6, 7, 8, 9};

var evenNumbers =
                   from num in numbers
                   where (num % 2) == 0
                   select num;
// Output the even numbers to the console
// This will actually execute the LINQ operation
foreach(int number in evenNumbers)
{
  Console.WriteLine(number);
}
If you execute this code in the debugger and step through it line by line, you’ll see that the LINQ operation doesn’t execute until the foreach loop outputs the results.
Using keywords to define the query is a very similar process across all the .NET languages. It has the advantage of being easy to read, but unfortunately many LINQ operations don’t have keywords associated with them. That’s why there’s another way of specifying a query: using standard method syntax. In standard method syntax, the preceding example would now look like this:
// Define an array of integers
int[] numbers = new int[10] { 0, 1, 2, 3, 4, 5, 6, 7, 8, 9};

var evenNumbers = numbers.Where(num => num % 2 == 0);
// Output the even numbers to the console
// This will actually execute the LINQ operation
foreach(int number in evenNumbers)
{
  Console.WriteLine(number);
}
This time you just use an extension method, Where(), which takes a lambda expression as its argument. This lambda expression is equivalent to the predicate used in the first example.
So far you’ve seen how you can query a locally-defined array. If this were all you could do with LINQ, it wouldn’t be worth the trouble. However, LINQ can also deal with queries against database objects using, among other things, either LINQ to SQL or LINQ to Entities. Following is a sample query that (after you have set up the required database connection) queries for all customers who live in the USA:
// Get database context by opening the SQL Server mdf file
var northwind = new Northwind(“Northwnd.mdf”);
var customersInUSA = from customer in northwind.Customers
                     where customer.Country == “USA”
                     select customer;
// Do something with customersInUSA
This book doesn’t cover the intricacies of how the northwind object is created from the database file, but you can see how the actual query has the same format as the one that processed the integer array.
You’ve seen in this section how LINQ can cope with many different types of collections; strictly speaking though, LINQ doesn’t work against collections, it operates against the IEnumerable<T> interface. This interface represents any collection of objects that can be enumerated and contain objects of type T. Any collection that implements this interface then acquires all the methods, such as Where(), OrderBy(), and so on, that are defined using extension methods (methods that are added to the class using external assemblies). The reason LINQ to XML works is that the classes it exposes implement IEnumerable<T>, enabling you to use the same syntax for querying as you use against other data sources.
This is the beauty of LINQ. It means that when you work with collections you always use a similar syntax to query them, and this applies to XML as well. At this stage, though, you may be asking yourself, “Why do I need yet another way of working with XML? I already have a number of other options.” The following section explains the importance of this new method.
Why You Need LINQ to XML
LINQ to XML is a useful addition to your XML armory for several reasons, spelled out in the following list:
- LINQ to XML enables you to use a similar technique to query a wide variety of data sources.
- LINQ to XML offers a way to extract data from an XML document that is much easier than both the DOM and the streaming/event-driven styles of .NET’s XmlReader and SAX (which were covered in the previous chapter).
LINQ to XML offers a new way of creating XML documents that is easier than using the DOM or an XmlWriter, including a simple way to deal with namespaces that mimics how they are declared in XML. It is recommended that if you are developing in .NET and have to extract information from an XML document, your default choice should be LINQ to XML. You should choose some other way only if there is a good reason to—for example, the document is too large to load into memory and needs one of the streaming handlers. These advantages are discussed in greater detail later in this chapter, but first you need to learn how to use LINQ to XML.
Using LINQ to XML
Now that you know a little about LINQ and why it might be a good choice for reading or creating XML, this section shows you how LINQ works in practice.
Often, with LINQ to XML tutorials, you’re presented with a sample XML document and shown how to query it. You’re going to do the opposite here: you’ll see how to create an XML document using what is known as functional construction. The standard way of creating XML using the document object model is to create the root element and then append whatever child elements and attributes are needed. A small sample in C# that creates an XML file describing a music collection is shown here:
 XmlDocument doc = new XmlDocument();
XmlElement root = doc.CreateElement("musicLibrary");
doc.DocumentElement = root;
XmlElement cd = doc.CreateElement("cd");
cd.SetAttribute("id", "1");
XmlElement title = doc.CreateElement("title");
title.InnerText = "Parallel Lines";
cd.AppendChild(title);
XmlElement year = doc.CreateElement("year");
year.InnerText = "2001";
cd.AppendChild(year);
XmlElement artist = doc.CreateElement("artist");
artist.InnerText = "Blondie";
cd.AppendChild(artist);
XmlElement genre = doc.CreateElement("genre");
genre.InnerText = "New Wave";
cd.AppendChild(genre);
doc.DocumentElement.AppendChild(cd);
// Add more <cd> elements
Program.cs in XmlDocumentDemo project
The preceding code adds one <cd> element with its attributes and children to the collection. By repeating the code, other <cd> elements can be added to form the complete music collection. You will end up with the file shown in Listing 12-1:
![]() LISTING 12-1: MusicLibrary.xml
LISTING 12-1: MusicLibrary.xml
<musicLibrary>
  <cd id=”1”>
    <title>Parallel Lines</title>
    <year>2001</year>
    <artist>Blondie</artist>
    <genre>New Wave</genre>
  </cd>
  <cd id=”2”>
    <title>Bat Out of Hell</title>
    <year>2001</year>
    <artist>Meatloaf</artist>
    <genre>Rock</genre>
  </cd>
  <cd id=”3”>
    <title>Abbey Road</title>
    <year>1987</year>
    <artist>The Beatles</artist>
    <genre>Rock</genre>
  </cd>
  <cd id=”4”>
    <title>The Dark Side of the Moon</title>
    <year>1994</year>
    <artist>Pink Floyd</artist>
    <genre>Rock</genre>
  </cd>
  <cd id=”5”>
    <title>Thriller</title>
    <year>2001</year>
    <artist>Michael Jackson</artist>
    <genre>Pop</genre>
  </cd>
</musicLibrary>
Although this code gets the job done, it’s not particularly easy to read and it’s quite long-winded, having to create, set, and append values for every element. LINQ to XML’s functional approach is shorter and more legible, as shown here:
 XElement musicLibrary =
        new XElement(“musicLibrary”,
          new XElement(“cd”,
            new XAttribute(“id”, 1),
            new XElement(“title”, “Parallel Lines”),
            new XElement(“year”, 2001),
            new XElement(“artist”, “Blondie”),
            new XElement(“genre”, “New Wave”)));
Program.cs in BasicDocumentCreation project
This code uses classes form the System.Linq.Xml namespace. The basic building blocks in this library are XElement and XAttribute. The first one, XElement, has an overloaded constructor; two of the most commonly used constructors take the name of the element, or more technically an XName, followed by its content or an array of content objects. The full definitions of these two overloads are:
public XElement(XName name, object content);
public XElement(XName name, params object[] content);
For the XName you can just use a string, which is automatically cast to an XName. The content is defined as an object, so you can either have a simple value such as a string, or include other XElements and XAttributes. The only thing you have to worry about is making sure your parentheses match, and this is fairly easy if you indent the code to follow the actual structure of the XML you are aiming to create.
You don’t have to create a document from scratch, of course. You can also load it from a file, a URL, an XmlReader, or a string value. To load from a file or URL, use the static Load() method:
XElement musicLibrary.Load(@”C:XMLmusicLibrary.xml”) ;
or
XElement musicLibrary.Load(@”http://www.wrox.com/samples/XML/musicLibrary.xml”) ;
If you want to turn a string into an XML document, use the static Parse() method (shown in the following code snippet), which takes the string to convert to XML as its argument:
XElement musicLibrary = XElement.Parse(
@”<musicLibrary>
    <cd id=”1”>
      <title>Parallel Lines</title>
      <year>2001</year>
      <artist>Blondie</artist>
      <genre>New Wave</genre>
    </cd>
    <!-- more <cd> elements here -->
  </musicLibrary”) ;
The next section takes you a bit further into using LINQ to XML with an introduction to creating documents using XDocument class.
CREATING DOCUMENTS
So far you’ve seen the XElement and the XAttribute classes. You may be wondering why you haven’t used an XDocument class; after all, if you create an XML document using the DOM you need to make heavy use of the DomDocument. This is where LINQ to XML and the DOM differ most. LINQ to XML does have an XDocument class, but you don’t have to use it; most of the time you just use the XElement class to load XML or build elements. However, in some instances the XDocument class is invaluable.
The XDocument class is useful when you need to add some metadata to the XML document—an XML declaration, for example—or when you want a comment or processing instruction to appear before the document element. Say you want the standard XML declaration declaring that the version is 1.0, the encoding is UTF-8, and that the document is standalone. Following is the output you’re looking for:
<?xml version=”1.0” encoding=”utf-8” standalone=”yes”?>
You achieve this by first using the XDocument class at the top level, and then by using the XDeclaration class, which takes three parameters to represent the version, the encoding, and the value for the standalone attribute. See the following example:
Program.cs in project BasicXDocumentUse
If you want to add a comment, use the XComment class like so:
XDocument musicLibrary =
  new XDocument(
    new XDeclaration(“1.0”, “utf-8”, “yes”),
      new XComment(“This document holds details of my music collection”),
      new XElement(“musicLibrary”,
        new XElement(“cd”,
        new XAttribute(“id”, 1),
        new XElement(“title”, “Parallel Lines”),
        new XElement(“year”, 2001),
        new XElement(“artist”, “Blondie”),
        new XElement(“genre”, “New Wave”))));
This leads to the following document:
<?xml version=”1.0” encoding=”utf-8” standalone=”yes”?>
<!-- This document holds details of my music collection -->
<musicLibrary>
  <cd id=”1”>
    <title>Parallel Lines</title>
    <year>2001</year>
    <artist>Blondie</artist>
    <genre>New Wave</genre>
  </cd>
</musicLibrary>
Finally, you can also use the XProcessingInstruction in a similar way. For example, if you want to associate an XSL transformation with the document you’d use the following code:
XDocument musicLibrary =
  new XDocument(
    new XDeclaration(“1.0”, “utf-8”, “yes”),
      new XProcessingInstruction(“xml-stylesheet”, “href='music.xslt'”),
      new XComment(“This document holds details of my music collection”),
      new XElement(“musicLibrary”,
        new XElement(“cd”,
        new XAttribute(“id”, 1),
        new XElement(“title”, “Parallel Lines”),
        new XElement(“year”, 2001),
        new XElement(“artist”, “Blondie”),
        new XElement(“genre”, “New Wave”))));
This code produces the following result:
<?xml version=”1.0” encoding=”utf-8” standalone=”yes”?>
<?xml-stylesheet href='music.xslt'?>
<!-- This document holds details of my music collection -->
<musicLibrary>
  <cd id=”1”>
    <title>Parallel Lines</title>
    <year>2001</year>
    <artist>Blondie</artist>
    <genre>New Wave</genre>
  </cd>
</musicLibrary>
So far the documents you have created have all been free of namespaces. What happens when you need to create elements or attributes that belong to a particular namespace? The next section addresses this situation.
Creating Documents with Namespaces
Creating elements in namespaces is always a little trickier than those without one, whatever programmatic method you are using. LINQ to XML tries to make it as easy as possible by having a separate class, XNamespace, that can be used to declare and apply a namespace to an element or an attribute.
To create a document with a namespace, perform the following steps:
 <musicLibrary xmlns=”http://www.wrox.com/namespaces/apps/musicLibrary”>
  <cd id=”1”>
    <title>Parallel Lines</title>
    <year>2001</year>
    <artist>Blondie</artist>
    <genre>New Wave</genre>
  </cd>
  < !-- more cd elements -->
</musicLibrary>
XNamespace ns = “http://www.wrox.com/namespaces/apps/musicLibrary” ;
XElement musicLibrary =
    new XElement(ns + “musicLibrary”,
      new XElement(ns + “cd”,
        new XAttribute(“id”, 1),
   new XElement(ns + “title”, “Parallel Lines”),
   new XElement(ns + “year”, 2001),
   new XElement(ns + “artist”, “Blondie”),
   new XElement(ns + “genre”, “New Wave”)));
Program.cs in DocumentWithDefaultNamespace project
Notice how the XNamespace class doesn’t use a constructor; you simply set the namespace URI as a string. When you create elements that belong in a namespace (in this example they all do), you concatenate the namespace with the actual name. XNamespace’s class overrides the plus (+) operator so that this action doesn’t merge the two strings, but creates a true namespaced element.
Creating Documents with Prefixed Namespaces
The code for using a prefixed namespace is quite similar to the code for a default namespace; the main difference is that you need to use the XAttribute class to define your namespace URI to prefix mapping like so:
The highlighted line uses the XAttribute class and a static member of the XNamespace class, Xmlns, to create the familiar xmlns:ns=”http://www.wrox.com/namespaces/apps/musicLibrary” code on the root element. Now that LINQ to XML knows the namespace URI is bound to the prefix ns, all the elements in this namespace will automatically be given this prefix. The subsequent document looks like this:
<ns:musicLibrary xmlns:ns=”http://www.wrox.com/namespaces/apps/musicLibrary”>
  <ns:cd id=”1”>
    <ns:title>Parallel Lines</ns:title>
    <ns:year>2001</ns:year>
    <ns:artist>Blondie</ns:artist>
    <ns:genre>New Wave</ns:genre>
  </ns:cd>
  <!-- more cd elements -->
</ns:musicLibrary>
So far you’ve seen how to create documents from scratch and how to load them from an existing source. The next section covers how to extract data from an XML document.
EXTRACTING DATA FROM AN XML DOCUMENT
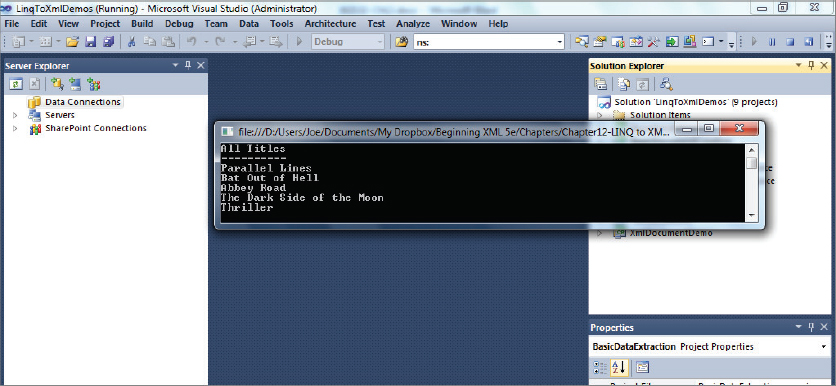
This section looks at some common scenarios that involve loading an existing XML file and retrieving specific parts of it. For the following activity, you load MusicLibrary.xml and display a list of all the CD titles. For this you’ll be making use of the Elements() method.
 using System;
using System.Xml.Linq;

namespace BasicDataExtraction
{
  class Program
  {
    static void Main(string[] args)
    {
      XElement musicLibrary = XElement.Load(@”MusicLibrary.xml”);
      ShowTitles(musicLibrary);
      Console.ReadLine();
    }

    static void ShowTitles(XElement musicLibrary)
    {
      foreach (XElement t in musicLibrary.Elements(“cd”).Elements(“title”))
      {
        Console.WriteLine(t.Value);
      }
    }
  }
}
Program.cs in BasicDataExtraction project
using System;
using System.Xml.Linq;
    static void Main(string[] args)
    {
      XElement musicLibrary = XElement.Load(@”MusicLibrary.xml”);
  {
    static void Main(string[] args)
    {
      XElement musicLibrary = XElement.Load(@”MusicLibrary.xml”);
      ShowTitles(musicLibrary);
    static void ShowTitles(XElement musicLibrary)
    {
      foreach (XElement t in musicLibrary.Elements(“cd”).Elements(“title”))
      {
        Console.WriteLine(t.Value);
      }
    }
  }
The Elements() method solely navigates down the child axis. Chapter 7, which covered XPath, also described the other axes that can be traversed, and many of these have corresponding methods in LINQ to XML. For example, instead of using the Elements() method, you could use Descendants(), which retrieves all descendants rather than just the immediate ones. The code from the previous activity would look like the following if you used Descendants()instead of Elements():
    static void ShowTitles(XElement musicLibrary)
    {
      foreach (XElement t in musicLibrary.Descendants(“title”))
      {
        Console.WriteLine(t.Value);
      }
    }
  }
It’s preferable from a performance point of view to use the Elements() method rather than Descendants() if you can, because you typically want to only search specifically in the child axis. Sometimes though, you can make the search more generic by using the Descendants() method, and for small documents the gains in performance are going to be tiny anyway. Alongside the Descendants() method you can also find DescendantNodes(). DescendantNodes() differs from Descendants() in that it finds any nodes, comments, processing instructions, and so on, whereas the Descendant() returns only elements. Note that none of the methods discussed so far include attributes in the collections they return. If you want to examine these you’ll need either the Attributes() method to fetch all attributes or the Attribute(attributeName) method, whereby you can specify the name of the attribute you’re interested in.
A selection of the more commonly used methods is shown in Table 12-1.
TABLE 12.1: Common Axis Traversal Methods in LINQ to XML
| METHOD NAME | DESCRIPTION |
| Ancestors* | Returns all the ancestor elements. |
| AncestorsAndSelf* | Returns all Ancestors but includes the current element. |
| Attributes* | Returns the attributes of the current element. |
| Descendants* | Returns elements that are descendants of the current element. |
| DescendantsAndSelf* | Returns all Descendants but includes the current element. |
| DescendantNodes* | Returns all Descendants but includes other node types such as comments (but not attributes). |
| Elements* | Returns child elements of the current element. |
| ElementsAfterSelf* | Returns a collection of sibling elements that come after this element in document order. |
| ElementsBeforeSelf* | Returns a collection of sibling elements that come before this element in document order. |
| Nodes | Returns any child nodes of this element. |
| NodesAfterSelf | Returns any sibling nodes that come after this element in document order. |
| NodesBeforeSelf | Returns any sibling nodes that come before this element in document order. |
* Those marked with an asterisk can also take a parameter specifying a name. Only nodes that match the name will be included in the return value.
The methods that include Before or After are used when you need to get elements based on their document order. For example, suppose you have a reference to the <cd> element that has an id of 3 and you want to display the titles of all the <cd> elements before that in document order. The following code retrieves the third <cd> element to do just that:
    static void ShowTitlesBefore(XElement musicLibrary)
    {
      XElement cd3 = (from cd in musicLibrary.Elements(“cd”)
                      where cd.Attribute(“id”).Value == “3”
                      select cd).FirstOrDefault();
      // code continued
    }
This example uses the built-in LINQ keywords rather than the functional style. First, you select all the <cd> elements, then you test the id attribute to see if it equals 3.
Once you have a reference to the <cd> element you want, use the ElementsBeforeSelf() method to retrieve the preceding <cd> elements and their <title> elements as shown in the following snippet:
Program.cs in BasicDataExtraction project
You then loop through the collection and display the Value of each <title> as before. The code displays the titles for the <cd> element that have an id of 1 and 2.
The next example uses the functional style to show all the titles after the third <cd>. It also uses ElementsAfterSelf() to find the siblings after the third CD in the document:
static void ShowTitlesAfter(XElement musicLibrary)
{
  XElement cd3 = musicLibrary.Elements(“cd”)
               .Where(cd => cd.Attribute(“id”).Value == “3”)
               .FirstOrDefault();
      foreach (XElement t in cd3.ElementsAfterSelf(“cd”).Elements(“title”))
      {
        Console.WriteLine(t.Value);
      }
    }
Program.cs in BasicDataExtraction project
Selecting elements based on an attribute can be a bit mundane, but there are more advanced features of LINQ, especially as they apply to XML. One of these features is grouping. A common requirement when processing any data is to group items based on a specific property. For example, you might want to group your CDs based on their genre. You can use the standard LINQ operators to accomplish this task, which can be broken down into two parts. First, you group the <cd> elements based on the <genre> element as shown in the following code:
static void GroupOnGenre(XElement musicLibrary)
{
  var groupQuery = from cd in musicLibrary.Elements(“cd”)
                    group cd by cd.Element(“genre”).Value into genreGroup
                    orderby genreGroup.Key
                    select new
                    {
                      Genre = genreGroup.Key,
                      Titles = from title in genreGroup.Elements(“title”)
                              select title.Value
                    };
  // code continues
}
Here you select the <cd> elements as before, but add a group operator that uses the <genre> element’s Value as the property to group on. The results are held in genreGroup. They are then ordered using the built-in Key property of any grouping variable created using LINQ; in this case the Key holds the genre value. Using genreGroup you create an anonymous type that has two members. The first, Genre, is filled using the same Key property that was used for sorting. The second member, Titles, uses a second LINQ query to extract all the <title> elements.
The second part of the function is used to output the results as shown in the following code snippet:
Program.cs in BasicDataExtraction project
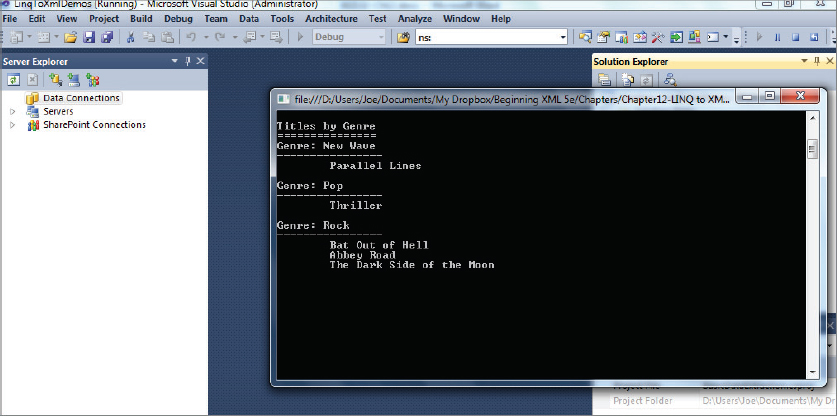
The outer-level foreach loops through all items in the groupQuery, which contains a collection of your anonymous types. The code then outputs the Genre property and uses a second foreach to loop through the Titles collection to show each Title in the group.
If you add the ShowTitlesBefore(), ShowTitlesAfter() and GroupOnGenre() methods to the original Program.cs file, underneath the ShowTitles() method and press F5 to run the code, you will see the results shown in Figure 12-3.
You have seen how to extract nodes and their values from a document. The next feature of LINQ to XML to investigate is how to modify an XML document.
MODIFYING DOCUMENTS
LINQ to XML has a plethora of methods that enable you to modify an existing XML document. This means that you can add new nodes, delete existing ones, and update values such as attributes and text content.
Adding Content to a Document
One of the most common operations is to add a new node. You can try this by adding a new <cd> element to your music library. To do so, perform the following steps:
 static XElement CreateCDElement(string id,
                                string title,
                                int year,
                                string artist,
                                string genre)
{
  return new XElement(“cd”,
          new XAttribute(“id”, id),
          new XElement(“title”, title),
          new XElement(“year”, year),
          new XElement(“artist”, artist),
new XElement(“genre”, genre));static void AddNewCD(XElement musicLibrary)
{
XElement cd = CreateCDElement(“6”, “Back in Black”, 2003, “AC/DC”, “Rock”);
musicLibrary.Add(cd);
}Program.cs in ModifyingDocuments project
<musicLibrary>
  <cd id=”1”>
    <title>Parallel Lines</title>
    <year>2001</year>
    <artist>Blondie</artist>
    <genre>New Wave</genre>
  </cd>
  <!-- cd elements 2, 3 and 4 -->
  <cd id=”5”>
    <title>Thriller</title>
    <year>2001</year>
    <artist>Michael Jackson</artist>
    <genre>Pop</genre>
  </cd>
  <cd id=”6”>
    <title>Back in Black</title>
    <year>2003</year>
    <artist>AC/DC</artist>
    <genre>Rock</genre>
  </cd>
</musicLibrary>
The Add() method is quite flexible. As well as specifying the node you want to add (as was done in the previous code example), you can also pass in a functionally constructed tree. You might want to do this if you are adding different elements and don’t want to bother constructing a function that creates each one. The following code produces the same result as before, but doesn’t use the helper function CreateNewCD():
static void AddNewCDDirectly(XElement musicLibrary)
{
  musicLibrary.Add(
      new XElement(“cd”,
        new XAttribute(“id”, 6),
        new XElement(“title”, “Back in Black”),
        new XElement(“year”, 2003),
        new XElement(“artist”, “AC/DC”),
        new XElement(“genre”, “Rock”)));
}
When you add an XElement to a document there is a lot going on behind the scenes. An XElement has a Parent property. When you first create the XElement, this property is set to null. When you use the Add() method, the Parent is set to the node that the Add() method was called from. So in all the previous examples the Parent property is set to the <musicLibrary> element.
Removing Content from a Document
Now that you’ve seen how to add content, try the opposite: removing content. The easiest way to accomplish this is to navigate to the node you want to delete and call its Remove() method. See the following example:
static void RemoveCD(XElement musicLibrary)
{
  XElement cd = (from entry in musicLibrary.Elements(“cd”)
                  where entry.Attribute(“id”).Value == “6”
                  select entry).FirstOrDefault();
  if (null != cd)
  {
    cd.Remove();
  }
}
This code first targets the <cd> that has an id of 6, which is the <cd> you just added with the AddNewCD() method. The code then calls the Remove() method, which leaves you with just five <cd> elements in your library.
The Remove() method also works on sets of elements. The following snippet removes all of the <cd> elements from the document:
musicLibrary.Elements(“cd”).Remove();
Updating and Replacing Existing Content in a Document
The last technique is how to update an existing document. Two operations need to be carried out on a regular basis: one is updating data within the document (either the value of an attribute or the text content of an element); and the second is replacing an entire element or tree of elements.
You have quite a few ways to update the text content of an element. One way is to use the ReplaceNodes() method, which replaces the nodes of the XElement it is called from. Suppose you want to update the <year> element of the Abbey Road CD, which has an id of 3. The following code finds this element and changes the year to 1986:
static void UpdateYearWithReplaceNodes(XElement musicLibrary)
{
  XElement cd = (from entry in musicLibrary.Elements(“cd”)
                  where entry.Attribute(“id”).Value == “3”
                  select entry).FirstOrDefault();
  cd.Element(“year”).ReplaceNodes(“1986”);
}
ReplaceNodes() also works with trees of nodes and just simple text content.
A second way to update the text is to use the SetElementValue() method like so:
static void UpdateYearWithSetElementValue(XElement musicLibrary)
{
  XElement cd = (from entry in musicLibrary.Elements(“cd”)
                  where entry.Attribute(“id”).Value == “3”
                  select entry).FirstOrDefault();
  cd.SetElementValue(“year”, “1987”);
}
Again, you single out the target element using a standard LINQ query and then use SetElementValue() on the parent of the element you want to change. This method also has other uses. You can remove an element completely by setting the second argument to null. You can also create new elements. If the <year> element hadn’t existed already for the <cd> you chose, it would have been created automatically by the code.
There is a similar technique to update, create, or remove an attribute’s value name: SetAttributeValue(). If you want to update the id of the Abbey Road <cd> element, the following code will accomplish that:
static void UpdateAttributeValue(XElement musicLibrary)
{
  XElement cd = (from entry in musicLibrary.Elements(“cd”)
                  where entry.Attribute(“id”).Value == “3”
                  select entry).FirstOrDefault();
  cd.SetAttributeValue(“id”, “7”);
}
The last method to look at is ReplaceContent(). This replaces the currently chosen node with the specified XML. For example, if you want to replace the first <cd> in the collection with a different one altogether, you’d use ReplaceContent() as follows:
static void ReplaceCD(XElement musicLibrary)
{
  XElement cd = (from entry in musicLibrary.Elements(“cd”)
                  where entry.Attribute(“id”).Value == “1”
                  select entry).FirstOrDefault();

  cd.ReplaceWith( new XElement(“cd”,
                    new XAttribute(“id”, 1),
                    new XElement(“title”, “Back in Black”),
                    new XElement(“year”, 2003),
                    new XElement(“artist”, “AC/DC”),
                    new XElement(“genre”, “Rock”)));
}
This targets the first <cd> element, then calls ReplaceContent() and passes in a new tree.
In Chapter 8 you saw how you can use XSLT to change the format of an XML document. The output of a transformation might be a differently formatted XML or a text document.
TRANSFORMING DOCUMENTS
Using a combination of the techniques you’ve seen so far, it’s possible to transform an XML document to a different format using LINQ to XML. In general, it’s not as powerful as using XSLT, but has the advantage of being simpler for a lot of transformations and precludes the need to learn a completely different programming paradigm.
The following Try It Out takes you through the steps of transforming your current music library to a different format.
<newMusicLibrary>
  <cd id=”1” year=”2001” artist=”Blondie” genre=”New Wave”>Parallel Lines</cd>
  <!-- nore cd elements -->
</newMusicLibrary>
using System;
using System.Linq;
using System.Xml.Linq;
    static void Main(string[] args)
    {
      XElement musicLibrary = XElement.Load(@”MusicLibrary.xml”);
      XElement newMusicLibrary = TransformToAttributes(musicLibrary);
      Console.WriteLine(newMusicLibrary);
      newMusicLibrary.Save(@”newMusicLibrary.xml”);
      Console.ReadLine();
} static XElement TransformToAttributes(XElement musicLibrary)
{
XElement newMusicLibrary =
new XElement(“newMusicLibrary”,
from cd in musicLibrary.Elements(“cd”)
                     select new XElement(“cd”,
                       new XAttribute(“id”, cd.Attribute(“id”).Value),
                       new XAttribute(“year”, cd.Element(“year”).Value),
                       new XAttribute(“artist”, cd.Element(“artist”).Value),
                       new XAttribute(“genre”, cd.Element(“genre”).Value),
                       cd.Element(“title”).Value));
return newMusicLibrary;
}from cd in musicLibrary.Elements(“cd”)
select new XElement(“cd”,
new XAttribute(“id”, cd.Attribute(“id”).Value),
new XAttribute(“year”, cd.Element(“year”).Value),
new XAttribute(“artist”, cd.Element(“artist”).Value),
new XAttribute(“genre”, cd.Element(“genre”).Value),
cd.Element(“title”).Value));
One of the downsides of transforming documents using LINQ to XML is that, although it is good for changes similar to the example of modifying the music library, where the new document follows a similar ordering to the original, it can’t cope so well where a lot of re-ordering is needed or where the output is not an XML format. For those sorts of problems you are probably better off using XSLT.
The final section of this chapter deals with two XML features that are particular to VB.NET: XML Literals and Axis Properties syntax.
USING VB.NET XML FEATURES
VB.NET has two features that are not supported so far in either C# or any other .NET language. These are XML Literals and Axis Properties. XML Literals includes new ways of creating XML documents and easier ways of managing namespaces. Axis Properties mean you can navigate through a document and retrieve elements, attributes, and their values with a succinct syntax.
Using VB.NET XML Literals
It is often the case that you need to build a new XML document based on an existing template rather than create the whole thing from scratch. In the past you had two choices: embed the template as a string of XML, either in the code itself or within a resource file; or load it as a file. Neither of these two solutions is entirely satisfactory. The string representation can be tricky to handle—often there are problems with quote marks and there is no checking of the XML for well-formedness. Loading from a file means that there is an extra item, the file itself, to include in any installation package, and the application needs to be able to read from the relevant area of the disk.
Luckily, VB.NET has a third alternative: XML Literals, which enable you to embed XML directly into your code. XML Literals also facilitate including namespace declarations, should you need them, and putting placeholders within the XML that can be filled in later by code.
Start with a simple example. The music library you’ve seen so far could be declared as follows:
Dim musicLibrary As XElement =
<musicLibrary>
  <cd id=”1”>
    <title>Parallel Lines</title>
    <year>2001</year>
    <artist>Blondie</artist>
    <genre>New Wave</genre>
  </cd>
  <cd id=”2”>
    <title>Bat Out of Hell</title>
    <year>2001</year>
    <artist>Meatloaf</artist>
    <genre>Rock</genre>
  </cd>
  <cd id=”3”>
    <title>Abbey Road</title>
    <year>1987</year>
    <artist>The Beatles</artist>
    <genre>Rock</genre>
  </cd>
  <cd id=”4”>
    <title>The Dark Side of the Moon</title>
    <year>1994</year>
    <artist>Pink Floyd</artist>
    <genre>Rock</genre>
  </cd>
  <cd id=”5”>
    <title>Thriller</title>
    <year>2001</year>
    <artist>Michael Jackson</artist>
    <genre>Pop</genre>
  </cd>
</musicLibrary>
In the previous code the variable musicLibrary is exactly the same as if musicLibrary.xml had been loaded using the Load() method shown earlier. In the preceding sections, the variable was specifically typed as System.Xml.Linq.XElement, but you could have used an implicit declaration instead, like so:
Dim musicLibrary =
<musicLibrary>
  <cd id=”1”>
    <title>Parallel Lines</title>
    <year>2001</year>
    <artist>Blondie</artist>
    <genre>New Wave</genre>
  </cd>
  <!-- rest of cd elements -->
</musicLibrary
If you try this code and then hover over the musicLibrary variable, you’ll see that it is still an XElement. If you had included an XML declaration, or any form of prolog, such as in the following code, musicLibrary would have been typed as System.Xml.Linq.XDocument:
Dim musicLibrary =
<?xml version=”1.0” encoding=”utf-8”?>
<musicLibrary>
  <cd id=”1”>
    <title>Parallel Lines</title>
    <year>2001</year>
    <artist>Blondie</artist>
    <genre>New Wave</genre>
  </cd>
  <!-- rest of cd elements -->
</musicLibrary
However, embedding a complete file like this is unusual. It’s more likely that you will have a basic structure that needs to be populated with data from an external source. XML Literals gives you an easy way to do this that is reminiscent of how classic ASP pages were coded. The following activity walks you through using XML Literals combined with placeholders to demonstrate the ease with which VB.NET allows you to define XML documents.
  Private Class CD
    Public Property ID As String
    Public Property Title As String
    Public Property Year As Integer
    Public Property Artist As String
    Public Property Genre As String
End Class Private Function GetCDs() As List(Of CD)
Dim cdList As New List(Of CD) From
{
New CD() With {.ID = “1”, .Title = “Parallel Lines”,
.Year = 2001, .Artist = “Blondie”, .Genre = “New Wave”},
New CD() With {.ID = “2”, .Title = “Bat Out of Hell”,
.Year = 2001, .Artist = “Meatloaf”, .Genre = “Rock”},
New CD() With {.ID = “3”, .Title = “Abbey Road”,
.Year = 1987, .Artist = “The Beatles”, .Genre = “Rock”},
New CD() With {.ID = “4”, .Title = “The Dark Side of the Moon”,
.Year = 1994, .Artist = “Pink Floyd”, .Genre = “Rock”},
New CD() With {.ID = “5”, .Title = “Thriller”,
.Year = 2001, .Artist = “Michael Jackson”, .Genre = “Pop”}
}
Return cdList
End Function
Module1.vb
  Private Function CreateMusicLibrary() As XElement
    Dim cdData = GetCDs()
    Dim musicLibrary =
      <musicLibrary>
        <%= From item In cdData
          Select <cd id=<%= item.ID %>>
                   <title><%= item.Title %></title>
                   <year><%= item.Year %></year>
                   <artist><%= item.Artist %></artist>
                   <genre><%= item.Genre %></genre>
                 </cd> %>
      </musicLibrary>
    Return musicLibrary
End Function Sub Main()
Dim musicLibrary As XElement = CreateMusicLibrary()
Console.WriteLine(musicLibrary)
Console.ReadLine()
End SubAt the moment these literals are available only in VB.NET, but there’s nothing stopping you from having a VB.NET project in an otherwise C# solution. You can also include both C# and VB.NET code files in the same web project if you put them in different folders and make a small change to your config file as described here: http://msdn.microsoft.com/en-us/library/t990ks23.aspx.
Next take a look at the second unique feature in VB.NET, Axis Properties.
Understanding Axis Properties in VB.NET
Axis Properties are another XML feature that are only found in VB.NET. They are intended to make navigation through an XML document easier as well as to facilitate the retrieval of values from the XML.
Four Axis properties in VB.NET’s XML features considerably simplify the code needed when extracting data from an XML source. Three of these take the form of shortcuts that can be used in place of the various Elements(), Attributes(), and Descendants() methods and the fourth is a convenient way to retrieve an element or attribute’s value. The four properties are known as:
- The Child Axis Shortcut
- The Attribute Axis Shortcut
- The Descendants Axis Shortcut
- The Value Property Shortcut
The following sections will explain each shortcut in more detail and provide an example of how to use each one.
Using the Child Axis Shortcut
The first Axis Property shortcut is used when you want to access elements that lie on the child axis.
If you have loaded your music library into memory and want to access all the <cd> elements, you have so far used the following code:
musicLibrary.Elements(“cd”)
Using the child axis shortcut however, you can write:
musicLibrary.<cd>
This is shorter and easier to read, but performs the same function.
Using the Attribute Axis Shortcut
The next shortcut is used to retrieve attributes. Previously, to find attributes you used the Attributes() or Attribute() methods. To show the id attribute of a <cd> element, you used the following :
cd3.Attribute(“id”)
Using the attribute axis shortcut you can write the following instead of the preceding:
cd3.@id
This uses the familiar @ symbol used in XPath to signify you are searching the attributes collection.
Using the Descendants Axis Shortcut
Not surprisingly, Descendants Axis Shortcut is used to find descendants.
Although children are limited to the level just below an element, descendants can be anywhere underneath. In earlier code you had to write the following to find all the <title> elements anywhere beneath <musicLibrary>:
musicLibrary.Descendants(“title”)
Now with the descendants axis shortcut, you can use three dots (...) as a shortcut:
musicLibrary...<title>
Using the Value Property Shortcut
The final shortcut, called an Axes Shortcut by Microsoft but really just operating on values, enables a quicker way to find an item’s value.
If you retrieve a collection of elements, you normally need to either use FirstOrDefault() or an indexer to find the first item and then use the Value property to get its content. For example, to get the first <title> element’s value you use:
musicLibrary...<title>(0).Value
The Value shortcut removes the need for the indexer and retrieves the value of the first element or attribute in the collection. The following code gives the same result as the preceding snippet:
musicLibrary...<title>.Value
The subroutine ShortcutsDemo() in the VbXmlFeatures project shows all these features in action.
The final VB.NET XML feature discussed in this chapter is how to manage namespaces.
Managing Namespaces in VB.NET
Assigning prefixes to namespace URIs is always a bit haphazard, and every XML technology seems to handle it differently. VB.NET has decided to use the same strategy as XML itself, which uses the following form:
<ns:musicLibrary xmlns:ns=”http://www.wrox.com/namespaces/apps/musicLibrary”>
  <!-- rest of document -->
</ns:musicLibrary>
The code in VB.NET to declare this namespace would be as follows:
Imports <xmlns:ns=”http://www.wrox.com/namespaces/apps/musicLibrary”>
This line needs to be at the top of the code file, outside the module declaration. The prefix ns can now be used to represent the namespace URI when searching. The following code shows how to load a namespaced version of the music library and find the second <title> element’s value:
'At the top of the module
Imports <xmlns:ns=”http://www.wrox.com/namespaces/apps/musicLibrary”>

'Within the module
  Private Sub NamespaceDemo()
    Dim musicLibrary = XElement.Load(≪musicLibraryWithNamespaces.xml≫)
    Dim secondTitle = musicLibrary...<ns:title>(1).Value
    Console.WriteLine(≪Second Title: {0}≫, secondTitle)
  End Sub
The working code is contained in the VB.NET project for this chapter.
SUMMARY
In this chapter you learned:
- LINQ is intended to unify access and manipulation of data collections from different sources.
- LINQ to XML is needed to make creation of XML documents simpler and to make navigation and data retrieval from XML a similar process to any fetching data from any other collection.
- Functional creation of XML documents means that the XElement class can take another XElement as part of its constructor, leading to a simpler way of defining an XML document.
- Using LINQ to XML to extract data is accomplished mainly through the Elements() and Attributes() methods.
- Using LINQ to XML to modify data is accomplished using methods such as ReplaceNodes() and SetElementValue().
- Transforming documents with LINQ to XML is possible but it doesn’t quite have the power of XSLT. It is a good choice if the basic ordering of the source and target XML are similar.
- VB.NET’s extra XML features are XML literals, to declaratively define XML documents and Axis properties to simplify navigation to a target item and retrieve its value.
EXERCISES
WHAT YOU LEARNED IN THIS CHAPTER
| TOPIC | KEY POINTS |
| The Purpose of LINQ | To provide a consistent way to treat any collection, whether it be objects, relational data, or arrays. |
| Why LINQ to XML | To make manipulating XML similar to handling any other data. |
| The Main Classes | XElement, representing an XML element and XAttribute representing an XML attribute. |
| Other Classes | XName to represent an item’s name and XNamespace to represent an XML namespace. |
| Main Methods | Elements(), to retrieve specified elements and Attributes() to retrieve attributes. |
| XML Literals | Available only in VB.NET and enable you to specify XML documents in declarative syntax with optional place holders for data that changes. |
| Axis Properties | Available only in VB.Net and enable shortcuts to be used to navigate to targeted content. |