
Since we just mentioned an opacity animation, we can start describing properties animation using that same example. You can start with any strip that you like, no matter if that is a video or image.
Hereafter, I will assume you will use the Video Editing workspace. If you don't remember how to use workspaces, go back to Chapter 1, Blender as a Video Editor for YouTube, and take a look at the workspace description.
How do you create an animation?
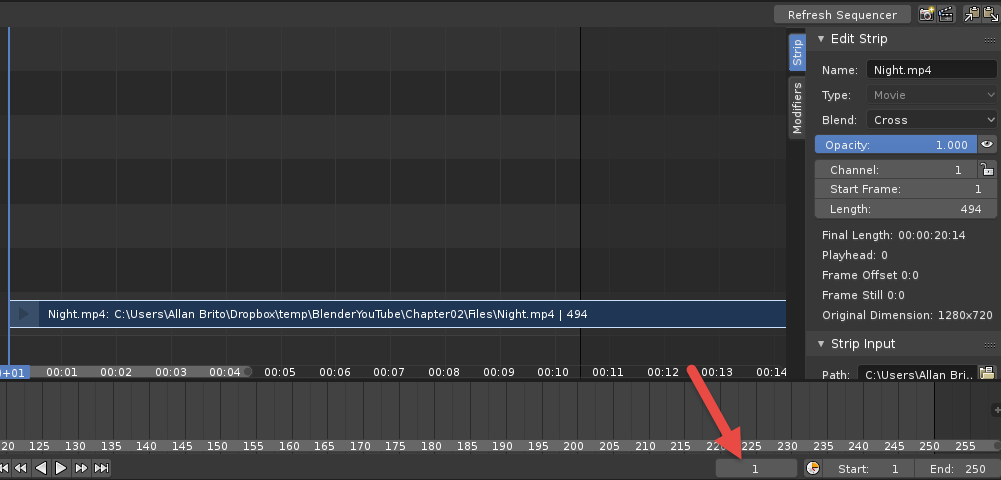
- Once you have a strip in your Sequencer, using either your playback head or the Timeline window, set the actual frame to 1. Click and drag with the mouse or use your Current Frame indicator, by typing the exact number, as shown here (Figure 4.1):
- With the current frame set as 1, you can select the strip and open your sidebar using the N key. There you will locate the Opacity control, and change it to 0.
- The critical step now is to add a keyframe. In Blender, you can add a keyframe to properties using either the I key or with a right-click. To use them, you should place the mouse cursor over the property, and press the key. If you right-click on the property, Blender will display more options, among them the Insert Keyframe to create a new keyframe at the location (Figure 4.2):

- You now have a keyframe at position 1! Next, set the current frame to 48 and change your opacity to 1 in the same strip. Insert another keyframe for the opacity. If you go back to frame 1 and press play, you will see the strip starting with full transparency and slowly appearing in two seconds!
One thing you should remember from the process is the order to insert keyframes:
- Set the position of your current frame
- Change the property value you want to animate
- Insert the keyframe
If you skip step 1 and go straight to the property value, you will eventually overwrite an existing keyframe. You can always use Ctrl + Z to undo such operations in case that happens.
Following the necessary steps, you can add keyframes and animation to almost any property in Blender. But, before we move on to effect strips, we should look at a few things related to animation, especially in the interface.
Look at Figure 4.3 for a few details:

Here are a few points you should look at in the interface after you add keyframes:
- In the Timeline window, you will see keyframes as orange diamonds.
- The background color of any property with keyframes will change. On the frame with a keyframe it will become yellowish, and between keyframes, it will have a green color.
- The graph editor will display the keyframes as a curve, which you can edit later. Place the mouse in that window and press the Home key on your keyboard to view all keyframes. You can also use the View menu and choose View All.
- Blender will only display that information in the UI for selected strip.
To create animations, you must have two keyframes with different values for properties. However, sometimes you may want to create a sequence of keyframes that share the same values.
In Blender, you will see a thick solid line connecting keyframes that share the same value. For instance, I took the example from the opacity animation and added another keyframe at frame 60, using the value of 1. The Timeline will display a thick line connecting them (Figure 4.4):

By hitting play, you won't see any changes in animation, because both keyframes share the same values.