
Chapter 20. Using a Content Management System to Build a Website
In This Chapter
![]() Five Reasons to Use Ning.com as Your CMS
Five Reasons to Use Ning.com as Your CMS
![]() Five Reasons to Use Joomla as Your CMS
Five Reasons to Use Joomla as Your CMS
![]() Building a Social Network with Ning.com
Building a Social Network with Ning.com
![]() Before Installing Your Joomla Software
Before Installing Your Joomla Software
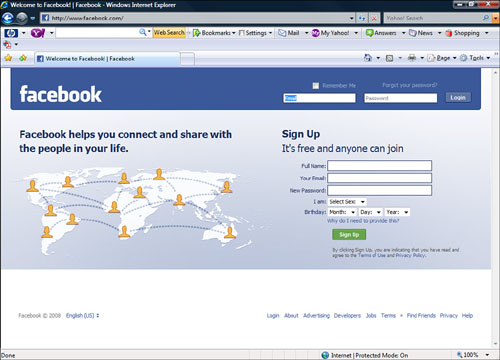
A content management system (CMS) is an editable set of web pages that enables you to organize, categorize, and manage content all through a web-based interface. So rather than build pages in HTML and then use an FTP client to move the files to a web server, you just log in to a web page and make content changes through your browser. A CMS can take many different forms. For example, Facebook is a CMS (see Figure 20.1). Facebook allows you to add, edit, and manage information about yourself through your web browser. A CMS also allows multiple people to edit these pages.
In the first part of this chapter, you use a CMS (ning.com) to set up your own social network. Ning.com lets you set up a social network in just a few minutes without having to mess with a web server. The second part of this chapter covers the open source CMS, Joomla. Joomla is being used for business, educational, and other industries. If you are unsure of whether to use ning.com or Joomla, the following lists contain reasons to use each. These lists will help you decide which program is right for you.
Five Reasons to Use Ning.com as Your CMS
![]() You want to create a social network—If you have a group of people with which you want to connect in your own social network and want to have greater control over the look and content of the social network site than you would with Facebook or other social network sites, ning.com is the place for you.
You want to create a social network—If you have a group of people with which you want to connect in your own social network and want to have greater control over the look and content of the social network site than you would with Facebook or other social network sites, ning.com is the place for you.
![]() You are brand new to content management systems—Ning.com makes it easy to get up and running quickly and connects you to a larger community of more experienced social network creators.
You are brand new to content management systems—Ning.com makes it easy to get up and running quickly and connects you to a larger community of more experienced social network creators.
![]() You have low technical ability—Ning.com makes it easy to create your own full-featured social network.
You have low technical ability—Ning.com makes it easy to create your own full-featured social network.
![]() You don’t want to spend any money for a CMS—A basic Ning network is free. You cannot save more money than that.
You don’t want to spend any money for a CMS—A basic Ning network is free. You cannot save more money than that.
![]() You don’t need your own domain—Ning’s networks all are hosted under the Ning.com domain, so there’s no need to bother with creating and paying for your own domain.
You don’t need your own domain—Ning’s networks all are hosted under the Ning.com domain, so there’s no need to bother with creating and paying for your own domain.
![]() You want to create more than a social network—Ning is a great tool for creating simple social networks, but Joomla has more robust features.
You want to create more than a social network—Ning is a great tool for creating simple social networks, but Joomla has more robust features.
![]() You have your own domain—If you want a specific domain name, the Joomla software has no domain name restrictions.
You have your own domain—If you want a specific domain name, the Joomla software has no domain name restrictions.
![]() You have some technical knowledge—Installing, configuring, and using Joomla software requires knowledge of some technical things.
You have some technical knowledge—Installing, configuring, and using Joomla software requires knowledge of some technical things.
![]() You care about bells and whistles—Joomla enables you to control every little detail of your CMS.
You care about bells and whistles—Joomla enables you to control every little detail of your CMS.
![]() Your hosting service offers Joomla installs—Some hosting services let you install Joomla automatically. This gives you more control and offers a simple installation.
Your hosting service offers Joomla installs—Some hosting services let you install Joomla automatically. This gives you more control and offers a simple installation.
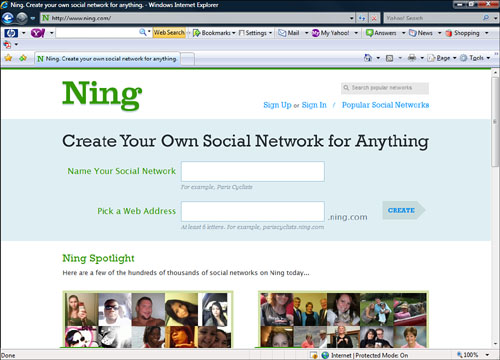
Ning.com is a CMS that enables you to create your own social network,, similar to Facebook.com (see Figure 20.2). You are probably not going to get millions of people as Facebook has, but you can have your own social network to connect with friends, colleagues, family, or other like-minded people. Ning.com was created by Marc Andreessen and Gina Bianchini. If you recall, Marc Andreessen is one of the guys who created the Mosaic web browser that is partially responsible for the birth of the Internet.
Building a Social Network with Ning.com
Ning.com offers a free version, which displays some Ning promotional links and has 10GB of storage and 100GB of bandwidth. This is a great place to start, and Ning.com makes it simple to get a social networking site up and running in no time.
Before you get started at Ning.com you need the following:
![]() A name for your social network
A name for your social network
![]() An address (URL) for your social network.
An address (URL) for your social network.
![]() An email address
An email address
Signing Up for Ning.com
warning
Because Ning.com is a website that is constantly being updated, these instructions may be different than what you see.
Before you begin using Ning.com you need to sign up for their service. The basic service is free and allows you access to their software and a whole community of people using Ning.com. This is how you sign up for ning.com:
1. Open your web browser and navigate to http://www.ning.com. This opens the homepage for ning.com, where you sign up for their service.
2. Enter the name of your social network in the Name Your Social Network box.
3. Enter the address for your social network in the Pick a Web Address box. This address needs to be six letters and can contain only numbers and letters.
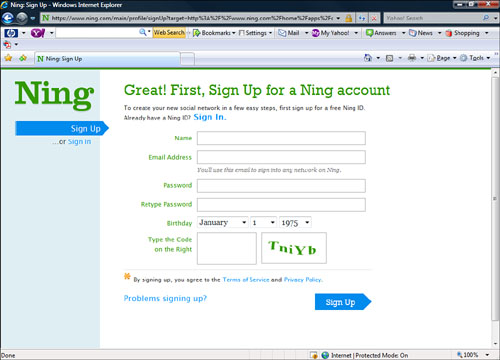
4. Click the Create button. The Sign Up for Your Ning Account page appears (see Figure 20.3). On this page, you enter all the information you need to set up your account on ning.com.
5. In the Your Name field, enter your name.
6. In the Email Address field, enter your email address. Giving your email address allows Ning.com to communicate information and administration notes. Make sure it is correct.
7. In the Password field, enter a word or phrase you are going to use for your password. When choosing a password, make it unique and easy to remember. Try to have a mixture of letters and numbers. The case of the letters matters also, so use a mixture of upper- and lowercase.
8. In the Retype Password field, enter your password again.
9. Select your birthday from the drop-down menus.
10. Enter the code as it appears in the box to the right of the empty box.
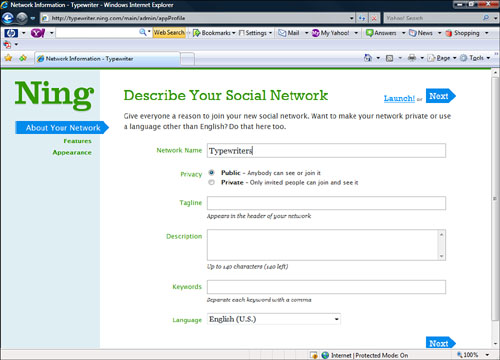
11. Click the Sign Up button. This opens the Describe Your Social Network page (see Figure 20.4), where you define some of the specifics of your new social network.
12. Your social network name should be displayed. You can change the name here if you want.
13. Select whether your network will be public or private. A public network allows anyone to see or join your social network. A private network requires you to invite people to your social network.
14. In the Tagline box, enter a tagline for your social network so people will have an idea of what your social network is about.
15. In the Description box, enter a longer description of your social network.
16. In the Keywords box, enter the keywords that match your social network. These are what people use to search for social networks, so make sure they are suitable for your site.
17. Select a language from the drop-down list.
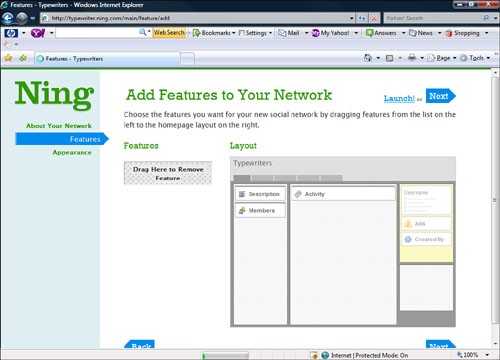
18. Click Next. The Add Features to Your Network page is displayed (see Figure 20.5). This page enables you to add different features to your social network. Just drag your features onto your page’s layout.
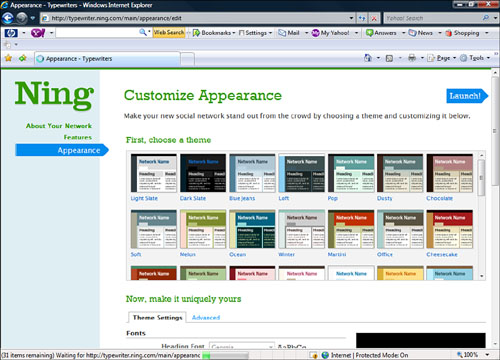
19. When you are finished with adding your features, click Next. The Customize Appearance page appears (see Figure 20.6). This page enables you to set the appearance settings of your social network.
20. Choose a theme from the list and then set specific details of that theme below the theme picker. You can also add a logo to your site here.
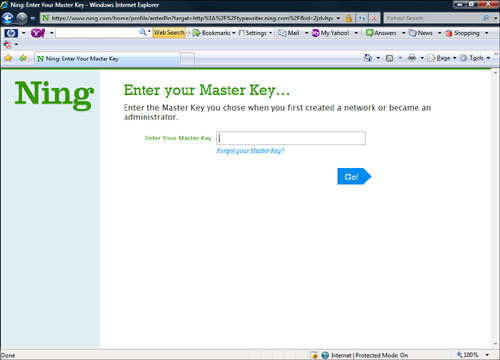
21. Click the Launch! button. This opens the Enter Your Master Key page (see Figure 20.7). You will use a Master Key to create or administer other networks you create.
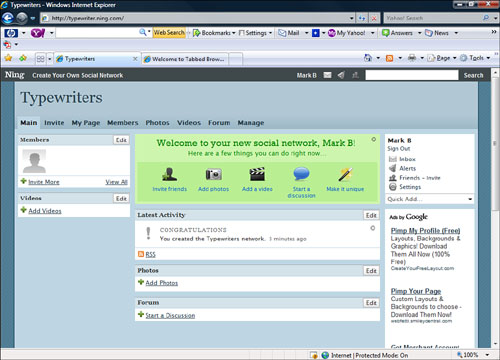
22. Enter your Master Key, confirm it in these two boxes, and click the Go! button. Your social network is now displayed (see Figure 20.8).
Now that you have a social network site you need to invite some friends. Your friends will add content and take part in your social network. To invite your friends to your social network, follow these steps:
1. On the main page of your social network, click the Invite Friends button. This opens the Invite Friends window (see Figure 20.9), where you can send email invitations to the friends that you want to join you on your social network.
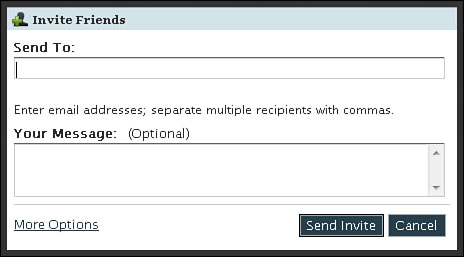
2. Enter the email addresses of your friends in the Send To box. If there are multiple emails, use commas to separate them.
3. Enter a message inviting these people in the Your Message box and click Send Invites. This sends out email invitations (which include instructions) to your social network.
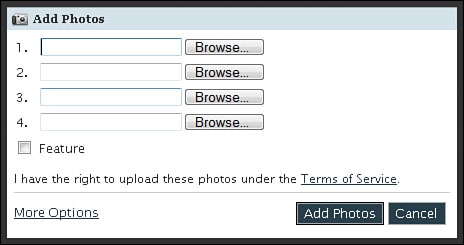
You can add photos or videos to your social network to give your new members something to look at or watch. To add photos or videos:
An important part of a social network is the ability to have discussions on different topics. Your ning.com social network has this feature already built in. To start a discussion, follow these steps:
1. On the main page of your social network, click the Start a Discussion button. This opens the Start a Discussion window (see Figure 20.11).
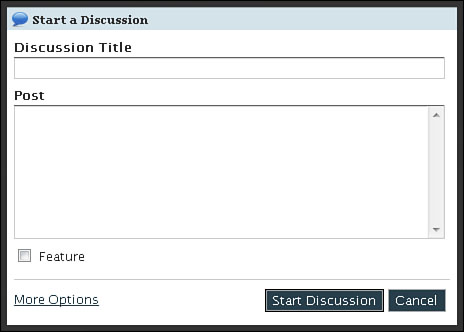
2. Enter the discussion title and body of your discussion post (what you want to talk about) in the appropriate fields, and click the Start Discussion button. Your discussion is now displayed on the social network’s main page.
Joomla is one of the best open source CMS software programs available because it’s easy to use and has some of the best features (see Figure 20.12). And it’s free. Unlike Ning.com, Joomla gives you total control of the configuration of your site.
Joomla can be used to run a social network, a blog, or even more complex information structures. It doesn’t enforce a use like ning.com does, so you can use the software for many types of sites.
Joomla also has a robust developer community that can be accessed to gain information about extending your Joomla installation or fixing problems you might have.
warning
When installing software on your own, there is a possibility that things will go wrong and might not work as expected. It’s important to back up anything important before beginning this process, just in case.
Before starting your install of Joomla software, you need to do some simple things with your hosting service, and you need some tools.
1. Check to ensure that the right software is installed on your server. To run Joomla 1.5, your web hosting service must provide
![]() PHP version 5.0 or greater (5.1.x is recommended)
PHP version 5.0 or greater (5.1.x is recommended)
![]() MySQL version 5.0 or greater
MySQL version 5.0 or greater
2. Get a text editor. You might have to edit some text files to get your Joomla install up and running. For more information about good text editors, refer to Chapter 5, “Gathering Your Development Tools.”
note
Without access to PHP and MySQL on your web server you cannot run Joomla software. If one of these pieces is missing, you need to use ning.com or look for another CMS solution.
3. Get an FTP client. When you are installing software such as Joomla, you need an FTP client to move files between machines. For more information about FTP clients, refer to Chapter 5.
4. Pick a username and password. Pick a username and password and make sure they are unique and contain letters and numbers.
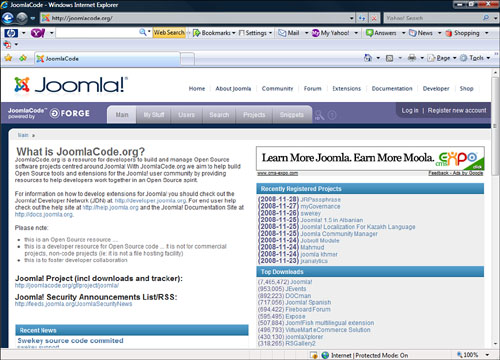
To begin using Joomla, you need to download it and install the software on your web server. To download the Joomla software, go to http://joomlacode.org/ (see Figure 20.13). This is the main source for the Joomla code. You will need to register before downloading the Joomla code.
Depending on your host, installing and configuring Joomla from this point might be tricky, so if you have any questions, consult the Joomla documentation. There is even an easy browser version of the installation you might be able to use depending on your server. Here are some documentation sources to help with you with your installation.
![]() Joomla! 1.5 Installation Manual—http://downloads.joomlacode.org/docmanfileversion/1/7/4/17471/1.5_Installation_Manual_version_0.5.pdf
Joomla! 1.5 Installation Manual—http://downloads.joomlacode.org/docmanfileversion/1/7/4/17471/1.5_Installation_Manual_version_0.5.pdf
![]() Joomla Browser Installation—http://help.joomla.org/content/view/39/132/
Joomla Browser Installation—http://help.joomla.org/content/view/39/132/
![]() Ten Steps to Joomla!—http://battractive.com/Joomla/Joomla-Install-small.pdf
Ten Steps to Joomla!—http://battractive.com/Joomla/Joomla-Install-small.pdf
After you have downloaded Joomla and installed it, you’ll notice that its operation is similar to ning.com. For example, you can add pages, content, and discussions like you did in ning, but Joomla gives you advanced features such as user management, modules, plug-ins, and templates, and it places no limitations on size.
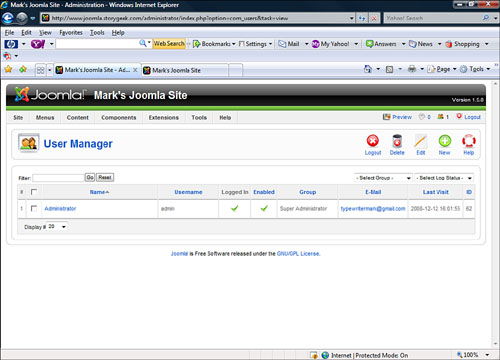
Like using WordPress software, there is a publicly viewable front part of the website and a password-protected area, where you administer your Joomla installation. In the administrative section of the website, you can add articles, manage users, and apply modules, plug-ins, and templates.
Articles are like stories or posts you add to your Joomla website. When you add an article, it appears on the front page like a blog entry. Follow these instructions to add an article:
1. Point your browser to http://yourdomain.com/administrator/index.php?option=com_login.
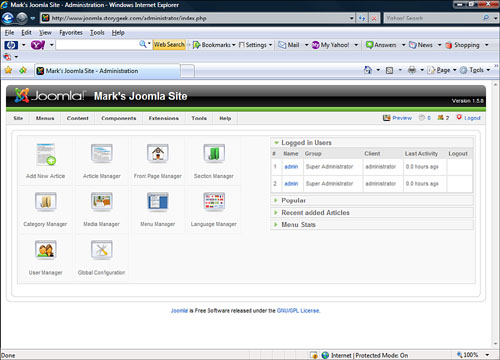
2. Log in to Joomla! Administration with the credentials you gave during your Joomla installation. This opens the administrator area of your Joomla site (see Figure 20.14).
3. Click the Add New Article button. This opens the New Article editor (see Figure 20.15)

4. Enter the content of your article and click Yes on the Front Page radio button.
5. Click Save. Your article will now appear on the front page.
Modules, plug-ins, and templates are all customizations you can add to your Joomla installation. They allow a wide range of features such as calendars, polls, image slide shows, and extensions to other websites. Here are some module, plug-in, and template resources:
![]() Joomla Extensions (http://extensions.joomla.org/)—This site contains a great collection of modules and plug-ins for your Joomla site.
Joomla Extensions (http://extensions.joomla.org/)—This site contains a great collection of modules and plug-ins for your Joomla site.
![]() Joomla Hacks (http://www.joomlahacks.com/)—A very techy resource for all things Joomla.
Joomla Hacks (http://www.joomlahacks.com/)—A very techy resource for all things Joomla.
Here are a few additional Joomla resources:
![]() Getting Started with Joomla!—http://www.joomla.org/about-joomla.html
Getting Started with Joomla!—http://www.joomla.org/about-joomla.html
![]() Joomla! Tutorials—http://www.joomlatutorials.com/
Joomla! Tutorials—http://www.joomlatutorials.com/
![]() Joomla Community Portal—http://community.joomla.org/
Joomla Community Portal—http://community.joomla.org/