Chapter 21. Building a Multimedia Website
In This Chapter
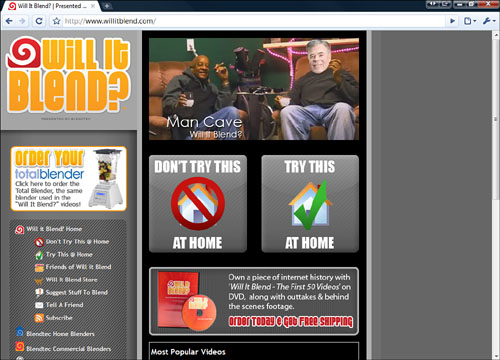
Great websites require not only great content, but also great multimedia. Whether you’re showing multimedia demos of products for your company or music for your band, using multimedia is the best way to show off this content. For a great example of the use of multimedia, check out Blendtec, which uses multimedia and humor to increase its high-end blender sales (see Figure 21.1).
Chapter 12, “Working with Multimedia,” covered how to prepare multimedia elements for use on your website. This project covers how to use some common types of multimedia files on a website: podcasts, audio files, video files, and Flash files. With the skills learned in this project, you’ll be able to create a dynamic, vibrant website that looks as if you spent a fortune on it.
There are some best practices you should keep in mind as you build your multimedia website. These tips will help you avoid common mistakes that people make when using multimedia on their sites. If you’ve spent any time browsing the web, you’ve probably seen many sites that make some of these mistakes.
![]() Do not make multimedia elements play automatically—This is a big no-no. Don’t you hate it when you visit a website and it immediately blares music or video at you? It is the equivalent of inviting someone into your house and then shouting at them when they arrive. Make playing any multimedia file the visitor’s choice.
Do not make multimedia elements play automatically—This is a big no-no. Don’t you hate it when you visit a website and it immediately blares music or video at you? It is the equivalent of inviting someone into your house and then shouting at them when they arrive. Make playing any multimedia file the visitor’s choice.
![]() Metatag your multimedia elements—If you use meta tags with your multimedia (see Chapter 17, “Promoting Your Website”), search engines will pick up your content.
Metatag your multimedia elements—If you use meta tags with your multimedia (see Chapter 17, “Promoting Your Website”), search engines will pick up your content.
![]() Link to browser plug-in sites—If your multimedia files use browser plug-ins to play, add a link to a site where people can download that plug-in.
Link to browser plug-in sites—If your multimedia files use browser plug-ins to play, add a link to a site where people can download that plug-in.
![]() If the file is large, warn people—If any of your multimedia files are downloadable, warn people about the ones that are large. Better yet, tell them the size of the files. No one likes starting a download of a multimedia file only to find out it is going to take all night. You may want to add estimated download times.
If the file is large, warn people—If any of your multimedia files are downloadable, warn people about the ones that are large. Better yet, tell them the size of the files. No one likes starting a download of a multimedia file only to find out it is going to take all night. You may want to add estimated download times.
![]() Not every site needs multimedia elements—Make an honest assessment as to whether the multimedia elements you are planning actually benefit the visitor. I have been to many websites with needless multimedia.
Not every site needs multimedia elements—Make an honest assessment as to whether the multimedia elements you are planning actually benefit the visitor. I have been to many websites with needless multimedia.
![]() Don’t assume everyone has a super-computer and a high-speed connection—Just because you have a fast computer, don’t assume everyone else does. Keep your multimedia elements simple so that people with slower computers and slower download speeds can still enjoy your site.
Don’t assume everyone has a super-computer and a high-speed connection—Just because you have a fast computer, don’t assume everyone else does. Keep your multimedia elements simple so that people with slower computers and slower download speeds can still enjoy your site.
![]() Choose standard formats—If at all possible, keep to the formats mentioned in Chapter 12. These file formats work on the largest number of computers and will cause the fewest problems for your visitors. If you can, provide more than one format for your multimedia files and let visitors choose what works best for them.
Choose standard formats—If at all possible, keep to the formats mentioned in Chapter 12. These file formats work on the largest number of computers and will cause the fewest problems for your visitors. If you can, provide more than one format for your multimedia files and let visitors choose what works best for them.
![]() Never depend on multimedia to communicate your message—Always back up important information in multimedia with text. That way if the multimedia doesn’t work correctly the visitor still has access to the important information contained in the multimedia file.
Never depend on multimedia to communicate your message—Always back up important information in multimedia with text. That way if the multimedia doesn’t work correctly the visitor still has access to the important information contained in the multimedia file.
![]() Clearly label adult content—If your multimedia files contain images or audio that might not be for everyone, it is a good idea to label that content. No one wants something coming out of their speakers at work they weren’t ready for.
Clearly label adult content—If your multimedia files contain images or audio that might not be for everyone, it is a good idea to label that content. No one wants something coming out of their speakers at work they weren’t ready for.
![]() Test Test Test—As mentioned in Chapter 16, “Testing Your Website,” testing is important for your website. Testing a multimedia website is even more important.
Test Test Test—As mentioned in Chapter 16, “Testing Your Website,” testing is important for your website. Testing a multimedia website is even more important.
As mention in Chapter 12, you can provide multimedia in either of two types: downloadable and streaming.
With downloadable files, you save the multimedia file to your web server and then place a link on one of your web pages. When someone visits your site and clicks on the link, the file is downloaded to the visitor’s computer. The visitor then uses a media player to play that web file. The drawback of using downloadable files is that the visitor has to leave your website to experience your multimedia file. Also, after the file is downloaded you lose control over it. Users who download your multimedia files now have their very own copies of it. If you are making your living from these multimedia files, you might not want to share them with everyone.
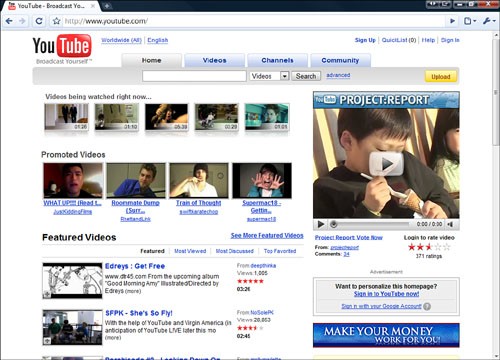
With streaming files, visitors to your website click on a multimedia link and a media player runs within their browser (usually a browser plug-in) to play the multimedia file. Streaming files are more difficult to set up than downloadable files, but have the advantage of keeping visitors at your site and also keeps them from downloading your multimedia files. You can also use the method of using another server with many video websites, such as YouTube.com (see Figure 21.2).
You can store your multimedia files in one of two places: on your server or on someone else’s. Which location you choose is dependent on your needs and resources.
If you store your multimedia files on your server, you first must make sure you have the space and bandwidth available to store these files. Multimedia files can be quite large, and large files require a great deal of bandwidth.
You also can store multimedia files on someone else’s server. For example, when you put a video file up on YouTube, you are storing that file on their web server. There are certain advantages and disadvantages to doing this. If you use YouTube to post a video file, their wealth of server space and bandwidth makes that file easily available, but they also might have a policy that limits file sizes. Regardless of where you post your files, you’ll always be at the mercy of the server, which can go down for periods of time and make your files inaccessible.
Now that you understand how to use and store multimedia files, let’s explore how to download and stream them. It’s best to be familiar with using both downloadable and streaming files, so the following sections explain each method in detail. The first section explains how to link to multimedia files, and the second section explains how to use an embedded player in a browser to play your multimedia files.
To allow people to download a file, you just need to create a link to that file and allow visitors to save it to their computers or play it immediately in the player associated with that file type. The first thing to do is create an audio file and put it on your web server. Then create a web page that links to that file. When someone visits your page and then clicks on the link, the browser asks visitors whether to save the file or play it. If they choose “download,” the file is saved on the visitor’s hard drive and any compatible player can be used to play it. If the visitor chooses to play the file, the browser starts the associated application and the visitor hears the audio after it is downloaded.
To create a link to an audio file, follow these steps:
1. Create your audio file and save it to your hard drive.
2. Move that audio file to your web server.
3. Create a page with the following code:
<html>
<title>Link To Audio File</title>
<body>
Use this <A href="audio.wav">link</A> to download an audio
![]() file.
file.
</body>
</html>
4. Save the HTML code as audio.html in the same folder as the audio file (see Figure 21.3).

5. Test!
As you can see, downloading audio and video has the advantage of being simple to set up and use.
Streaming audio and video requires a bit more work. When creating a streaming audio or video link, you need to embed the player as well as link to the file.
Streaming audio and video requires some programming and also requires the creation of complex links to other sites that can play your audio or video files remotely. Here are some resources to help you:
![]() XSPF Web Music Player—http://musicplayer.sourceforge.net/
XSPF Web Music Player—http://musicplayer.sourceforge.net/
![]() Gcast—http://www.gcast.com/
Gcast—http://www.gcast.com/
![]() Embedding Windows Media Player—http://www.streamalot.com/wm-embed.shtml
Embedding Windows Media Player—http://www.streamalot.com/wm-embed.shtml
![]() Embedded MP3 Audio Player—http://www.macloo.com/examples/audio_player/
Embedded MP3 Audio Player—http://www.macloo.com/examples/audio_player/
Instead of doing all the work yourself there are now video hosting sites that allow you to play and reference your videos. The best part is that the video hosting sites (like youtube.com) have made streaming very easy for you. Here are the steps:
1. Create your video file and save it to your hard drive.
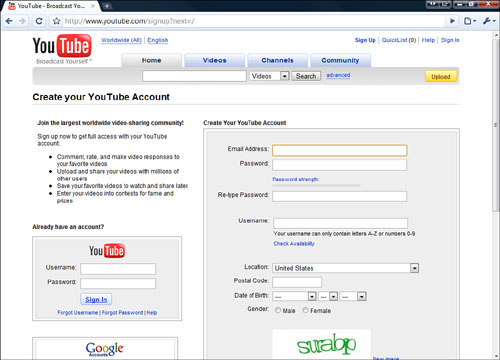
2. Go to youtube.com and create an account: http://www.youtube.com/signup?next=/. Creating an account enables you to upload videos (see Figure 21.4).
3. After you have a youtube.com account, log in and click the Upload button. This opens the video upload screen.
4. Enter the appropriate information for your video and upload the file. YouTube lets you upload a number of video types, but take note that the file needs to be less than a gigabyte and less than 10 minutes in length (unless you have a special YouTube account).
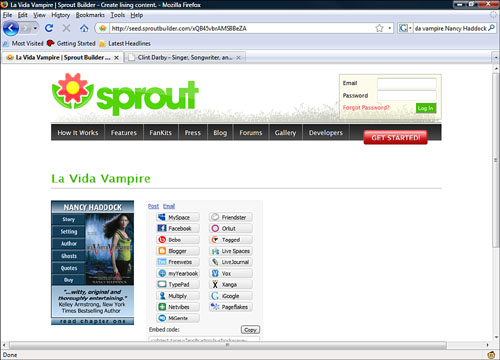
5. After your video is uploaded, you will notice that on the page for the video is an area called Embed, as shown in Figure 21.5. This area contains the code you need to add this YouTube video on any webpage.

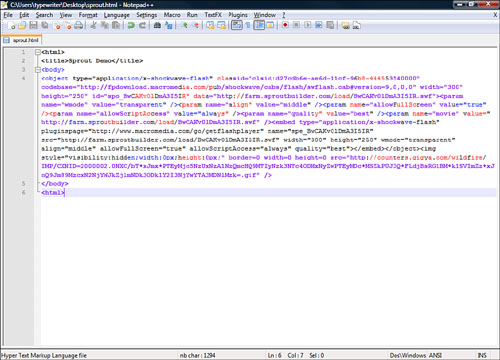
6. Create a blank web page and add the embed text in the body of your page. For example:
<html>
<title>Party Video</title>
<body>
<object width="425" height="344"><param name="movie"
![]() value="http://www.youtube.com/v/Wl7aHBMOvsE&hl=en&fs=1">
value="http://www.youtube.com/v/Wl7aHBMOvsE&hl=en&fs=1">
![]() </param><param name="allowFullScreen" value="true"></param>
</param><param name="allowFullScreen" value="true"></param>
![]() <param name="allowscriptaccess" value="always"></param>
<param name="allowscriptaccess" value="always"></param>
![]() <embed src="http://www.youtube.com/v/Wl7aHBMOvsE&hl=en&fs=1"
<embed src="http://www.youtube.com/v/Wl7aHBMOvsE&hl=en&fs=1"
![]() type="application/x-shockwave-flash"
type="application/x-shockwave-flash"
![]() allowscriptaccess="always"
allowscriptaccess="always"
![]() allowfullscreen="true" width="425"
allowfullscreen="true" width="425"
![]() height="344"></embed></object>
height="344"></embed></object>
</body>
</html>
7. Save your web page, view it, and you will see the video (see Figure 21.6).

Audio and video make your website come alive, and now you can create interactive multimedia elements for your website without spending any money or learning a programming language.
Sprout (www.sproutbuilder.com) is a website that uses Flash to create a multimedia authoring environment for free. After you have logged in to the Sprout site you gain access to the Sprout Builder, which enables you to build multimedia elements called sprouts. These sprouts are then added to your website.
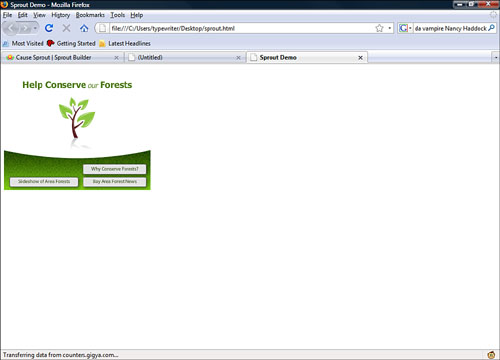
In essence, a sprout is like a mini-site you build in the Sprout Builder and then publish. After it is published, you add the Sprout code to your website, and it then appears on the page to which you added the code. Each sprout is made up of one or more pages with elements on each of them (see Figure 21.7).
Some examples of sprouts are media players, interactive news and calendars, or slideshows. What you do is up to your imagination. Before building a sprout, check out the Sprout Gallery (http://sproutbuilder.com/gallery).
warning
Although this sounds like a great idea, you need to remember you are using another website to provide content. If Sprout suddenly goes away, so does your content.
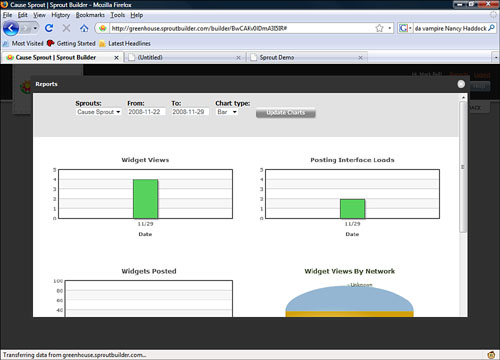
Sprout has a lot of features, including templates, a variety of components, easy publishing, and excellent statistics. They have an excellent community you can access through forums, as well as a great blog.
This section covers how to sign up for a Sprout account, build your first sprout, add a sprout to your web page, and how to edit your sprout.
As with most of the sites used to create content in this book, you need to create a Sprout account to use the service. I like Sprout a lot, but registering an account is a bit complicated. Follow these steps to sign up for a sprout account:
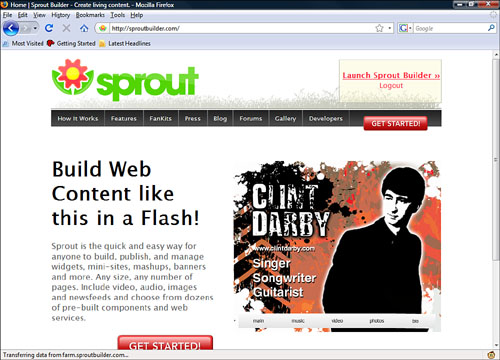
1. Open a web browser and go to http://sproutbuilder.com/. This opens the sprout home page (see Figure 21.8) and shows you some examples of sprouts.
warning
The instructions included here reflect the most recent version of the Sprout site. Be aware that things might have changed and might be slightly different than what you see in this text.
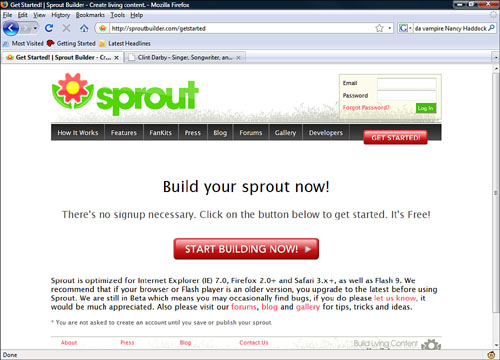
2. Click the Get Started button. This opens the Start Building page (see Figure 21.9). No sign-up account is needed for Sprout, but it is a good idea to set one up at first.
3. Click the Start Building Now button. This opens the Create New Project screen (see Figure 21.10). Before you create your account you need to choose a type of project.

4. Select Blank Slate. We will come back later and talk about this screen, but right now you are just signing up for an account. This opens a second Create New Project Screen (see Figure 21.11).
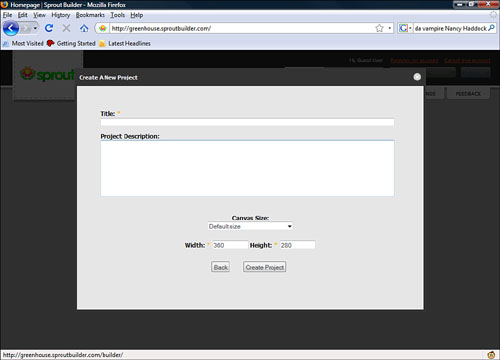
5. Enter a name and project description. You can change this later.
6. Click Create Project. This opens your new project in the Sprout Builder. The Sprout Builder is the area on the website you use to build Sprouts (see Figure 21.12).
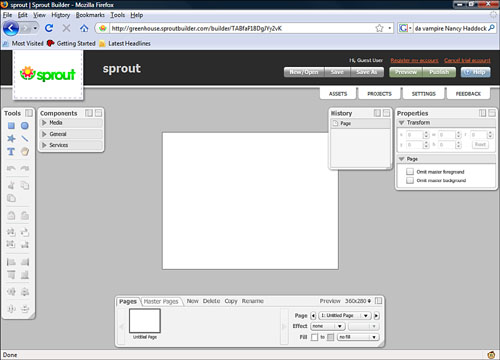
7. Finally, to register your account, click Register My Account at the top of the screen. This opens the Sign Up screen, which is used to gather your account information (see Figure 21.13).
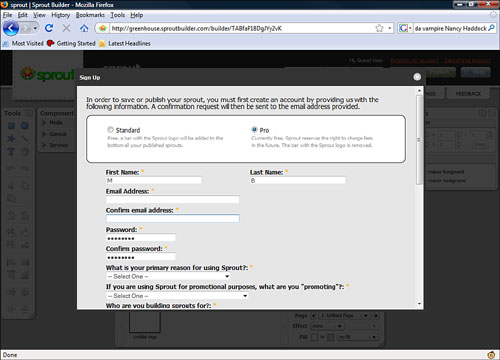
8. Select the type of account you want. Standard accounts mean that when you publish your sprout, the Sprout logo is displayed on the bottom of your sprout. The pro account doesn’t have the Sprout logo and is free for now, but Sprout may charge a fee in the future.
note
To me, choosing the Pro account is the way to go. It is free right now, and if Sprout does begin to charge they will let you know. Sprout doesn’t capture credit card or any payment information, so it doesn’t cost anything to register.
9. Fill out the information in the Sign Up screen and click Create Account. This opens the Verify Your Email Address screen, where you enter a code you have received in your email (see Figure 21.14).
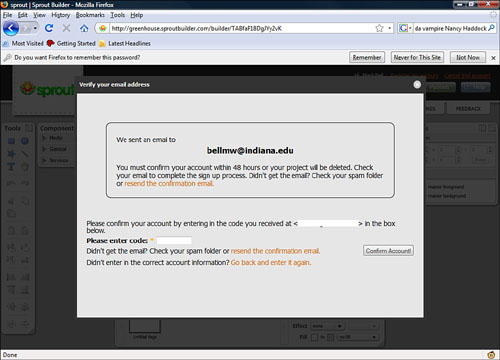
10. An email with a verification code is sent to your account with a code in it. Copy this code into the Verify Your Email Address screen and click Confirm Account. This verifies your account. Click Continue Building. This returns you to the Sprout Builder screen. When you come back to the Sprout Builder, use your email account and your password to log in.
The Sprout Builder is used to create sprouts. Again, sprouts are small multimedia widgets you build with the Sprout Builder and publish to your page. Here are the steps to take to create your first sprout:
1. Open the Sprout Builder.
2. Click the New/Open button at the top of the page. This opens the New/Open screen. From this screen you can create a new sprout or open an existing one. This screen lets you pick a blank sprout or pick a template. These templates just offer shortcuts and ideas for building your own sprouts. Choose a Blank Slate Sprout, a template, or one of your existing sprouts.
3. You are then asked to give your new sprout a title and a description. Click Create Project. This opens the new sprout in the Sprout Builder.
4. Creating your sprout the way you want it is going to take some time. It will be individualized to you based on your content. Have fun and be creative. The Help content (accessed by clicking Help on the top of the Sprout Builder) has great instructions and excellent tutorials, tips, and tricks. Also included are help videos that make learning Sprout Builder easy.
5. After you have created the sprout the way you want it, you need to publish it. When you publish a sprout, Sprout does all the difficult crazy coding for you and provides the code to add to your web page on the Publish Results screen (see Figure 21.15).
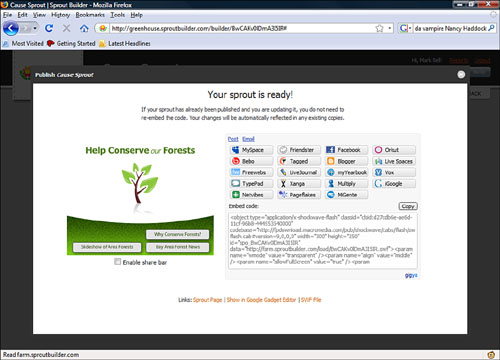
6. Once published, close the Publish window and save your sprout. To save a sprout click Save.
After you have your sprout published, you need to put your Sprout code into the body of a web page. Follow these steps:
After you have a sprout created you might want to make some changes to it. You use the Sprout Builder to do this. Here are the steps:
1. Open the Sprout Builder.
2. Click the New/Open button.
3. Select an existing sprout.
4. Make edits to your sprout.
5. Click Save.
note
If you don’t change the size or shape of your sprout but just the elements in it, you don’t need to add the republished code to your website. Just refresh your browser displaying the sprout and the changes will be displayed. If this does not work, you need to cut and paste the republished code.
6. Click Publish.
7. Add the code to the web page again.
8. Your new sprout is now displayed.
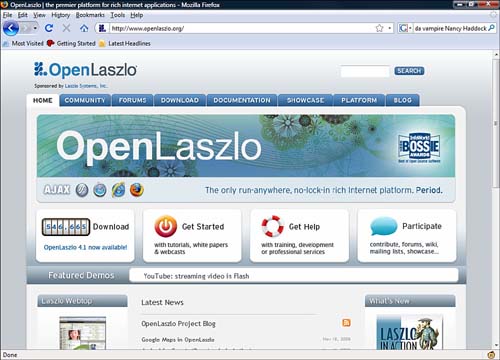
If you need something more complicated than Sprout allows, there is an open source alternative to the expensive programs such as Macromedia Flash. OpenLaszlo (http://www.openlaszlo.org/, see Figure 21.19) is an open source program that allows you to develop advanced robust multimedia websites. This program is not for the beginner, but can help you build amazing multimedia websites. It requires scripting, programming, and graphics skills.