
Chapter 22. Building a Wiki
In This Chapter
![]() Five Reasons to Use PBwiki to Host Your Wiki
Five Reasons to Use PBwiki to Host Your Wiki
![]() Five Reasons to Use MediaWiki for Your Wiki
Five Reasons to Use MediaWiki for Your Wiki
![]() Building a Wiki Using PBwiki.com
Building a Wiki Using PBwiki.com
A wiki is an editable set of web pages that enables users to collaborate to create a site that organizes information. The word wiki is a Hawaiian word for “fast”. The idea is that anyone can change a wiki page fast. The first wiki was created by Ward Cunningham in 1994, but the wiki really began to take off when Wikipedia was created in 2001.
The subject matter for a wiki can be anything—and I do mean anything. There are wikis about camping trips, television shows, online games, and car racing, to name a few. Any time people need to collaborate on creating an information source, a wiki is an excellent choice.
This chapter covers how to use a website called PBWiki and open-source software called MediaWiki to build your own wiki. PBWiki is a website that enables you to create wikis, and MediaWiki software installs on your own web host and enables you to run and manage your own wiki.
There are distinct differences between PBWiki and MediaWiki, so to help you decide which is best for you, I’ve created lists of reasons to use each. These lists will help you determine your priorities and decide which section of this chapter you should read.
![]() You are brand new to wikis—PBwiki makes it easy to get up and running quickly while connecting you to a larger community of more experienced wiki creators.
You are brand new to wikis—PBwiki makes it easy to get up and running quickly while connecting you to a larger community of more experienced wiki creators.
![]() You have low technical ability—PBwiki is a nice and easy way to access some very complicated technology that you never have to worry about.
You have low technical ability—PBwiki is a nice and easy way to access some very complicated technology that you never have to worry about.
![]() You don’t want to spend any money for a wiki—A basic PBwiki wiki is free for 3 or fewer users. You can’t save more money than that.
You don’t want to spend any money for a wiki—A basic PBwiki wiki is free for 3 or fewer users. You can’t save more money than that.
![]() You don’t care about bells and whistles—If you want a simple, well-run, robust wiki and don’t care about the latest gadgets or add-ins, PBwiki is for you.
You don’t care about bells and whistles—If you want a simple, well-run, robust wiki and don’t care about the latest gadgets or add-ins, PBwiki is for you.
![]() You don’t need your own domain—PBwiki’s wikis are all hosted under the pbwiki.com domain. If not having your own domain isn’t an issue for you, then PBwiki is a good choice for you.
You don’t need your own domain—PBwiki’s wikis are all hosted under the pbwiki.com domain. If not having your own domain isn’t an issue for you, then PBwiki is a good choice for you.
![]() You have your own domain—If you want a specific domain name, using the MediaWiki software has no domain name restrictions.
You have your own domain—If you want a specific domain name, using the MediaWiki software has no domain name restrictions.
![]() You want a lot of people to edit your wiki—MediaWiki has no restrictions on how many people can edit your wiki.
You want a lot of people to edit your wiki—MediaWiki has no restrictions on how many people can edit your wiki.
![]() You care about bells and whistles—If you want to control every little detail of your wiki, you might want to download the MediaWiki software.
You care about bells and whistles—If you want to control every little detail of your wiki, you might want to download the MediaWiki software.
![]() You have technical knowledge—Installing, configuring, and using MediaWiki software requires knowledge of some technical things.
You have technical knowledge—Installing, configuring, and using MediaWiki software requires knowledge of some technical things.
![]() Your hosting service offers MediaWiki installs—Your hosting services let you automatically install Mediawiki. This gives you control and easy installation.
Your hosting service offers MediaWiki installs—Your hosting services let you automatically install Mediawiki. This gives you control and easy installation.
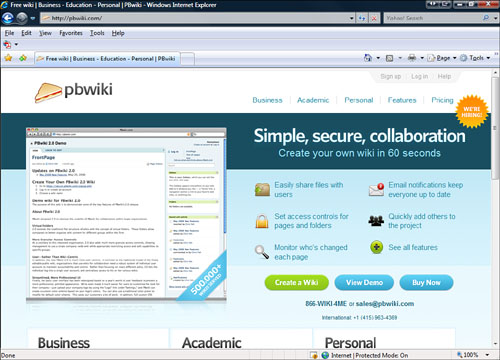
PBWiki is a website that offers hosting of education and business wikis. The name is meant to imply that creating a wiki on their site is as easy as creating a peanut butter sandwich. They have over half a million wikis on their site (Figure 22.2). The site allows quick wiki creation and use without requiring you to run the wiki software on your own host. You can also browse their lists of blogs and find out who else is using their site.
Building a Wiki Using PBwiki.com
If you want to use a very basic version of a wiki and want someone else to take care of all your hosting needs, PBwiki.com is a good solution. This section of the chapter covers getting a wiki up and running on PBwiki.com.
Before you begin at PBwiki.com you need the following:
![]() An idea for your wiki
An idea for your wiki
![]() A name for your wiki
A name for your wiki
![]() An email address
An email address
To begin using PBwiki.com, you need to sign up for their service. It is 100% free (but only if you have fewer than three users) and gives you access to their software and a whole community of people using PBwiki.com.
caution
Because Pbwiki.com is a website that is constantly being updated, these instructions may differ from what you see.
1. Open your web browser and navigate to http://www.pbwiki.com. This opens the home page for PBwiki, where you sign up for the wiki hosting service.
2. Click the Create a Wiki button. The Signup for Your PBwiki page appears (see Figure 22.3). On this page, you enter all the information you need to set up your wiki on the PBwiki.com servers.
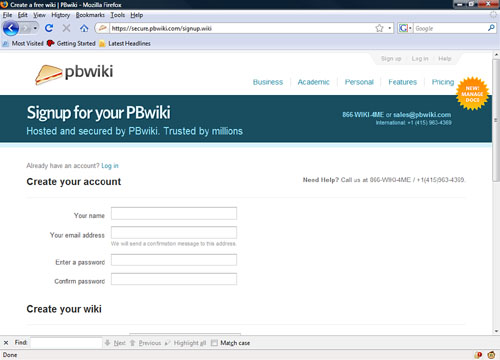
3. In the Your Name field, enter your name.
4. In the Email Address field, enter your email address. PBwiki.com uses your email address to communicate information and administrative notes. Make sure it is correct.
5. Next, in the Password field, enter a word or phrase. When choosing a password, make it unique and easy to remember. Try to have a mixture of letters and numbers. The case of the letters matters also, so use a mixture of upper- and lowercase.
6. In the Confirm Password field, enter your password again. Choose a wiki name and enter it in the Wiki Name field. This also becomes the URL to your wiki, so it can’t have any spaces and should be letters and numbers only.
7. Select what you are using this wiki for. The options are For Individuals, For Education, and For Business. Each of these options affect the default settings for your wiki.
8. If you want to use PBwiki 2.0, (and you do because it has a new interface and some new features) click the Yes, Please Make This a PBwiki 2.0 Wiki box.
9. Next, click the Create My Wiki button.
10. Finally, check your email for a confirmation email and follow the instructions carefully.
After you have signed up for PBwiki.com, you need to activate your account. PBwiki.com will have sent you an email, to the address you provided when you were signing up. When you receive the email message, read it and follow the instructions in the email. This includes clicking on a link to activate your wiki.
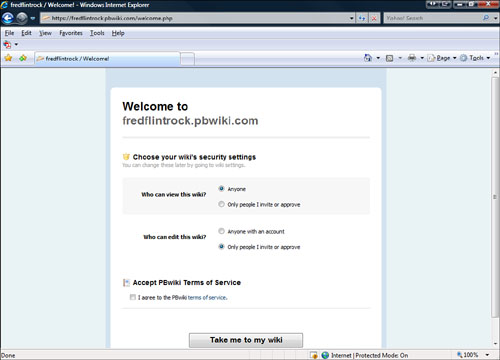
After you have done this, PBwiki.com asks you to establish your security settings before you can use your wiki (see Figure 22.4). Follow these instructions:
1. Select who can view your wiki (either anyone or only people you invite or approve).
2. Select who can edit your wiki (either anyone or only people you invite or approve).
3. Take the time to read a stunningly exciting set of Terms of Service.
4. Click the box saying you agree to the PBwiki terms of service.
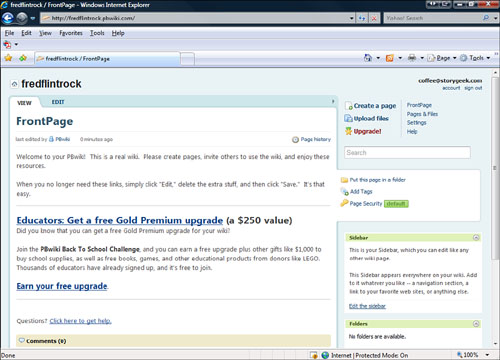
5. Click the Take Me to My Wiki button. Your new wiki is displayed (see Figure 22.5). To begin, the front page of your wiki is displayed. This page, like any page on your wiki, is editable by you. Because you are a registered user and owner of this wiki you have options along the right side—things such as adding a new page and uploading files.
The power of wikis is apparent in the ability you have to edit the pages to share information with all visitors. Editing PBwiki pages is easy. After you turn on edit mode for your wiki page you have a WYSIWYG editor for that page. Follow these instructions to turn on edit mode:
1. Click the tab at the top of the page that says edit. This opens the page in edit mode (see Figure 22.6). Edit mode enables you to edit your PBwiki page.
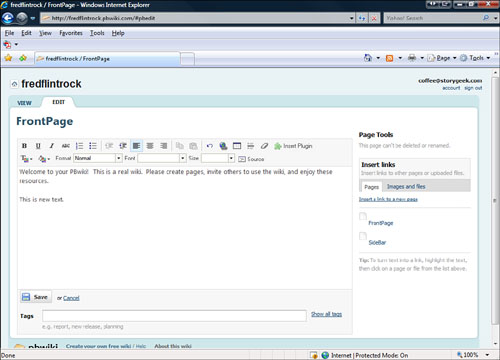
2. Now you can edit all the text on the page. Across the top of the edit area is a formatting toolbar that enables you to format your text.
3. When finished, click the Save button. The edits you made have now taken effect.
PBWiki also enables you to add pages easily. These pages help you organize information and enable you to expand your PBwiki. Follow these instructions to add a page:
1. Click the Create Page button on the top-right corner of the page. This opens the page where you name your new wiki page (see Figure 22.7).
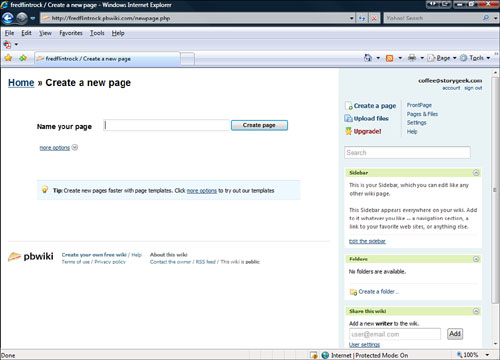
2. Enter the name of the page and click Create Page. You are then presented with a blank page with your title on it. Edit and save the new page as instructed in the preceding section.
After you have more than one page, you’ll want to create links to multiple pages. You do this in the edit mode. Follow these steps to add a link:
1. Open a page in edit mode.
2. Enter some text for the hyperlink.
3. Click the Link button in the formatting toolbar. This opens the Create Link Window (see Figure 22.8).
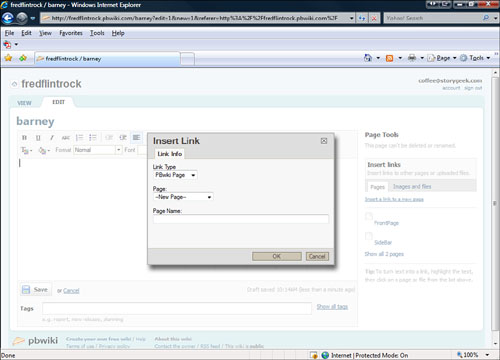
4. From the Link Type list, select PBwiki page.
5. In the Page Name box, select the page to which you want to link. If it is a new page, you can enter the name in the Name field.
6. Click OK. Your new link is created.
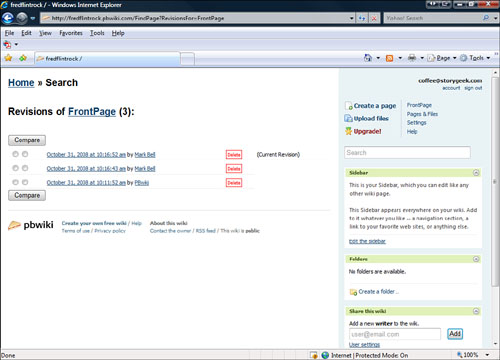
One of the most powerful features of a wiki is page history. This means a copy of every version of a wiki page is kept and can be compared to every other version of that page. For example, if you make a change to a wiki page and then come back in a few hours and see it has changed again, a wiki page history can tell you the exact changes that were made, who made them, and when. You also can then revert to any one of those previous versions of the page. If you have a moment, look at the history of a Wikipedia page and you will see how much work actually goes into creating it. To view a page’s history, click the View History button at the top of the page. This then shows you the page’s History (see Figure 22.9)
If you’ve already tried the PBwiki.com solution but want to expand the functions, the look, or the feel of your wiki, or maybe you’re more of a techie geek and you want something more than PBwiki.com has to offer, then MediaWiki is for you.
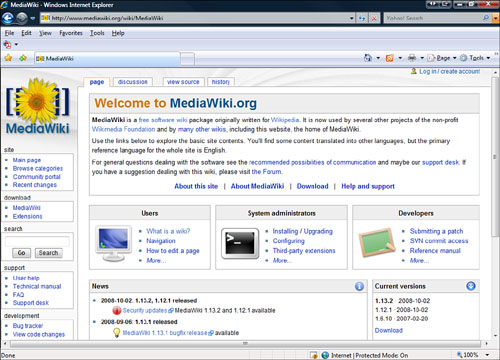
MediaWiki enables you to install and configure your wiki, MediaWiki (see Figure 22.10). There are a number of different open source wiki software programs—MediaWiki, TikiWiki, and FlexWiki, to name a few. I am going to cover MediaWiki because it is the same software used to run Wikipedia and because it’s an excellent example of a wiki.
caution
When installing software on your own there is a possibility that things will go wrong or might not work as expected. It’s important to back up anything important before beginning this process, just in case.
After you have decided to install your own MediaWiki software you need to do a few things before you begin.
Like the WordPress software discussed in Chapter 19, “Building a Blog Site with WordPress,” the MediaWiki software uses scripts written in PHP and MySQL for a database. For a high-level view of this architecture, with an explanation of the parts, see Chapter 19.
Before starting your install of MediaWiki software, you’ll need some tools and you’ll need to do some simple things with your hosting service.
If you need help finding a host, refer back to Chapter 2, “Choosing a Location for Your Site.” Here’s what you need to do before installing the MediaWiki software:
1. Check to see that the right software is installed on your server. To run MediaWiki 1.13.2, your web hosting service has to provide
![]() PHP version 5.0 or greater (5.1.x is recommended)
PHP version 5.0 or greater (5.1.x is recommended)
![]() MySQL version 4.0 or greater
MySQL version 4.0 or greater
note
Without access to PHP and MySQL on your web server you cannot run MediaWiki software. If one of these pieces is missing, you need to use PBWiki or look for another wiki solution.
2. Get a text editor. You might have to edit some text files to get your WikiMedia install up and running. A text file is simply a file with words and numbers in it that doesn’t contain formatting. For more information about good text editors, refer to Chapter 5, “Gathering Your Development Tools.”
3. Get an FTP client. FTP stands for File Transfer Protocol and is a fancy name for the software that allows you to easily transfer files between machines. When you are installing software such as MediaWiki you need to be able to move files between machines easily. An FTP client is a program that helps you do this. For more information about good FTP clients, refer to Chapter 5.
4. Pick a username and password. Like all usernames and passwords, yours should be unique and contain letters and numbers.
Similar to other more complex software we have covered (Joomla and WordPress), you need to download the MediWiki software to your computer and install it on your web server. Follow these steps:
1. Download MediaWiki software. Go to http://www.mediawiki.org/wiki/Manual:Downloading_MediaWiki (see Figure 22.11).
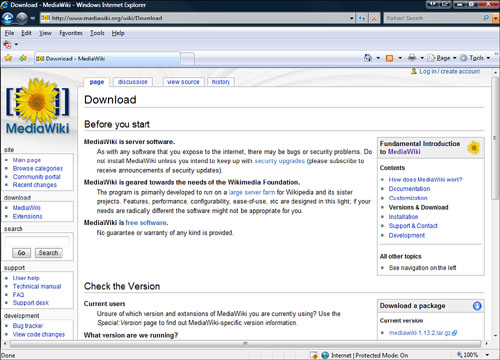
2. Click the Latest Version link.
Geek Speak
tar.gz file
A tar.gz file is a special type of zip file. You need a program that opens zip files such as WinZip or 7zip. For more information, consult Chapter 5.
3. Navigate to the correct version directory (1.13.2).
4. A tar.gz file will be downloaded to your computer.
5. Unzip this file to your hard drive.
From this point on, you can refer to the MediaWiki installation documentation to install and configure Mediawiki. Here are some additional documentation sources to help you with your installation:
![]() MediaWiki Installation Guide—http://www.mediawiki.org/wiki/Manual:Installation_guide
MediaWiki Installation Guide—http://www.mediawiki.org/wiki/Manual:Installation_guide
![]() Installing Mediawiki Is Much Easier than the Instructions Suggest—My Quick 10 Step Tutorial for Installing Mediawiki—http://www.idratherbewriting.com/2007/06/14/installing-mediawiki-is-much-easier-than-the-instructions-suggest-my-quick-10-step-tutorial-for-installing-mediawiki/
Installing Mediawiki Is Much Easier than the Instructions Suggest—My Quick 10 Step Tutorial for Installing Mediawiki—http://www.idratherbewriting.com/2007/06/14/installing-mediawiki-is-much-easier-than-the-instructions-suggest-my-quick-10-step-tutorial-for-installing-mediawiki/
![]() Installing MediaWiki—http://www.washington.edu/computing/web/publishing/mediawiki.html
Installing MediaWiki—http://www.washington.edu/computing/web/publishing/mediawiki.html
After you have downloaded and installed MediaWiki, its operation is similar to that of PBwiki, with quite a few added features and no limitation on size or number of users. Here are a couple of additional MediaWiki resources:
![]() MediaWiki help file—http://www.mediawiki.org/wiki/Help:Contents
MediaWiki help file—http://www.mediawiki.org/wiki/Help:Contents
![]() Using MediaWiki—http://www.deakin.edu.au/itl/dso/guides/qg-mediawiki-userguide.html
Using MediaWiki—http://www.deakin.edu.au/itl/dso/guides/qg-mediawiki-userguide.html
![]() MediaWiki User Guide—http://en.wikibooks.org/wiki/MediaWiki_User_Guide
MediaWiki User Guide—http://en.wikibooks.org/wiki/MediaWiki_User_Guide