
We can't wait for you to see your parallax backgrounds, but right now the game is not testable. There is no ground to drive on, and our rover still needs its collision shapes adjusted. If you remember from our previous chapter, collision shapes must be edited in the base object, and not the instance on the game stage. So, let's start with the wheels.
In the asset library, open the Objects section and select the Wheel. In the properties window, you'll see a field called CollisionShape. Click the Edit button for this field.
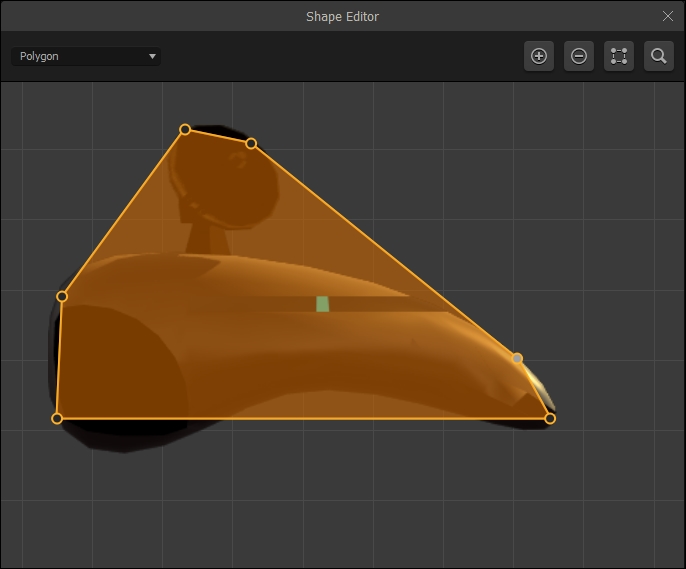
Within the shape editor, you can see that the current collision shape barely covers the axle of the wheel. Let's expand this selection using the handle (a small dot) on the right side of the circle to cover the entire wheel. It should look like the following screenshot:

Since we did this with the master object for the wheels (and not the two instances of the wheels on our stage), both wheels are affected by this new shape. Now the wheels will actually roll on the ground, rather than falling through it.
Now let's take care of the rover's collision shape. Following the same process as we did in Chapter 2, Orientation, let's adjust the polygon shape of the rover's body by adding points and dragging them around until the shape looks like the following screenshot:
Great, now our rover is set up (basically) to drive. We just need something to drive on!
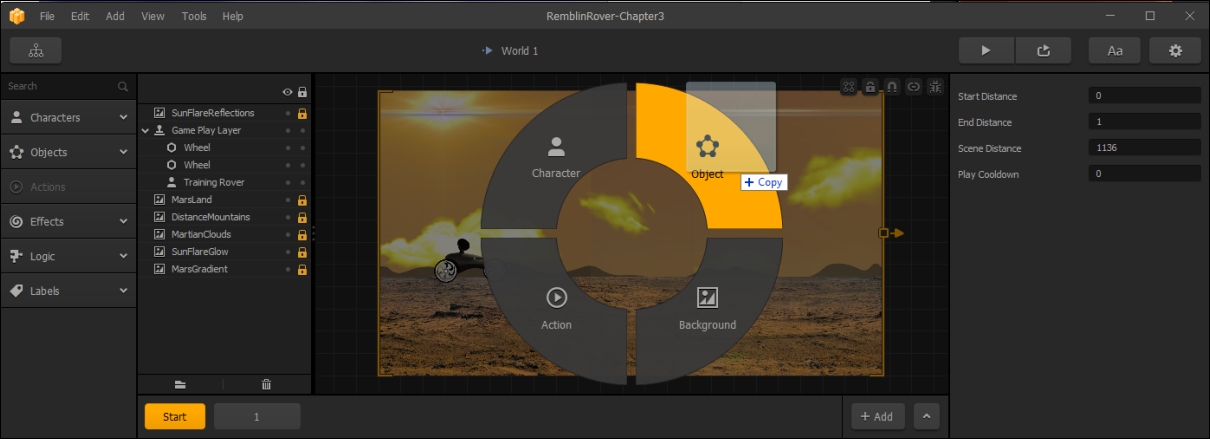
In a motocross game, the ground and obstacles are somewhat synonymous. The ground is an obstacle that can destroy our character, but not every obstacle is a ground object. We add obstacle objects the same way we added backgrounds with one exception. In the Projects/RamblinRover/Ground folder, you'll find GroundBlockCutaway-Mars.png. Drag that file over the stage, and let it go over the Objects part of the overlay that pops up as illustrated in the following screenshot:
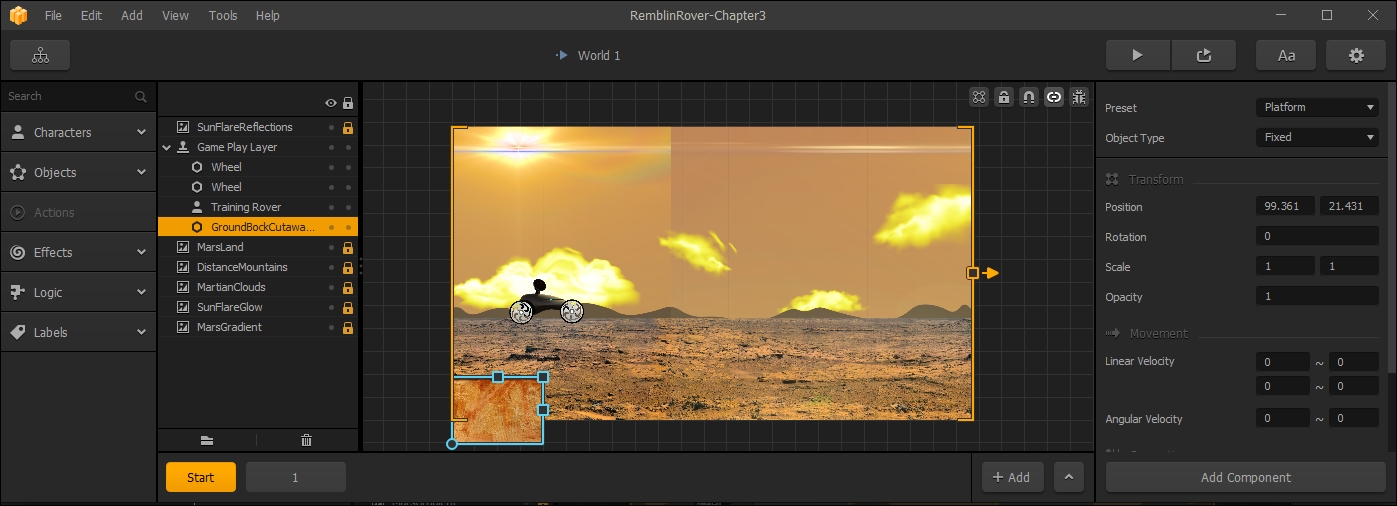
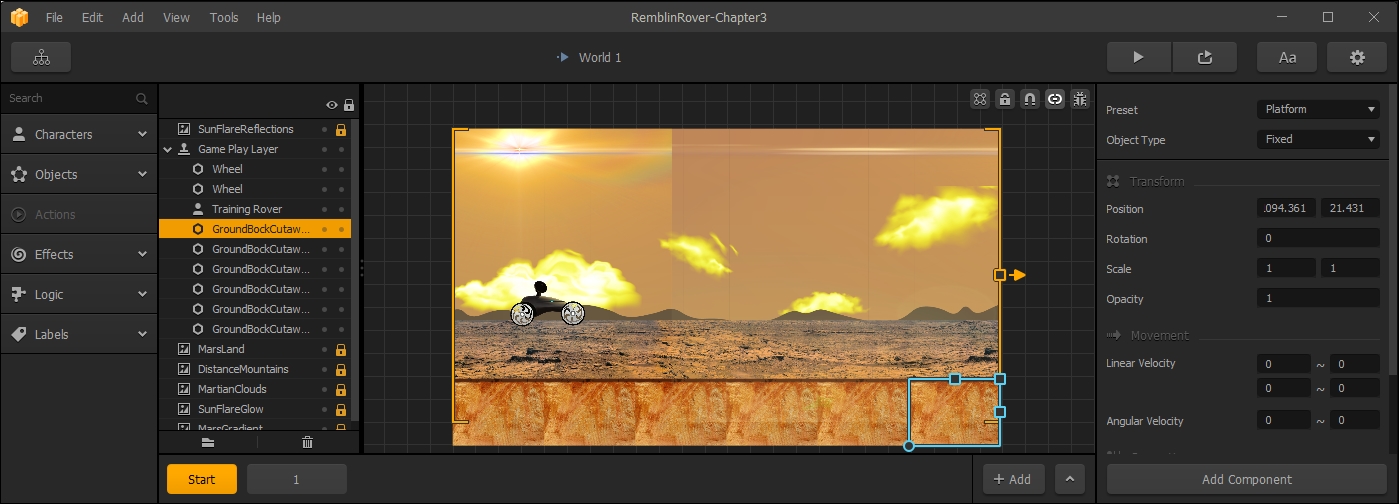
Now we just need to position our first ground-block and set up its actions. Drag the GroundBlockCutaway object that's on the stage down to the bottom left so that it's a little below the visible area. It should look like this:
What we're doing here is creating a base instance of the ground block. Once we get all of the settings correct, we'll duplicate this across the visible area of the stage. In the properties window, scroll down to the bottom. You'll see a Properties section in the properties window. This is where we can set collision actions.
A collision is exactly what it sounds like: something that will happen when two objects' collision shapes intersect. By default, when a new object is put on the stage, its Collision Type is set to Collide. All this means is that this parameter is telling the program that "yes, we'd like this object to make something happen when another object touches it."
In the next chapter (Chapter 4, Advanced World Design —Ramblin' Rover, Part 2), we'll have some objects that have a No Collide setting. That setting is for what we call decorations, for example, a tree that you don't want to be a background element (because background elements are tiled). Then, you can drive right by a tree without anything happening, and you can place that tree wherever you'd like on the level without it automatically tiling across your whole world.
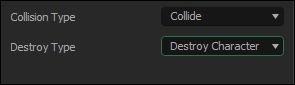
The next parameter is Destroy Type. By default, this is set to No Destroy. Set this to Destroy Character so that it looks like the image on the right.
Let's take a quick look at what each setting in this parameter does:
- No Destroy: Two different things can happen when an object comes in contact with this. First, if this is not a physics object, then it will not let anything pass. It's a brick wall. Your character will stop dead, or bounce off it. Second, if it is a physics object, it will bounce off your character, get pushed by it, or react in some other way, but nothing will be destroyed...only interact with it based on physics parameters.
- Destroy Character: If your character touches this object, your character will be destroyed, and the game will be over.
- Destroy Enemy: This is where you might use the object as something to throw or push at an enemy to destroy it. Think of it as the shell of a turtle in Super Mario Bros. Jump on it once, and it destroys the actual turtle head and legs (beneath), then on the bounce it shoots across the screen, you can run behind it, and it destroys your enemies.
- Destroy All: This is bad... really bad for anything that touches it. It will literally destroy anything and everything that comes in contact with it.
Now, we're set with the ground-block template. Creating more instances that look just like this is pretty easy. Just press the D key on your keyboard, and another instance is created to the right. Press this key four more times and the ground stretches out across the visible area.
On the right of the visible area, you'll see a large orange bracket with a small orange rectangle in the center. You'll also see a small orange arrow just to the right of that square. Drag this little orange square to the right until the bracket goes to the edge of the last ground-block. This extends the scene so that it holds all of the ground-blocks. Your final Start scene should look like the following screenshot:
Before we move on, let's clean up some resources. As we're not going to be using any of our original obstacles, let's eliminate them from our asset library. In the Objects section of our library, select and delete (by clicking on the little X on the top-right of their icons) the Platform and Enemy objects.
Now, let's create our first obstacle on Scene 1!