
Ok...so it's a little slow and boring. So, let's get into making it a bit more exciting. Start by speeding things up. Select the Level 1 node, and increase the Time Warp value to 100 (currently set at 55). This will nearly double the speed of the game making it more challenging and fun. Give it a try now (using the Preview button). So, even though the graphics are still boring and primitive, you actually begin to have some fun.
This is a great example of what world parameters can do. Simply changing one parameter can give the player an entirely different game experience. We'll be using this principle heavily with Ramblin' Rover. The player will have the chance to drive their rover on several different planets. Using parameters, we can change whether the wheels spin out on a vehicle, how much pull the gravity has, and even how much the atmosphere drags when you perform tricks.
But we digress...let's go make this thing look a bit better too. Start by double-clicking on the Level 1 node...
Although this is a tutorial demo, this is very close to what the Buildbox templates look like upon loading; grey obstacles and assets with a white character. All are primitives. It's actually pretty smart if you consider it. This makes it easy to tell what assets still need to be replaced when creating a game.
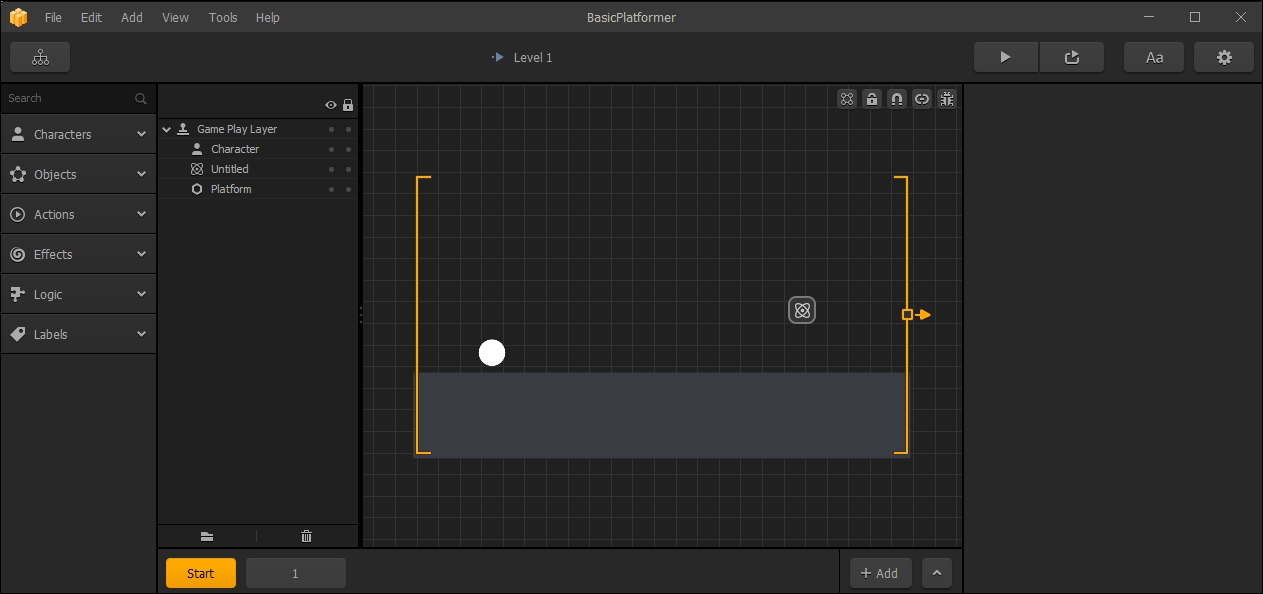
Let's start off by turning off all of the buttons at the top-right of the stage (ShowGameFrame, LockBackground, and ActivateConnectionMode). We'll turn some of these back on later, but for now they're obstructing our view. Let's also get rid of all the tutorial text objects and arrows in our frame by selecting them with your mouse and hitting Delete on your keyboard. Now your screen should look something like the following screenshot:
Now, let's replace the most prominent graphic asset in the game... the character. With this small exercise, you're learning the basics of Buildbox. Let's kill two birds with one stone here; we'll also learn about image sequence animations.
We've created a small 15-frame animation of a pair of eyes with shoes that we'll dub Herman. There are two types of animation in Buildbox:
- Where an asset is moved across the screen using keyframes. We'll get into this type of animation later.
- Where an asset itself has several different images (also called frames) to create the illusion of movement, kind of like a flip-book or a film strip.
The image below shows all 15 frames from Herman's walk cycle. A walk cycle animation is a series of images that can be looped to create what looks like a character walking on a treadmill. In cartoons, this walk cycle would be then moved across a background (the first type of animation). Since it's our character, we'll set this up so that whenever it moves, this walk cycle plays:
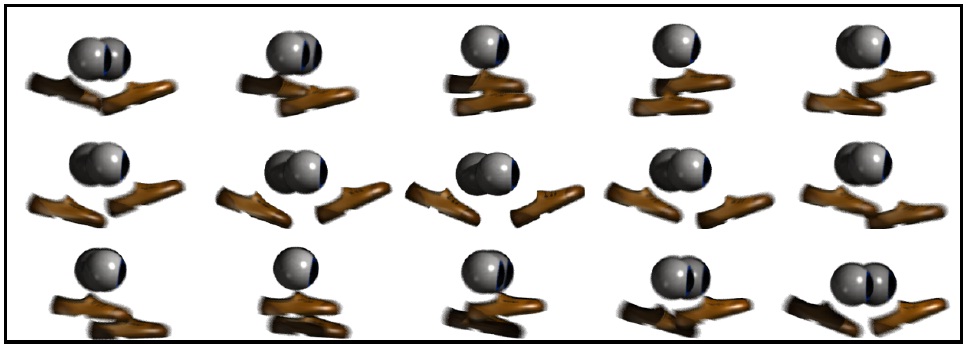
You may notice that it's just Herman taking two steps. But because the last frame of the animation leads into the first, it's loopable. The actual character we'll need is only around 80-90 pixels tall. But since we may play this on large devices (such as a Windows computer with a 4K monitor), we've rendered (output the animation from our 3D software) at twice the resolution we needed (300 x 175).
If you've downloaded the content, you can find these images in Projects/BasicPlatformer/Characters/Herman. In the asset library, open the Characters section and click on the image of the white-ball character. This will open the properties for the character itself. It's different than clicking on the character on the stage. When selecting the character on the stage, you will edit its instance properties. An instance is a single use of an object from the asset library. When selecting the object inside the asset library, the global properties of that object are available. Global properties affect every instance of the object everywhere in the game.
Applying image-sequence animations to objects is fairly easy. All graphics assets in Buildbox pretty much work the same way...drag and drop. Do you remember how we created the Restart button on the Game Over screen? We just dragged the image over and dropped it on an image field.
Applying animated image sequences is very much the same thing. Where a character is different than a button is that it's made up of several image sequence animations:
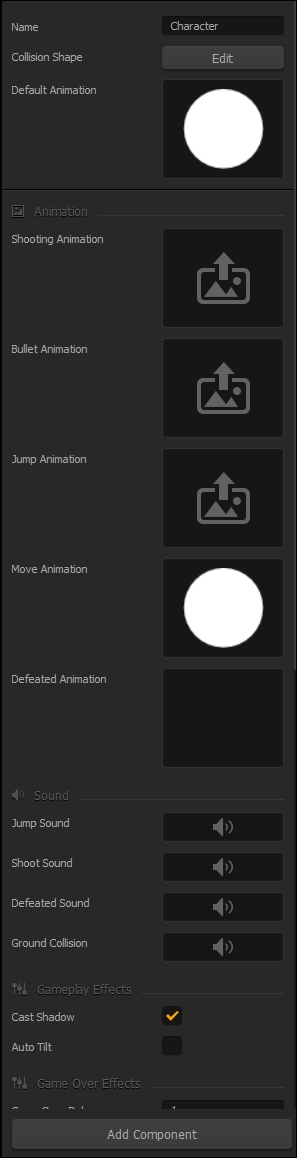
The image on the right shows the properties for the (currently) white ball character. First, let's change the Name to Herman.
If you select all of the images from the walk cycle image sequence, you can simply drag them (all at the same time...not individually) to the Move Animation field.
Now try the game using the Preview button. When Herman is standing still, he's a small ball. When you move him, he's a huge character...but he walks. Granted, the graphic of him walking is not aligned to the ground (yet), and he's way too big...but he walks! We'll fix his size and alignment soon. For now, let's get some more animations set up.
In your file browser, locate Projects/BasicPlatformer/Characters/Herman-Idle. Select all of the images from this folder and drag them to the Default Animation field.
Then, drag all of the images from the Projects/BasicPlatformer/Characters/Herman-Jump folder to the Jump Animation field. The result should look something like the following screenshot:

Now that an ugly white ball has been transformed into an actual character, we need to make that character right for our world. First, we have to alter Herman's Collision Shape. Currently, the software still thinks that Herman is a small ball and not a large character with other shapes. So if we were to play the game right now, his feet would be below the ground and he would even seem to go through objects. Open the Collision Shape Editor window by clicking on the Edit button of the Collision Shape field. You should now see the Shape Editor window, and it will resemble the following screenshot:
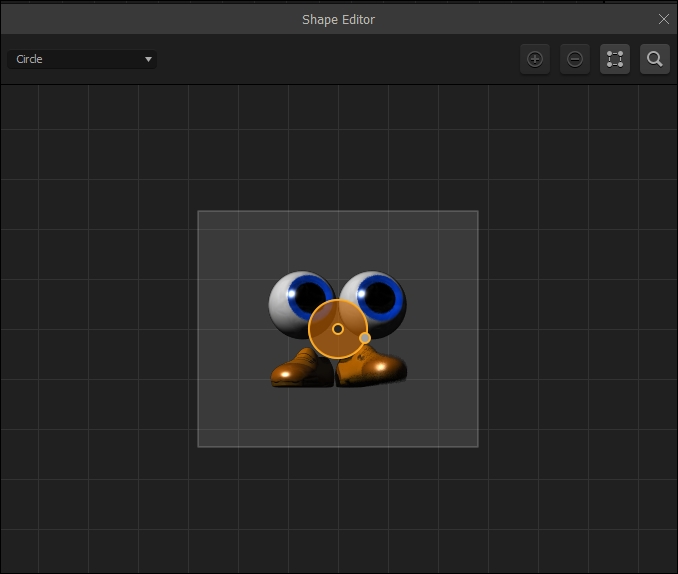
The orange circle in the center is the current collision shape. Let's change it to a polygon by selecting Polygon from the drop-down menu in the upper-left of the window.
You should now see a square, but we need a more complex shape. By clicking the + icon on the top-left of the window, you can add points to the polygon. You'll want to add two points, and drag the points until the resemble they next screenshot:
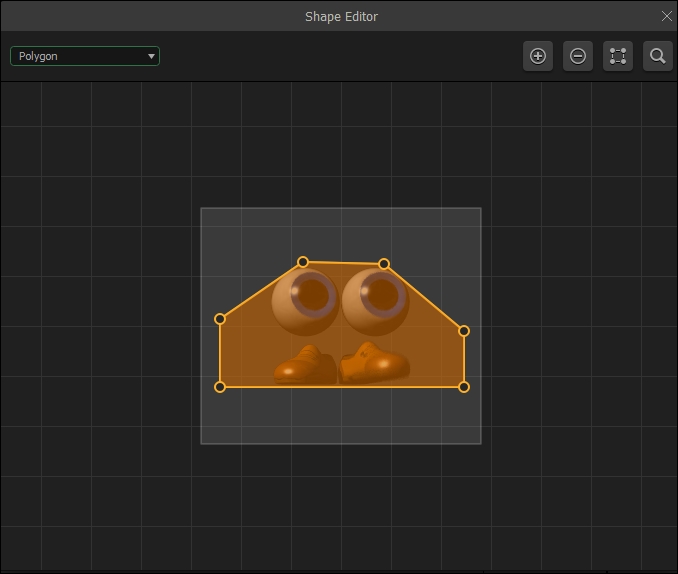
You may wonder why this shape is wider than the actual image. Well, that's because we have to account for the walk cycle's feet moving while Herman walks. Notice that we also lined up the bottom of the collision shape with the bottom of Herman's feet. If (while dragging points around) you see the shape turn red, this means it is not a usable shape. Buildbox does not allow concave areas of a collision shape. If it turns red, just move the points until the shape turns orange again, remembering that any areas of the shape must be convex. Do you feel like you're back in high school geometry yet? See, it wasn't a useless class!
We'll get much deeper into collision shapes when we make Ramblin' Rover. Remember, the purpose of this chapter is to just give you a feel for how Buildbox works at a high level. We'll drill down into the details as we go.
Now, let's make Herman the right size and position him. Close the Shape Editor window. After selecting Herman on the stage, set both Scale fields to a value of 0.5. Then, drag him so that his feet are hovering just over the ground (not in contact, but just above). When the game starts, he'll drop down to the ground. The following screenshot shows Herman at the correct scale, and placed properly:

Give it a try using the Preview button. Now we've gone from a boring white ball to a cute character that the player can identify with.
If you play the game, you'll notice that although we removed the text and arrows, they pop up again downstream. This is because we haven't removed them from the other scene just yet.
Scenes are just sections of a world chained together. They are the essence of how a game is structured in Buildbox. By using scenes, you can set up a game to play them sequentially, set them up to play randomly (to change the game to a unique experience whenever played), and even make them a rare find by using a cooldown time.
At the bottom of the screen, you'll see the Scene Selection interface. Currently, the Start scene is selected. By clicking on the button with the number 1 in it, we will be able to edit that scene. Once you have clicked it, you should be able to delete all of the arrows and text from this scene, following the same procedure as before.
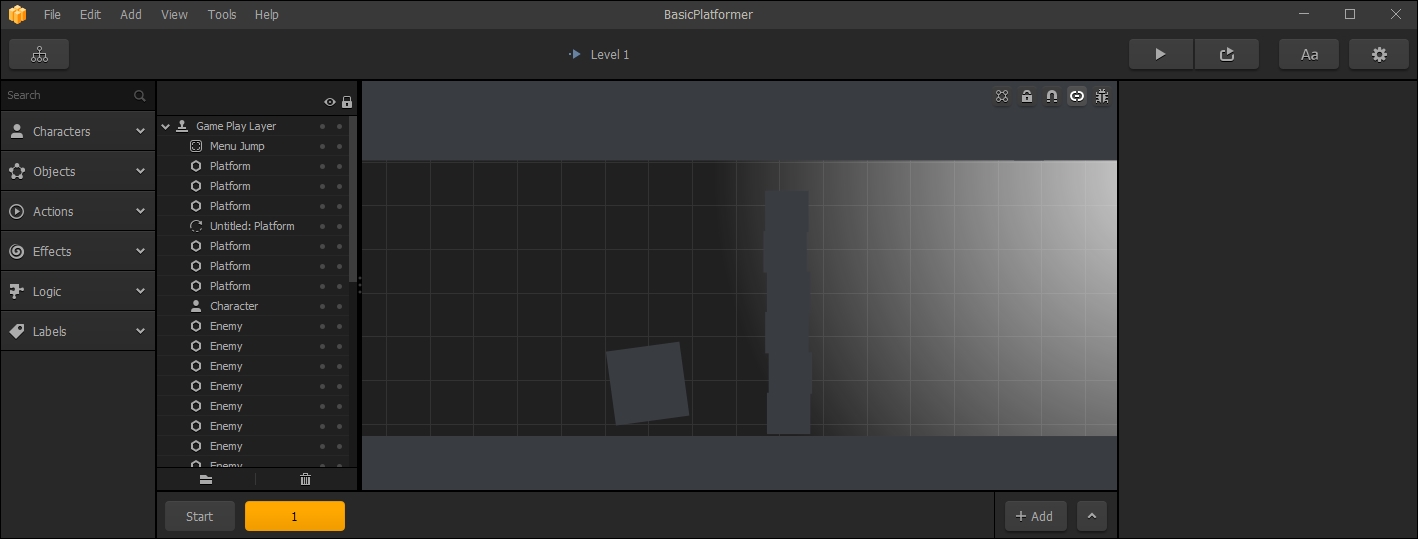
Moving around on the stage is a bit clunky in Buildbox. Currently, you may not be able to see the entire stage. By holding down the spacebar, you can drag the scene around to see all of the areas of it. Also, you can zoom in and out by simply using the scroll-wheel of your mouse. Use these controls to make sure you've removed all the arrows and text, then focus in on the stack of blocks.
You should be where the image below indicates. Since we changed our Time Warp setting for this world, it has affected the physics. The block wall that used to fall over now ends up on the ground before we get to it. Let's go ahead and stack the blocks a bit better:
Start by deleting all of the stacked blocks except the bottom one. We're about to learn about instancing. Now that you have only one block to worry about, position this block directly on the ground. This is done by zooming in on it as far as possible, and using your arrow keys to move the object down until there is no gap under it. Be careful not to go further than the ground though, as this can cause issues. Your result should look like this:

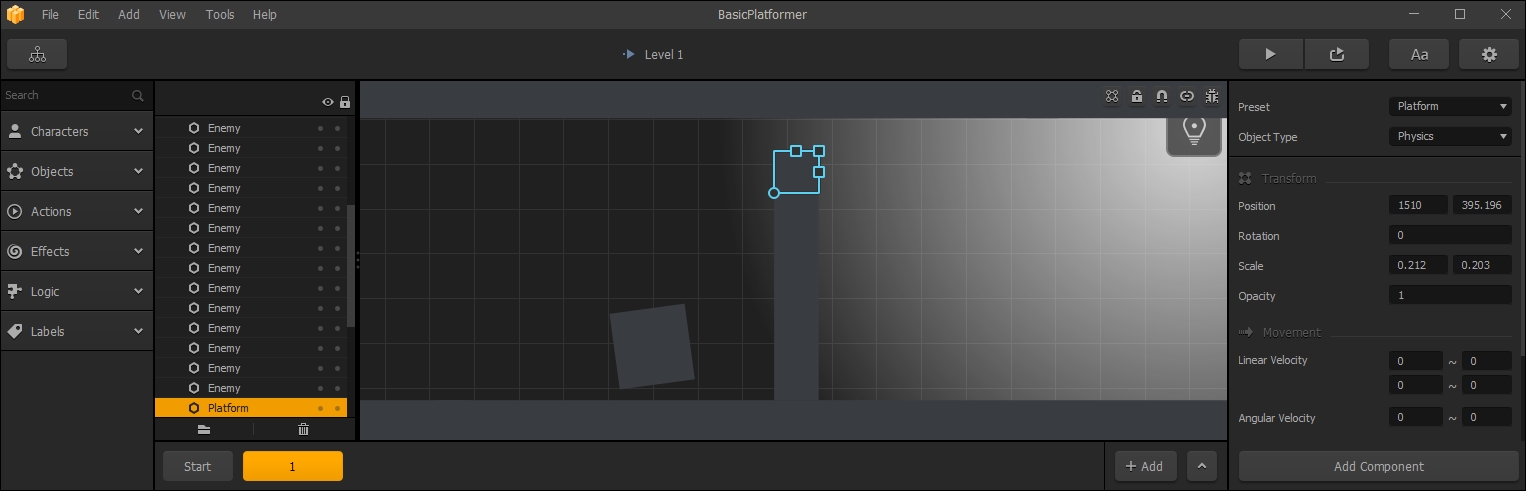
Now for the easy part. Start by zooming out with your Mouse Wheel so you can see the floor and ceiling (as well as the box you just positioned). With the block still selected, hit your W key on the keyboard five times. You now have six blocks all stacked on each other. The instancing controls are the same as W, A, S and D controls in a video game. W instances objects up, A instances objects to the left, S instances objects down, and D instances objects to the right. The following screenshot shows your wall aligned more nicely, and prepared for the new physics settings:
There's just one more thing we need to do in order to make this functional. Our old character had a much smaller collision shape. Before, the big block would activate when we got close and knock down the wall. Since our collision shape is bigger, the center of our character can't activate the block easily. This is what's known as a wake-up distance.
Select the larger block to the left of the wall, and in the Properties window, change the Wake Up Distance to 150. This should give us enough space so that the block knocks down the wall easier. Give the game a try!
You might notice that once you go to the secret level, things move slowly again, and Herman is HUGE! This is because each world has different settings for physics. Each world is really a separate game all in itself.
Although worlds can share assets, each world (as stated in the previous sections) has its own physics. It also has a unique background. This way, each world is just that...a world unique all unto itself. But we really have a world that is supposed to mirror the previous world because it's just a secret area. So, we have to really mimic all of the same settings we input for the Level 1 world.
Try to remember what we did to the physics settings and to the size settings. If you can, go repeat this process from memory. If not, here is how it is done again.
Go back to the Game Mind Map. Here, click the Secret Level node to select it. Once the Secret Level node is selected, set the TimeWarp setting (in the Properties window) to 100.
Now that we've matched the physics up so they're cohesive, let's set up Herman to match the Level 1 world. Double-click the Secret Level node to open up that world. You're going to want to make sure that the Start scene is the scene that is selected. The reason is that the character can only be edited in the Start scene. In all other scenes, just a ghost of the character shows on the stage.
Change both of the Scale values for Herman to 0.5. Also, navigate between the two scenes and make sure any text and arrows are deleted.
And there you have it! You now have a playable game (granted, it's very simple and rudimentary), and you should be proud. After all, it's one more game you've built with Buildbox than before!
