8. Shooting Indoors
If you want the most professional-looking footage, you’ll need to take control of your lighting. Remember that your camera is nowhere near as sensitive as your eyes, so it takes extra effort to get a great image.
It is necessary to learn how to use the light that you already have in a location. More important, however, is trying to control it by adjusting the lighting or enhancing it by adding more light. If you take the time to focus on lighting, your footage will look its best. It might mean choosing a location with good available light or creating your own environment using lighting instruments.
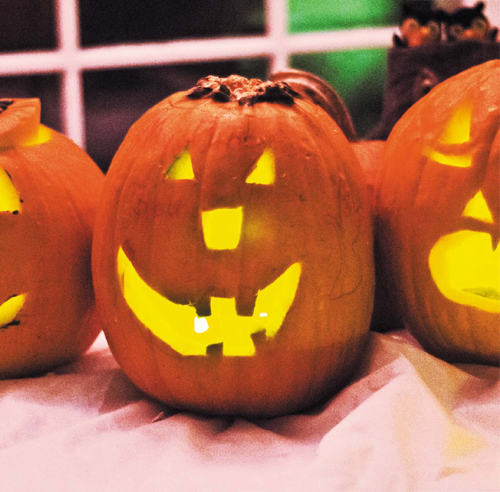
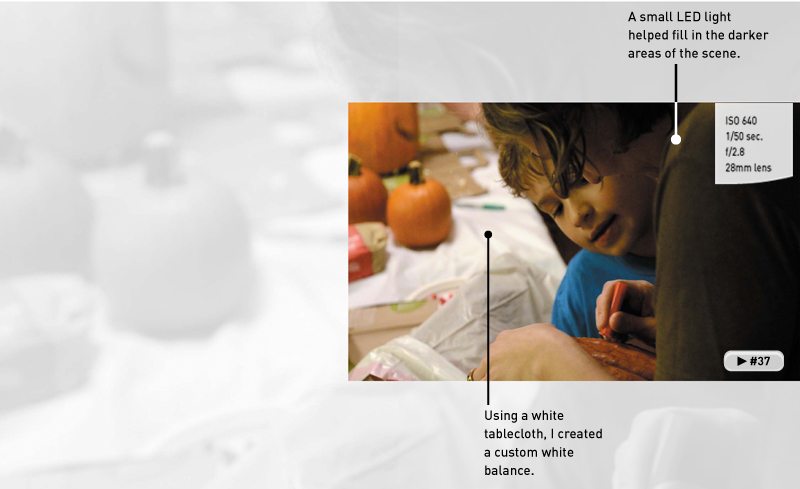
Poring Over the Footage
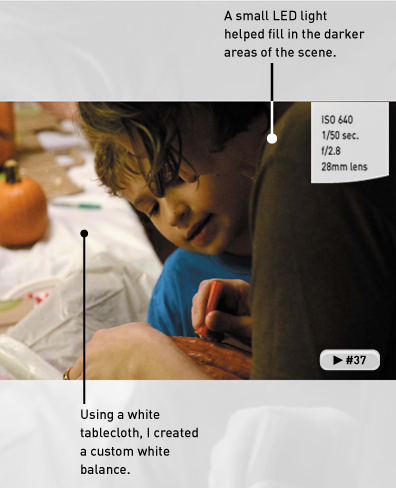
A favorite Halloween tradition at our house is pumpkin carving. In this case I had control over where we carved the pumpkin and how I lit the scene. I adjusted the overhead lighting to get a nice base level of lighting. I also drew the window blinds to let in as much light as possible.
Poring Over the Footage
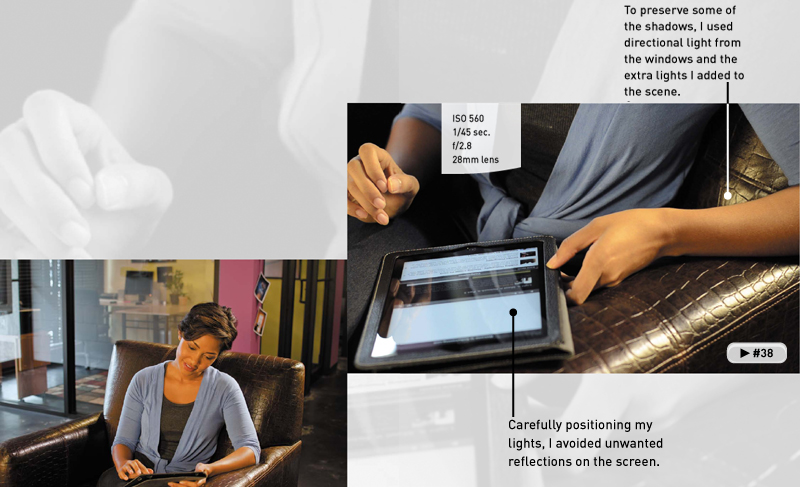
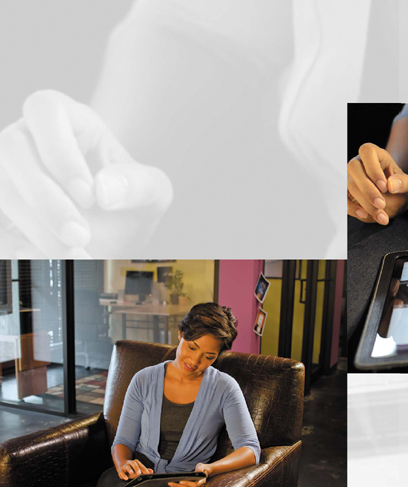
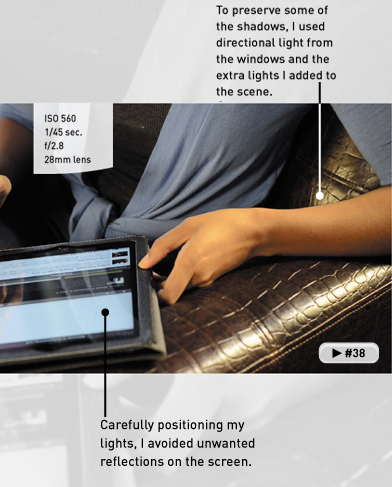
While shooting a web promo video, I needed to shoot footage to illustrate the product. In this case it was an iPad application. I positioned my subject near a window to get plenty of light in the scene. I also added two small lights to help fill in my subject. Because the screen was essentially a giant mirror, I had to pay attention to and adjust my camera and lighting positions to avoid unwanted reflections.
Using Available Light
There will be many times when you’ll have no control over the lighting in your scene. You might be shooting in an office or public building where you are not allowed to touch the light switches. Other times you might not have time to make lighting changes. So, it’s important for you to learn to shoot under the light you have. Unfortunately, when dealing with indoor lighting, there are even more variables to consider than when shooting outdoors in the sunlight.
What Is the Lighting Situation?
You’ll first want to analyze the lighting at your shooting location. Determine if there’s mixed lighting, such as sunlight coming through a window combined with overhead fluorescent or incandescent lighting (Figure 8.1). Will your subjects be backlit by a bright window that will turn into a wash of white light behind them? Can you reduce the types of lighting affecting your scene by closing the blinds?

Figure 8.1. This location originally had too many lighting sources, which included fluorescent, incandescent (bulb), and daylight sources. I opened the blinds to let in more daylight. I also turned off the fluorescent light to unify the scene.
You might be lucky and have just a single light source with a consistent color temperature. Determine if the lights are too bright and are making your scene look harsh. If so, perhaps there’s a dimmer switch you can control or lights that you can change. The key is to make the best out of the lighting you have to work with.
What Is the Color Temperature?
Remember that light often has a visible color, which is even easier to see on-camera. The sky is blue because of the temperature of light. The orange flame of a candle is a different temperature than the flame on a gas stove. In a basic sense, light takes on the following colors:
• Sunlight = blue light
• Standard lightbulbs (tungsten) = orange light
• Fluorescents = greenish light
The color of light can have a huge impact on the look of your scene. The human eye is very particular when it comes to color, so it’s important to pay close attention to light and its temperature. It’s all about setting up your camera correctly. If you rush or get sloppy, your video can end up looking amateurish. Calibrating your camera ensures that areas like skin tones look natural. Generally, you can solve color problems by white balancing the camera (Figure 8.2).

Figure 8.2. When a scene is properly lit and the camera is set up correctly, skin tones look consistent across multiple shots.
Getting the Right White Balance
Your camera has several presets for white balance. More important, however, is that you have the ability to set a custom white balance. You can change the settings on your camera to completely match the environment you’re shooting in. Although this process may vary from camera to camera, it typically involves the following steps.
1. Set your camera to a Custom White Balance mode (Figure 8.3).

Figure 8.3. Most cameras offer the ability to set a custom white balance based on the scene you’re shooting.
2. Take a picture of an object that has a lot of white in it. Compose the shot so the white fills most of the frame.
You can ask a person to hold up a piece of white paper as a quick reference card. White works well because pure white is the proper balance of all colors.
3. Your camera will use the image to calibrate its settings. It will typically notify you via the Live View monitor that the white balance is good.
4. Confirm the proper color temperature by pointing your camera at the scene and visually inspecting the image on your screen.
In some instances you may need to take the reference photo before you set your camera to a Custom White Balance mode, and then choose it as part of the white balance process. For detailed instructions for your camera, refer to your camera’s manual.
Adding More Light
To this point, you’ve made do with the lighting you have. However, just as you might use a flash to add light to your still photography, it is natural to use additional lights for shooting your video. Keep in mind that your eyes are far more sensitive to light than your DSLR camera when shooting video. The use of extra lights can go a long way toward creating a sharper image. Just remember that you’ll need to white balance the camera again if you change the lighting in your room or location.
Using Practical Lights
Film and video professionals often refer to the “real” lights at a location as practical lights (Figure 8.4). They can include floor lamps, desk lamps, or any other indoor lighting you might find at a location. If you’re shooting in a dark room, consider adjusting the lighting level. If you’re lucky, the lights will have a dimmer or three-position switch so you can adjust the intensity of the light until you have a level that works well for your scene.
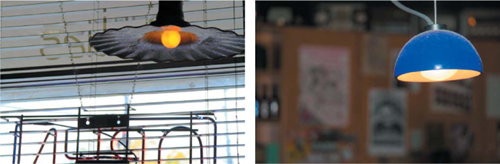
Figure 8.4. Overhead lights like these will impact your location’s lighting.
China Ball Lanterns
A highly affordable option to add light to a scene is to use China ball lanterns (Figure 8.5). Typically made from heavy-duty paper or silk, these balls diffuse the light from a standard light socket. A lantern can illuminate an entire room with 360-degree lighting. The fixture can create soft natural light that produces pleasing skin tones.
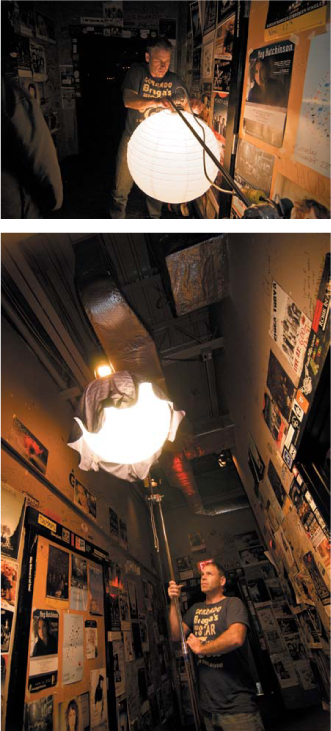
Figure 8.5. A China ball lantern can gently illuminate your location and provide lots of light.
For a China ball lantern kit, you’ll need the following items:
• Paper lantern. Lanterns range in size from 12 to 30 inches. Cost is usually $3 to $20 depending on the size. You can also get lanterns made of flame-resistant materials, which cost more.
• Practical light socket assembly. This is generally a medium socket with an on/off switch. The socket can handle up to 660 watts, terminates with a standard household connector, and costs approximately $6 per unit.
• Lightbulbs. Bulbs will range between $5 and $20 for photo-quality bulbs. Be sure you do not exceed the recommended wattage of the fixture.
China ball lantern fixtures are very affordable and are also very easy to travel with. Because they are slightly flammable, however, you should never leave them turned on and unattended. To make them safer to use, consider adding an optional Lanternlock fixture. This unit will fully expand the lantern and helps keep a hot bulb from setting the paper on fire. They run about $60 to $85 and can be added to increase the usefulness of a China ball lantern.
• Filmtools (www.filmtools.com/chinlan.html)
• Asian Ideas (www.asianideas.com/lanterns2.html)
• Paper Lantern Store (www.paperlanternstore.com)
Shop Lights
If you’ve ever poked around a hardware store, you may have come across high-power shop or work lights. They are a bit heavy (and can get dangerously hot), but they do put off a ton of light to shoot with (Figure 8.6). With a few adjustments, these lights can be adapted to use for video. You will also find newer fluorescent work lights, which also can be useful.
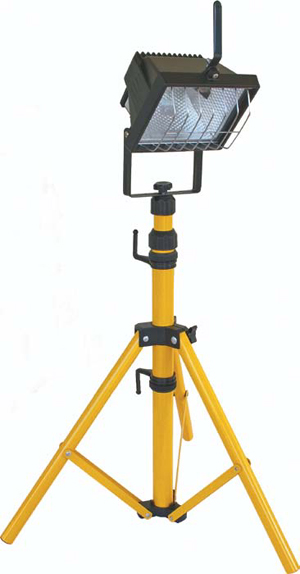
Figure 8.6. Shop lights are affordable but not ideal for video shooting. Photo by iStockPhoto.
Consider these tips for safely and effectively using shop lights:
• Remove the grates. Some shop lights have metal grates over the light cages, which can cause irregular shadows. You’ll need to carefully remove these with a screwdriver.
• Stands and handles. Adjust the height of the lamp if it has a stand or hang it from a safe position if it includes a handle and hook.
• Heat and safety issues. Some shop lights are very powerful (and hot). Be careful to avoid burn injuries by using proper safety equipment like leather work gloves to handle the lights. Also, make sure children and others can’t bump the lights or knock them over.
• Positioning. Try bouncing the light off a wall or ceiling to soften the light and diffuse it.
Reflector Clamp Light
Another cheap type of light that you can use is a reflector clamp light (also called a scoop). These types of lights (Figure 8.7) can also be found at a hardware store and typically cost about $10. The light features a clamp and light socket with a metal reflector to focus the light.
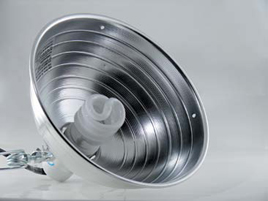
Figure 8.7. Reflector clamp lights are affordable and useful for small lighting jobs.
You can use a standard or compact fluorescent lightbulb to light your scene as well. Because they are not very powerful, you’ll need to use a few of them to light a scene. You can also use daylight-balanced lightbulbs to white balance your camera easily.
LED Lights
A very popular choice for video lighting is the use of LED lights. The technology behind LED is light emitting diodes (Figure 8.8), which are based on semiconductor diodes. LEDs have been in consumer electronic devices like VCRs, toys, and televisions for years. It is the modern development of white light from LEDs that allows them to be used for lighting your scene. It’s only recently that they’ve become more cost-effective and color accurate.
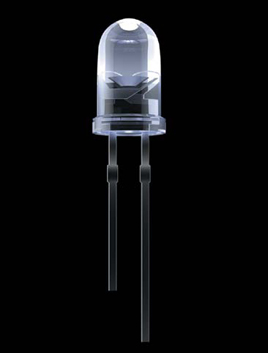
Figure 8.8. An individual LED is not that bright, but when combined with others, can be quite effective.
Although LED lights are some of the most expensive lights you can buy, they are still quite popular for several reasons:
• Less power use. LED lights use a fraction of the power that traditional video lights pull. In fact, I have some lights that can run off AA batteries for several hours.
• Less weight. LED lights are very compact and lightweight. You can even get small units, which can be mounted right to the camera or a light stand (Figure 8.9). These lights are great for when I travel, because airline baggage fees add up quickly.
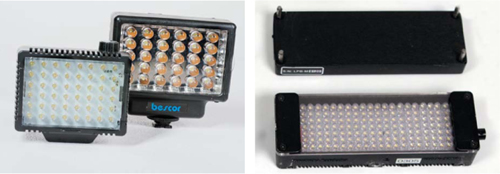
Figure 8.9. LED lights come in many sizes.
• Durability. Unlike a normal lightbulb, LEDs are very difficult to break.
• Less heat. The technology used in LED is solid state, so the lights emit a lot less heat than incandescent lights, making the lights safer to use and more comfortable for your subject.
As you shop for LED lights, be sure to look at all your options. Many smaller LED lights can be found for around $100–$150 (Figure 8.10). Other brands that include several additional features (such as built-in dimmers and color temperature controls) can range between $700 and $1,400 per light.
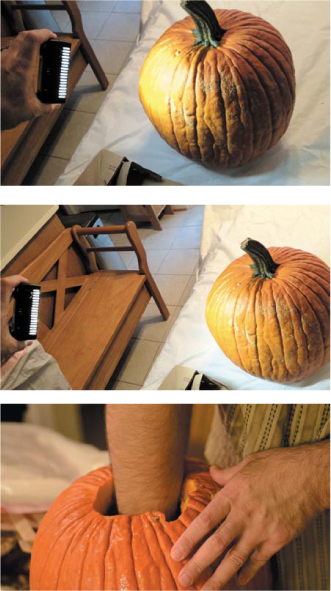
Figure 8.10. The small LED light is easy to hold and cool to the touch. Placing it too close to a subject creates a harsh hot spot (top). Pulling it farther back spreads the light out and reduces its intensity (middle). This light was useful to help fill in the shadows of the scene (bottom).
Fluorescent Lights
One type of video lighting that is widely used is portable fluorescent lighting fixtures. Companies such as Lowell, Mole Richardson, Westcott (Figure 8.11), Cool Lights, and Kino Flo (Figure 8.12) make these fixtures. These lights are also used by photographers, especially in a studio environment.
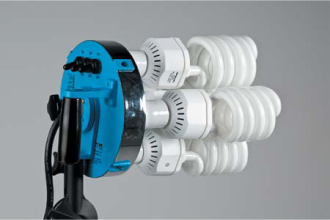
Figure 8.11. The Westcott Spiderlite is a popular photography light that also works well for video. The light sells for about $350. Photo by Brad Moore.
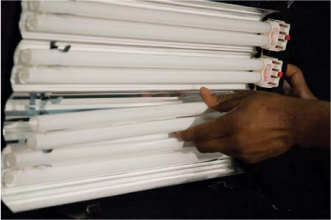
Figure 8.12. Kino Flo makes several fluorescent lighting fixtures. They tend to be expensive and start at around $600. They are quite popular with video professionals.
A fluorescent light can start at around $300 for a single light kit. You’ll find that multiple light kits can include several accessories but can run you a few thousand dollars. Purchasing true video lights are an investment, but good lights last for many years.
Fluorescent lights are popular for several reasons:
• Soft light. Fluorescent bulbs are a great source of even, soft light. They produce attractive lighting for shooting interviews.
• Flexible pricing. Several manufacturers sell them at various price points. They are generally more affordable than many other lighting technologies. You can also use several regular CFL lightbulbs to a similar effect.
• Cool lights. The lights run at a cool temperature, which means they can run all day in a small room without turning it into an oven. This is important to keep everyone comfortable.
• Module based. Many of the lights are modular, meaning that you can change the number of bulbs used in the fixture and control how intense the light gets.
• Controlling features. Many of the lights offer built-in dimmers as well as barn doors that you can bend to help focus the light onto your subject.
The Concept of Three-point Lighting
Three-point lighting is the standard approach used as a starting point by film and video professionals. For it, you’ll use three light sources focused on the subject from different angles. This technique serves as the foundation for more advanced lighting strategies as well. The goal of three-point lighting is to properly light the subject so it looks good while also separating the subject from the background.
Key Light
The key is your primary light source for your subject. Generally speaking, it is the brightest light and is placed between 15 and 45 degrees to the side of your subject. The goal is to use this light to bring out the features of your subject’s face (Figure 8.13). This is typically a broad light that is also soft. The most common type of light to use is a fluorescent fixture or a light with a softbox diffuser to spread the light.
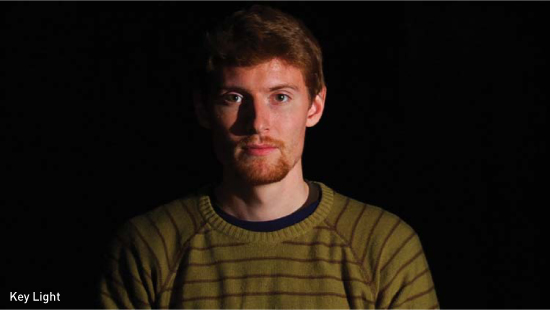
Figure 8.13. The key light is used to fill in the bulk of the facial details.
Fill Light
The fill is your secondary light and is generally opposite the key light. Its job is to fill in the scene and minimize harsh shadows caused by the key light. You can choose to set this light to equal the brightness of the key light, but usually it’s a better idea to reduce its intensity a bit (Figure 8.14).
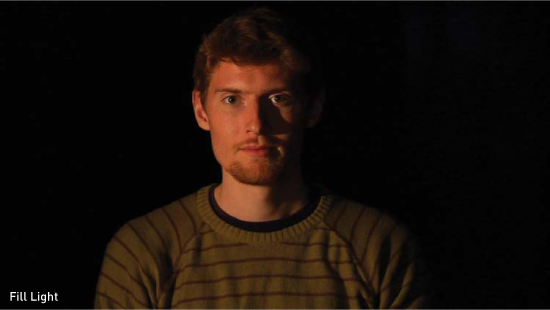
Figure 8.14. The fill light is used to remove shadows across the face.
To control this light, use a fixture that has a dimmer (hardware stores carry dimmers). If you can, move the light farther away to reduce its intensity.
Backlight
The backlight is your third and typically least intense light source. Its role is to highlight the edges of your subject, which helps separate the subject from the background. This can create a more three-dimensional look, which is often pleasing. Placement of the backlight is usually behind and above your subject (Figure 8.15). Some will even hang the light from a ceiling or railing. You can also place the backlight close to the floor or off to the side and have it point upward.
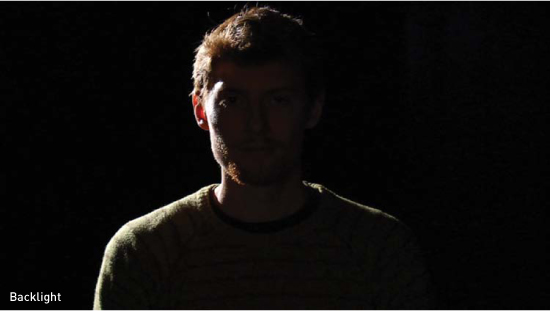
Figure 8.15. The backlight creates an edge around your subject’s hair to help separate the subject from the background.
Putting All Three Together
You should use all three lights at the same time so they combine to create even and attractive lighting (Figure 8.16). Mastering the concept of three-point lighting can dramatically help you improve the quality of your subject. When lit correctly, you can often shoot the subject with multiple cameras or angles without having to relight or adjust lights.
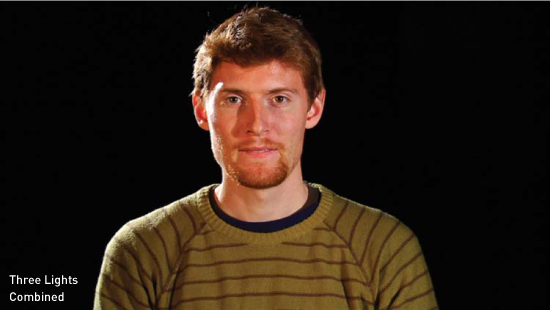
Figure 8.16. All three lights combine to create a well-lit subject.
Chapter 8 Assignments
You’ve now shot under lots of lighting conditions. It’s time to focus on taking control of your lighting. By completing the following exercises, you can practice shooting under more controlled light and see how it improves your project.
Evaluate a Location
Pick an indoor location for shooting video. Carefully examine the location and see what you can do to control the light. Are there window blinds you can open or close? Do you need a custom white balance for your camera?
Add Some Light
Continue working in the same location as you did in the preceding assignment. Add some light to the room to brighten it. You can do this by using practical lights or windows in the room, or by adding your own lighting instruments. Shoot some before and after footage, and compare the difference lighting makes.
Research a Lighting Kit
Investing in lights is an important decision. Research options for lights and compare prices. Design a three-point lighting kit that you can afford (even if that means using lights from the local hardware store). Any additional light is almost always an improvement in your footage.
Share your results with the book’s Vimeo group!
Join the group here: vimeo.com/groups/DSLRVideoFSTGS