
12. Publishing and Sharing Video

Photo by iStockphoto.
One of the best feelings you’ll have when you enter the world of DSLR filmmaking is finishing a video-editing project. You’ll have a sense of accomplishment for the practical reason that it probably took you longer than you expected, as well as for more personal reasons.
Chances are you’ll be ready to share your video with an audience. This exciting process allows you to receive not only praise for your work, but more important, criticism. It is through the feedback loop that you’ll become a better creator. In this chapter I’ll explore several different digital delivery scenarios you can use to post your work for others to see.
Quality Checks
When you think you’re done with a video, you need to stop and check it again. You can literally blink and miss a mistake in your video (like a split-second gap that causes a black flash frame). The reality is that it’s best to watch your video a few times with a fresh set of eyes (and maybe even a few trusted outside opinions) (Figure 12.1).

Figure 12.1. Letting others you trust view your work is part of the creative process. Heeding a little criticism can often make a good video great. Photo by iStockphoto.
What You Want to Check
It’s important that you have specific goals in mind during your quality check. You and any others you invite to review the video should be checking for the same things. Although all feedback is helpful, you should target feedback to certain objectives so you can take action when it comes in. Critiques on your shooting location or subject matter won’t help much if you actually want feedback on pacing and audio. I’m a big fan of soliciting feedback throughout the creative process rather than getting it all at the completion of the project.
Here are some areas to pay attention to (and communicate with others about) when performing a quality check:
• Content or story review. Feedback about the content or story is useful early in the editing stage, so you may want to post a first draft for critique and stick to the basics. For example, does the story you’ve edited make sense to the viewer? Without having a lot of details, can viewers jump in and follow along? Let the folks reviewing the draft know that you are just looking for comments on structure, and that there are still technical issues you need to address.
• Rough cut review. Show your first polished version to a trusted collection of peers or friends. At this point you should be looking for feedback on the video as a whole. Elements like music and graphics should be placed (but some elements may still be missing). A rough cut is usually 80 percent done (or more). Encourage feedback on all elements, but be sure to identify those that are still missing from the piece in your request for feedback.
• Fine cut review. At this stage, all elements are placed and the video is 98 percent done. All that is left is to make final tweaks to color and sound as well as ensure that no little mistakes have slipped through. This is your chance to catch any minor issues, no matter how small.
A Productive Review
To ensure a successful review, be sure to tell everyone on your review committee the goals for the review session. Let reviewers know what sort of feedback you’re looking for and that you appreciate them taking the time to offer their critique. Here are a few guidelines to keep the review moving in the right direction:
• Keep it positive. Be sure to keep all your reactions calm and civil. Chances are the criticism is meant to make your video better. Responding to criticism or feedback negatively will change the tone of the whole conversation. Think about comments made on your work as furthering the project, not as a personal attack.
• Keep comments specific. Ask people to be specific in their reactions. It is helpful to know which parts felt slow or where the audio was unclear. Ask reviewers to identify specific times in their comments (for example, at 1:13 the audio was muffled and too quiet).
• Take action on feedback. If people took the time to comment on your project, do something with that information. Remember that you can always duplicate the project or sequence so you have two different versions as you experiment with the suggested changes.
Outputting a Backup Copy
When a project is done, you’ll want to create a high-resolution backup copy. Ideally, you’ll create a movie file that matches (or even exceeds) the quality of the original source footage (Figure 12.2). Sure, you should back up all your assets and your project files too, but a self-contained backup of the finished project is very convenient for creating new derivative files (like web-shared videos or DVDs). Most of the time you’ll start out with a full-resolution, full-frame rate, final QuickTime or AVI file that you back up.

Figure 12.2. When you’re done editing your project, be sure to save a high-resolution copy to future-proof it.
The format you use for the backup will vary based on several factors:
• Editing platform. Your editing software may install its own video formats (or codecs). For example, if you’ve installed Apple Final Cut Pro, you’ll have access to Apple’s ProRes codec family, which offers a range of choices for creating high-resolution video files. When working with DSLR video, the most popular choice is Apple ProRes 422, but the lower-quality Apple ProRes LT codec is also acceptable for DSLR video projects if total storage space is a concern or limited.
• Third-party codecs. You can also purchase and install dedicated video codecs. For example, the Cineform codec family is quite popular. It is owned by the same company that makes GoPro video cameras. Multiple versions are available, including several packages. The Cineform Studio Professional package sells for $129 and offers a suite of useful tools for creating high-quality master files and transcoding footage for editing tools that require it. The Cineform codec is cross platform, so the files can be created and used on a Mac or a Windows machine.
• Match source settings. Many people will simply choose to output their backup quality footage to the same format they shot on—for example, creating a high-quality H.264 file as either an MPEG or MOV file. Although this is an acceptable solution, it can introduce issues. Most noticeably, you will likely see a shift in color because the compression format causes the images to lose some color details. Choose this option if it is all you can afford to do. However, I strongly encourage you to use the method suggested by your editing software or to purchase a third-party mastering codec.
Delivering Video to the Web
Online video viewership continues to boom (in fact, more than half of all people in the United States watch online video regularly). Originally, web video was an expensive and complex venture. In just the last few years, delivering HD video through a website has become a common occur-rence. Whether it’s through a popular website like YouTube or Vimeo, or posted directly to social media outlets like Facebook or Google+, people are watching video online (Figure 12.3).
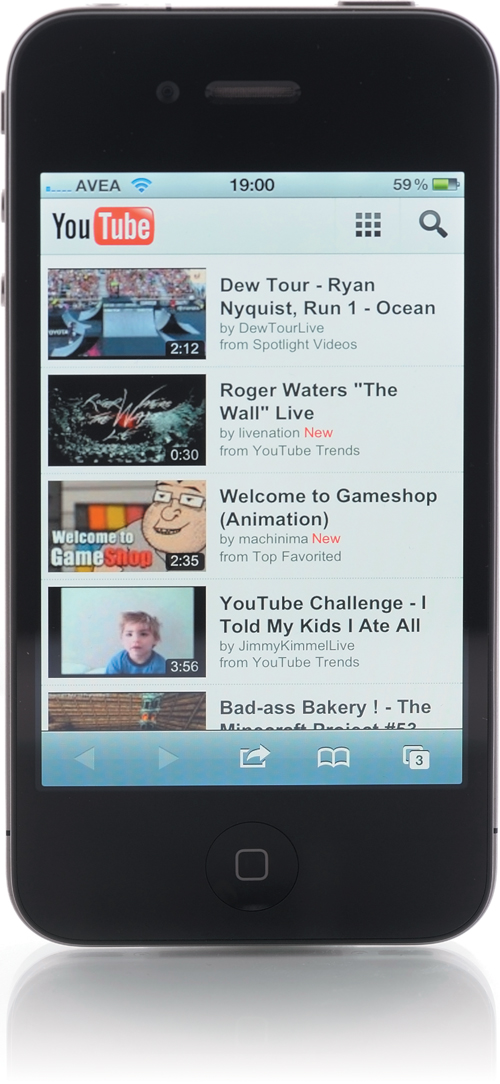
Figure 12.3. Delivery to mobile devices, like smartphones, continues to become more important. These days, more people are buying tablets and phones than computers (by far).
But just because it’s everywhere doesn’t mean that everyone is doing it “right.” If you want to create video files for the Web, you’ll need to balance three factors: file size, the creation process, and final quality. This is not unlike the old adage of good, fast, cheap—pick two. Unfortunately, you (and the world) want all three:
• File size. Producing a small file size with good image quality is not easy to do. Fortunately, advances with formats like H.264 have made this process substantially easier.
• Creation process. You’ll need to consider how difficult it is to create the web video files you want and determine if you need a dedicated software application that you buy separately.
• Final quality. It’s easy to choose presets to create files, but the files may be unnecessarily large and take too long to download (especially on mobile devices). Of course, you can create small files quickly by just throwing away information. But these fast encoding methods don’t deliver great-looking files.
Don’t worry; there are solutions. By taking the time to understand video compression and Web delivery, your files will look great and be ready to publish to the Internet.
Determining a File Format
When it comes time to post your video online, you’ll first need to decide which file format you will use. Different websites often restrict your choices. Similarly, not all video will play on different computers, mobile phones, or consumer electronic devices. There are a ton of different formats on the Web.
For example, if you are targeting a work environment, the two most popular choices are Windows Media and Flash Video. On the other hand, if you want people using Macs and those using mobile phones and iPods to see the file, MPEG-4 is the clear leader. Don’t make the mistake of lumping online video formats together; they often have very unique properties.
Here is an explanation of the most popular file formats:

• MPEG-4. The MPEG-4 file format is a collection of multiple files (called parts). Each part offers a set of rules about how the audio and video should be formatted. The standard was first introduced in 1998 but continues to evolve with important new changes. The two most common parts of MPEG-4 are Part 2, which is used in codecs, such as DivX and QuickTime 6; and H.264, which is part of QuickTime 7 and QuickTime X as well as Blu-ray Discs. When you see MPEG-4, it typically refers to the older version, which ensures broader compatibility with devices.

• H.264. The H.264 format is a smaller part of the MPEG family and is also called MPEG-4 Part 10, or AVC (Advanced Video Coding). It is widely used by DSLR video cameras when recording video. It can also be optimized for the Web and consumer electronic devices. Apple uses it across their iOS line of products, as does Sony. This is currently the most popular HD video format for delivery of video over the Internet.

• HTML5. Although it’s more than just a video format, the use of HTML5 is gaining popularity. The format originally led to a platform war between Adobe and Apple (that extended to the iPhone and Droid product lines). HTML5 won, and Adobe announced in 2011 the discontinuation of Flash Video for mobile devices. Several websites use HTML5 video players, including YouTube, Vimeo, and DailyMotion.

• QuickTime. Apple Computer invented QuickTime as a video platform (it’s been around for more than 20 years). It is tightly integrated into Apple’s software and operating system. It’s also available as a stand-alone media player and plug-in for the Windows operating system. QuickTime is installed on many users’ computers when they install the Apple iTunes software. The native format for QuickTime is a .mov file, which is used by popular video-editing tools, like Final Cut Pro X, iMovie, and Adobe Premiere Pro. The MOV format can contain video that uses a variety of codecs. Some of these codecs are suited for the Web, whereas others are designed exclusively for video editing.

• Flash Video. Flash Video is a popular format because it supports interactivity (such as adding advanced controls or advertising features into a video). Flash as a platform has continued to evolve in recent years and appears to be moving more toward being a tool for creating web content that can output to multiple formats, including H.264 and HTML5 for video.

• Windows Media. The default media player for the Windows operating system is Windows Media Player. The application can play back many formats but is optimized for the Windows Media file format. This format is quickly losing popularity, because it is primarily designed for computer-based viewing only.
Choosing a Video Compression Tool
Many video compression (or encoding) tools are on the market. Most video-editing tools have some built-in capacity for creating files. But several dedicated applications offer better control and speed. For most of you, a compression tool should offer broad support for presets, as well as the ability to resize your video for different devices (Figure 12.4).
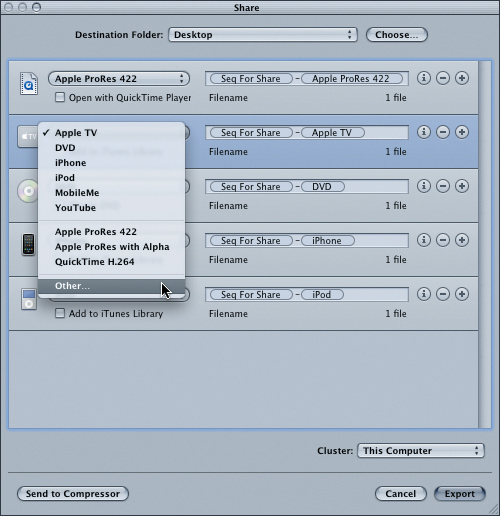
Figure 12.4. Using a tool like Apple Compressor, you can create video formatted for multiple devices and websites.
Here are the top features to look for in a compression tool:
• MPEG-4 and H.264 support. The MPEG-4 format (and H.264 subset) is the most popular way to deliver video online that is broadly compatible. Be sure to look for this feature. Older versions of encoding tools may not offer this feature, but the newer versions generally do.
• Apple and Droid compatible presets. Between the Apple iOS and Google Droid operating systems, your video can reach most of the people who are on the go. Presets will make it easier to create compatible files for the many different phones, tablets, and portable media players in use.
• Customizable presets. You’ll want the ability to modify presets or create your own. By storing customized presets, you can ensure consistent results that match your needs.
• Compression preview. A preview can show you what the compressed video file will look like as you adjust its settings. This is a useful way to visualize what changes to the file’s settings will do to its appearance, quality, and file size.
• Batch processing. The ability to batch process files is an essential time-saver. It allows you to add multiple files to your software compression tool and choose output formats. You can then walk away and let the computer work on its own, saving you time and effort.
Affordable Compression Tools
Essentially, all compression tools do the same thing. They take large video files and make them smaller. What differs from one tool to the next are factors like speed, supported file formats, and user interface design (Figure 12.5). Fortunately, most of these tools are either free or inexpensive. You’ll also find demo versions that you can try out before you buy.

Figure 12.5. Several tools are available for compression that range in price and features, including (from left to right) Apple QuickTime Pro ($29), Apple Compressor ($49), Adobe Media Encoder (bundled with Adobe Premiere Pro), and MPEG Streamclip (free).
Here are some recommended tools to try:
• QuickTime Pro (www.apple.com/quicktime/pro). This versatile application lets you convert video from one format to another. QuickTime Pro is a cross-platform solution and lets Mac and Windows users convert video files to work with Apple’s portable media players. It can also produce files using the Apple TV spec, which matches the HD requirements of most video-sharing sites. The app sells for $29.
• iMovie (www.apple.com/ilife). Apple’s entry-level video-editing tool can publish QuickTime and H.264 files directly. It can also publish video directly to YouTube, Vimeo, and Facebook. The app is sold separately for $15 through the Mac App Store or bundled with four other apps in the iLife suite.
• Adobe Premiere Elements (www.adobe.com/products/premiereel). This versatile editing tool also contains a versatile compression tool set. With it, you can create movies in several formats, including MPEG-4 and Flash, and post directly to social media and video-sharing sites. The app sells for $99 new and is available for both Windows and Mac.
• MPEG Streamclip (www.squared5.com). MPEG Streamclip is a multipurpose video converter, player, and editor that works on both Mac and Windows. It can encode to many formats; it can also cut, trim, and join movies. The biggest benefit is that it’s free!
• Microsoft Expression Encoder and Expression Encoder Pro (www.microsoft.com/expression/products/Encoder4_Overview.aspx). This Windows-only tool comes in a free and a Pro version. It replaces the Windows Media Encoder, which was retired in mid-2010. It can create Windows Media Video files and Silverlight files. The Pro version can also output H.264 files.
• Apple Compressor (www.apple.com/finalcutstudio/compressor). This powerful compression tool used to be bundled with Final Cut Studio but is now sold separately in the Mac App Store for $49. It allows you to create Apple-compatible files and is optimized for computers with multiple processors.
• Adobe Media Encoder (www.adobe.com). This compression tool is not a stand-alone product. Rather, it is a core technology in the Adobe Creative Suite products that works with video. You can easily access it through products like Adobe Premiere Pro. It supports several web video formats and offers excellent control.
Specific Hosts for Web Video
To make sharing your videos a little easier, I’ll give you some specific tips for publishing to video-sharing websites. I’ll tackle the “big four.” If you post a video to YouTube (Figure 12.6), Facebook, Vimeo, and Twitter, you will safely reach the vast majority of potential viewers.

Figure 12.6. Publishing to video-hosting services is typically straightforward; they can extend your audience greatly and make it easier for them to watch.
All four services are either free or have a free version available. There are benefits to each (as well as drawbacks) that are worth discussing. I recommend that you publish to at least two of these sites, but publishing to all four can broaden your reach even further.
Publishing to Youtube
The most popular video-sharing site in the world is YouTube (Figure 12.7). Now owned by Google, YouTube was launched in early 2005. It quickly rose to the top of the video-sharing websites, offering both user-generated and professionally created video content. The service uses Flash and H.264 video as the underlying architecture, and has recently started experimenting with HTML5.

Figure 12.7. YouTube has emerged as the top video-sharing site.
YouTube is so popular because it is easy to use and search. It also works well on most mobile phones. Although it is expected that YouTube would be a solid platform for the Droid operating system (which is owned by Google), even Apple and other manufacturers offer broad support for the popular service.
Even though YouTube is very popular, many web creators avoid it. The site has a “flea market” feel to it and has a free-for-all approach. Your content can get grouped with other content that is off topic or a direct competitor. I recommend using YouTube, but you’ll need to market the video on your own. The YouTube service integrates well into social networks like Facebook, Twitter, and Google+. YouTube also offers easy-to-use embeddable players for blogs and websites. Be careful when using embeddable players. Always deselect the Show Related Content option; otherwise, viewers will be encouraged to leave your video and website to explore other videos on YouTube.
To post a video to YouTube manually (remember that many editing tools can upload for you):
1. Sign up for a YouTube account at www.youtube.com/signup.
2. Be sure to closely read the terms of service to understand what you are allowed to do and what rights you grant Google. You can view the terms at https://accounts.google.com/TOS.
3. Visit www.youtube.com/my_videos_upload to post a video (Figure 12.8).
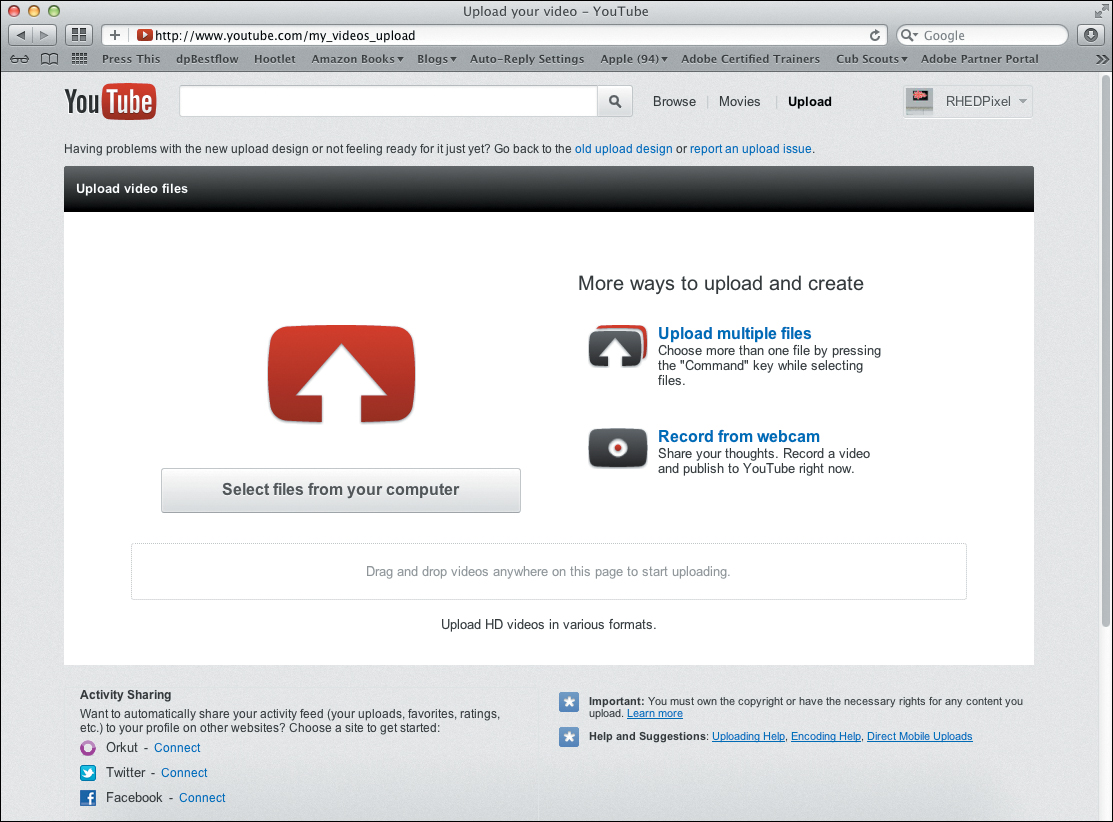
Figure 12.8. YouTube’s upload page makes it easy to just drag a file to upload it.
4. Drag a properly formatted video onto the upload page.
Ideally, your video will be a compressed HD file, which allows for a high-quality file with reasonable upload times. Use these specs:
• Keep the video shorter than 15 minutes (unless your account has been approved for longer uploads).
• Save the file as an H.264 formatted video saved as an .mp4 file.
• Upload at 1920x1080 or 1280x720.
• Use a high-quality, variable bitrate (vbr) setting. Your compression application probably has a preset labeled YouTube HD (or similar).
5. Complete all the fields that ask for information about your video (Figure 12.9).
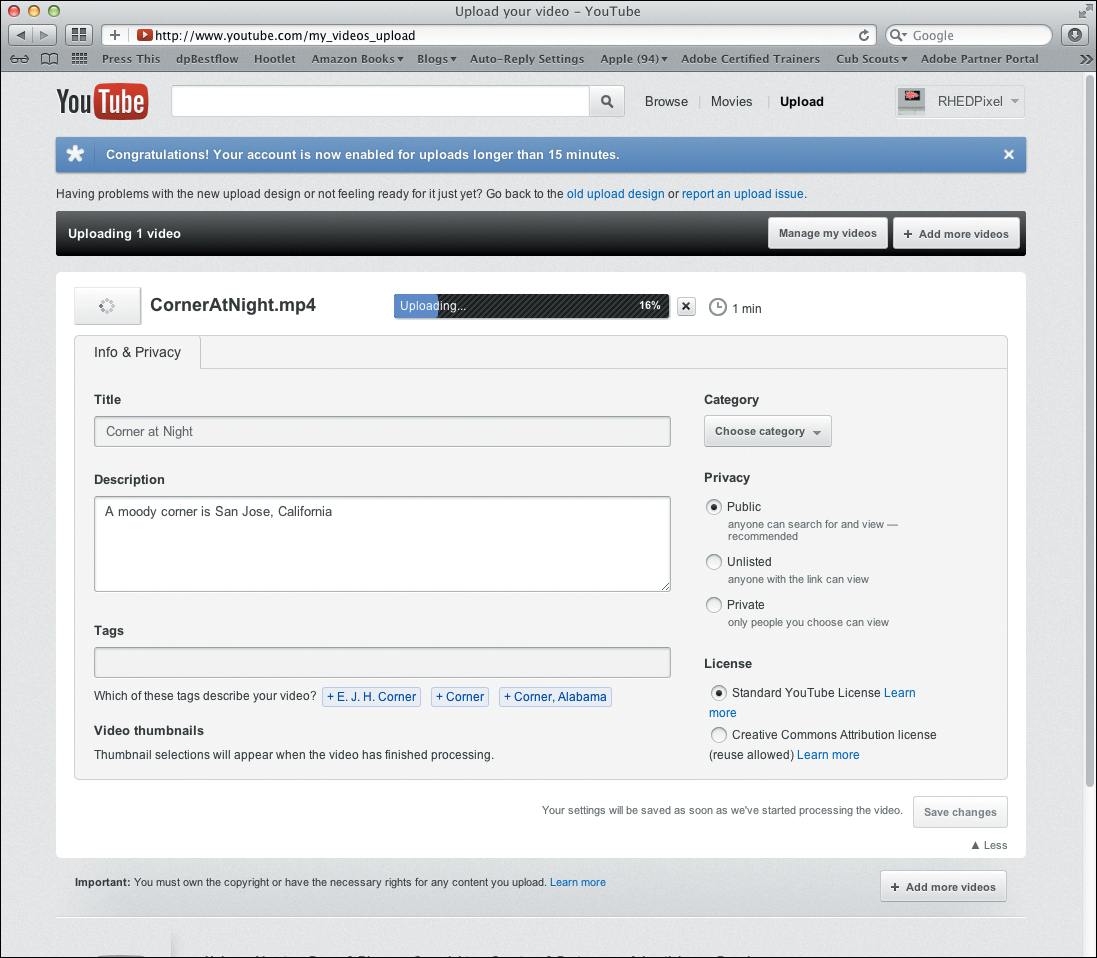
Figure 12.9. Be sure to fill in all the details about your video to make it easier for people to find using searches.
Be as detailed as possible, especially with keywords, so your video is easy to search for and find.
6. Choose a category to help organize your video and group it with similar videos.
7. Choose a privacy level that matches your needs:
• Public is best for videos you want to share with the whole world.
• Unlisted is like an unlisted phone number. All viewers can see the video; they just need its URL.
• Private allows you to create a list of authorized users who can log in and view the file.
8. Assign a license type that controls how the video can be used and attributed.
9. Click Save to complete the process (although the page will usually auto save for you).
Depending on the duration of your video and site traffic, it can take a few minutes for your video to process and become available online (Figure 12.10).
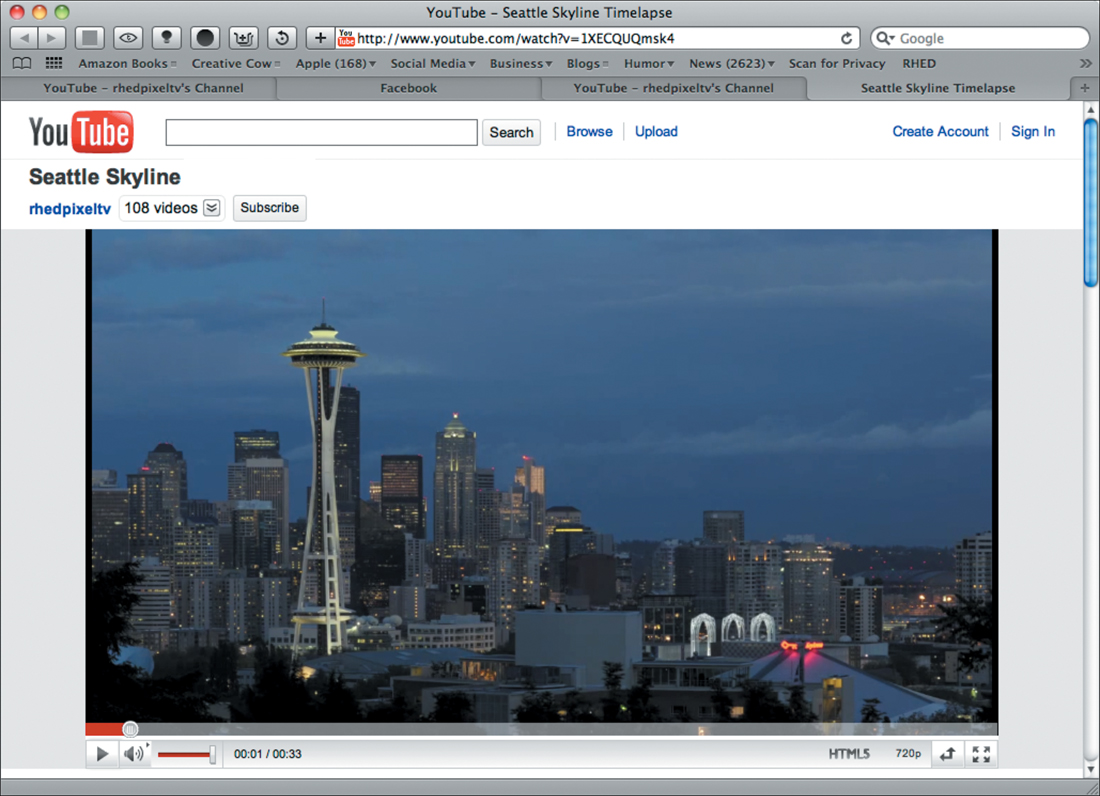
Figure 12.10. A video presented on a YouTube page.
Publishing to Vimeo
Many video professionals and enthusiasts have flocked to Vimeo (Figure 12.11) for its high-quality video hosting (www.vimeo.com). The site caters to video professionals, artists, and enthusiasts with terms that respect copyright. Vimeo offers free and paid accounts with different levels of service.

Figure 12.11. Vimeo is a new service that’s popular with filmmakers and artists.
You’ll find that support for Vimeo is widespread. For example, iMovie and Final Cut Pro X can export and publish directly to Vimeo. Adobe Premiere Pro can export to Adobe Media Encoder with very accurate Vimeo presets.
To post a video to Vimeo manually (remember that many editing tools can upload for you):
1. Sign up for a Vimeo account at www.vimeo.com/join (Figure 12.12).
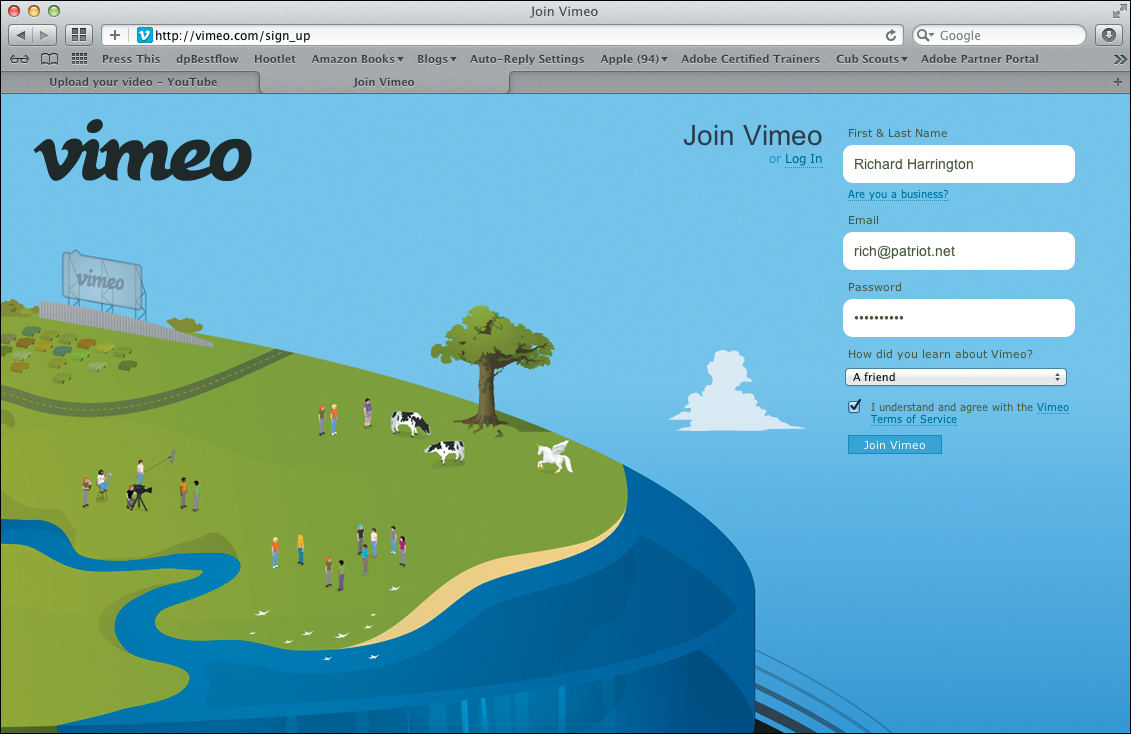
Figure 12.12. Vimeo’s signup page.
2. Choose between a Basic (free) account or a Plus (paid) account. The page clearly lays out the benefits of each.
3. Enter all of the required information about you.
4. Be sure to read the terms of service to understand what you are allowed to do and what rights you grant Vimeo. You can view the terms at www.vimeo.com/terms.
5. Also, read the Vimeo community guidelines at www.vimeo.com/guidelines.
Vimeo takes these rules quite seriously, so I suggest you follow them.
6. Visit www.vimeo.com/upload or click the “Upload a video” button on any page.
7. Choose a properly formatted HD video to upload. Use these specs:
• Save the file as an H.264 formatted video saved as an .mp4, .m4v, or .mov file.
• Upload at 1280x720.
• Use a high-quality, variable bitrate (vbr) setting. Do not exceed 5000 kbps (kilobits per second). Your compression application probably has a preset labeled Vimeo HD (or similar).
• You’ll find detailed tutorials for all major editing and compression tools at www.vimeo.com/help/compression.
8. Complete all the fields that ask for information about your video (Figure 12.13).
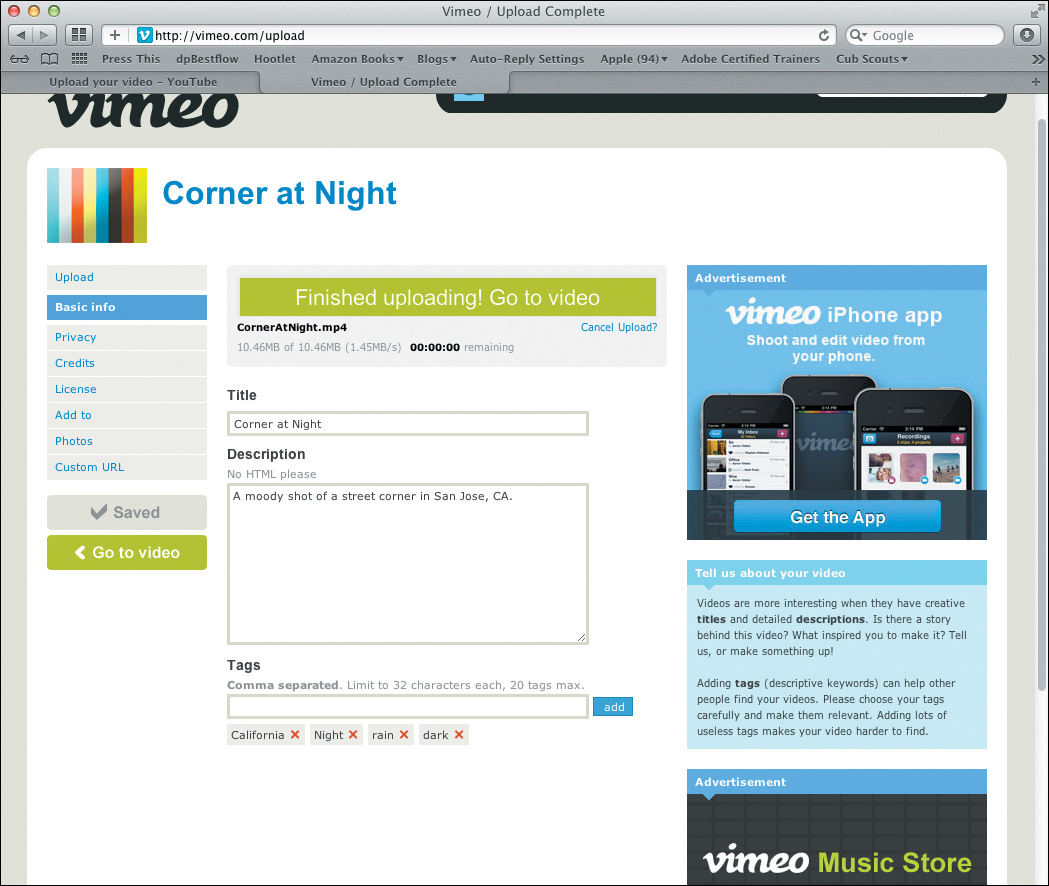
Figure 12.13. Be sure to complete all the details about your video.
Be as detailed as possible, especially with keywords, so your video is easy to search for and find.
9. Click the Save Changes button to store your information.
You’ll also find additional controls in the left column for thumbnails, photos, privacy, and more.
10. Click the “Go to video” button to see your clip.
Depending on the duration of the video and site traffic, it can take a few minutes for your video to process and become available online (Figure 12.14). Basic account members have to wait longer for their video to process.
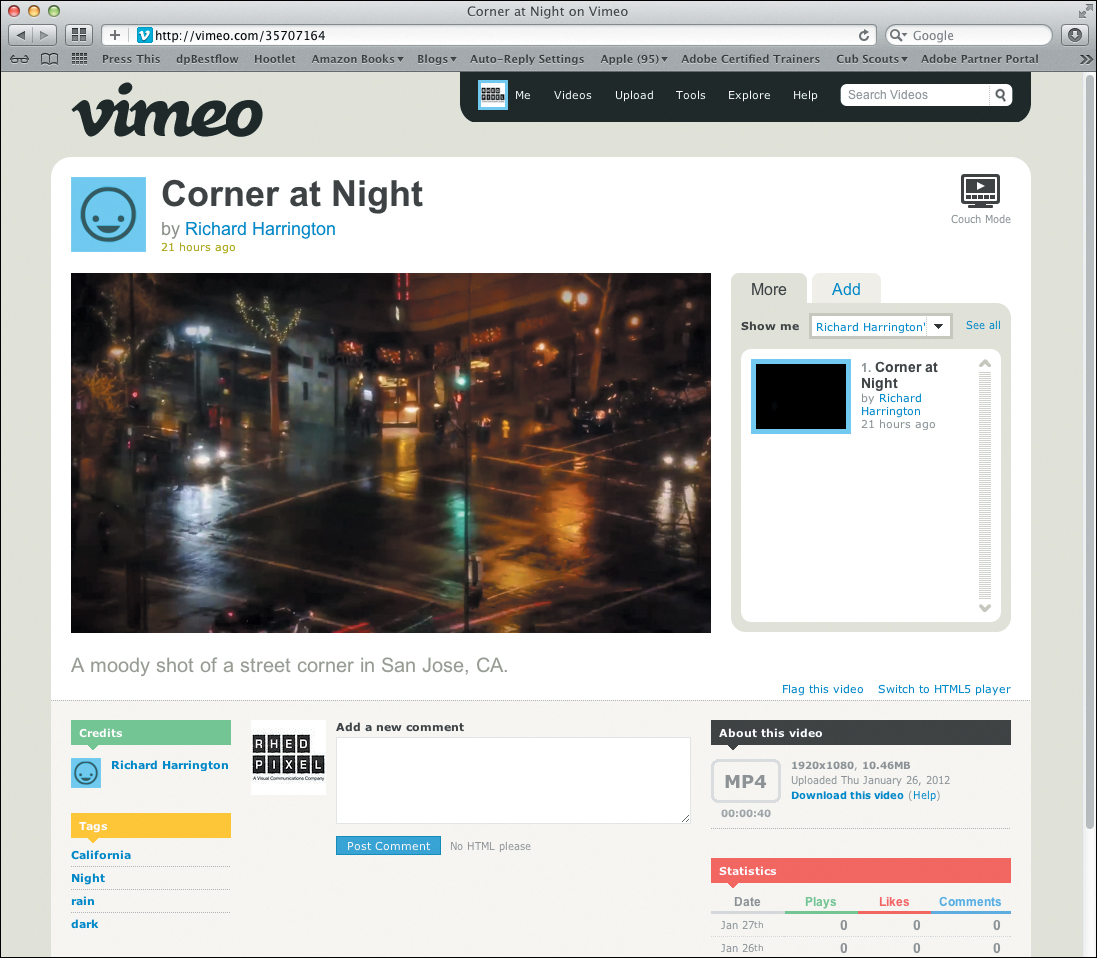
Figure 12.14. A video presented on a Vimeo page.
Publishing to Facebook
Facebook is the most popular social networking site in the world. In fact, in many countries more than 50 percent of all adults have an account. Facebook (Figure 12.15) is a free service that makes it easy to share video and news with friends, family, and colleagues. Most editing tools can publish directly to Facebook, and it supports all major video formats, like QuickTime and Windows Media, but converts all these formats to Flash Video (and HTML5 for mobile versions) after you upload.

Figure 12.15. Facebook is the largest social network in most countries.
You can also add a YouTube or Vimeo video to your Facebook timeline. Just click the Share button on your video’s page at each hosting service or paste the link to your video into a status update.
To post a video to Facebook manually (remember that many editing tools can upload for you):
1. Sign up for a Facebook account at www.facebook.com (Figure 12.16). If you’re already a member, just log in.
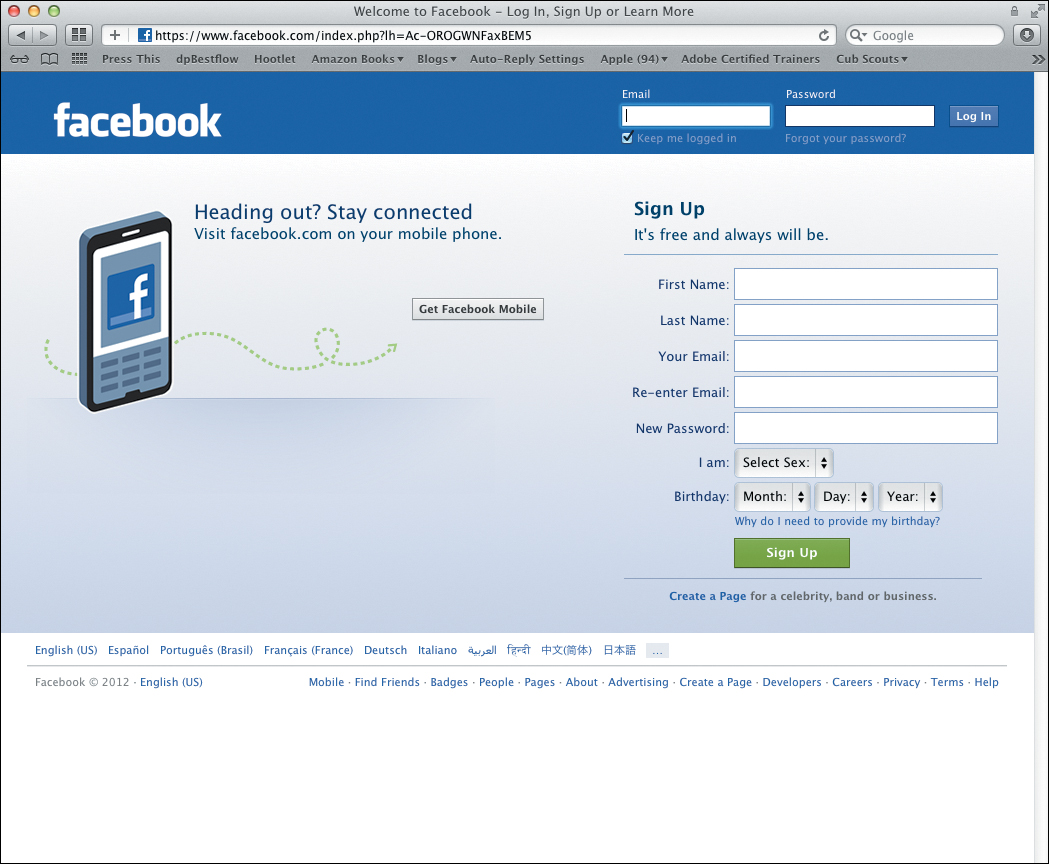
Figure 12.16. Facebook’s signup page.
2. Near the top of the page, click the Add Photo/Video button (Figure 12.17).

Figure 12.17. You add a video as a status update.
3. Click the Upload Photo/Video button.
4. Enter a description into the field labeled “Say something about this.”
5. You can use the buttons along the bottom of the post to tag people in the video or add location information (Figure 12.18).
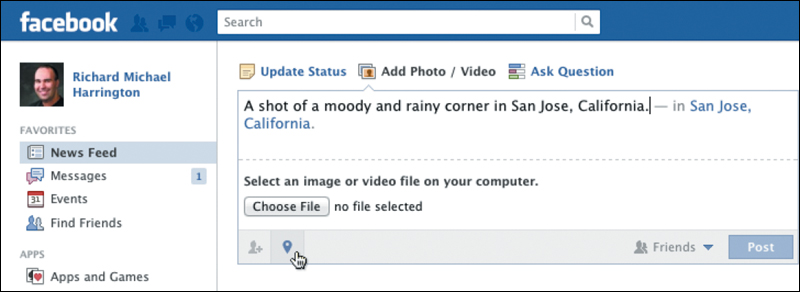
Figure 12.18. Be sure to give details about your video to help the viewer understand the scene.
6. Click the Choose File button to select a video on your computer for posting.
Facebook claims it supports more than 30 different formats, but it prefers an HD MP4 file. I find that using the YouTube preset works great for Facebook. The upload limit on your account will vary, but to increase it, just verify your account on your profile page.
7. Click Post to add the video.
8. A status window opens to show you the progress of the upload.
Depending on the duration of your video and site traffic, it can take a few minutes for your video to process and become available online.
9. The video is added to your video collection and is posted to your timeline. You can use Facebook’s standard sharing features to tell your friends about it.
Although videos you’ve posted to Facebook can be embedded on other sites, they will only play in HD on Facebook.com.
Publishing to Twitter
Twitter is a popular micro-blogging platform that allows people to share short status updates (Figure 12.19). It works particularly well for mobile devices (phones and tablets). Twitter is most popular with the tech-savvy, because it makes it easy to keep in touch with a private network or public forum for those who share the same interests.

Figure 12.19. Twitter allows you to share short messages and attach photos and video.
Accounts are free, and you can sign up at www.twitter.com by clicking the “Sign up for Twitter” button on the home page.
Although the mobile application version of Twitter for most smartphones supports video upload, the home page does not. The easiest way to post a video to Twitter is by using a helper service; YouTube and Vimeo have this ability.
To add a video, you can:
• Paste the link of the video’s page into a tweet (your update) (Figure 12.20).
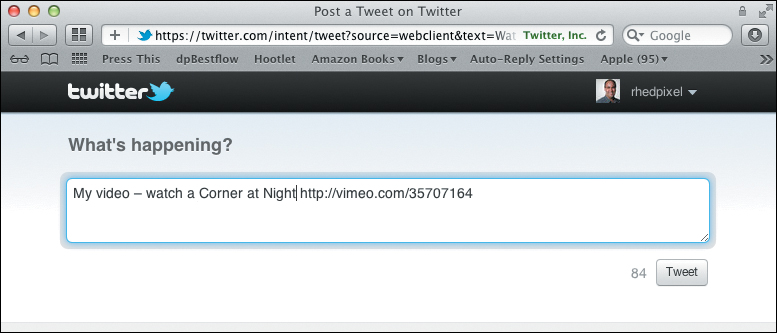
Figure 12.20. Tweets are generally short (fewer than 140 characters). The link to your video will be shortened but will still work.
• Click the Twitter button on your video’s page, which will be in a section labeled Share above or next to the video (Figure 12.21).
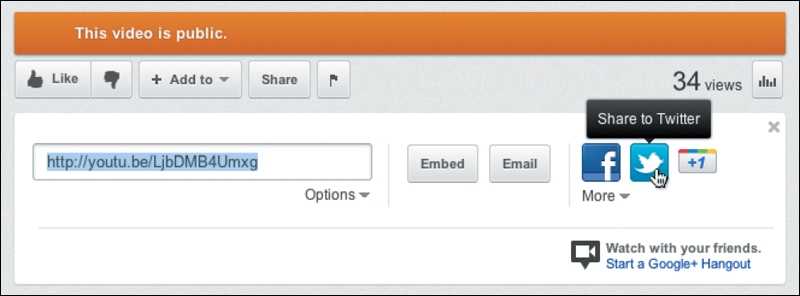
Figure 12.21. You can often share a video to Twitter (or Facebook) by clicking the Share button.
• If you’re logged into Vimeo or YouTube, you can connect your Twitter account in your account settings. This will automatically tweet any video that you post.
Once the video is posted, it will appear in your update (Figure 12.22). People who read the tweet can see the video play inline with the update or on their mobile device.
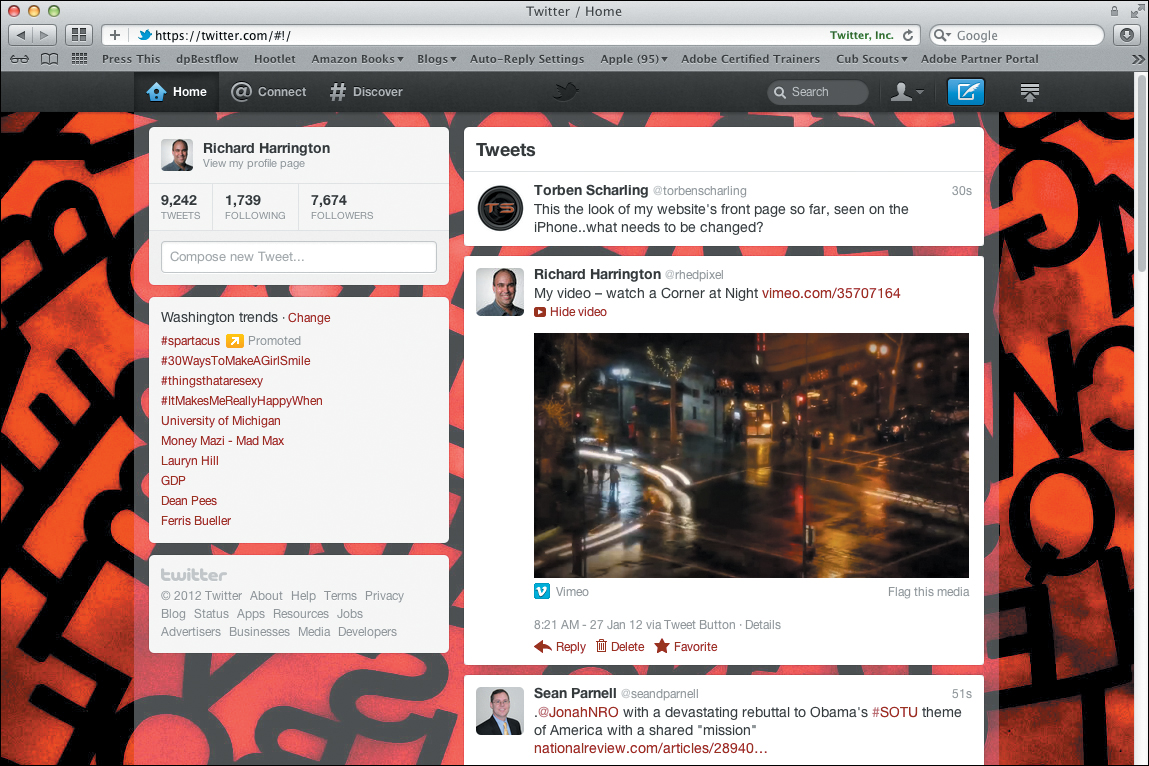
Figure 12.22. A video can appear right along with your post to Twitter.
The End of the Road?
Congratulations; you’ve reached the end of this book. However, it is not the end of your journey; rather, it is the beginning. Video is a fun and challenging medium to create in. To explore more information about video, I recommend checking out the following books and online resources:
• From Still to Motion: A photographer’s guide to creating video with your DSLR by Ball, Carman, Gottshalk, and Harrington (Peachpit, 2010)
• From Still to Motion: Editing DSLR Video with Final Cut Pro X by Harrington, Shapiro, and Carman (Peachpit, 2012)
• The Visual Story by Bruce Block (Focal Press, 2007)
• Richard Harrington Blog (www.RichardHarringtonBlog.com)
• Triple Exposure (www.3Exposure.com)
Share your results with the book’s Vimeo group!
Join the group here: vimeo.com/groups/DSLRVideoFSTGS