
9. Recording Sound
An often-repeated mantra in the film industry states that “audio is half the picture.” Think about it this way: Although you might be able to tell a compelling story in pictures alone, audio gives your story a voice. The idea is that viewers expect great sound; without it they’ll stop paying attention. Then this is easy, right? Just press Record. Well, when it comes to audio, nothing is that simple.
Although the final audio for a project is often crafted during the editing stage, you should never underestimate the importance of capturing good audio in the field. If you record your audio at an improper volume, it can have distortion. Even though you might be new to recording audio, the best practices are relatively easy to learn.
Capturing Great Audio
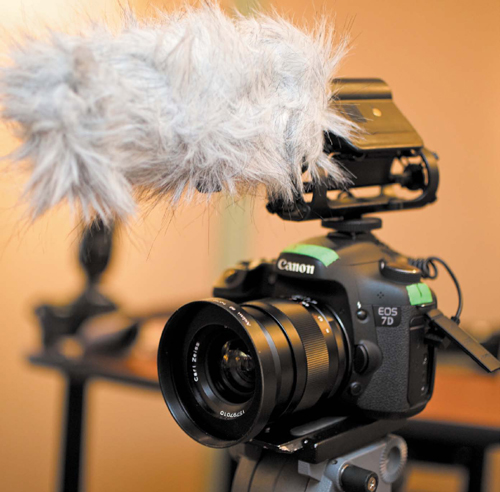
If you want to record great audio, you need to make audio a priority. What are the sounds you want the audience to hear? Where do you need to place your microphone to capture those sounds (Figure 9.1)? Remember that audio completes the experience of the viewer; you need to think about it as much as you do the rest of your shooting. Here are a few guidelines to improve your audio:
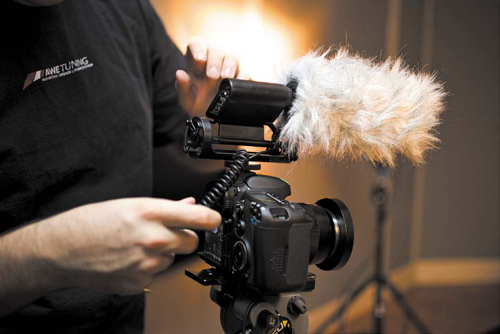
Figure 9.1. A shotgun microphone mounted on your camera can capture much better background or ambient sound than your camera’s built-in microphone. It works well because it records location sounds from where the camera is placed.
• Start with good sound. Although you might record a narration track after shooting your footage or use sound effects and music to complete a project, you still need good audio from the field. This is especially true with interviews.
• Are you listening? When recording audio in the field, you should actually listen during the recording. Be sure to listen for any audio problems like pops, clicks, or distortion. Always wear headphones, preferably the over-the-ear kind.
• Minimize noise. If you’re shooting in a loud environment, take action. You may need to move or relocate. Step farther away from a busy street. If there’s an air conditioner running, ask if you can turn it off. You need to pay special attention when recording narration or interviews. Fortunately, just like there are filters that can make a photo look better, there are also filters to improve audio quality in postproduction.
Technical Essentials of Audio
Photography and videography have lots in common. After all, video is essentially several still images recorded in rapid succession. However, audio is pretty unique. For most people, the technical aspects of audio are largely foreign (Figure 9.2). Let’s quickly explore some of the fundamental audio concepts; we’ll explore specific techniques later in the chapter.
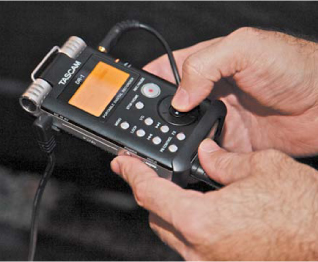
Figure 9.2. An external audio recorder offers many options, including channels, sample rate, and file format.
Setting Your Channels
Are you old enough to remember the days of mono records and tape? Did you grow up listening to AM radio? These days stereo audio is the norm, and even multichannel surround sound is pretty common. Mono, stereo, and surround are all terms that describe how audio channels are configured:
• Mono. With mono, only a single channel of audio is recorded. For example, if you plug one microphone into your camera, that microphone is generally recorded to one channel.
• Dual mono. Often confused with stereo, dual mono systems record separate mono channels to the left and right channels of a camera. Some single microphones record this way as well.
• Stereo. Stereo recording allows for separate left and right channels, and a mix between them. Some microphones are really two pickup devices or a stereo microphone, meaning the microphone will record to both the left and right channels. If you’re using an external audio recorder, it’s much easier to put a different audio source onto each track.
• Multichannel. Multichannel is sometimes referred to as surround sound and usually records two or more channels of audio. This type of audio is typically created during the editing stage.
Most video-enabled DSLR cameras will record either mono (single channel) or stereo mixed audio. You are free to add additional channels when you complete your final edit.
Sampling Rate
The sampling rate of your audio equipment describes how many times per second the analog audio source is sampled when converted to a digital file. Audio is an analog medium caused by the compression of air, which creates sound waves. This analog noise is converted into a digital file by your microphone and DSLR camera.
When you look at the files created by your camera or by additional audio hardware, you’ll often see numbers like 44.1 kHz or 48 kHz, which is the sampling rate of the audio being recorded. As a general rule of thumb, the higher the sampling rate, the better the audio quality. For example, audio made for a Web presentation might use a sampling rate of 22 kHz, and as a result will sound somewhat muffled. But audio recorded at a sampling rate of 48 kHz will sound clear.
The abbreviation kHz (kilohertz) is a fancy way of indicating that the electrical frequency cycles 1,000 times per second. A sampling rate of 48 kHz literally means 48,000 electrical cycles per second.
Chances are your DSLR will record audio at 48 kHz, although some may record at 44.1 kHz. If you choose to use an external audio recorder, you’ll find some that can record up to 96 kHz and even 192 kHz. You typically won’t use these higher rates, which are usually reserved for professional musicians or audio engineers.
Bit Depth
You might be familiar with a photographic concept called bit depth, which represents how much information is used to describe color in a file. JPEG images are typically 8 bits per channel, whereas camera raw files can be 10 to 16 bits per channel. Well, the same holds true for audio.
A high bit depth allows for smoother blending between frequencies in the audio portion of your file. A high bit depth can also provide an expanded dynamic range. Most DSLR cameras record at 16 bit. However, you can find external recorders that record at higher bit depths, such as 20-bit and 24-bit audio. These are usually overkill for dialogue but can help to produce quality sound when recording musical performances.
Microphone Pickup Patterns
When you start to explore microphones, you’ll discover that they have different purposes. Some are designed to pick up sound at a close range (like a vocal mic), whereas others pick up sound from far away (like a shotgun microphone). All microphones have a directional area that defines where they are most sensitive to sounds. This pickup area has a distinct shape known as a polar pattern.
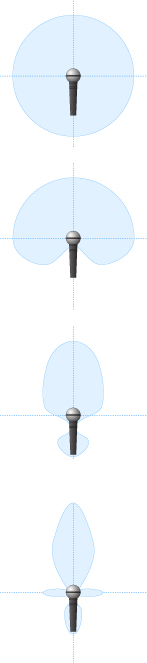
Here are the most common microphone polar patterns:
Omnidirectional. If you need a microphone that picks up a lot of sound, choose an omnidirectional microphone. An omnidirectional microphone’s response is equally sensitive to audio coming from all directions. This style of microphone picks up sound in a spherical pattern and works best for controlled sets without much background noise.
Cardioid. The most common style of microphone has a cardioid pickup pattern (named for its heart-shaped pattern). The benefit of this mic is that it is unidirectional, which means it is more likely to pick up the sounds in front of the microphone instead of sounds coming from the back (like the camera operator).
Hypercardioid. This mic pattern is an exaggerated version of the cardioid pattern. It is very directional and eliminates most sound from the sides and rear. Hypercardioid as well as the previously mentioned cardioid pattern are commonly used as vocal or speech microphones, because they are good at rejecting sounds from other directions.
Shotgun. Shotgun microphones are highly directional. They have small areas of sensitivity to the left, right, and rear but are significantly less sensitive to the side and rear than other directional microphones. This type of microphone is often mounted on top of a DSLR camera to pick up sounds farther away.
Recording Audio with the Internal Microphone
The microphone quality of DSLR cameras falls well below the cell phone in your pocket. It is low quality and worthless for all but the most basic tasks. Because the microphone is too close to the lens and camera mechanisms, it is prone to picking up unwanted noise (Figure 9.3). You can use this microphone to record background noise or as a sound bed, but it will fail when you try to capture higher-quality audio like conversations or performances.
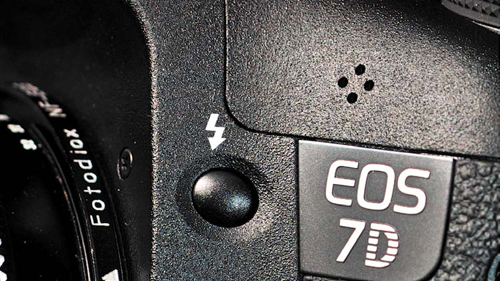
Figure 9.3. The built-in microphone on a DSLR is virtually useless if you’re concerned about recording quality audio. You’ll use it for reference and backup, but that’s all it’s really good for.
Why would manufacturers offer such inferior mics? I have two theories. The first is to save money. Most people buy a DSLR camera primarily for taking photos. So the manufacturer skimps to save a couple of bucks in cost. My second theory is just that they don’t know any better. Most DSLR manufacturers have little to no experience recording sound (just taking great images).
Many DSLR cameras have an Automatic Gain Control (AGC) option. AGC attempts to automatically adjust your audio levels based on the relative level of sound that the camera “hears.” This option does not work well because the camera is constantly adjusting audio. If you can turn off this option, do so.
Recording Audio with an On-camera Microphone
One of the most popular purchases of DSLR owners is an external microphone that mounts to the top of your camera and plugs into the audio jack on the side of your camera (Figure 9.4). Typically, these mics have a shotgun-style pickup pattern, which means they’re good at picking up audio from far away.
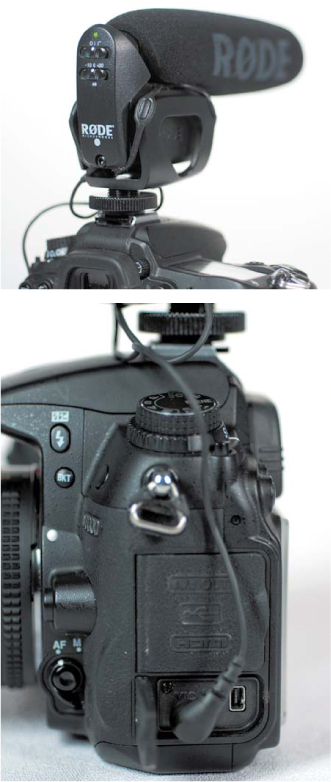
Figure 9.4. Using the Rode VideoMic Pro is one way to significantly extend the audio recording capabilities of your DSLR camera.
External microphones are useful for getting sound in “run-and-gun situations” when you just need to shoot as quickly as possible (or don’t have an extra set of helping hands). If you’re on vacation, at a sporting event, or roaming around just shooting footage, a shotgun mic is a great choice because it’s easy to use and picks up a lot of sound.
The only drawback is that a shotgun microphone can sound a little hollow. If you need to record dialogue, conversations, or interviews, you may want to invest in some additional audio gear like a lavalier microphone.
Recording Audio with a Lavalier Microphone
If you need to record an interview, the most professional choice is a lavalier microphone (or lav mic). This type of microphone can effectively isolate the sound from a subject you’re recording. A lavalier mic is usually placed on the front of a subject’s clothing or collar (be sure to keep it from rubbing against anything else) (Figure 9.5). It also tends to not pick up as much background noise because it is placed so close to the desired subject. A lav mic sounds much different than a shotgun mic because it tends to have richer sounds for vocals (this is largely due to how close it is placed to a subject’s mouth).
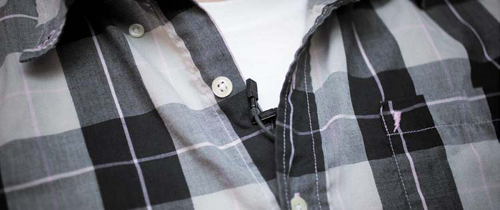
Figure 9.5. Using a lavalier microphone is a discreet way to place a microphone close to your subject’s mouth. Photo by Lisa Robinson.
The most affordable lav mics that you can purchase are wired, meaning that you’ll have to connect them directly to a recording device (like your camera or external audio recorder) (Figure 9.6). You can also use a wireless microphone system that sends audio to a receiver that can be connected to your camera. The advantage of a wireless microphone is that your subject is free to move around.
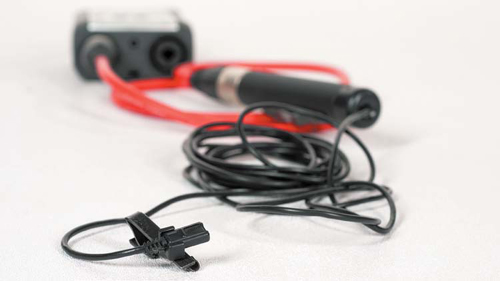
Figure 9.6. Most lavalier microphones use a professional-style XLR audio connector.
An old trick of the trade is to hide lavalier microphones inside clothing. An easy way to do this is with an adhesive bandage. Just leave the microphone sticking out a bit above the top of the bandage when you adhere it.
There’s No Replacement for Mic Placement
• Microphone rub. Although lavalier mics allow you to place them very close to your subject, try to avoid having the microphone rub against clothing.
• Getting too close. Proximity is important, but there is such a thing as getting too close. When the mic is too close, it can become overloaded, which distorts the sound. Most of the time you should place the mic 6–12 inches away from the source (or the distance between your outstretched pinky and thumb).
• Work with the pickup pattern of the mic. If you’re using a shotgun microphone, position it so it can capture the directional audio it’s capable of recording. Make sure it’s pointed directly at the subject, not something else. When using a lavalier mic, make sure it stays pointed near your source’s mouth and that it doesn’t rotate and turn sideways or upside down.
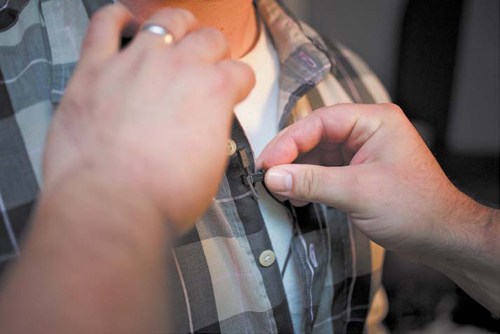
Figure 9.7. Try to place a lavalier microphone within 12 inches of the subject’s mouth. Photo by Lisa Robinson.
Recording Audio with Dual System Sound
The most popular approach for capturing sound when using a DSLR camera is the same used by the film industry—dual system sound. This means that you have two “systems” for recording: one for audio (a dedicated audio recorder) and the other for video (your DSLR camera). This method is popular because you and the camera can move freely (with no cables connecting the microphone). If audio is critical, the best solution is to record files to a second device (Figure 9.8).
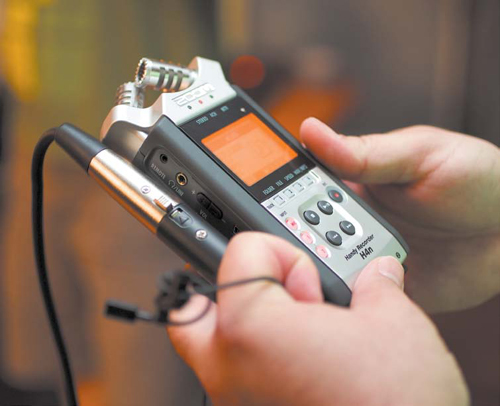
Figure 9.8. Manual audio recorders offer easy to access controls and audio meters to help accurately monitor and adjust recording levels. Photo by Lisa Robinson.
Dedicated audio recorders produce higher-quality audio for several reasons:
• Higher-quality file formats can be used.
• Audio can be sampled at a higher frequency for greater quality.
• Professional-grade microphones can be used.
• The microphone can be placed significantly closer to the subject. Generally, the microphone should be within 6–12 inches of the person talking. Untethering the microphone from the camera makes it easier to hide wires and leaves you freer to move around.
Recording with a Smartphone Application
One affordable option to use as a dual system sound device is a smartphone (like an iPhone or an Android phone) to record sound. Several high-quality recording applications are on the market that typically cost between $5 and $50. Do your best to avoid recording to compressed MP3 files, because with these files you’ll lose a lot of audio fidelity from the original source. One of my favorite apps is Pro Audio To Go (www.revuptransmedia.com) for the iPhone, which can record to uncompressed AIFF audio files.
For any of these applications, you’ll likely need an XLR adapter to connect a professional microphone to your phone. Although some microphones include a 3.5mm plug (the standard connection on a phone), most do not. Cable options run between $10 and $30 depending on the connection type you want (XLR, phono plug).
Recording with a Dedicated Recorder
Several different brands of dedicated audio recorders are on the market (Figure 9.9). Most record to either removable media like a Secure Digital (SD) card or to internal flash memory. Be sure to avoid those that use the more heavily compressed options (such as MP3). Most editing applications can accept an AIFF or WAV file that’s recorded at 48 kHz and 16 bits per channel.
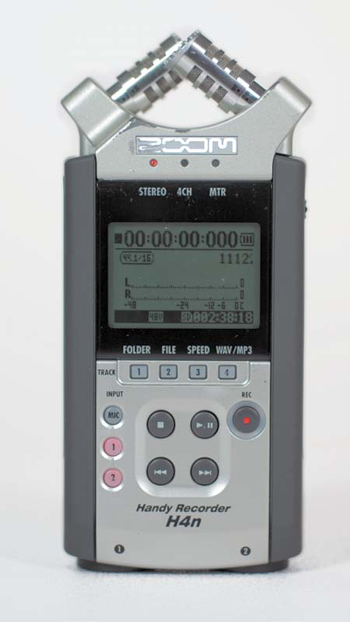
Figure 9.9. The Zoom H4n is a popular external audio recorder that allows for pro-quality audio connectors and sampling rates.
Many manufacturers of digital audio recorders exist, but I’ve had great experiences with the following:
• H4n and H2n from Zoom (www.zoom.co.jp)
• DR and HD series from Tascam (www.tascam.com)
Syncing Audio in the Field
If you choose to use a sync sound approach (where you record on two devices), you’ll need to actually provide the sync point. When you edit your footage, you’ll want to have audio on both your camera’s sound track (using the built-in or better yet an external shotgun mic) and on the audio recorded (with the dedicated audio device and a professional mic). Additionally, you should have a visual sync point on the video clip. Having multiple reference points makes it easier to synchronize the different sources (a process covered in Chapter 11, “Editing Essentials”). Here are a few tips for syncing sound in the field to make editing your audio and video together easier:
• Use a clapboard. There’s a reason film productions use a clapboard (Figure 9.10). When picture and sound are recorded to two different systems, it makes it easy to synchronize when editing, because there are visual and audio cue points (Figure 9.11). The slate can also display information about the shot or production. A quality clapboard will run you about $35, and it’s money well spent (plus you’ll feel official). This well-proven syncing method has been used in film production since its start.
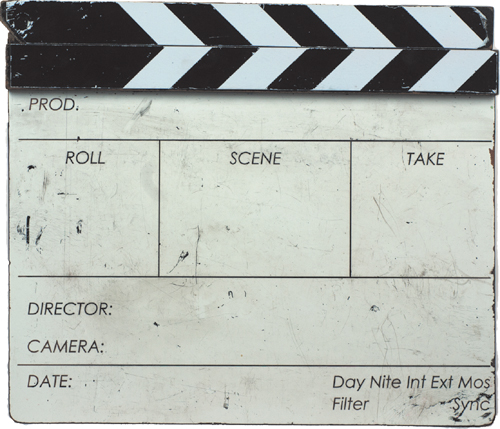
Figure 9.10. A clapboard is a traditional film and video production tool that’s been used for many years.
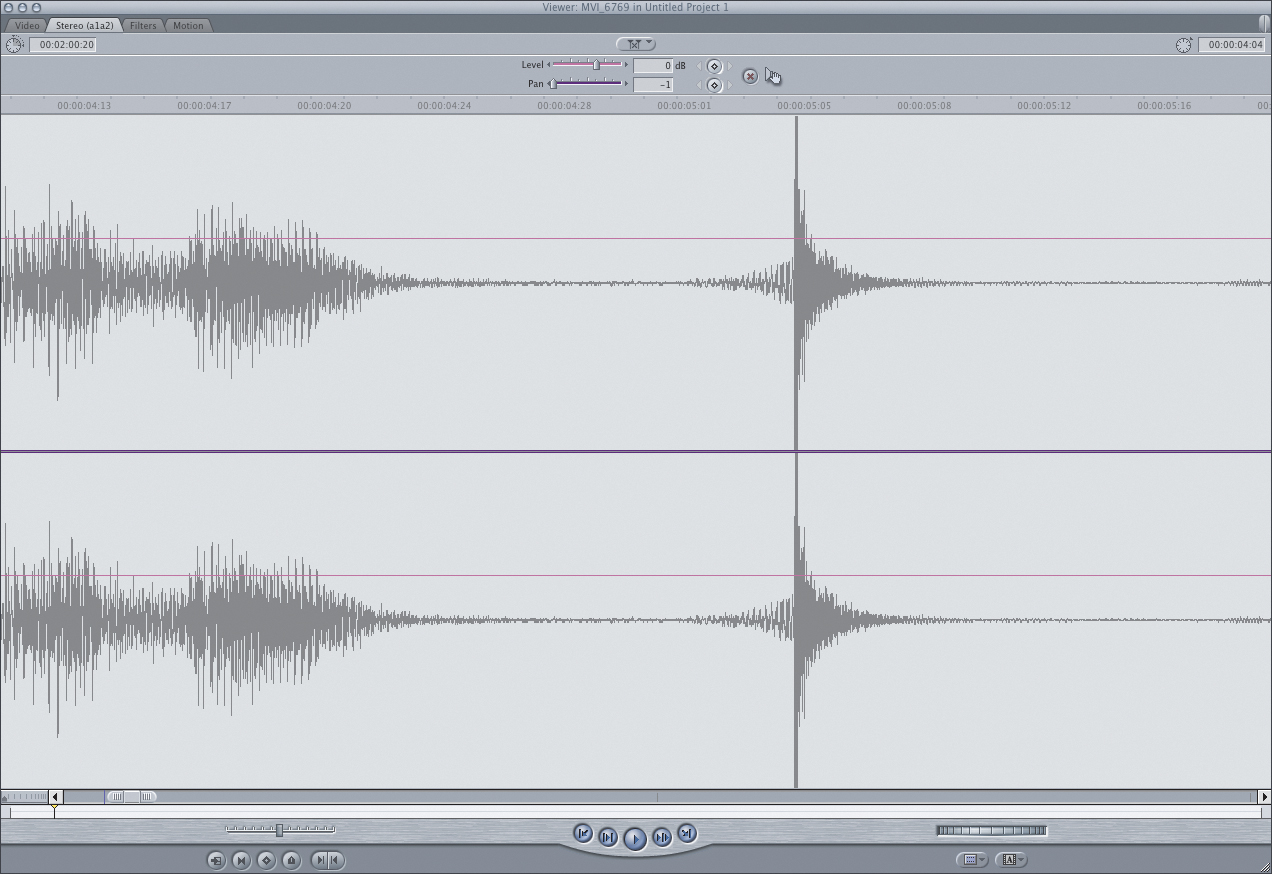
Figure 9.11. The clap of the clapboard produces an easy-to-see spike in the audio waveform. You’ll use this when editing to help sync up your higher-quality audio with the original video.
• Use a slate application. Several applications exist for smartphones or tablets that allow you to load information about the production (Figure 9.12). They can also generate a countdown and a sync point. These applications will typically make a noise and flash the screen white for an instant to make syncing easier when editing.
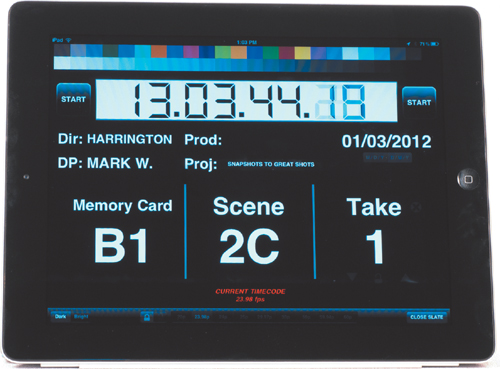
Figure 9.12. A slate application (like DSLR Slate) can help you clearly sync and organize your production in the field.
• Use your hands. A clapboard is nice to have, but it often gets forgotten or misplaced on set. In a pinch you can make your own visual and audio reference sync points. The easiest way to do this is simply by clapping your hands and recording the sound to video and audio (Figure 9.13).
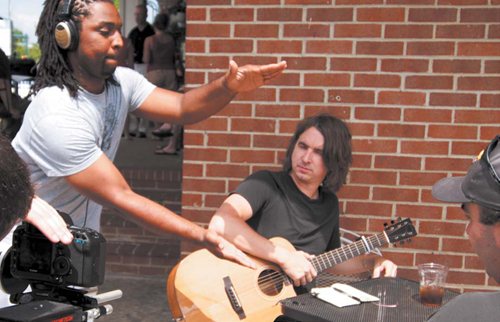
Figure 9.13. Your hands (or a colleague’s) can create a sync marker as well. Just be sure your camera is securely attached to the tripod before you let go of it.
Monitoring Your Audio
Could you take great pictures with your eyes closed? Probably not. Well, the same holds true for audio. Just because you’re recording sound doesn’t mean you’re capturing good sound. You need to hear what you record, while recording, if you want to be confident that it’s right.
How else would you notice if the battery in your microphone died, or if the cable you were using had a short in it? Don’t assume that all you have to do is plug in a microphone, set levels, and walk away. That is a recipe for disaster! Fortunately, you can purchase a good set of headphones for under $100 (Figure 9.14).
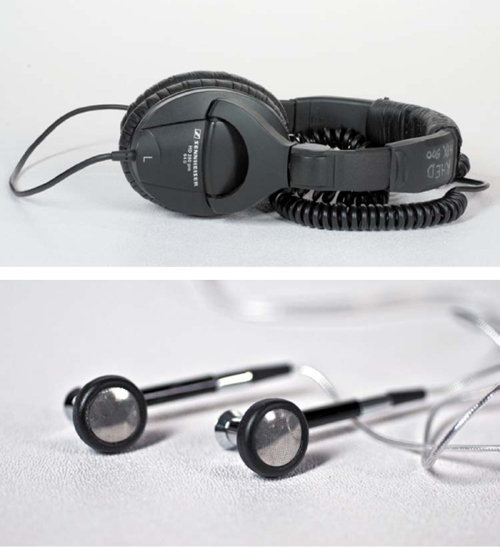
Figure 9.14. A pair of over-the-ear headphones are much more effective than earbud-style headphones from your portable media player or phone.
Although you might be tempted to use the earbuds from your iPod, their design will prevent you from isolating the audio of your recording. I strongly recommend over-the-ear headphones. By actively monitoring your audio, you’ll be able to adjust for problems when they occur (instead of trying to solve problems after the fact).
When recording audio, make sure the sound is not too loud; otherwise, the audio will be distorted. Some audiometers use colors to show distortion (which can result in clicking, popping, or buzzing in the audio track): Yellow is a warning, and red means the audio is distorted. Additionally, some audio recorders use a numbered system. The maximum target on a digital scale is -6 dBFS (Figure 9.15), but you should average levels around -20 dBFS to -10 dBFS for the best sound.
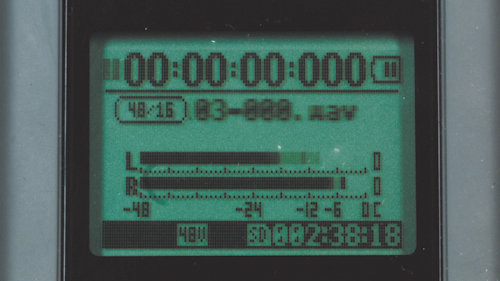
Figure 9.15. Most audiometers will bounce continuously in time with your audio. However, they will leave a trace mark to show the peak levels recently achieved. The trace marks will typically hold for a few seconds or until a louder sound pushes them higher.
Share your results with the book’s Vimeo group!
Join the group here: vimeo.com/groups/DSLRVideoFSTGS