
10. Backing Up and Organizing Your Footage
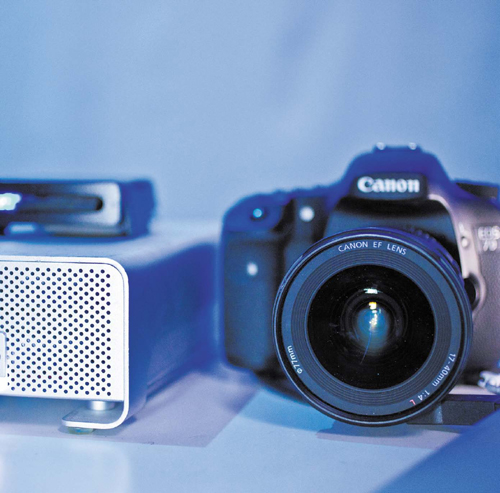
Photo by Lisa Robinson.
After shooting great footage, the last thing you probably think about is backing up that footage (but for the 5 percent of you who do, you’re smart and well organized). But the truth is, if you lost your footage, it might be impossible to replace it. Taking the time to make sure your footage is safe is essential. Additionally, a little organization before you import your footage into your editing software will go a long way toward speeding up the tasks at hand.
A practical Workflow
When video pros talk about their process, they call it a workflow. Although that may seem like an inflated term, it’s actually very fitting. The goal is to literally make the work process flow more smoothly. Having a clear path that’s easy to follow and backing up your footage ensures that this will happen. The last thing you want to do is accidentally erase a card before it’s been properly backed up (Figure 10.1). So, let’s explore a simple workflow that should work for DSLR video projects:
• Mount memory cards. You should use a dedicated memory card reader or a USB cable between your computer and camera to mount the cards on a computer. Both will let you read the cards like any other disk and use the data on your computer.
• Transfer footage to a backup drive. After you mount a card for the first time, transfer the footage to your backup drive. This drive should be a dedicated drive that you only use to keep a copy of your footage. Maintaining a copy on a separate drive (that you don’t work with) ensures that you’re protected against a drive crash or accidental data loss. Be sure to leave this drive plugged in. Drives left unpowered for a long time can experience data loss.
• Transfer footage to an edit drive. When you return to your primary computer, transfer your footage to a drive dedicated to video editing. This should be a drive that’s separate from your computer’s built-in hard drive.
• Archive data for long-term storage. If you really want a true backup, consider archiving your data using a long-term media format (such as DVD or Blu-ray discs). This process can be a bit time-consuming and can be performed slowly over time.
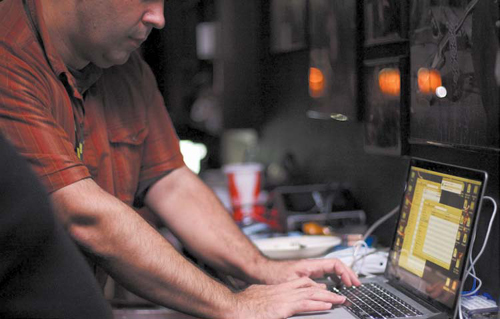
Figure 10.1. Your data management work-flow needs to be executed consistently. You may need to transfer and back up footage in the field to free up memory cards. Make sure you take the time to back up the data to at least two different locations. Photo by Lisa Robinson.
Choosing a Card Reader
There are two reasons to invest in a good memory card reader (Figure 10.2). The first is speed; you’ll want to get the data off the card as quickly as possible. Video files are much bigger than still photos (after all, you’re shooting 24–60 frames per second). Having a fast card reader will speed up the process of transferring data to your drive or computer.
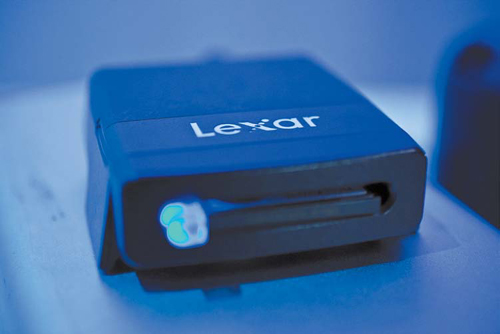
Figure 10.2. A fast card reader will speed up the transfer of your footage. This device from Lexar connects to your computer via a FireWire 800 connection. Photo by Lisa Robinson.
The second reason is to avoid wear and tear on your camera. Although most manufacturers include a USB port on their cameras, you don’t want to risk damaging your camera’s mini-USB connection because it’s directly attached to the main circuitry of your camera.
Here are some considerations to think about when choosing a card reader:
• Connection type. Make sure you use a fast connection port. Although a USB 2.0 or 3.0 connection is very fast, you can also turn to FireWire for speedy transfers (Figure 10.3). If your computer offers an ExpressCard or Thunderbolt connection, these are quite speedy too.
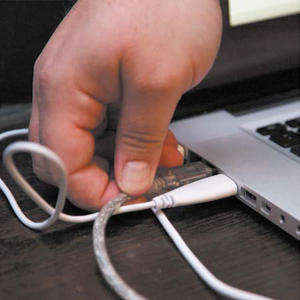
Figure 10.3. Make sure your memory card reader is firmly connected to your computer. If it unplugs accidentally while data is transferring, you can corrupt files. Photo by Lisa Robinson.
• Bus power. Choose a reader that’s bus powered, which allows for the card reader to operate without the need for external power. It can simply run by using the connection bus to your computer, like FireWire or USB.
• Speed. Transferring footage quickly mostly depends on card speed, but a slow card reader can handicap even a fast card. I use a FireWire 800 reader to transfer my footage.
• Multiple slots. Some card readers offer two or even four slots, which are handy for loading additional cards. These readers let you load multiple cards and then walk away while the computer works.
Choosing Hard Drives
As you start to shoot more and more video, you’ll notice that your need for more hard drives will increase because video files are fairly large. You’ll fill up a 16 GB memory card in about an hour of shooting. At this rate, it’s no wonder that you’ll outgrow your existing drives quickly.
Additionally, video editing places extra demands on your storage. For the best computer performance, you should store your video files on a separate hard drive. This allows your computer to access its applications and operating system while reading large video files from a separate dedicated drive (Figure 10.4). Toss in the additional problem that many editing software applications convert your video to a larger file format (to make it easier for the computer to use), and you’ll quickly see your hard drive usage spike.
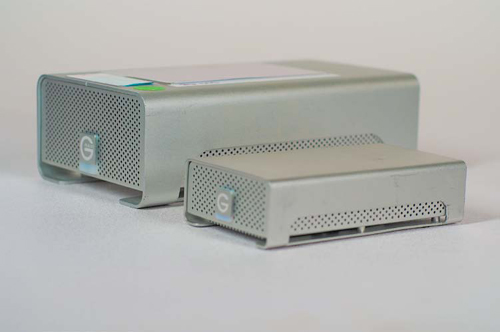
Figure 10.4. Both of these drives offer RAID 0 performance: One is a desktop drive, and the other is meant to be portable for laptop use. RAID 0 means that two drives are in each case and split data evenly across the two disks (referred to as striped) to work more efficiently for the higher data throughput demands of video editing.
Interface Types
The first factor to consider when choosing a hard drive is its interface type. Make sure your computer can connect to the drive; if not, it won’t be very useful. Additionally, different interface types offer different data transfer speeds (Figure 10.5). Because video editing involves working with large files, you’ll want to use the fastest one available to you.
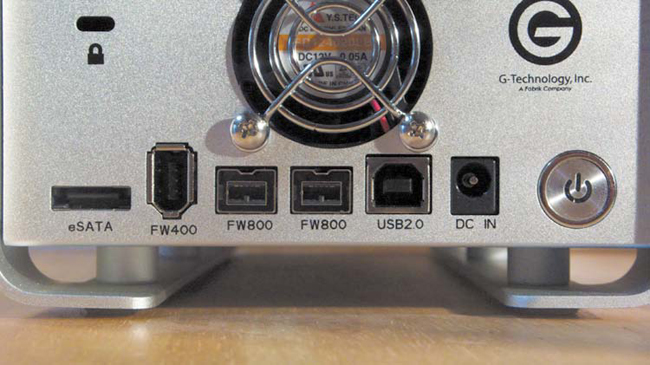
Figure 10.5. Many higher-performance drives offer multiple connection types. This drive has USB 2.0, FireWire 400, and the faster FireWire 800 and eSATA connections.
Let’s take a look at the most common connection types.
Firewire
FireWire has become the most common standard connection type for those editing video (you may also hear it referred to as iLink or IEEE 1394) (Figure 10.6). Currently, two varieties of FireWire are in wide use: 400 and 800 (IEEE 1394b). The number refers to the data transfer speed: 400 and 800 Mb/second.

Figure 10.6. Look for the official FireWire logo when choosing a drive.
Additionally, there are three types of connectors: 4pin, 6pin, and 9pin. The 6pin and 9pin options are most common for hard drives. You may also need to get a special 6pin to 9pin converter cable to make the drives work on your computer. An advantage of FireWire drives and laptop computers is that both the 6pin and 9pin connectors can carry power to run a bus-powered drive from your laptop’s internal battery or your computer’s power supply. This means that you can edit without having to find additional outlets to plug your drives into (which improves portability).
USB
The Universal Serial Bus (USB) port has emerged as the most common computer connection in use. USB comes in three varieties: 1.1, Hi-Speed 2.0, and Super-Speed 3.0 (Figure 10.7):
• USB 1.1 has a transfer speed of 12 Mb/second. This connection speed is OK for mice and keyboards, but not OK for data transfers unless you want to wait all day for data on a memory card to transfer to a drive.
• Hi-Speed USB 2.0 has a much more respectable transfer rate of 480 Mb/second. In practice, USB 2.0 is not as fast as FireWire due to the way computers handle the ports.
• Super-Speed USB 3.0, the newest standard, is just starting to emerge. It supports transmission speeds up to 5 Gbit/sec. This specification is very fast and works well for video editing. At the time of this writing, Apple has not added USB 3.0 to the Mac platform, making it a Windows-only solution for now.

Figure 10.7. If you’re considering a USB drive, look for the newer USB 3.0 interface for the best performance. It’s also backward compatible with USB 2.0.
Keep in mind that a USB connection is subject to slowing down if there is a slower device on the bus. So, be sure to use a hub with multiple ports and keep your slower peripherals, like your printer, keyboard, and mouse, plugged into a different port.
SATA
Serial ATA (SATA) is the most common drive interface available today and is widely used in desktop and laptop computers (Figure 10.8). If you want to use an external drive with SATA, you may need to add a special card to your computer to expand its ports. If you have an open slot in a tower computer that you want to fill with a drive, SATA is the likely connection type.

Figure 10.8. The SATA logo identifies devices that adhere to the Serial ATA standards.
Additionally, SATA comes in a few flavors. The original spec referred to as SATA I runs at 150 MB/second. SATA II, which is most common today, runs at 300 MB/second and is backward compatible with SATA I. SATA III has been announced but is not commercially available yet. SATA III units will be able to run at up to 600 MB/second. However, real-world speeds will often be slower due to compromises made by drive manufacturers in regard to the quality of all the other components of the drive.
Drive Speed
The speed of a drive is another important factor you need to consider when selecting a hard drive. The rate at which a drive spins is typically measured in revolutions per minute (rpm). Portable field drives that use mechanical drive units will usually come in one of two speeds: 5400 or 7200 rpm. Desktop drives are available at those speeds or faster speeds (such as 10,000 and 15,000 rpm). The faster a drive, the more expensive it is in a general sense. Be sure to select a faster drive speed (like 7200 rpm) to accelerate the transfer of your camera memory cards as well as to improve performance when editing.
Selecting a Portable Drive
If you plan on editing your video on a laptop, or you need to carry your drive between locations, you’ll want to invest in a portable drive. This class of drive is typically a laptop-sized drive in a bus-powered case (Figure 10.9), which makes the drive small and easy to transport.
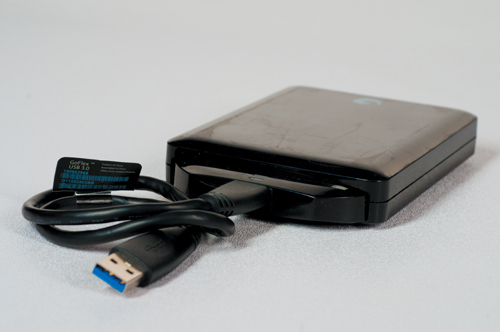
Figure 10.9. This portable USB 3.0 drive provides fast enough speed for most DSLR editing tasks.
Here are a few details to look for when choosing a portable drive:
• Bus power. You don’t want to lug around extra power adapters with you, so be sure to select drives that can be bus powered from your computer’s battery or power supply.
• Speed. Portable field drives that use mechanical drive units (unlike newer solid state drives) will usually come in one of two speeds: 5400 or 7200 rpm. Select the faster speed to facilitate rapid transfer of camera memory cards.
• Connectivity. Be sure to select a drive with varied connectivity. Drives with connections for FireWire 400 and 800 or USB 2.0 and 3.0 are good choices for portable drive units.
Selecting an Internal Drive
If you’re using a desktop computer, especially a tower, you may have an open slot that can hold a second drive. You can add additional storage on your own pretty easily on most computers (or have it serviced by a professional). When choosing an internal drive for video editing, be sure to purchase one with a fast rpm option (either 7200 or 10000 rpm) (Figure 10.10). Additionally, you should avoid the lower-power solutions (often labeled or advertised as green drives) because they are not as efficient for editing large video files.
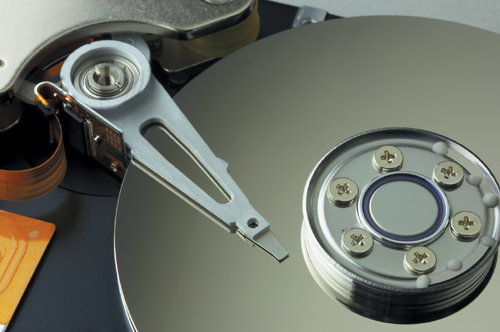
Figure 10.10. Internal drives come in several classes. For video editing tasks, make sure you choose a server-class drive. These are often referred to as black drives, but you’ll find the drive class on the packaging or in the manufacturer’s description. Photo by iStockphoto.
Selecting an External Drive
If you’ve maximized your internal storage options, you may still need some external space. Adding a full-sized external drive lets you easily expand your storage choices. If you choose a drive that uses its own power supply, you can get a drive that is even higher in performance than your internal storage.
Most of the same suggestions for portable drives apply to external drives. However, you can also take advantage of a RAID (Figure 10.11).
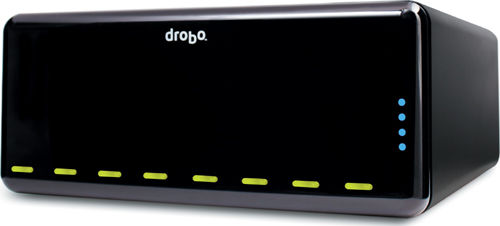
Figure 10.11. A Drobo Pro provides redundancy and speed, which makes it a great combination for video editing.
Basically, RAID is a technology that allows multiple drives to act as a single drive. This combination has two major benefits (which can be exclusive of each other). First, a RAID can offer a big boost in drive performance because the drives work together. Second, you can set up a RAID so that data is redundant, which means that a drive can fail with no loss in data.
Here are the simple options when choosing a RAID:
• RAID 0 is a striped array, meaning there is no redundancy, but speed and throughput are at their maximum.
• RAID 1 is a mirrored array, meaning that if you have two 2 TB disks for a total of 4 TB, you’ll actually only have 2 TB of storage; the other 2 TB is used as a mirrored drive.
• RAID 5 allows for parity data spread across disks, meaning that you can have one disk fail and you won’t lose any data. Because the data lives on both drives automatically, you can have one of the two drives fail. After a failure, you can rebuild the RAID array.
• RAID 6 is similar to RAID 5. The data is automatically spread across the array. But unlike RAID 5 with one backup drive, you can actually lose two separate drives.
Transferring your Footage
Although you’re probably in a hurry to start editing your video, I recommend that you slow down when transferring your footage (Figure 10.12). You want to be certain that the data has successfully been copied to multiple drives before you clear a memory card. After all, this is the only chance to get things right. Once you’ve erased a card, the data is gone.
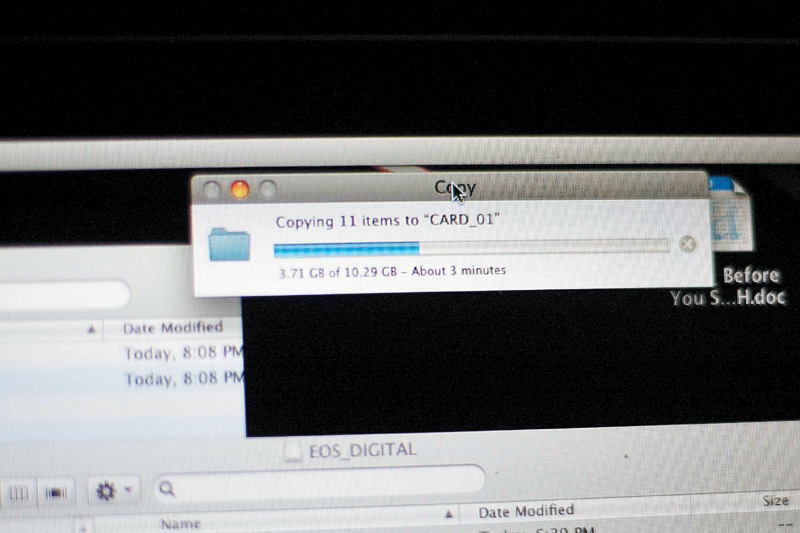
Figure 10.12. Make sure you take the time to verify your copied data. Visually inspect the copied files and make sure the file count and the size match the original source. You should also spot check a few files and open them to make sure the data is valid.
Here is a practical data transfer workflow I recommend.
1. Take a quick assessment of the cards that you need to transfer. How many cards do you have? About how much data do you need to transfer?
2. Make sure you have enough drive space to hold the files once they’re transferred.
3. Place all of the cards to be transferred into one pile with the label side facing down.
4. Make a new folder on your backup drive for each project. Copy each card to your backup drive. Be sure to copy the entire card folder structure (not just the video files). The metadata created by your camera to describe the clips may be contained in other folders and may be needed by your software tools to properly use the video files.
5. Place each card you’ve finished copying into a new pile (moved a noticeable distance from the initial pile) with the label side up.
6. Make a new folder on your second drive (used for editing) for each project. Copy the cards (and their entire folder structure) to your editing hard drive.
7. Reformat each of your memory cards in your digital camera.
8. Place each memory card back into its case or a card wallet.
Organizing Your Footage
After copying all your footage from your memory card to your hard drives, you should have a folder for each memory card if you followed my advice. This means you are partially organized.
Now you need to review your footage and identify which shots you like as well as those that are garbage. In the pro video world, this is known as making selects. The benefits of choosing the best video clips early on is that it reduces how much footage you need to import (and possibly convert) for your editing application. The less footage you have loaded, the easier it is to find the clips you’re looking for.
Viewing Footage
The best way to view your clips is at full size and by playing them back in real time (Figure 10.13). This makes it easier to judge issues like focus and exposure (your two greatest problems with DSLR video). There are two ways to do this: through your operating system or your editing software.
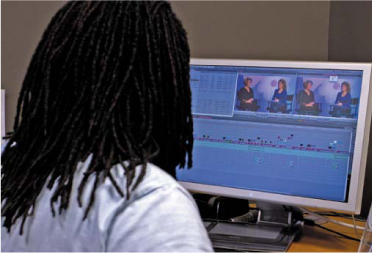
Figure 10.13. Looking at your footage on a computer lets you see the footage at a higher resolution. You can also use evaluation tools like scopes to measure color.
The System Level
The easiest way to view your footage is by using your computer’s operating system. If you’re working on a Mac, you can watch video clips by using the Quick Look option (just select a clip and press the spacebar). This lets you watch a clip in real time. You can then use labels to color code the keeper clips. With Windows you’ll find a similar Quick Preview feature in Windows 7 and later.
You can also use your built-in media player to view the clips. For most DSLR media, I recommend the QuickTime Player software. If you don’t have this application, you can download the free version from www.QuickTime.com.
Your Editing Software
If your editing software can work natively with the footage (that is, without converting its file format), you can import all of the transferred footage to view it. You can then use the built-in organization features of your editing software, like folders (bins), labels, keywords, and so on. Be sure to actually delete (or hide) the unwanted clips from your project (don’t worry; they’ll still be on your hard drive if you need them).
Making Selects
After viewing your footage, the next step is to make selects. The goal here is to further refine the clips you actually want to use in your editing project. The reason for doing this is simple: By the time you start editing your project, you don’t want to have to search through a huge amount of footage to find exactly what you want. Being discriminating earlier on will make the editing easier because you won’t be inundated with too many choices.

Figure 10.14. Setting up a standard folder structure for each project helps you stay organized.
Essentially, you’ll create a series of folders to help organize each project. Each subfolder is assigned to a specific part of a project. This approach works with all editing software. Here’s the basic subfolder structure of the Common Media folder and how it works:
• 01 Original Footage. This folder is where you copy footage from your memory cards.
• 02 Selects. After viewing your footage, you can copy selects to this folder. If you can work with camera native footage in your software, this is the presorted footage that should be imported into your editing application
• 03 Transcoded Footage. If your workflow needs it, you’ll transcode footage to this folder (see “The Option of Transcoding” section). You can then import this folder directly into your editing application.
• 04 Project Files. Save project files from editing and other applications here. Also, use an Old Projects folder to keep older versions separate from your current project.
• 05 Graphic Sources. This folder contains any graphics project files for your project. You can use applications like Photoshop, After Effects, or Motion to create logos, titles, backgrounds, and more.
• 06 Graphic Exports. This folder contains any animations you’ve generated.
• 07 Audio Sources. If you’ve recorded audio to a separate recorder, place those files here.
• 08 Stock Footage. If you’ve purchased any footage from a stock company, place it here. You can also put footage that comes from older projects here.
• 09 Exported Files. I like to keep all of my exports in one place. Any Web, DVD, or portable media files should be placed in this folder.
• 10 Production Paperwork. Most projects will have additional files, like scripts, log notes, and more. Store these in one location for easy reference.
The Option of Transcoding
The practice of transcoding essentially converts the footage shot in your camera into another file format. This is typically done to make it easier for the computer to work with the footage during editing. Formats like H.264 are highly compressed, and as such, can require a lot of computer-processing power to decompress the files as they are transferred.
To improve performance, many pros transcode to a new file format optimized for video editing. This process often increases disk usage by six to ten times but reduces the load on the computer’s processors. Compressing footage often uses RAM or your computer’s graphics card. So, converting your footage up front by transcoding gets that step out of the way.
Do I Need to Transcode?
A few years ago, transcoding was an absolute necessity. All footage had to be transcoded into another file format just to be able to work with it in an editing application. Typically, this transcoding task was and still is done by the nonlinear editing software, but stand-alone utilities also exist (see the next section).
You may need to transcode your footage if your computer or editing software meets any of these conditions:
• 32-bit operating system. If you’re using a 32-bit operating system, each application can only use 3 GB of RAM (which can be a problem because video can be very RAM-intensive). Editing video typically involves playing back multiple streams of picture and sound. So, if you don’t have a lot of RAM, editing can be very tough (and lead to the picture skipping, audio drifting out of sync, or even crashing).
• Slow processors. Working with camera native footage requires the video to be decoded on the fly. This task is much easier if you have multiple processors in your computer.
• Older/feature-limited software. Newer software applications are more likely to support camera native editing than older or feature-limited applications. Programs like Final Cut Pro X and Adobe Premiere Pro offer support for video shot with many DSLR cameras. If you’re using software targeted to consumers or hobbyists, you’re more likely to need to transcode your footage prior to editing.
Software Tools for Transcoding
When it comes to transcoding, most editing tools offer their own solutions. For example, when you import into Final Cut Pro X, you can choose to optimize media, which is just another way of saying transcoding. The editing software will start to convert your footage in the background while importing.
Although this is a valid workflow, many pros look for other software tools to make transcoding faster and easier. Using a dedicated transcoding application can let you set up multiple computers to tackle the job. It can also avoid the delay caused by some nonlinear editing software, which blocks you from working during the import process.
Here are some of my favorite tools:
• Apple Compressor. This Mac-only application is available in the Mac App Store for $49 (Figure 10.15). It is a full-featured compression and transcoding application that allows you to easily transcode footage from your DSLR. If you’re using Compressor, you’ll most likely use the Apple ProRes codec (compressor decompressor) to transcode to.
Figure 10.15. Apple Compressor.
• Cineform Studio or NeoScene. Cineform makes compression utilities as well as its own video codec (Figure 10.16). The Studio bundle is a free utility for H.264 media that you can download from www.GoPro.com. The more robust NeoScene suite (www.cineform.com) costs $129 and supports more file formats. Both utilities convert files to the Cineform codec, which can be used by the Windows and the Mac platform.

Figure 10.16. Cineform NeoScene.
• MPEG Streamclip. MPEG Streamclip offers two benefits (www.squared5.com) worth noting (Figure 10.17). First (and foremost), it’s free. Second, it’s also very fast. The only downsides are that it does not offer any easy-to-use presets, and it relies on you to find or use your own video codecs.

Figure 10.17. MPEG Streamclip.
How to Minimize Transcoding
I recommend avoiding transcoding if at all possible. The process is very time-consuming and can essentially tie up your computer completely for hours or even days. It also gets very expensive due to the increased use of hard drive space.
Here are a few simple strategies to avoid transcoding:
• Choose your software wisely. Many editing tools offer the ability to work with the material in the same format as that recorded by your camera. Be sure to look for the label “native editing” and check the tool manufacturer’s website to see if your camera model is listed.
• Be aware. Try to shoot short clips. Instead of letting your camera roll freely, start and stop the camera often. This will make editing a lot easier and avoid wasted footage.
• Be picky. Chances are you’ll shoot more footage than you need. By carefully screening your footage and preselecting your shots, you can reduce the amount of footage you import into your nonlinear editing software.
Share your results with the book’s Vimeo group!
Join the group here: vimeo.com/groups/DSLRVideoFSTGS