In This Chapter
Exporting a report to a static HTML page
Adding hyperlinks to your reports
Routing reports on your intranet with Crystal Server
Using a viewer to read a report
Hosting your reports on
crystalreports.comIntegrating your reports with
salesforce.com
As organizations become more interconnected electronically, an emerging trend is to communicate more over the network than by passing around paper. In many cases, organizational intranets have become the communications medium of choice. Beyond the organization's borders, extranets and the Internet have assumed more important roles. Crystal Reports takes advantage of this trend. Report features, such as drill down and subreports, require the report reader to be online. It's not hard to drill down into a sheet of paper, but when you do, you don't see very much, and it tends to ruin the surface of your desk.
In this chapter, I discuss the various electronic means of distributing reports. The reports are distributed and accessed using a variety of tools. One of these ways, I mentioned briefly in Chapter 21, namely exporting to a static HTML page, visible on a local area network, a wide area network, or around the world on the World Wide Web. One of the really handy features of HTML is that it enables you to navigate from one page to another using hyperlinks. Here I describe how to add hyperlinks to a Crystal report. A brand new way to distribute reports is to make use of the crystalreports.com Web site hosted by Business Objects. It provides a secure repository for your reports that are always available to your authorized report viewers, as long as they have an Internet connection.
The flipside of report publishing is report viewing. Reports on crystalreports.com can be viewed with a common Web browser. Your readers can view reports that reside on a local network using the Crystal Reports Viewer. You can even attach a report to an e-mail message.
Web pages, whether they're designed to be viewed by a small group of people on a company intranet or by a worldwide audience on the Web, are implemented by using HyperText Markup Language (HTML). A report created in Crystal Reports can go online in several ways. Exporting to a static HTML page is the easiest but also the most limited. The only thing that gets exported is what's visible onscreen.
Warning
When you export a report to a static HTML page, take note of the word static. The data in the report is only a snapshot of the data at the time of the export. An exported report isn't updated when the data in the original report changes. To display the changed data, you have to export the report again.
For many applications, you don't need to go beyond static HTML. In those cases, exporting is as easy as 1-2-3. Well, actually, it's as easy as 1-2-3-4:
Open the report that you want to export, and display the screen — the main report or subreport — that you want to present to your online audience.
Choose File
Export. Then, from the submenu that appears, choose Export Report.
The Export dialog box appears.
From the Format drop-down list, select HTML 4.0. From the Destination drop-down list, select Disk File. Then click OK.
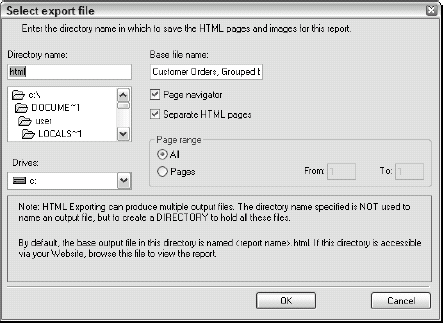
The Select Export file dialog box appears, as shown in Figure 22-1.
Choose the drive and directory where you want to place the HTML file, make a couple of additional selections as shown in Figure 22-1, and then click OK.
An HTML version of your report is created and stored in the directory you selected. From there, you can upload it to your Web server.
Warning
When you export a report to another format, such as HTML 4.0, you'll likely lose some of the formatting of the original report. Crystal Reports does its best to preserve the original formatting, but the appearance of the exported report probably won't match the original exactly. If you're not happy with how the exported report looks, you might have to make changes to the original to come up with a design that is less affected by the change of file type.
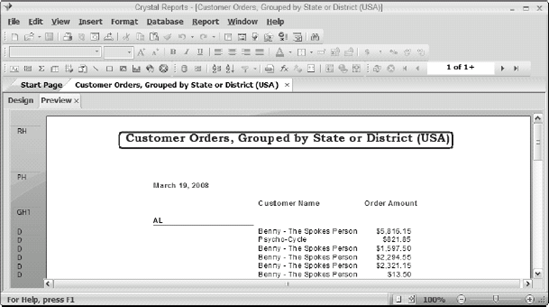
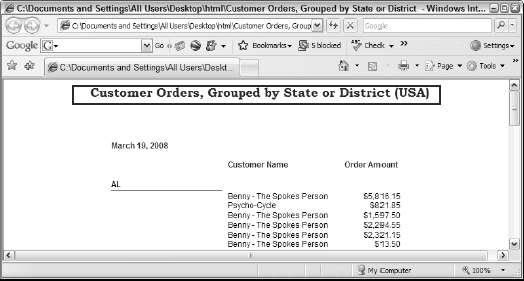
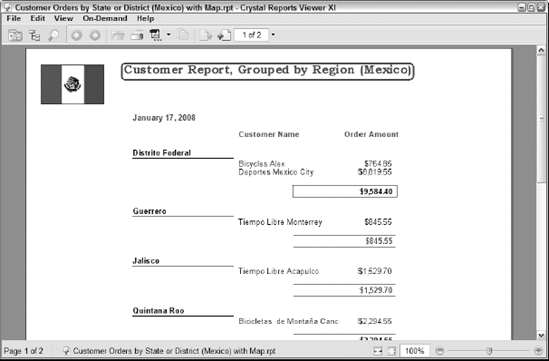
Figure 22-2 shows the top of the Customer Orders, Grouped by Region (Mexico) report as it exists in Crystal Reports. Note that the title is enclosed in a box with rounded corners.
After exporting the report to HTML 4.0, it looks like Figure 22-3.
The two reports look virtually identical except that the corners of the box enclosing the title are no longer rounded.
Note
More complex formatting features, however, such as cross-tabs and OLAP grids, might not translate as well in the exported report. Judge each case individually.
After you save your report to a disk file, you can upload the file to your Web server in the same way that you upload any other files that appear on your site.
One of the most valuable features of Web-based content is the capability to quickly move between pages by using hyperlinks. By clicking a hyperlink associated with a word, a phrase, or an image, a report reader can instantly display a different page that provides more detail.
Crystal Reports enables you to add hyperlinks to your reports without your having to become a HTML scripter. Here's how:

Alternatively, right-click the selected object and choose Format Field or Format Text.
The Hyperlink tab of Format Editor appears, as shown in Figure 22-4. If the Hyperlink icon on the Expert Tools toolbar appears dimmed, it probably means that you have not selected an object to anchor the hyperlink.
Select the type of hyperlink that you want.
For example, to link to a Web site, also type a Web site address in the Hyperlink Information text box.
Click OK.
The anchor object doesn't look any different, but now when you hover the cursor over your hyperlink anchor object, it turns into the familiar pointing hand, indicating that a click sends you somewhere else.
In addition to linking to a Web site, you can link to several places or even delete a link; refer to Figure 22-4. Here's a brief description of the options available:
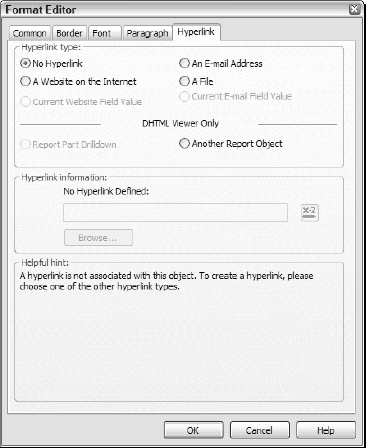
No Hyperlink: Removes a hyperlink from the selected object.
A Website on the Internet: Links to a Web site.
Current Website Field Value: Select this when you want to link to the URL contained as a value in the selected object. This option appears dimmed if no URL is contained as a value in the selected object.
An E-mail Address: Enables users to send e-mail messages to a recipient that you specify. When you select this option, the Hyperlink information area changes, enabling you to enter an e-mail address.
A File: Links to a file on the user's computer.
Current E-mail Field Value: Select this when you want to send an e-mail message to the address contained as a value in the selected object. This option appears dimmed if no address is contained as a value in the selected object.
Report Part Drilldown: Specifies which detail object is displayed when the user drills down on a report part. (I explain Report Parts in Chapter 20.) This type of hyperlink works only with DHTML (dynamic HTML) viewers, such as Internet Explorer 4.0 and above, and is dimmed if the source object you chose is not appropriate for drill down.
Another Report Object: Links directly to the object that the user specifies. The destination object might be in this report or in another report.
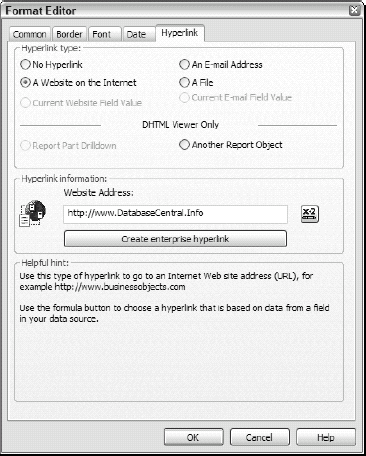
As a typical example of how to establish all of these hyperlinks, let's link to a Web site on the Internet. Follow these steps:
Open the source report and select the object that you want as the originator of the hyperlink.
Click the Insert Hyperlink icon.
The Hyperlink tab of Format Editor appears.
In the Hyperlink Type area, select the A Website on the Internet radio button.
In the Hyperlink Information area, fill in the URL of the Web site to which you want to link.
Figure 22-5 shows what Format Editor looks like at this point.
Click OK to establish the link.
When the cursor hovers over the source object, it turns into the traditional hyperlink-indicating pointer hand icon. Double-clicking the source object launches your default browser and displays the target Web site.
crystalreports.com is a report storage and distribution service hosted by Business Objects. You can upload your reports to crystalreports.com, where they will be available over the Web to any users whom you designate and issue passwords. Two editions are available:
Starter: Free but with limited capacity
Professional: Essentially unlimited but carries a monthly charge
Note
When you store your reports on crystalreports.com, only users that you authorize can view them.
To get started with crystalreports.com, you must first have some reports to upload and some users who you want to be able to see them. Then, do the following.
In your Internet browser, go to
crystalreports.com.There is quite a bit here.
If you're a registered user: Click LOG IN to get started.
If you're not a registered user, do the following:
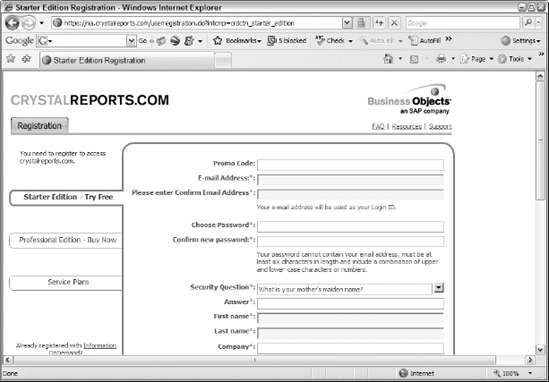
Click TRY IT FREE.
You're taken to the Registration page shown in Figure 22-6.
Choose between the Starter and Professional editions.
You can register for the Starter Edition by giving your contact information, or pop for the Professional Edition by giving the same information and then arranging for making the monthly payments.
Log in.
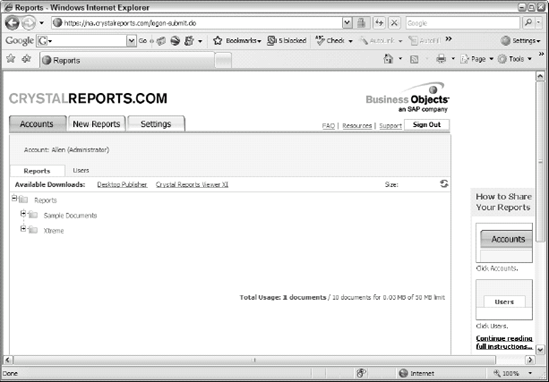
You go to the
crystalreports.commain page, as shown in Figure 22-7.
You can practice on some sample reports, as well as free downloads of Crystal Reports Desktop Publisher and Crystal Reports Viewer. I discuss them both later in this chapter. Crystal Reports Desktop Publisher is the tool you use to upload reports to crystalreports.com. Crystal Reports Viewer is the tool with which authorized users can view reports. It can be used by people on your local intranet or over the Internet by people anywhere in the world.
salesforce.com is an example of an on-demand customer relationship management (CRM) solution that delivers strategic sales and marketing information across organizational boundaries in large commercial organizations. crystalreports.com can be integrated into salesforce.com, adding business analytics capability. As a result, information from salesforce.com and information from an organization's other data sources can be combined on a single screen to give executives a strategic view of company operations. Information is displayed in a manner designed for quick, easy comprehension with customized reports, dashboards, and graphical renderings. salesforce.com is just one example. Many other business intelligence products include Crystal Reports as their report writer. Reports generated in any of these environments can be hosted on crystalreports.com.
Crystal Reports Desktop Publisher is a free utility that you can download from the Business Objects Web site. You can use it to upload to crystalreports.com the reports that you want to host there.
After you install Crystal Reports Desktop Publisher and launch it, you see the screen shown in Figure 22-8.

As an example, publish the Customer Orders by State or District (Mexico) report to crystalreports.com.
Put the files you want to upload to
crystalreports.cominto a folder by themselves.When you specify a folder to Crystal Reports Desktop Publisher, it uploads all the reports it finds in that folder.
Click the New Folder button in the Desktop Publisher.
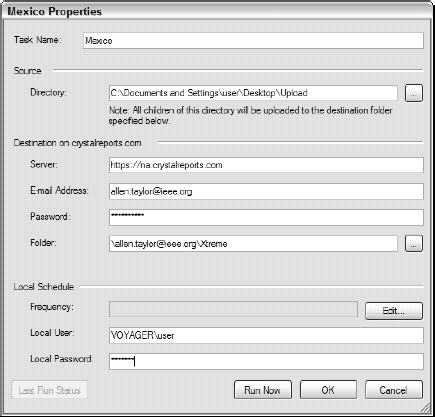
The Untitled Properties dialog box appears.
Fill in the fields in the Untitled Properties dialog box.
The address of the destination server has been filled in for you.
Specify the following:
The source directory of your upload folder
Your identifying e-mail address
Your
crystalreports.compasswordThe folder on
crystalreports.comwhere you want your report to go
When a dialog box pops up displaying your
crystalreports.comfolders, specify one of them.At this point, the Untitled Properties dialog box has been renamed to reflect the Task Name you entered, and should look something like Figure 22-9.
Warning
Be sure to fill in the Local Password field at the bottom of the dialog box with your logon password on your local computer. If you don't have a logon password, create one. Without such as password, Publisher cannot connect to
crystalreports.com. The upcoming Figure 22-10 shows the error message you receive if you don't enter a local password into the Properties dialog box.Finish in the properties window by doing one of the following:
Click Run Now to upload the contents of the upload folder immediately.
Click the Edit button to schedule an upload later.
Warning
When you use crystalreports.com, you are entrusting your valuable business information to Business Objects, an external organization. Clearly Business Objects takes its fiduciary responsibility seriously and protects your information from harm. However, technical difficulties can arise, no matter how well designed a system is. When that happens, your information might become unavailable to you, and you might see a message such as that shown in Figure 22-10.

After a report is successfully uploaded to crystalreports.com, it's available to users whom you authorize to view it.
You can create a list of authorized users by importing a CSV file showing each user's information. You can do this from the Users tab on the crystalreports.com main page as shown in Figure 22-11. The format you must follow in the CSV file is specified by a template you can view by clicking under the Browse button.

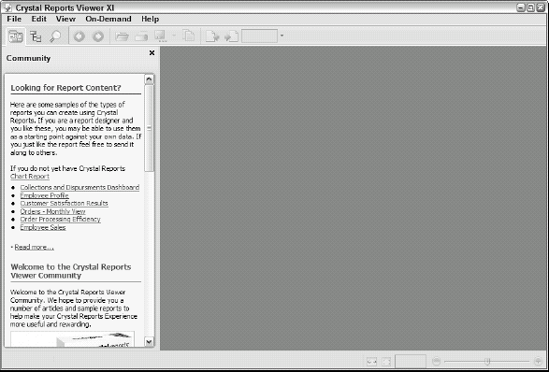
In order to create a Crystal report, you need to have Crystal Reports, either 2008 or one of its earlier versions. However, you don't need Crystal Reports to view a Crystal report. You can do that with the free Crystal Reports Viewer, which you can download from the Business Objects Web site. The Crystal Reports Viewer gives users most of the flexibility of Crystal Reports itself, but is not quite as interactive. You cannot refresh a report from the Viewer, and you cannot view reports that contain parameters. However, an organization with a small number of developers can distribute the reports they create to a large number of users very economically. When you launch the Viewer, you see something similar to Figure 22-12.
The Community panel (on the left) is your link to resources that help you get the most out of the Viewer. When you click any link there, your Internet browser takes you to the appropriate topic on the Business Objects Web site — maybe a sample report, or an article telling you how to perform a given operation. There is also a forum where you can ask questions and receive answers from other Crystal Reports Viewer users. As your familiarity with the product grows, you can switch roles and be the person who is helping rather than the person being helped.
You can open a report within the Viewer in several different ways. One way is the familiar one of choosing File
When you load a report into the Viewer, the Community side panel is replaced by the Contents side panel, as shown in Figure 22-13. In this case, the Contents side panel displays a map of report sections.
You can dismiss the side panel if you wish, to display the full width of the report, by clicking the X in the panel's upper-right corner. This is probably the mode that you want to operate in, as shown in Figure 22-14.
You want to be able to easily move through a multi-page report page by page. The Viewer gives you this capability with the page movement icons in the middle of the toolbar, just to the left of the display of which page you are on.
Click the right-pointing arrow to move forward through the report; click the left-pointing arrow to move back toward the beginning. Figure 22-15 shows what this looks like on page 5 of a 29-page report.


To jump directly to a report section, just click that node in the tree diagram in the Contents panel, which shows all the nodes in the report; see Figure 22-16.
Note
If the Contents side panel is suppressed, just click the Contents tab on the toolbar to redisplay it.

Moving to a hidden section
Some reports have hidden sections. You can find these sections and view what is contained in them, with the help of the Contents panel. Figure 22-17 shows a report that contains hidden details.
Notice the link icon to the left of all the state nodes in the tree. The link icon indicates a hidden section at that node. Click the link icon for the node of your choice to display the detailed information that is hidden in that section. Figure 22-18 shows one example.

Figure 22-17. Report with hidden details.

Figure 22-18. Hidden section of a report.
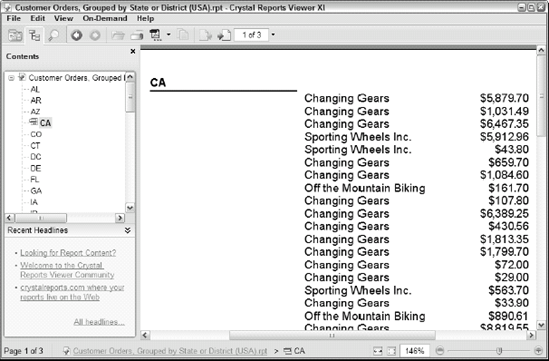
You can do for a section that is not hidden the same thing that you can do for a hidden section: namely, select it and display it all by itself. To do this, right-click the group heading for the group you want to isolate. A contextual menu displays, as shown in Figure 22-19.
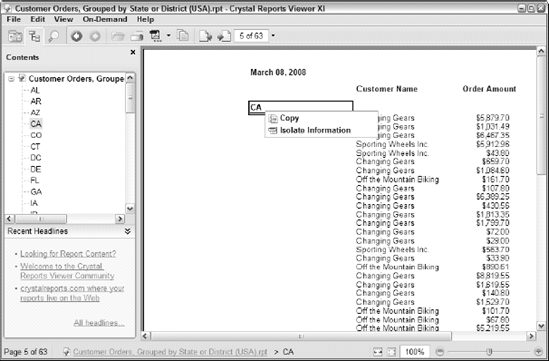
Choose Isolate Information from the menu. The section you choose is displayed, unadorned by headers and footers, and unaccompanied by any other sections.
In the lower right of the Viewer is a zoom slider that you can use to change the size of the report. The default size is set to 100, but you can make it bigger or smaller as shown in Figure 22-20.
To the left of the slider are the Fit Page and Fit Width icons. Clicking the Fit Page icon resizes the report page to fit entirely within the viewer. Clicking the Fit Width icon resizes it to fill the viewer horizontally, but not necessarily vertically.
Printing a report from the Crystal Reports Viewer is much like printing from any Windows application. You can choose from two options: Print Current Section and Print All (Include Hidden Sections). Select whichever of these gives you what you want.
E-mailing a report is easy. To attach your report to an e-mail, just choose File
From Crystal Reports Viewer, you can export a report in Microsoft Excel, Microsoft Word, or Adobe Reader format. Here's how:
Choose File
Export Current Section.Select one of the three available formats.
Select the directory you want to export to.
Verify the report name and export file type.
Click Save.
The report is exported in the specified format to the selected directory on your system.
To search for a word of phrase buried somewhere in a report, click the Search tab to display the Search side panel. Enter the search term or phrase and then click the Search button, as shown in Figure 22-21.
The Viewer scans the report and then displays the page number of each page upon which the target word or phrase appears.
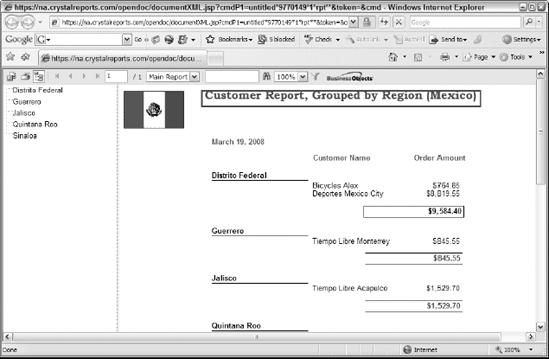
The cool thing about having your reports available on crystalreports.com is that any authorized user with an Internet connection can access them, using nothing more than an ordinary browser. Users don't need Crystal Reports or Crystal Reports Viewer. A report accessed from crystalreports.com using a browser looks something like Figure 22-22.