80 Applying Angles and Tension in Our Drawings
One day as my wife, Dee, and I were coming home from the tennis courts, we stopped along the country road so she could clip some reed-like plants for use in her basket making. While stopped, I, as usual, took up pen and pad and rather unthinkingly sketched what was before me — a multitude of things that were not a good setup composition-wise. I simply went through the motions of sketching. I got a lot of it down but it was a hodgepodge. Suddenly, I realized that if one of my students had done that, I would have reminded them of the rules of perspective and certainly because it was so fresh in my mind, having worked up a handout paper on angles and tension that week. So I corrected my sketch — several times — attempting to simplify and clarify things, aware that I was now drawing, not copying. The possibilities became infinite. I was no longer confused or intimidated by the array of bits and pieces — by the parts. I began to see the scene as a whole, with all the parts fitting together into what I thought of as landscape gestures.
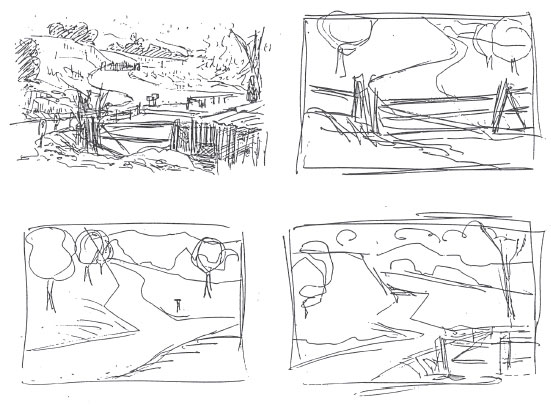
The subject was a landscape but the process of sketching it was the same as if it had been a live model. I make no special claims for the drawings as they are crude and quickly drawn. Their only purpose is to demonstrate a shifting from copying to creating. Betty Edwards (Drawing on the Right Side of the Brain) would have said “Shifting from the left side to the right side of the brain.”
How can we apply all this to figure drawing? On the following page I have reproduced a class drawing, and for the short time in which it was done, it is quite anatomically solid. But it reminds me of my first sketch of the hills —we were involved in copying, getting lots of this
and not enough of this.
![]()
In animation squash and stretch is one of our greatest tools. Drawing a stretch with these will in no way put the idea across. We have to learn to shift our mental gears so that when drawing a stretch, we lean less on our knowledge and infatuation of anatomy and simply draw a stretch.
![]()
Here is the drawing along with three sketches I made to suggest a simple and more direct approach to the problem of capturing the pose. I changed the angles of the arms, torso, and legs slightly to illustrate what I mean when I speak about using angles to clarify a pose or to bring out some desirable nuance of gesture. In one of the sketches I straightened out one whole side of the figure to show that an almost straight line can be used for a stretch and still retain some semblance of anatomy. Notice in one of the sketches I copied the angles of the lower legs, while in the other two sketches I varied them. Also notice how some sharp angled lines were used on the figure’s left foot to make it read clearly as it works against the right leg. The student’s drawing is a little nebulous in that area. As for tension in the drawings — imagine a large rubber band connected from hand to hand, foot to foot, knee to knee; hand to knee, head to foot etc. Tension is simply the stretching, pulling, elastic force, pressure, or exertion that takes place in a pose or an action. So in effect, to capture the essence of this pose, we would not merely be drawing the left hand and the left knee, but more important, the tension between them.
