
2. Working with Windows
In This Chapter
• Understanding views
In this chapter, you get a little extra bang for your buck because the information I present throughout most of this chapter applies to more than just Quattro Pro—it applies to almost every Windows program you use.
No, I’m not talking about your operating system—Windows 98, Windows XP, Windows 2000—but rather the windows—screens—available to you while you work in Quattro Pro. For example, suppose that you create a notebook that contains two sheets and you would really like to view both sheets simultaneously. Or, suppose that you have three notebooks open and you want to switch between them or view them side by side. Or suppose that you have Quattro Pro open and you receive a phone call from a colleague who wants to schedule a meeting, so you need to move Quattro Pro out of the way while you check your calendar. By properly managing windows, you can do all of these things, and you can use the techniques I describe to manage windows in most Windows-based programs.
Windows are not the only feature that affects what you see onscreen; you also can use the views available in Quattro Pro to gain some insight into a notebook. At the end of this chapter, I’ll show you the views available to you; although these views are specific to Quattro Pro, you’ll find that other Windows-based programs also have views, and the concepts are the same.
Working with Windows
The term window refers to some portion of your screen. Open programs appear in windows and files open in those programs also appear in windows.
Windows can be different sizes. When a window occupies all the space available on your screen, the window is maximized. When you can see only the title bar of a window, that window is minimized. And, as you’d expect, you can size a window somewhere between the maximum and minimum size; you can easily identify a window that is somewhere between maximum and minimum size because that window has its own title bar. In this section, I’ll show you how to control the size of the Quattro Pro window and the notebook file window.
What Size Is the Window?
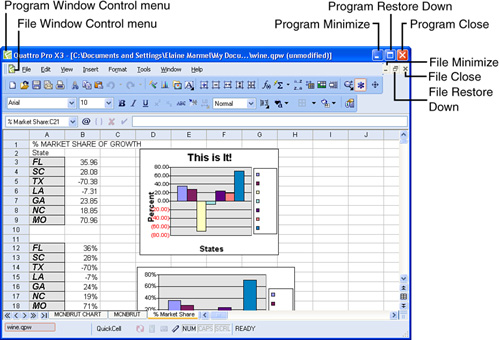
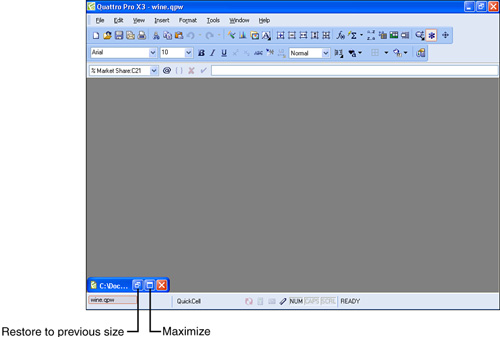
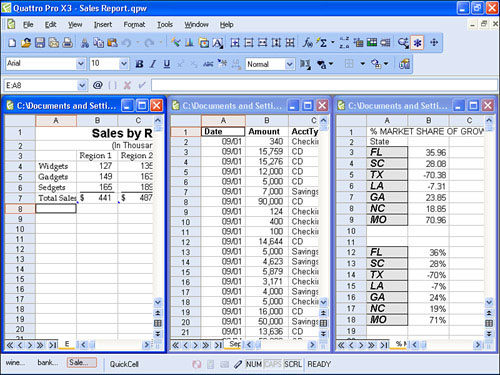
Compare Figure 2.1, Figure 2.2, and Figure 2.3. In Figure 2.1 and Figure 2.2, Quattro Pro fills the entire screen, and we say that Quattro Pro is maximized. But in Figure 2.3, Quattro Pro does not fill the entire screen, and you can see the background of my Windows XP desktop behind Quattro Pro.
Figure 2.1. Both Quattro Pro and the open notebook are maximized.
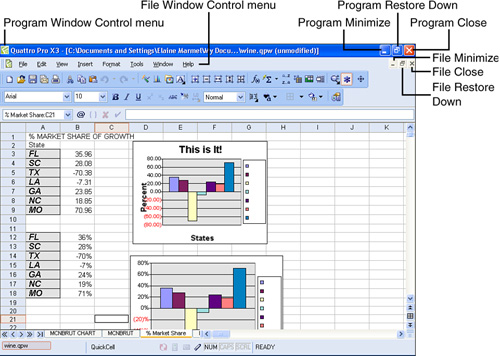
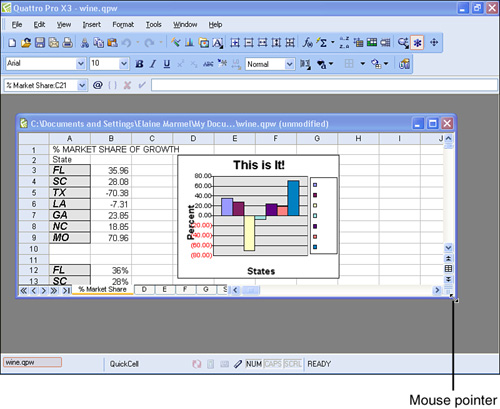
Figure 2.2. Quattro Pro is maximized, but the open notebook is not maximized.
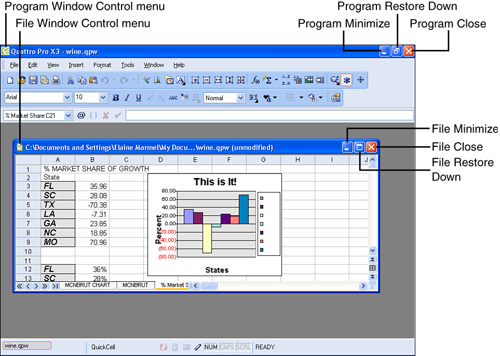
Figure 2.3. The open notebook is maximized, but Quattro Pro is not.
Every window has its own set of window control buttons. For program windows, the buttons appear on the right edge of the program’s title bar, and you have access to menu commands that perform the functions of these buttons if you click the Window Control Menu button, the leftmost button on the program title bar.
Finding the window control buttons for open files can be a little trickier. If a file is maximized within a program window like the file shown in Figure 2.1 and Figure 2.3, the file control buttons appear immediately below the window control buttons, on both the right and left sides of the file window. If the file is not maximized within a program window, like the file shown in Figure 2.2, the file has its own title bar and its window control buttons appear on either end of the file’s title bar.
You may also have noticed that some windows have a Maximize button and others have a Restore button in the same spot as the Maximize button. The button that appears depends on the whether the window is already maximized. If the window is maximized, you see a Restore Down button—the button that has two small squares in it (the squares are intended to represent a window, by the way). You use the Restore Down button to reduce the size of the window from its maximum to some smaller size. If, however, the window is not maximized, you see a Maximize button—the button that only one square on it—in the same location where the Restore button appears. You use the Maximize button to enlarge the window so that it fills all available space.
Minimizing, Maximizing, or Restoring a Window
You can minimize any window. When you minimize a program, an icon for the program appears in the Windows taskbar; in Figure 2.4, I minimized Quattro Pro by clicking the Minimize button on the Quattro Pro title bar, and you can see the Windows XP desktop.
Figure 2.4. When you minimize a program, an icon for it appears in the Windows taskbar.
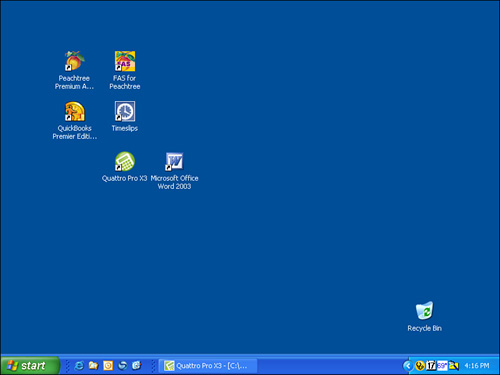
To redisplay any minimized program, click the icon in the Windows taskbar; the program reappears in whatever size it was before you minimized it.
You also can minimize a file within a program window; when you minimize a file within a program window, you see only the file’s title bar in the program window (see Figure 2.5).
Figure 2.5. When you minimize a file in a program window, you see only the file’s title bar.
To minimize a file, you click the file’s Minimize button. After you minimize a file, you can restore it to the window size it had before you minimized by clicking its Restore button. Or, you can maximize the file by clicking its Maximize button.
Tip

You can often determine what these buttons do if you hover your mouse pointer without clicking and without moving for two or three seconds. A small box appears, supplying the name of the button.
Resizing a Window
You’ve seen how to minimize or maximize a window, but I haven’t yet shown you how you can set the size of a window somewhere between its minimum and its maximum.
To set the size of a window, display that window and then click its Restore Down button to reduce it to a size that doesn’t fill the Quattro Pro window; at this point, the Restore Down button changes to the Maximize button.
You can now change the size of the window by dragging any edge of the window. To enlarge the window, drag outward, and to reduce the size of the window, drag inward. When you place the mouse pointer over any edge of the window, the shape of the mouse pointer becomes a double-headed arrow. If you want to change both the horizontal and the vertical size of the window simultaneously, drag any corner of the window, as you see in Figure 2.6.
Figure 2.6. To resize any window, drag any side of the window.
Arranging Windows
You’ll need to arrange windows when you open two or more notebooks in Quattro Pro simultaneously or when you create multiple views of a single notebook. See the next section, “Exploring Views,” for more information on views.
When you work with multiple notebooks or views, you can minimize one window to see another or you can tile or cascade the windows so that you can switch between files by clicking the title bar of the file you want to bring to the forefront.
To arrange windows, start by opening all the files you want to view or create the views you want to use. Then, open the Window menu and click Cascade to create the arrangement you see in Figure 2.7.
Figure 2.7. These windows are cascaded.
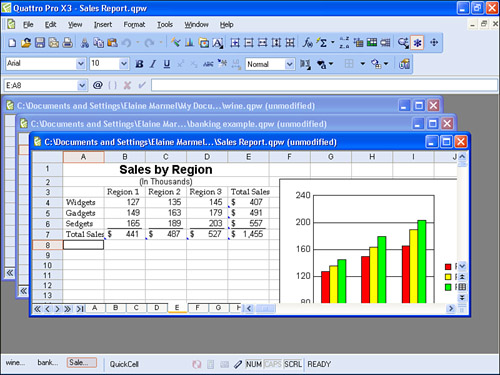
You can view any of these windows by clicking their title bars.
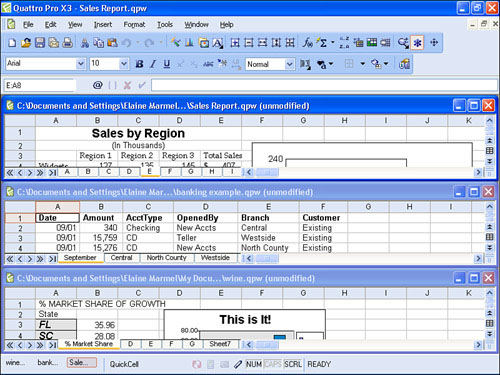
If you open the Window menu and click Tile Top to Bottom, you can create the arrangement shown in Figure 2.8. To work in any of these windows, click its title bar; the information shown in the Input Line reflects the selected cell in the active notebook. The active notebook is the one whose title bar you clicked.
Figure 2.8. Quattro Pro will arrange the windows in this type of configuration if you choose the Tile Top to Bottom command from the Window menu.
You also can tile windows across the screen by opening the Window menu and clicking Tile Side to Side (see Figure 2.9).
Figure 2.9. In this arrangement, Quattro Pro displays the windows from side to side.
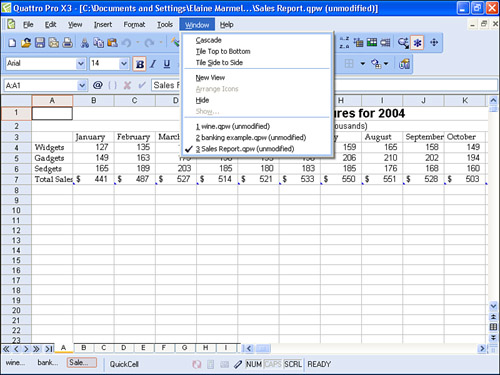
Although you can tile as many windows onscreen as you want, the law of diminishing returns kicks in when you try to display more than just a few windows. Although all the files will be open and visible, you’ll have a hard time seeing the data in the files. You may prefer to open all of the views and then switch between maximized views of each window by opening the Window menu and clicking the name of the notebook you want to view (see Figure 2.10).
Figure 2.10. You can easily switch between open notebooks and views using the Window menu.
Exploring Views
By default, Quattro Pro displays files in Draft view, and all of the figures you’ve seen in this book up to this point appear in Draft view. But Quattro Pro contains two other views that you may use regularly—the Page view and the Page Breaks view.
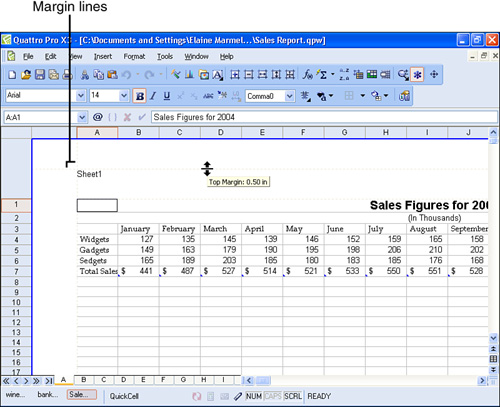
In Page view, you can see and adjust the margins—both the page margins and the header and footer margins. To adjust any margin, move the mouse pointer over that margin; when the pointer shape looks like the one shown in Figure 2.11, drag the margin.
Figure 2.11. You can use Page view to visually adjust margins.
Page Breaks view shows you where printed page breaks will occur (see Figure 2.12). Using Page Breaks view, you can make adjustments before printing; for example, based on the page breaks you see in Page Breaks view, you may choose to set up rows or columns that will appear on each page you print or change the size of paper on which you intend to print. Or, you may move page breaks. For details on setting up row or column headings, changing paper size, or adjusting page breaks, see Chapter 6, “Printing.”
Figure 2.12. Use Page Breaks view to help you identify additional page setup characteristics to set.


Quattro Pro contains one other view, the Objects Page view, which most beginners don’t use, so I’m not covering it in this book.
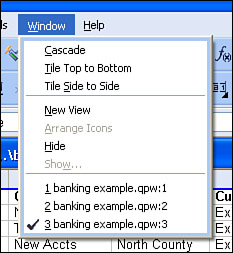
Earlier in this chapter, I mentioned that you can view different spreadsheets in the same notebook simultaneously. To do this, create views for each spreadsheet by opening the Window menu and clicking the New View command the same number of times as the number of spreadsheets you want to view. For example, suppose that you have a Banking notebook that contains information for three different area banks and you want to simultaneously view all three areas. Open the View menu and click the New View command three times. At the bottom of the Window menu, you’ll see three occurrences of the Banking notebook (see Figure 2.13).
Figure 2.13. Each view you create appears at the bottom of the Window menu, along with any open notebooks.
Caution

By default, Quattro Pro sets the top and bottom page margins to the minimum required by your printer. If you try to make either of these margins smaller, your printer probably won’t cooperate and will ignore your setting.
Tip
You may have noticed that the spreadsheet names are not letters, as you learned earlier. You can rename spreadsheets to something meaningful to you; see Chapter 4, “Editing in a Spreadsheet,” for details.
Then, use the Cascade command or the Tile Top to Bottom or Tile Side to Side command to view the windows at the same time and click a different spreadsheet tab in each view (see Figure 2.14).
Figure 2.14. Display different tabs of the same notebook in different views.
