Hour 8. Working with Multitouch and Other Input
What You’ll Learn This Hour:
• Making touch-first apps
• Using the Pointer events
• Using the built-in gestures using Gesture events
• Making use of the GestureRecognizer object
• Getting the most out of the keyboard
• Using the pen/stylus
• Performing character recognition when using ink
Touch is an important part of the Windows 8 experience. It isn’t required to use the operating system, but machines that have touch capabilities make using Windows 8 a joy. When we design our functionality and visuals, we need to account for touch; our apps need to be “touch first.” This is not “touch only”—the mouse is still king for the most precise pointing tool, and a standard keyboard is the fastest way to enter text. Another common input type is the pen. Windows 8 has excellent stylus support. We even see in this hour how to utilize the APIs for word recognition. So although we want to handle all types of inputs in our apps, we need to make sure our app is designed to be a touch-first app.
Making Our Apps Touch First
We need to be sure to accommodate touch by creating larger UI elements. Clicking a small target is easy with a mouse; tapping the same area needs to be just as easy. When designing for touch, the tiles need to be larger so that the user can accurately tap the desired item. The UI also needs to be set up in such a way that it prevents fingers from obscuring important information.
Apps also need to provide immediate visual feedback when a tap takes place. This feedback can include highlighting the current touch target. Apps should utilize physics effects such as acceleration and inertia to deliver a natural feel to panning (scrolling) interactions. Apps should also utilize snap points to help guide users know where the most useful states of our applications are.
Apps must be designed with the understanding that touch will be primary input method for our users, even for devices that have no touch support. The good news is, when we support touch, we get mouse and stylus/pen capabilities with no additional effort.
Designing apps to utilize touch requires a different approach than with more traditional inputs. With an indirect pointing device, such as a mouse, the device itself typically provides physical feedback to the user (such as when the user presses the left mouse button and then releases it with an actual mechanical click). In addition, the display might provide feedback, such as a button being clicked on a web page. For touch, the display is the single device to provide feedback; there is no indirect pointing device. Our fingers directly manipulate the controls and objects on the display. Thus, the display needs to not only handle the actual input, but also provide visual feedback to the user. No intermediary device can provide that tactile feedback.
In addition, touch does not have a hover state. The user either is touching the device or is not. A pen/stylus, mouse, and keyboard each provide a mechanism for hover or focus. So although we need to design apps to be touch first, we need to provide additional information for the nontouch input devices.
By adding visual feedback during interactions, our apps can help the user learn how the interactions affect the app. This appropriate visual feedback can give the user confidence in interacting with the system. Visual feedback enables the user to adapt and interact with the system appropriately. Windows 8 provides visual feedback when touch input is detected. This feedback cannot be disabled.
Apps need to provide an immersive experience to the user. Regarding touch, this is possible when we account for the targeting mechanism of touch and understand three limitations: the lack of accuracy when dealing with touch, the difficulties of occlusion when utilizing touch, and time mode changes.
Targeting
Targeting refers to how an app handles the actual contact of the finger to the display. We need to make our UI objects and controls easy to target. The elements must be large enough that the fingers can confidently select the target area. We need to analyze the entire contact area of the finger to determine the most likely object being targeting. When we have a group of items together, we need to make sure that, as the finger is sliding between the different objects, the current item is changing appropriately. The user can see that if he or she lifts the finger, that specific item in the group will be activated.
Accuracy
We need to provide some help for users as they are interacting with our app using touch. We can provide snap points to make it easier for the user to interact with the content by having the content stop at desired locations. When the user is panning, it is important to pan across a single axis even if the finger is actually moving in an arc across both axis.
Occlusion
When using touch, a finger can easily obscure other items on the display. To avoid this, elements must be sized large enough that the user can see at least part of an element even if the finger is directly on it. Any context menus or ToolTips should be open above the touch point, not below it. The user’s hand will obscure any UI elements displayed beneath the touch point. When we need to worry about precision, we should provide handles that are offset to improve accuracy. This can be beneficial when selecting text, resizing images, finding a scene in a movie’s timeline, and so on.
Timing
The elements on the screen that the user is manipulating should respond in real time as the user is manipulating the object. A direct correlation should exist between touching the display and having the element respond in some way. Instant feedback helps the user feel engaged and in control of the app. Time mode changes refer to causing the app to behave differently if the touch action happens quickly or slowly. We should avoid time mode changes except for when it is used to help the user learn or explore. An example is tapping and holding to get more information. Most of the time, we want the user to get immediate feedback when touching the screen.
Working with Multitouch
Now that we have discussed the what and why of touch, let’s discuss the how. Let’s see how we can effectively utilize touch and multitouch in our apps to help users feel in control of our apps.
If you are developing on a device without any touch, the Simulator can help in certain scenarios. More information on the Simulator comes in Hour 9, “Working with Location and Hardware Sensors,” and Hour 13, “Working with Fullscreen, Filled, Snapped, and Portrait Views.” The top four buttons (after the Minimize and Always on Top buttons) on the top right of the Simulator allow for touch, pinch/zoom, and rotation modes.
Fortunately, Windows 8 handles this out of the box when we utilize the Windows Library for JavaScript (WinJS) controls. It also handles this when we use the HTML intrinsic controls. Both follow the best practices for touch interaction. They provide visual feedback, animated physics effects, and standard interactions through default touch support. They provide both DOM pointer events and DOM gesture events. They also handle targeting. However, we can work with a low-level API to handle all the captured points. Plus, we can enumerate the devices available and check their capabilities through the Windows Runtime. This is done through the Windows.Devices.Input.PointerDevice namespace.
Allowing Zooming and Panning Using CSS
This first example covers how to allow elements to be zoomed and panned. This is done using CSS rules. To get started, let’s create a new Blank App project called ZoomAndPanExample. We can replace the body of the default.html page with the following markup:
<div id="area">
<img id="image" src="/images/large.png" draggable="false" />
</div>
We have an image for which we want to allow panning and zooming. The image is inside a container div with an id of area. The image itself has the draggable attribute set to false. The draggable attribute is a CSS3 standard used for dragging and dropping. We set it to off so that it doesn’t interfere with our gestures. We are using the container div because we want the image to be capable of zooming in and going past the edge of the screen. Any image can be placed in the images folder. The image included in the source code example, named large.png, is a 2,560×1,440 image. The default.css should have the following rule:
#area {
overflow: auto;
width: 100%;
height: 100%;
-ms-content-zooming: zoom;
-ms-content-zoom-limit-min: 50%;
-ms-content-zoom-limit-max: 600%;
}
This rule sets the overflow property to auto so that it allows scrolling. The width and height are set to take up the entire window. -ms-content-zooming will have no effect if the element doesn’t allow overflow in both the x-axis and the y-axis. The minimum limit and maximum limit specify how zoomed in (maximum limit) or zoomed out (minimum limit) an element can be. Setting the minimum limit to 50 percent means that the image can be smaller than the current window size. The default minimum value is 100%, and the default maximum value is 400%.
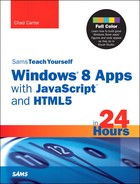
In running the app, the image is the standard height, and we see just the upper-left portion of the image. Simply turning on overflow and setting the -ms-content-zooming property to zoom turns on zooming for the element. We overrode the default minimum and maximum values, but that wasn’t required. Just by using the CSS properties, we were able to get panning with very little work. Figure 8.1 shows the results of zooming in and panning to the bottom right of the image element.
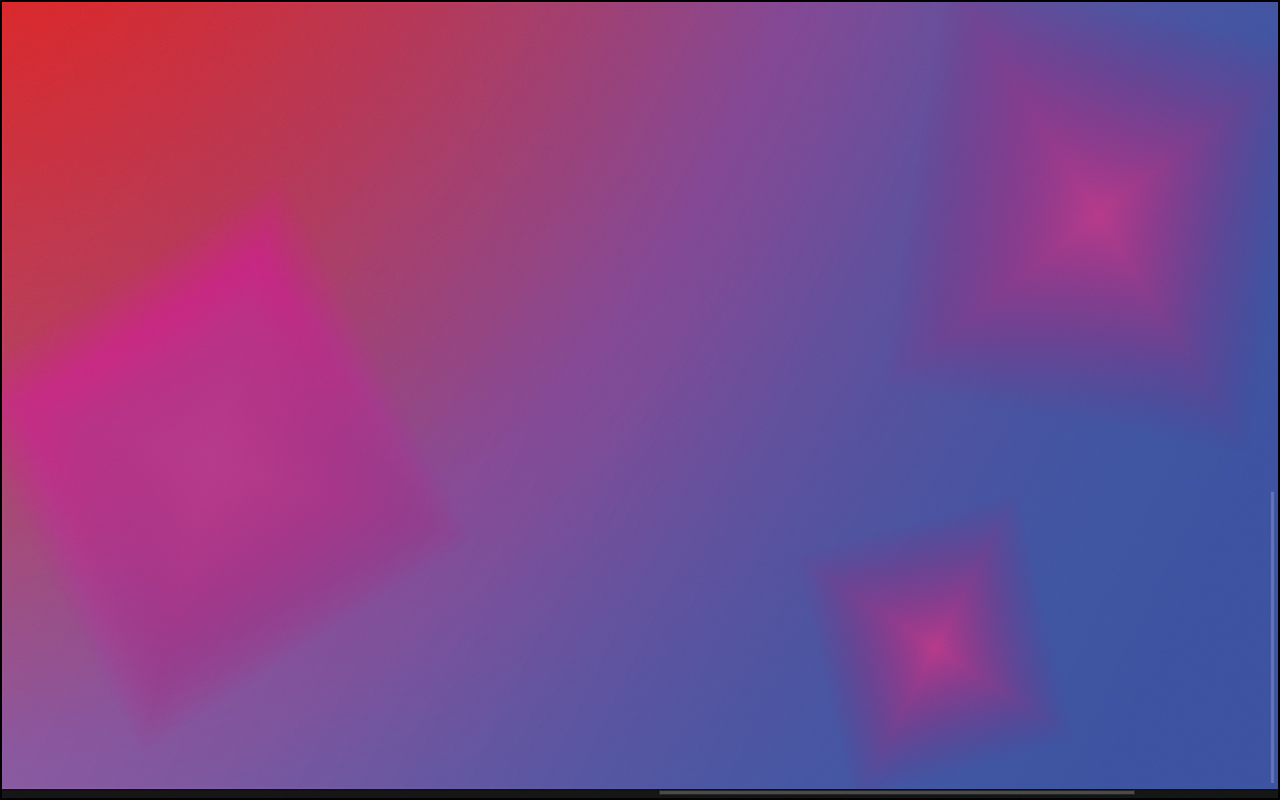
Figure 8.1. Simply setting some CSS properties enables zooming and panning with little effort.
If we want the image to default to having the entire image displayed, we can set up a rule for the image to have a width and height of 100%:
.image {
width: 100%;
height: 100%;
}
We can restrict panning across a single axis at a time by setting the -ms-scroll-rails property to railed:
-ms-scroll-rails: railed;
Finally, we could set snap points in our image. Snap points can help the user land on a specific point even if the gesture would have scrolled past it or not quite reached it. The snap type can be set to mandatory, which means any scrolling results in a position on one of the predefined snap positions. Conversely, the snap type can be set to proximity, which tries to find a snap point to use if it is within a certain threshold. However, if a suitable snap point isn’t found, the scroll position ends based on the physics calculations regarding the inertia of the scroll action. To set the scrolling to a mandatory snap point, we set the following rule:
-ms-scroll-snap-type: mandatory;
If we want to set specific snap points across the x-axis, we can add the following property and value:
-ms-scroll-snap-points-x: snapInterval(0%, 20%);
This forces the snap location to be at 0%, 20%, 40%, 60%, 80%, or 100%. The first parameter is the first snap position, and the second parameter is the distance between the snap points. These can be absolute values instead of a percentage. Similar properties exist for the zoom (zoom-limit, zoom-limit-max, and zoom-limit-min); they accomplish the same task when the user is zooming the element instead of panning.
If we don’t want the scroll bars to be displayed, we can turn them off by setting the following property on the #area CSS rule:
-ms-overflow-style: none;
We need to be careful, though, because this might cause issues for mouse users, who might not be able to easily scroll the image.
If we want to make sure an element does not allow panning or zooming, we can set the following property:
-ms-touch-action: none;
The valid values for the -ms-touch-action property are auto, none, pan-x, pan-y, pinch-zoom, and manipulation. The manipulation value is the same as “pan-x pan-y pinch-zoom”. This property determines how the default touch behaviors are handled for the contact. If a default touch behavior is not invoked, a DOM event is fired for the contact. This can be a pointer or a gesture event, which we cover next. CSS properties provide better performance over DOM events.
Working with Pointer Events
The pointer events are MSPointerDown, MSPointerMove, and MSPointerUp. This is similar to the built-in DOM events mousedown, mousemove, and mouseup. However, these should be used instead of the more traditional mouse events because they work with touch, mouse, and pen/stylus. The events give us a pointer object with an internal type of Windows.UI.Input.PointerPoint. With the events passing this object, we have access to position and rawPosition. position takes into account the latency and computation time between the time the user touches the screen and the time the system is notified of it, and it generates events for apps to listen for and then handle and draw to the screen appropriately. The system uses prediction to keep the apps responsive and make the feel of the app fast and fluid. The point data we get back is thus not the actual position. This is typically good. Sometimes, however, we want the real position. In these cases, we have access to the rawPosition data.
Each point has a pointer id. This pointerId provides a unique identifier for each contact point. Each point also has information on the actual pointer device (touch, mouse, pen/stylus) that caused this contact point. Through the PointerPoint object, we can get either the current point (getCurrentPoint) or the intermediate points (getIntermediatePoints). getCurrentPoint provides the last point data available. getIntermediatePoints provides a collection of points, from the last time point data was retrieved until this time. Enough information thus is available to make smarter decisions about what the user is trying to do. If we grabbed just the last point, we could miss important information about how the user was interacting with the app.
Pointer unifies all “pointing” devices into a single, consistent set of interfaces and events. This makes it easy to “code for touch and get mouse and pen for free.” If we need to get device-specific information for an app, we can also find that in the PointerPoint object. This includes contact geometry for touch, tilt and pressure information for pen/stylus, and buttons for mouse devices.
To demonstrate how to work with MSPointerDown, MSPointerMove, and MSPointerUp, let’s create a new Blank App project called PointerEventsExample. The body of the default.html file follows:
<div id="area"></div>
<textarea id="results"></textarea>
The default.css is simply setting the div to a default color and size:
#area {
width: 500px;
height: 500px;
background-color: red;
}
Finally, we add some JavaScript to actually listen for and handle these events. To start, we add the following code after the call to the app.start function:
document.addEventListener("DOMContentLoaded", init, false);
function init(evt) {
var area = document.getElementById("area");
area.addEventListener("MSPointerDown", pointerDown, false);
area.addEventListener("MSPointerUp", pointerUp, false);
area.addEventListener("MSPointerMove", pointerMove, false);
}
We simply call an init function after the DOM content is loaded. The init function adds the MSPointer* listeners. Next, we add the three listeners:
function pointerDown(evt) {
var results = document.getElementById("results");
area.style.backgroundColor = "blue";
var pointerPoint = evt.getCurrentPoint(evt.target);
var rp = pointerPoint.rawPosition;
results.value = "Down: (" + rp.x.toFixed(2) + "," + rp.y.toFixed(2) + ")";
}
function pointerMove(evt) {
var results = document.getElementById("results");
area.style.backgroundColor = "green";
var pointerPoint = evt.getCurrentPoint(evt.target);
var rp = pointerPoint.rawPosition;
results.value = "Move: (" + rp.x.toFixed(2) + "," + rp.y.toFixed(2) + ")";
}
function pointerUp(evt) {
var results = document.getElementById("results");
area.style.backgroundColor = "red";
results.value = "Up";
}
When we handle the pointerDown event, we set the background color on the div to blue. We then display the x and y coordinates of the rawPosition. On the pointerMove event, we set the background color of the element to green and display the x and y coordinates of the move. Finally, when the pointerUp event is raised, we handle it by resetting the background color to red and setting the results to Up. The code is simplistic, but it isn’t quite complete. If we run it, we see that it does function, for the most part. When we touch inside the div, it turns from red to green because we are moving. (It is very difficult to have our finger simply press down and not move.) And when we lift our finger, it turns back to red, so that is working as well. But if we press down on the div and then move off the area and lift our finger, the canvas stays green because we lifted after we left the area. The app did not get the MSPointerUp event. We can correct that by adding the following statement anywhere inside the pointerDown event handler:
area.msSetPointerCapture(evt.pointerId);
Similarly, we need to add the following function at the end of the pointerUp event handler:
area.msReleasePointerCapture(evt.pointerId);
The first function starts capturing the contact points even if the element isn’t in focus while the events are firing. As long as the down event was kicked off, we start capturing that pointerId associated with that capture point. Then in the pointerUp event handler, we stop capturing that pointerId. This way, when we touch and then move off the div before lifting our finger, the div is notified and can reset the color to red.
If we try to use the mouse, without even pressing down, the div turns green. The mouse is thus constantly firing the pointerMove event. We need to add logic at the top of the function to ignore any events unless a mouse button is pressed. Then the entire pointerDown event handler can be replaced with the following code:
var inMouseClick = false;
function pointerDown(evt) {
if (evt.pointerType === evt.MSPOINTER_TYPE_MOUSE
&& (evt.button !== 0 || inMouseClick))
return;
else if (evt.pointerType === evt.MSPOINTER_TYPE_MOUSE)
inMouseClick = true;
var results = document.getElementById("results");
area.msSetPointerCapture(evt.pointerId);
area.style.backgroundColor = "blue";
var pointerPoint = evt.getCurrentPoint(evt.target);
var rp = pointerPoint.rawPosition;
results.value = "Down: (" + rp.x.toFixed(2) + "," + rp.y.toFixed(2) + ")";
}
We declare a variable to hold if the mouse has been clicked. The first time the event is fired, the button property gets a value other than the default -1. However, the next event clears out that button property, so we need to know whether to continue to capture the move events. We set the inMouseClick flag to true if the left button is pressed. We can change the pointerMove function to the following:
function pointerMove(evt) {
//don't process if it is a mouse, but not a left click
if (evt.pointerType === evt.MSPOINTER_TYPE_MOUSE && !inMouseClick)
return;
var results = document.getElementById("results");
area.style.backgroundColor = "green";
var pointerPoint = evt.getCurrentPoint(evt.target);
var rp = pointerPoint.rawPosition;
results.value = "Move: (" + rp.x.toFixed(2) + "," + rp.y.toFixed(2) + ")";
}
If the mouse is kicking off the move event but the button wasn’t pressed, we just exit the function because we don’t want to process this event unless the left mouse button was actually pressed. Finally, we can change the pointerUp event handler to the following code:
function pointerUp(evt) {
var results = document.getElementById("results");
area.style.backgroundColor = "red";
results.value = "Up";
area.msReleasePointerCapture(evt.pointerId);
inMouseClick = false;
}
We simply set the inMouseClick flag to false because the user let go of the left mouse button. We have seen how to get the position and raw position of the contact points. Most of the time, we don’t need to worry about this sort of detail. When we need to know only which gesture was used, we can simply tie into the gesture events.
Working with Gesture Events
Gesture events are similar to pointer events. We can start listening for different gestures. The following gesture events are available for us to recognize out of the box in Windows Store apps:
• Tap
• Hold
• Change
Gestures fall into the following two categories: static gestures and dynamic gestures. Static gestures are single events, such as tap, whereas dynamic gestures are extended interactions that create a flow of gesture updates. The static gesture events are the MSGestureTap and MSGestureHold events. The dynamic gestures, such as slide, swipe, turn, pinch, and stretch, use the MSGestureChange event with the MSGESTURE_FLAG_BEGIN, MSGESTURE_FLAG_CANCEL, and MSGESTURE_FLAG_END flags. The handlers for these events get the MSGestureEvent object passed in. This includes information such as the scale, translation, rotation, and velocity. These values can then be used to apply a CSS 2D transformation on a particular element.
To show how to hook up to these gesture events, let’s create another demo, called GestureEventsExample. This can be created from the Blank App project template in Visual Studio. The default.html body contents can be replaced with the following:
<div id="area">
<img id="image" src="/images/large.png" draggable="false" />
</div>
The default.css needs only the following rule to keep CSS from handling panning and zooming:
#area {
-ms-touch-action: none;
}
To start with the JavaScript code, we can add the following inside the default.js file after the call to app.start:
document.addEventListener("DOMContentLoaded", init, false);
var image;
var actualSize = true;
var imageW, imageH;
function init(evt) {
image = document.getElementById("image");
imageW = image.width;
imageH = image.height;
image.addEventListener("MSGestureTap", toggleDimensions, false);
image.addEventListener("MSGestureHold", handleHold, false);
var gesture = new MSGesture();
gesture.target = image;
image.addEventListener("MSPointerDown", function (evt) {
gesture.addPointer(evt.pointerId);
}, false);
}
The init function, which gets called when the DOM content is fully loaded, gets a handle to the image element and stores the image’s width and height. We then start listening to two events: MSGestureHold and MSGestureTap. Both are static gestures. However, even to use the static gesture events, we need to do an additional step: to pass the contact id (pointerId) to the gesture. To do this, we create a local variable gesture by instantiating an MSGesture object. We then set the target of that gesture object to our image element. Finally, we create an event listener for the MSPointerDown event. We call out to an anonymous function immediately. Inside the anonymous function that handles the event, we simply add the pointerId value we get passed to the gesture object. This point data is allows the gesture object to determine how the points translate to a gesture.
Next, we can add the MSGestureTap event handler called toggleDimensions:
function toggleDimensions(evt) {
if (actualSize) {
//fit the image into the window
image.width = window.outerWidth;
image.height = window.outerHeight;
actualSize = false;
}
else {
//make it the actual size of the image
image.width = imageW;
image.height = imageH;
actualSize = true;
}
}
We initialized the actualSize flag to true when the app launched. This signifies that the image isn’t scaled down, so the entire image can be seen on the display at once. Because the image is larger than our resolution, we see only the top left of the image when actualSize is true. If we are in that mode, we modify the width and height properties on the image to scale the image down to match our screen resolution, and we flip the value of the flag. On the other hand, if we are already in the scaled-down view instead of the actual-size view, we reset the image width and height to match the actual width and height we stored when we first loaded the image. We also set the actualSize back to true.
The other event we need to handle is the MSGestureHold event. Let’s create the handler by adding the following code:
function handleHold(evt) {
evt.preventDefault();
if (evt.detail & evt.MSGESTURE_FLAG_BEGIN) {
toggleDimensions(evt);
}
if (evt.detail & evt.MSGESTURE_FLAG_END) {
toggleDimensions(evt);
}
}
For this simple project, the first line isn’t needed, but we are preventing this event from continuing to bubble up the stack because we are handling it. The hold gesture has three states: MSGESTURE_FLAG_BEGIN, MSGESTURE_FLAG_CANCEL, and MSGESTURE_FLAG_END. In this particular example, we are concerned only with the MSGESTURE_FLAG_BEGIN and MSGESTURE_FLAG_END states. The handleHold function will also get called for the MSGESTURE_FLAG_CANCEL state, in which the user holds but then moves before lifting the finger. We simply want to toggle the dimensions of the image when the MSGestureHold event begins. We then toggle it back when it has ended, even if the user canceled it. We are basically creating a peek to see the other view; when we stop holding, we want it to go back to the original state. This is different from the tap event we handled earlier. For the single tap event, we want to immediately toggle the view. For a hold, it is temporary for however long the user holds down the finger (or pen or mouse). Note that, in many scenarios, we would want different results to occur if the user canceled the hold. Be aware that the end flag is sent along with the cancel flag when the gesture is canceled. In the next section, we explore how to register for an event that is fired only when the hold completes successfully.
If we run the project at this point, we see the image loaded on the screen, but just as in the last example, only the top portion of the image is displayed. If we tap (or click) the image, the toggleDimensions method is called and we see the entire image on our display. We can tap again to make the image its full size. We can also tap and hold to have it toggle the view for us, but when we either lift our finger or cancel the hold by dragging away, the view reverts to the way it was.
Very little effort went into handling the tap and tap-and-hold gestures. Next, we handle the scale, pinch, and translate interactions on our image. To begin, we need to add the following line inside the init function:
image.addEventListener("MSGestureChange", handleChange, false);
Now we can add the handler called handleChange to our code:
var rotatingOrScaling = false;
function handleChange(evt) {
if (evt.rotation > 0 || evt.scale !== 1)
rotatingOrScaling = true;
else
rotatingOrScaling = false;
// Get the latest CSS transform on the element
var matrix = new MSCSSMatrix(evt.target.style.transform);
if (rotatingOrScaling) {
evt.target.style.transform = matrix
// Apply Scale
.scale(evt.scale)
// Apply Rotation
.rotate(evt.rotation * 180 / Math.PI);
}
else {
//no inertia allowed on translation
if (evt.detail == evt.MSGESTURE_FLAG_INERTIA)
return;
evt.target.style.transform = matrix
// Apply Translation
.translate(evt.translationX, evt.translationY);
}
}
We create a flag to determine whether the event is causing a rotation or scaling. If it is, we want to handle those transactions differently than the typical translate (move) gestures. This isn’t required—we could have these combined, but this shows how we can gain more fine-tuned control. We set the flag to true if the rotate and scale properties have any nondefault properties (0 and 1, respectively). We then use the CSSMatrix function, which is still being worked on in the standards body—and that’s why we are using the MSCSSMatrix version. This function takes a transform value, which is exactly what we get passed into the MSGestureChange event. We set the matrix that was just created to a variable aptly named matrix. We do not discuss linear algebra or matrix math in this book, but it is important to know that matrix math enables us to combine multiple actions, such as translation (movement), rotation, and scaling, in an object. Fortunately, the system does all the heavy lifting, in that information is stored in the transform property; from that, we can create this matrix. When we have the matrix, we can perform operations such as scale, translate, and rotate on it. This is done by multiplying the matrices. Matrix multiplication is not communicative, however. Multiplying a matrix with a rotation matrix and then with a translation matrix gives entirely different results than using the same values but multiplying them in the opposite order.
For the purposes of this demo, we simply apply the scale to the matrix and then apply the rotation. We could also apply the translation here, but to demonstrate a little more control, we handle translations separately. This way, as the user is scaling and rotating the item, he or she won’t inadvertently move it to a new location. Of course, this might be bothersome to nimble-fingered users, but it provides controls to users who aren’t as dexterous. If we aren’t rotating or scaling, we do apply the translation matrix in a separate step. Before we do, though, we check to see if the MSGESTURE_FLAG_INERTIA flag is set. If the PointerPoint that was just passed in was generated from an inertia calculation, we ignore the point when applying the translation. This way, we don’t easily shove the image off the screen with a vigorous flick of the finger.
Let’s change the way the toggleDimensions function works now that we have transformation information being set from the handleChange function. We need to declare a variable called transform immediately above the toggleDimensions function:
At the end of the first condition, which checks to see if actualSize is true, we can store the current transform and then reset the existing transform to reset the image:
//store current transform
transform = evt.target.style.msTransform;
evt.target.style.msTransform = new MSCSSMatrix();
Finally, at the end of the else part of the condition, we need to reset the transform to what it was originally:
//reset to transform
evt.target.style.msTransform = transform;
Now if we run the app, we can see that our tap and hold gestures are still in place, but now we can also move the image by dragging it. We can also rotate it and scale it at the same time. If we try to flick the image off the screen, it proves to be difficult because we are ignoring the inertia values. To see how the inertia affects our scaling and rotating gestures, quickly scale down and rotate the image. The image becomes extremely small, to the point that it might not even be visible; no way is offered to tap it to bring it back. Let’s make a final tweak to this demo to make sure the image isn’t getting scaled down or up too far.
Above the comment // Get the latest CSS transform on the element in the handleChange function, let’s add the following code:
var MIN_SCALE = .25;
var MAX_SCALE = 2;
var scale = evt.scale;
if (evt.scale > MAX_SCALE)
scale = 1;
else if (evt.scale < MIN_SCALE)
scale = 1;
We are declaring our desired minimum and maximum scale values. Next, we set a new scale variable to what we are getting passed to us from the event. If the scale amount is out of our threshold, we reset it to 1. The final necessary changes are to ignore any scale values when we are getting inertia events and to replace evt.scale with scale in the rotatingOrScaling condition:
if (rotatingOrScaling) {
if (evt.detail == evt.MSGESTURE_FLAG_INERTIA)
scale = 1;
evt.target.style.transform = matrix
// Apply Scale
.scale(scale)
// Apply Rotation
.rotate(evt.rotation * 180 / Math.PI);
}
else { ... }
With those changes in place, we will get a nice fast rotation effect if we get inertia events, but the scaling and the translating will be ignored. Figure 8.2 shows the image being scaled and rotated.
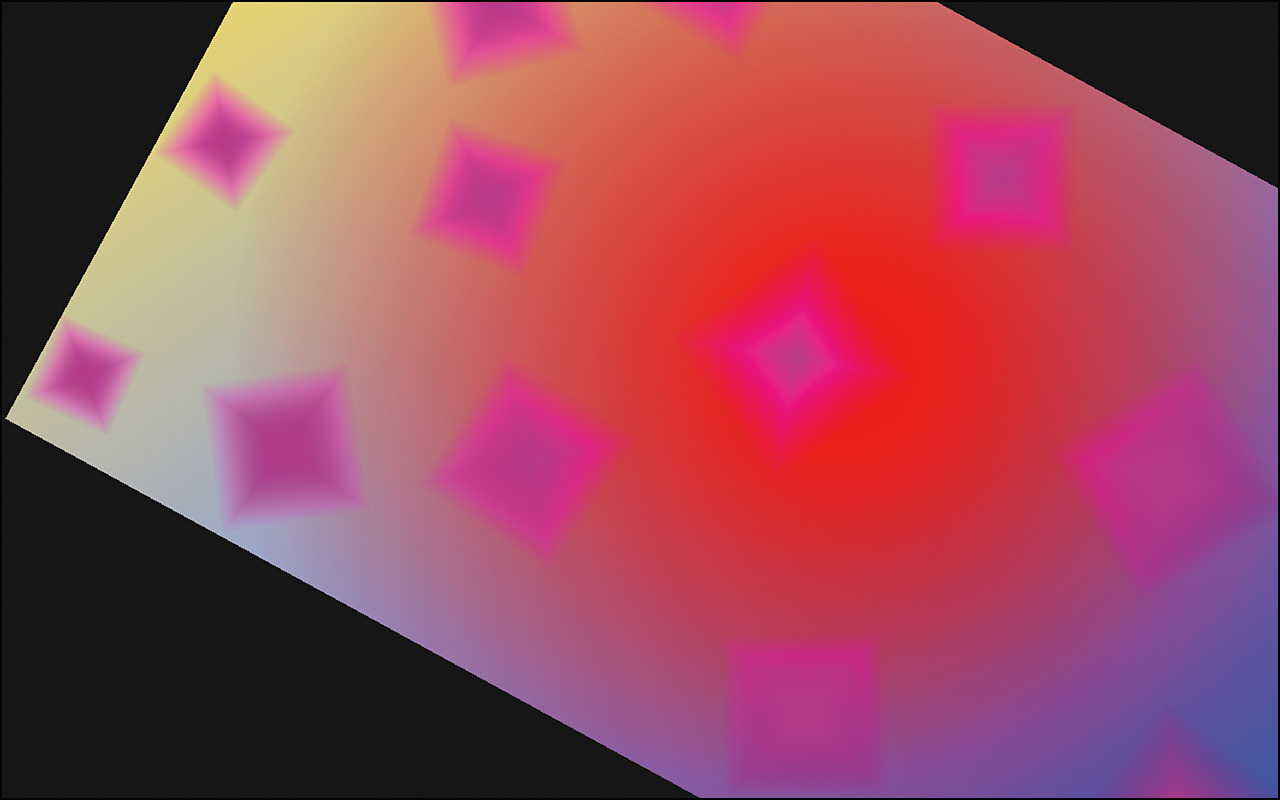
Figure 8.2. Using gesture events, we can rotate, scale, and translate our elements.
Working with the GestureRecognizer
With both the DOM pointer events and the DOM gesture events, WinJS handles targeting for us. The majority of the time, using CSS or these events provides what we need. If we want to create our own gestures or handle the raw data in some other way, we can utilize GestureRecognizer. The GestureRecognizer class is part of the Windows Runtime itself. It works in a similar way as the gesture events we just looked at.
GestureRecognizer enables us to handle scenarios when we need to detect and work with multiple gestures inside a single element. This can be important when making a game using the canvas element.
GestureRecognizer uses componentized gesture detection based off PointerPoints. The getPoints function gets the most recent point; the getIntermediatePoints function gets a collection of all the points since the last time we called it. The points are then handed off to the processMoveEvents function so that it can detect which gestures are being performed. The GestureRecognizerExample shows how to tell the gesture recognizer object which gestures we are looking for in the GestureSettings property:
var gr = new Windows.UI.Input.GestureRecognizer();
gr.gestureSettings =
Windows.UI.Input.GestureSettings.manipulationTranslateRailsX |
Windows.UI.Input.GestureSettings.holdWithMouse |
Windows.UI.Input.GestureSettings.crossSlide |
Windows.UI.Input.GestureSettings.rightTap |
Windows.UI.Input.GestureSettings.hold |
Windows.UI.Input.GestureSettings.drag |
Windows.UI.Input.GestureSettings.tap;
The GestureRecognizer class provides a few more options for us with gesture events (such as right-tap and cross-slide). The example omitted other options, including rotate, scale, and translate. This demo focuses on the options we haven’t seen yet. Much like the gesture events, we can listen to manipulations. This is done through the manipulationstarted, manipulationupdated, and manipulationcompleted events:
gr.addEventListener("manipulationstarted", manipulationStartedHandler, false);
gr.addEventListener("manipulationupdated", manipulationDeltaHandler, false);
gr.addEventListener("manipulationcompleted", manipulationEndHandler, false);
As with the gesture events, the event handlers are passed in the PointerPoint objects with all the information for which we need to do any custom processing. We thus have multiple ways to get to the raw data. Besides the manipulations, GestureRecognizer enables us to handle the cross-slide event and the right-tap event. The cross-slide event occurs when the finger selects an item by moving in a straight line. When the movement is small, it is simply a cross-slide. But when the movement continues past a threshold, it becomes a drag gesture. This is evident on the Windows start screen. We can select a live tile by doing a cross-slide motion, but if we continue, the tile pops out of place and we start dragging it around the screen. A right-tap works like the press-and-hold action we saw when we looked at the gesture events. However, a right-tap gets activated only when the holding action completes. If the user cancels the hold, the right-tap is not called.
As with the gesture events, for this to work, we must listen for the MSPointerDown event and then pass the currentPoint we get to the Gesture Recognizer’s processDownEvent function. In addition, we need to do the same process with the MSPointerMove event and pass intermediatePoints to the processMoveEvents function of the Gesture Recognizer. This enables the object to crunch the data to determine which gestures are being performed. Each event that we can handle and then pass to the Gesture Recognizer appears here:
var pointerSink = document.getElementById("PointerSink");
pointerSink.addEventListener("MSPointerDown", function (evt) {
gr.processDownEvent(evt.currentPoint);
}, false);
pointerSink.addEventListener("MSPointerMove", function (evt) {
gr.processMoveEvents(evt.intermediatePoints);
}, false);
pointerSink.addEventListener("MSPointerUp", function (evt) {
gr.processUpEvent(evt.currentPoint);
}, false);
pointerSink.addEventListener("MSPointerCancel", function (evt) {
gr.processUpEvent(evt.currentPoint);
}, false);
The pointerSink element is simply a div that has the highest z-order and that we make cover the entire screen to catch all the interactions. The CSS for the div follows:
#PointerSink
{
position:absolute;
top: 0;
left: 0;
width:100%;
height:100%;
}
The demo app writes to a text area when different gestures occur. When a general manipulation starts, the text is cleared out. It is also cleared out if a right-tap occurs. Any other captured event simply writes out to the text area. The complete code for this example can is located in Hour08GestureRecognizerExample.
Supporting Mouse and Keyboard
The MouseCapabilities class inside the Windows.Devices.Input namespace enables us to retrieve the properties exposed by the mouse (or multiple connected mouse devices). First we instantiate a new Windows.Devices.Input.MouseCapabilities object. Then we can check to see if a mouse is present by calling the mousePresent property on the object. We can also check for a vertical mouse wheel and a horizontal mouse wheel by checking the verticalWheelPresent and horizontalWheelPresent properties, respectively. We can determine the number of buttons a mouse has by checking the numberOfButtons property. We can even check whether the buttons are swapped by checking the swapButtons property. We don’t discuss any mouse events because they are widely documented on the Internet. Plus, we should always be using the pointer events anyway. After all, when we code for touch, we get mouse for free. The event information we get passed to our pointer handlers also provides information on which buttons (if any) are currently pressed. We cover how to check that in the next section when we discuss the stylus/pen because it, too, has buttons
The keyboard class is called KeyboardCapabilities and is also in the Windows.Devices.Input namespace. Besides physical keyboards, Windows 8 provides two different software keyboards. The first is the onscreen keyboard Soft Input Panel (SIP). The purpose of this is to emulate most of the functionality of a physical keyboard. The second is the touch keyboard (SIP). The touch keyboard is different, in that it isn’t trying to emulate an actual hardware keyboard as the onscreen keyboard is doing. Instead, it wants to provide a different layout based on the current context. For example, it appears only when an editable field gets focus. If the onscreen keyboard is being displayed, the touch keyboard is not displayed. The great thing about the touch keyboard is that if we use the HTML5 input types, the keyboard uses scoped views, which means the layout will be appropriate for the specific input type. For example, if we want a textbox that provides a scoped view for URL input, we can simply use the url type on our input element:
<input type="url" name="url" id="url" size="50" />
The SoftwareKeyboardExample project under Hour08 shows the different input types in action. When working with the software keyboards, we need to handle the Showing and Hiding events exposed by the Windows.UI.ViewManagement.InputPane object so that we can handle when the keyboard is displayed. We want to make sure that the field that has focus is visible. Figure 8.3 shows the SoftwareKeyboardExample running. It has a blue div that takes up 25 percent of the space and an orange div that takes up the majority of the application space, at 55 percent. The input elements need to be visible even when software keyboards are present. Some are off the screen because they have only 20 percent of the display to render. Finally, after the group of input elements, we have two more div elements. The last div has been turned into an input control, with the contenteditable attribute being set to true and the role being set to textbox. In addition, we turned on spell check by simply setting the spellcheck attribute to true.
Figure 8.3. The SoftwareKeyboardExample sample app.
The only JavaScript in the project is just to show how we can capture keyboard events. When trapping keyboard events, we can listen for keypress, keydown, and keyup. In our example, we are waiting after the actual key is pressed to grab the actual character value. For games, it is more appropriate to listen to the keydown event to continually get the event called while the key is being pressed. The JavaScript we have in the project follows:
document.addEventListener("DOMContentLoaded", init, false);
function init(evt) {
var customtextbox = document.getElementById("customtextbox");
customtextbox.addEventListener("keypress", handleKeyPress, false);
}
var data = "";
function handleKeyPress(evt) {
data = data + evt.char;
var sniffer = document.getElementById("sniffer");
sniffer.innerHTML = toStaticHTML(data);
}
In the handler, we simply pass the actual key strokes to the div with the id of sniffer. It is wrapped in the toStaticHTML method, to ensure that no bad script can be injected.
When we tap into the input box or our custom contenteditable textbox, the keyboard is shown and moves the input box that has focus above the software keyboard. Figure 8.4 shows how the same app automatically handles scrolling when an editable content box gets the focus. It also shows the results of the handleKeyPress event handler. No additional code was needed for this particular example. All the CSS in the project is strictly for styling.
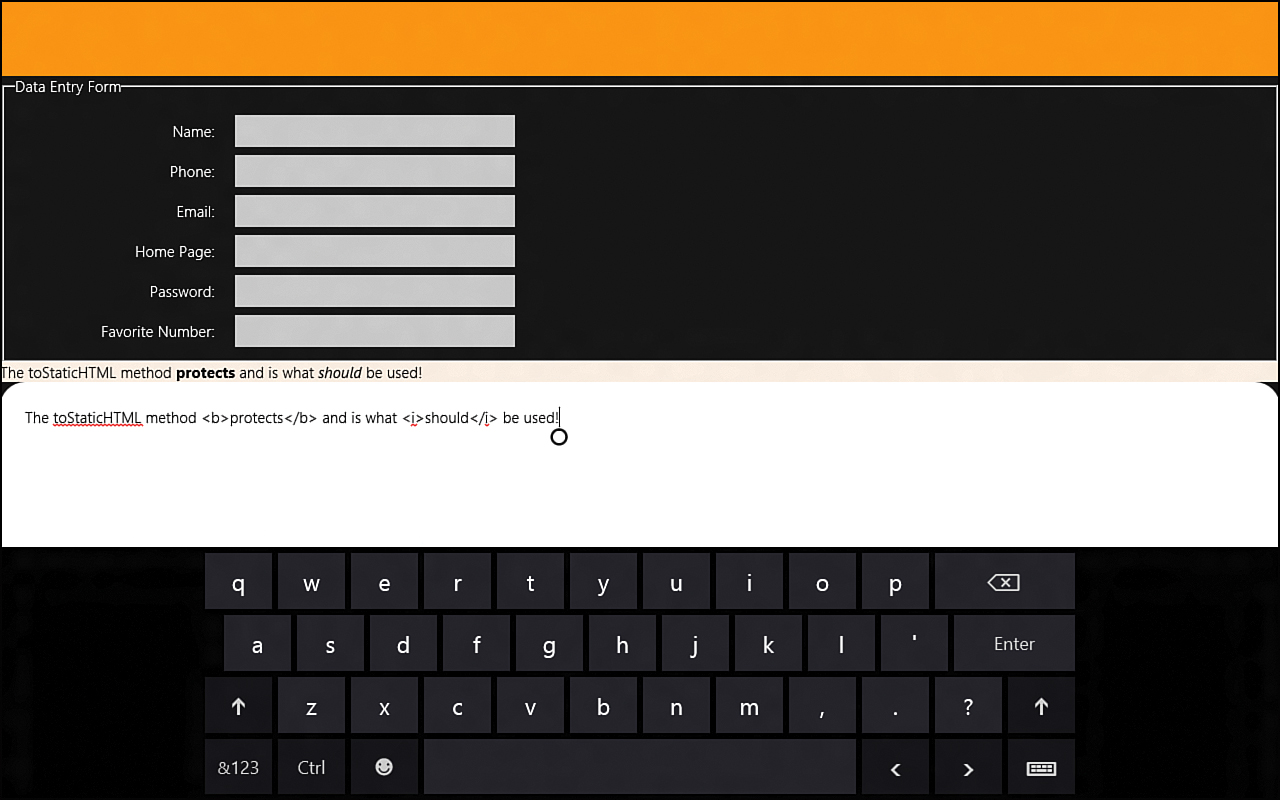
Figure 8.4. The touch keyboard is being used to enter content into the custom div that was marked with the contenteditable attribute. Spellchecking is also set. The sniffer div is being populated by listening for the keypress event.
The tabindex values should be set on all interactive UI elements that are not in the tab order automatically. The tabindex HTML attribute accepts integer values. Setting the tabindex attribute allows screen reader users to navigate around the interactive UI elements by using the Tab key. Any element that can be tapped needs to also allow the user to invoke it with the Enter button or the Spacebar button. The arrow keys on the keyboard must be set up to properly allow inner navigation between child elements. When an app first starts, the main element that the user will likely interact with first should automatically have the focus. For our sample project, we explicitly set the name input field to have focus with the autofocus attribute:
<input type="text" id="name" name="name" autofocus="autofocus" />
Besides being able to navigate the app using the Tab and arrow keys and activating UI elements by using the spacebar and Enter keys, users should be able to access commands and controls by using keyboard shortcuts. The keyboard shortcuts are called accelerator keys and consist of the Ctrl key and a letter key. However, shortcut keys should not be the only way to perform a task. We want to make sure that we design our apps to be touch first, but to equally support every other input device. In general, anything in our app should be manipulated by any input device and shouldn’t rely on a particular device. The code can be found under Hour08SoftwareKeyboardExample.
Using the Stylus or Pen
Fortunately, by writing our code to make our app a touch-first app, we get pen for free, just as we got mouse for free. However, when discussing ink, it is hard to think about it without thinking about recognition—that is, translating the ink strokes into actual letters and words. Microsoft’s inking capabilities are second to none. Many current form factors ship with a stylus/pen, and many more will in the near future. This technology will continue to get better, but it is pretty amazing how well the engine can recognize words.
Try It Yourself: Creating an Inking Example That Includes Recognition
1. Let’s create a new Blank App project called InkExample.
Inside of default.html, we replace the contents of the body element with the following:
<canvas id="canvas" width="1280" height="760"></canvas>
<input id="results" type="text" />
2. We will be writing on a canvas object and then will use gestures to get our app to either clear the canvas or recognize what we wrote and put what it thinks in the resulting textbox.
3. The CSS rules to add to default.css are very simple:
#canvas { -ms-touch-action: none; }
#results { width: 1280px; }
4. We are disabling the default touch actions because we are handling them ourselves. We also set the width of the textbox to match the width we set for the canvas.
The minimum resolution Windows 8 supports is 1,024×768. Most existing tablet devices that include a stylus/pen have their maximum width at 1,280px. Most devices coming out will support 1366px width or higher. This app could have been based on the FixedLayout project template, to better support different resolutions. The FixedLayout project template was discussed during Hour 2, “Trying Out File | New | Project.”
5. Now that we have the HTML and CSS set up, we can get to the meat of the example, which resides inside the JavaScript. We can add the following code to the default.js file under the app.start function:
var canvas;
var ctx;
var w;
var h;
var gesture;
var inkManager = new Windows.UI.Input.Inking.InkManager();
var currentContactId = -1;
document.addEventListener("DOMContentLoaded", init, false);
function init(evt) {
canvas = document.getElementById("canvas");
ctx = canvas.getContext("2d");
w = canvas.attributes['width'].value;
h = canvas.attributes['height'].value;
ctx.lineWidth = 5;
clearCanvas();
canvas.addEventListener("MSPointerDown", beginWriting, false);
canvas.addEventListener("MSPointerMove", write, false);
canvas.addEventListener("MSPointerUp", stopWriting, false);
canvas.addEventListener("MSGestureTap", recognizeText, false);
canvas.addEventListener("MSGestureHold", clearStrokes, false);
gesture = new MSGesture();
gesture.target = canvas;
}
6. We declare some variables that we will be using, including the inkManager, which provides all the magic for us. We initialize the contact id to -1 because nothing is currently touching the screen. When the content is loaded on the DOM, we call the init function, which sets up the canvas element. It also clears the canvas, as we see shortly. It wires up pointer events so that we can write to the canvas and gesture events so that we can initiate the recognize text functionality if the user taps the display or clears out the pen strokes we have stored if the user does a hold gesture. Finally, we create a gesture object and set the target of the gesture to the canvas element.
7. To begin, let’s make the clearCanvas function, which simply draws a white rectangle that covers anything else that was previously there. If we were using the ui-light.css style, we could use the clearRect function because it clears it to transparent black, which would make the canvas white like the background. We are using the ui-dark.css style, though, so we use the following code:
function clearCanvas() {
ctx.fillStyle = "white";
ctx.fillRect(0, 0, w, h);
}
8. Next, we implement the pointer handler for the MSPointerDown event. We call this function beginWriting:
function beginWriting(evt) {
//add pointer id to gesture
if (evt.pointerType !== evt.MSPOINTER_TYPE_PEN) {
gesture.addPointer(evt.pointerId);
}
//don't allow more than one contact
if (currentContactId !== -1)
return;
if (evt.pointerType === evt.MSPOINTER_TYPE_TOUCH)
return;
canvas.msSetPointerCapture(evt.pointerId);
inkManager.processPointerDown(evt.currentPoint);
var rawPos = evt.currentPoint.rawPosition;
ctx.beginPath();
ctx.moveTo(rawPos.x, rawPos.y);
currentContactId = evt.pointerId;
}
9. To start, we add to the MSGesture object we created any points that didn’t come from the stylus/pen. This handler is called for any pointer events, regardless of whether they are from the mouse, the stylus, or the user’s finger. At the end, we set the currentContactId to the current pointerId of the contact we are processing. At the beginning, we ensure that the currentContactId still has its initial value because we do not want to allow multiple inputs at the same time. We simply return and ignore any other pointer events that occur while we are writing. Because we have handled the touch contact point, we also return whether the current event was kicked off due to a touch point. We don’t want our fingers writing; only the pen or mouse is allowed to write in this example.
We have seen the msSetPointerCapture in the past, and the purpose is the same. If the contact moves out of the area, we still want the points captured. Very similar to how we passed the points to the gesture object, we also pass these stylus or mouse points to the InkManager’s processPointerDown function. This pattern should be familiar by now. Because we are working with precise input, we want the actual rawPosition data, not the predicted values provided by position. We call beginPath on our context and then move (without drawing) the position of the path to the rawPosition x and y values we received from the contact point.
10. Now that we’ve started writing, we can handle the actual MSPointerMove event by writing the following handler:
function write(evt) {
if (evt.pointerId !== currentContactId)
return;
inkManager.processPointerUpdate(evt.currentPoint);
var rawPos = evt.currentPoint.rawPosition;
ctx.lineTo(rawPos.x, rawPos.y);
ctx.stroke();
}
11. The very first check we make is to ensure that we are handling only the contact point that was initially started. If another contact point was made, we ignore it by exiting the function. Just as we passed in the points to the processPointerDown call, we are passing in the current point to the processPointerUpdate function of the Ink Manager. We then draw a line from our current position to the position that was just passed to us in this event. The Ink Manager thus has nothing to do with the display. We simply pass it points, and it stores them internally. We then use the same points to draw the lines on the screen.
12. Next, we can handle the MSPointerUp event by writing the following code:
function stopWriting(evt) {
if (evt.pointerId !== currentContactId)
return;
canvas.msReleasePointerCapture(evt.pointerId);
inkManager.processPointerUp(evt.currentPoint);
var rawPos = evt.currentPoint.rawPosition;
ctx.lineTo(rawPos.x, rawPos.y);
ctx.stroke();
drawAllStrokes();
currentContactId = -1;
}
13. As with the update handler, we immediately bail out of the function if it isn’t the pointer id we are interested in. At the end, we reset the contact id so that it is captured when the user starts writing again. We release the pointer capture for the canvas element and call the processPointerUp function on the Ink Manager. This causes the Ink Manager to store the actual stroke information of the line we just drew. We draw a line to this final point and call a function that makes the lines softer, with less jitter, called drawAllStrokes. So the app has two modes of drawing. The first is the immediate drawing, which we are seeing now and occurs during the pointer down, move, and up events.
14. The second mode this app uses to draw clears the canvas and then loops through each stroke the Ink Manager contains to redraw them using a Bezier curve. It removes any jitter and smooths out the strokes the user created:
function drawAllStrokes() {
clearCanvas();
inkManager.getStrokes().forEach(function (stroke) {
var first = true;
stroke.getRenderingSegments().forEach(function (segment) {
if (first) {
ctx.moveTo(segment.position.x, segment.position.y);
first = false;
}
else {
ctx.bezierCurveTo(segment.bezierControlPoint1.x,
segment.bezierControlPoint1.y,
segment.bezierControlPoint2.x,
segment.bezierControlPoint2.y,
segment.position.x,
segment.position.y);
}
});
});
ctx.stroke();
ctx.closePath();
}
15. The InkManager provides a getStrokes function. For each stroke the inkManager contains, we can call the getRenderingSegments. For each segment, we can use the segment information to call the bezierCurveTo function on the context of the canvas element. If it is the first point of the segment, we first move the context position to the start of the segment. After all the segments have applied to the context, we draw the lines by calling the context stroke function. Finally, we close the path.
16. If we comment out gesture event listeners (that call recognizeText and clearStrokes), our app will run and we can start writing on the canvas with the stylus/pen or the mouse.
17. Let’s uncomment those gesture event listeners and then add in the handlers. To start, we create the clearStrokes function, which is the event handler for the gesture hold event:
function clearStrokes(evt) {
// Iterate through each stroke.
inkManager.getStrokes().forEach(function (stroke) {
stroke.selected = 1;
});
inkManager.deleteSelected();
results.value = "";
ctx.beginPath();
drawAllStrokes();
}
18. The clearStrokes function simply loops through all the strokes inside the Ink Manager and selects each one. It then calls the deleteSelected function to remove them. The Ink Manager enables us to write code to actually select the strokes, but this book doesn’t cover that. The upcoming “Further Exploration” section gives some examples that do. After strokes are deleted from the Ink Manager, we clear any value we have stored in the results textbox. Then we use drawAllStrokes to clear the canvas to white. No strokes are actually drawn because they were just deleted!
19. The final piece of code to complete this example is the code that looks at what was written and displays the text of the strokes in the results textbox. The recognizeText gesture event handler is called when the hold gesture event is raised:
var isAsync = false;
function recognizeText(evt) {
if (isAsync)
return;
if (inkManager.getStrokes().size === 0)
return;
isAsync = true;
var currentText;
var recognitionTarget;
recognitionTarget = Windows.UI.Input.Inking.InkRecognitionTarget.all;
inkManager.recognizeAsync(recognitionTarget).done(
function (recognitionResults) {
inkManager.updateRecognitionResults(recognitionResults);
currentText = "";
recognitionResults.forEach(function (recognitionResult) {
currentText += recognitionResult.getTextCandidates()[0] + " ";
});
results.value = currentText;
isAsync = false;
},
function (e) {
results.value = "recognize error " + e.number.toString();
isAsync = false;
}
);
}
20. We are using asynchronous functions, so we need to make sure we don’t try to recognize text if it is already in the process of trying to do so. That is, we don’t want to call the recognizeAsync function if it hasn’t returned from the last time we called it. To handle this, we add an isAsync variable and initialize it to false. We then check to see if it is false. If it is, we can continue with the function. If there aren’t any strokes to try to recognize text from, we exit the function. Otherwise, if the Ink Manager has strokes, we set the recognitionTarget to be all the strokes. Besides all, the other options are recent and selected. We pass this target into the recognizeAsync method. The recognizeAsync method does not automatically update the existing results, so we can pass recognitionResults to the updateRecognitionResults function to get the updated results. The recognitionResults contains each written word. The getTextCandidates function returns all possible candidates for that particular word. We loop through each result and then pull only the first possible word from the getTextCandidates function. The word is added to the results window. If an error occurs, we write the error number to the results window instead. Whether an error occurs or the function succeeds, we set the isAsync variable back to false so that the next time the user taps to cause the app to recognize the text, the function is executed. If we didn’t have the isAsync flag, the inkManager would throw an error if we tried to recognize text before the last request to recognize that the text was completed.
21. When we run the app, we now have full text recognition. To clear the text, we just tap and hold. If we want to kick off the recognition process to display the results in the textbox, we just have to tap the display. We have created an app that uses gestures for commands, as well as accepts ink input. Figure 8.5 shows the results of the work.
Figure 8.5. Even with poor penmanship, the ink recognition API does a great job of determining what the text should be.
Further Exploration
We discussed many things regarding input in this hour, but we also didn’t touch on a lot of items. For example, sometimes we need to allow content to be panned across while zooming into a particular element. We discussed how to pan and zoom in a single element, but we didn’t cover how that is handled when that one item is in a collection of items. Perhaps we want to pan across the collection of items and then zoom into a particular item. The sample “Input Panscroll and Zoom Sample” is a great resource to see how to handle that situation. Scenarios 4 and 5 in the sample are relevant to this discussion.
More info on the GestureRecognizer class can be found at http://msdn.microsoft.com/en-us/library/windows/apps/windows.ui.input.gesturerecognizer.aspx.
We discussed some theory regarding touch first, but this article, “Guidelines for Visual Feedback,” in the Microsoft documentation, is excellent: http://msdn.microsoft.com/en-us/library/windows/apps/hh465342.
For querying the devices attached to the machine and determining their capabilities, the following article, “Identifying Pointer Devices,” will be of interest along with the “Input Device Capabilities Sample”: http://msdn.microsoft.com/en-us/library/windows/apps/hh465379.
When discussing ink, we didn’t show ways to select the strokes. This can be very powerful, and any serious inking app needs to have it. The following article, “Responding to Pen and Stylus Input,” has excellent information: http://msdn.microsoft.com/en-us/library/windows/apps/hh700425.
The Windows SDK samples of interest for this hour are
• Input device capabilities sample
• Input DOM pointer and gesture event handling sample
• Input ink sample
• Input instantiable gestures sample
• Input manipulations and gestures (JavaScript) example
• Input panscroll and zoom sample
• Input touch keyboard text input sample
Summary
We have another hour of jam-packed information behind us. Fortunately, most of the examples in this hour handled edge cases. Utilizing the WinJS controls and HTML intrinsic controls makes many of these very straightforward and even easy to accomplish. We discussed the theory and terminology behind making apps touch first. We covered targeting, accuracy, occlusion, and timing. We showed how to use CSS to have an app zoom and pan the elements with very little effort.
We looked at pointer events and saw how to capture the down, up, and move events. That laid the foundation for gesture events. We explored the built-in gestures and we also examined how to tie into the change events to obtain transformation information such as scale, rotate, and translation. Then we took a look at the GestureRecognizer, which is a low-level API that is part of the WinRT itself. It provides an event for cross-slide and right-tap. We also saw how to tie into the raw manipulations.
We covered how to use the onscreen and touch keyboards and how to trap specific keys. We saw how the HTML5 controls drive the way the touch keyboard is displayed. We even discussed how to create a textbox control and have it enable spellchecking and cause the touch keyboard to be displayed.
Finally, we ended the hour with an example application in which we can write to the screen using a stylus and then have the app recognize the characters that were written. We combined the gestures covered earlier in the hour with handling stylus/pen input. At this point, we know how to handle multitouch, mouse, keyboard, and pen/stylus. We now know how to tie into pointer and gesture events, as well as how to inspect the raw point data when needed.
Q&A
Q. Should I use pointer events, gesture events, or the Gesture Recognizer?
A. Gesture events and the Gesture Recognizer depend on the down pointer event, so the pointer event must be used if either the gesture events or the gesture recognizer is used. Using both might also be beneficial if the cross-slide gesture is needed in addition to the hold gesture. If CSS is an option for the app, that will produce the best performance.
Q. Can I programmatically show or hide the onscreen or touch keyboards?
A. No. The system determines when they should be displayed, and the user effectively closes them when selecting an element that doesn’t allow input. To get the keyboard to show, the element must be set with contenteditable set to true.
Q. How can I tell if the right mouse button is pressed?
A. The button information is passed to the pointer events. The left mouse button has an id of 0, and the wheel button has an id of 1. The right mouse button has an id of 2. To handle the condition of both a mouse and the right mouse button pressed, the following condition is used inside the pointer event:
if (evt.pointerType === evt.MSPOINTER_TYPE_MOUSE && evt.button === 2) { ... }
Workshop
Quiz
1. For Windows Store apps, should the context menus should be displayed below or above the touch point?
2. We need to write conditional logic when dealing with input devices such as a mouse, a stylus/pen, and touch. True or false?
3. What needs to be passed into the MSGesture object’s addPointer function?
4. What is the difference between the position and rawPosition properties of the PointerPoint object?
Answers
1. The context menus should be displayed above the touch point. If they are displayed below it, they will be hidden by the rest of the hand.
2. False. We can detect the different input devices, but the majority of our logic works as long as we write for touch first.
3. The MSGesture object’s addPointer function takes the pointer id from the MSPointerDown event:
element.addEventListener("MSPointerDown", function (evt) {
gesture.addPointer(evt.pointerId);
}, false);
4. When we get a PointerPoint object passed to our events, we can use the position property to get a nice prediction value to account for latency. The rawPosition property is the exact touch point that was hit with no prediction in place.
Activities
1. After looking at Microsoft’s “Input Panscroll and Zoom Sample” sample code, create your own control that allows panning between multiple images and enables each image to be rotated. Utilize mandatory scroll snap points.
2. Extend the SoftwareKeyboardExample JavaScript code to handle the Backspace key being pressed during the handleKeyPress event handler. When the Backspace key is pressed, modify the sniffer innerHTML to remove the last added character.
3. Convert the InkExample to use the code from the Fixed Layout project template that was created in Hour 2. Modify the HTML and styles so the canvas is centered on the page regardless of the resolution of the app.