
Preserving Shadows
The ‘shadow catcher’ technique - designed to preserve the natural shadows of a subject
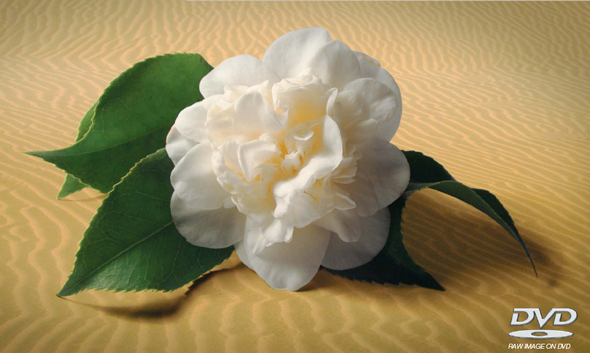
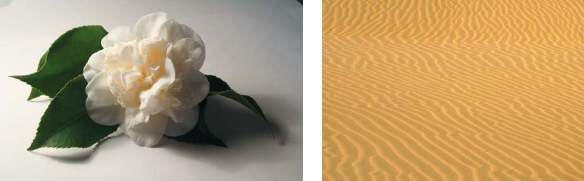
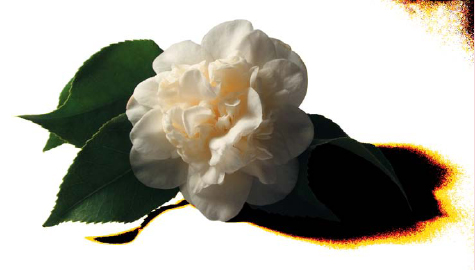
The flower for this project was photographed (using a digital compact) on a cold winter’s morning in the temperate hills of Victoria whilst the sand (shot on Kodachrome film) hails from the Great Indian Desert in Rajasthan. Unlikely bedfellows, but with a little craft the two can lie together comfortably within the same frame - but only if the shadow (created by a not-so-subtle 75 watt globe and a couple of pieces of white paper) is captured with all of its subtlety and delicately transplanted to its new home in the desert.
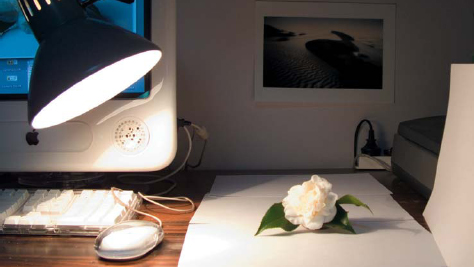
Capture your subject against a plain white backdrop. For bigger subjects you just need a bigger backdrop. Professional studio photographers photographing full length models use a curved backdrop that extends from beneath the model’s feet to the far wall in one continuous arc. If the white backdrop is to appear white then the backdrop has to be lit as well as the model. The surface should be smooth so the texture of the backdrop is not transplanted along with the shape of the shadow. In this project the white backdrop (a few sheets of printing paper) is separated from the subject using a mask and then placed in the ‘Multiply’ blend mode to make it invisible. The shadow which is not white blends with the new background.
Botanical Health Warning: The delicate petals of the flower can be cooked, frazzled or fried by the heat of a tungsten lamp in just a few minutes. Be prepared to work quickly or use soft window light as a low-temperature alternative.
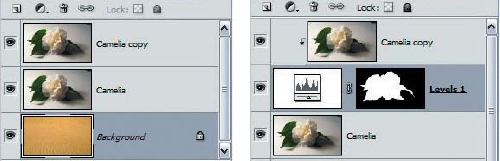
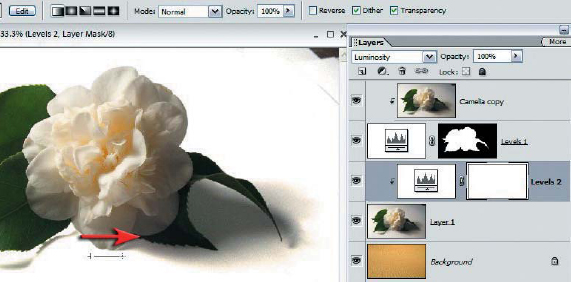
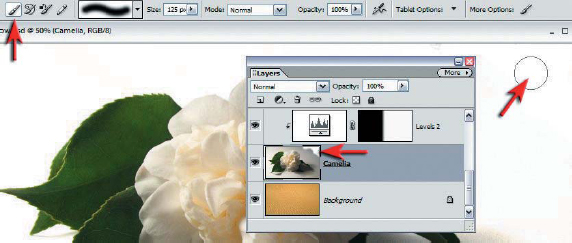
1. Place the subject on its own layer above the new background and then duplicate this layer. Add a levels adjustment layer between the two layers and ‘Group’ the top layer with this adjustment layer. Create an accurate mask that hides the background of the top layer. Switching off the layer directly above the background may make this task easier.

PERFORMANCE TIP
Use any combination of the selection techniques outlined in the previous projects or for really tricky selections consider investing in a Wacom graphics tablet. This allows you to paint using a pen instead of your mouse with the Selection Brush Tool.
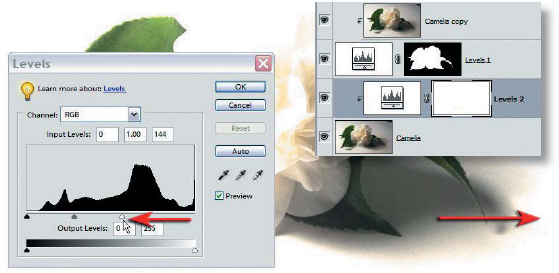
2. Group a levels adjustment layer, this time above the Camelia layer. Now move the highlight slider to the left to clip (or render white) all of the levels that are not part of the shadow on the right side of the image. Ignore the left side of the image for the time being.
PERFORMANCE TIP
Holding down the Alt key as you move the white slider in the Levels dialog box will give you an accurate idea of when the backdrop becomes 255 white.
3. The levels adjustment that has been applied to the right side of the image will clip some of the delicate shadows on the left side of the image. To restore these delicate shadows you will need to mask this side of the image from this overly aggressive levels adjustment. Use the Gradient Tool with the ‘Linear’ and ‘Black, White’ or ‘Foreground to Transparent’ options (if black is the foreground color) to draw a short gradient in the center of the image from left to right.
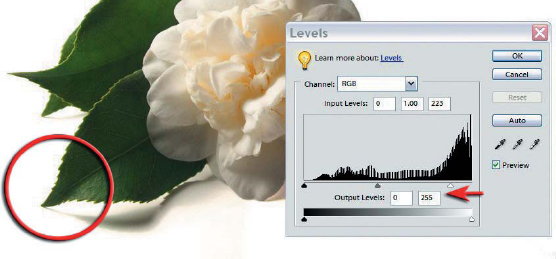
4. Create another levels adjustment layer (grouped with the other adjustment layer) and concentrate on making the left side of the image white whilst leaving the shadows intact. Be careful not to clip the really subtle shadows just beneath the tip of the leaf. When this has been achieved draw a gradient in the opposite direction to prevent the right side of the image being adjusted a second time.
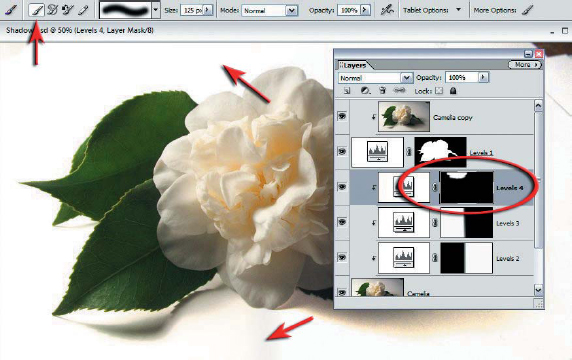
5. A third adjustment layer can be used to render any remaining gray areas of the backdrop white. Fill the adjustment layer with black and then paint with white to clean the backdrop selectively.
6. Any details that cannot be clipped using the levels adjustment layers can be removed by painting them white on the base layer of the clipping group. Although this is considered destructive editing it should be remembered that this layer has also been duplicated and these pixels could be retrieved if necessary from the top layer.
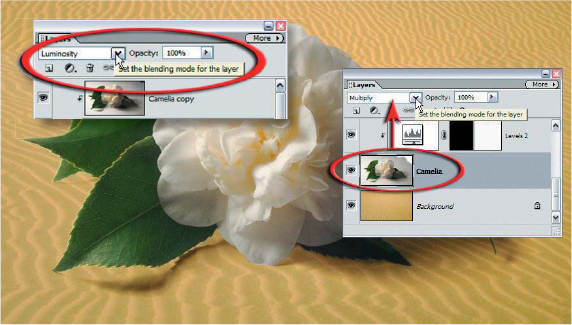
7. Switch the blend mode of all three adjustment layers to ‘Luminosity’ mode to remove any color that may have been introduced into the shadows and then switch the blend mode of the base layer of the clipping group to ‘Multiply’ mode, The white will now be rendered transparent whilst the shadows will be blended into the underlying background hue, color and brightness.
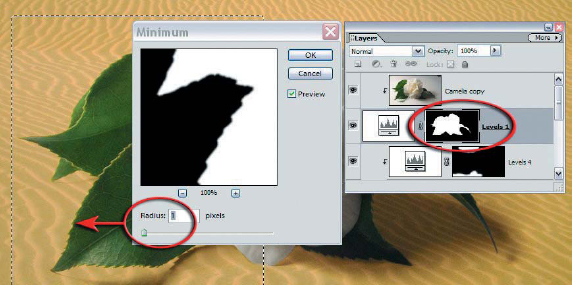
8. Use the Minimum/Maximum filters or a levels adjustment on the layer mask if a white halo is visible around the subject. If a halo is present only in a localized area make a feathered selection around the offending area prior to moving the edge.
PERFORMANCE TIP
If it is not possible to preserve the original shadow, try to capture a second image from the direction of the light source. Make a selection of this second image and fill this selection on a new layer (below the actual subject). Apply the Gaussian Blur filter, lower the layer opacity and then use the Free Transform Tool to distort and move the shadow into position.