
Cropping

Ensure the horizon lines of your images do not resemble ski slopes by making use of the fabulous new Straighten Tool
This simple project may unmask some of the hidden features of the Straighten and Crop tools to enable you to optimize your images for print or screen viewing. You will learn that you can straighten, resize and crop your image with just a few clicks and that the ‘Free Transform’ command can correct any unnatural perspective as a result of using wide angle lenses. Quality starts here.


1. Open the image from the supporting DVD in the Standard Edit workspace. Click on the ‘Straighten Tool’ in the Tools palette. Select the option ‘Grow Canvas to Fit’ in the Options bar above the image window. Now click on the horizon line, and with the mouse clicker held down, drag a line along the horizon line of the image. The image will automatically be straightened.
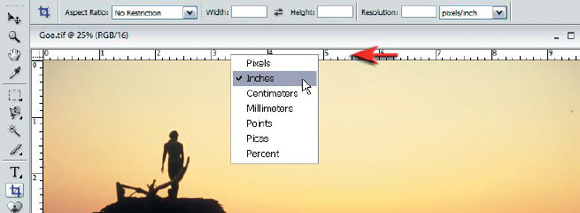
2. When we size an image we should select the width and height in pixels for screen or web viewing and in centimeters or inches for printing. Typing in ‘px’, ‘in’ or ‘cm’ after each measurement will tell Elements to crop using these units. If no measurement is entered in the field then Photoshop Elements will choose the default unit measurement entered in the preferences (Preferences >Units & Rulers). The preference can be quickly changed by right clicking on either ruler (select ‘View >Rulers’ if they are not currently selected).
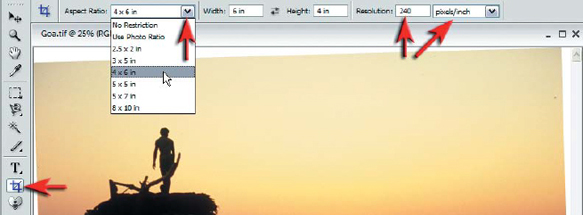
3. The action of entering measurements and a resolution at the time of cropping ensures that the image is sized (pixel dimensions altered) and cropped (shaped) in one action. Entering the size at the time of cropping ensures the aspect ratio of the final image will match the printing paper, photo frame or screen where the image will finally be output.
Note >If an aspect ratio, or both width and height measurements are entered into the measurement fields, the proportions of the final crop will be locked. This new aspect ratio may differ from that of the original capture and this in turn may prevent you from selecting either the full width or full height of the image, e.g. if you have entered the same measurement in both the width and height fields the final crop proportions are constrained to a square.

PERFORMANCE TIP
If only a small amount of the image is being removed it is important to cancel the ‘Snap to Grid’ option in the View menu. If this option is selected it is difficult to move the cropping selection close to the edge of the image without it ‘snapping’ to the edge (as if the crop bounding box had a magnetic attraction to the edges of the document).

4. Drag the cropping marquee over the image to create the best composition. Drag any of the corner handles, or inside the crop marquee, to adjust the composition and then commit the crop by clicking on the tick or double-clicking inside the crop marquee. The image should get smaller on the screen as excess pixels are discarded. If the image grows on screen Photoshop Elements is adding pixels (upsampling), which can lead to a loss of quality. If this happens you need to either start with a larger image file or decrease the output dimensions. It is important to save this cropped version using a different name to ensure the higher resolution master file is preserved.
PERFORMANCE TIP
When using the Straighten Tool to align to a vertical within the image you must hold down the Ctrl key whilst dragging your line to prevent the image from being rotated to the horizontal format.
The Straighten Tool is disabled for 16 Bits/Channel images. To straighten an image without the Straighten Tool first move the edge of the crop marquee to either a vertical or horizontal line within the image. Move the cursor to a position just outside one of the corner handles of the cropping marquee and when the double-headed curved arrow appears you can rotate the cropping marquee to align it with the horizontal or vertical within the image. Then extend the cropping marquee by dragging one of the corner handles.
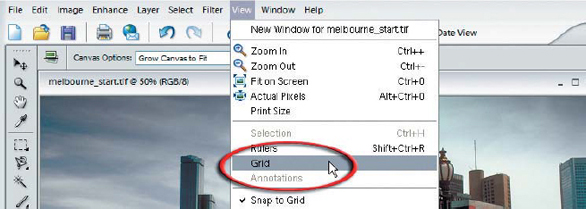
5. When a camera is tilted up or down with a short focal length lens (wide angle) the verticals within the image can lean excessively inwards or outwards (converging verticals). Professional architectural photographers use cameras with movements or special lenses to remove this excessive distortion. To correct the perspective use the ‘Transform’ command. Switch on the ‘Grid’ in the View menu to start this process.
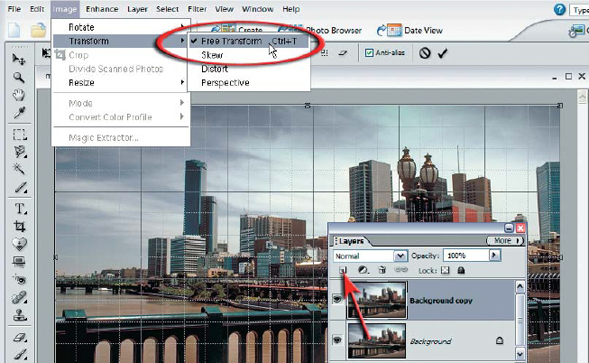
6. Duplicate the background layer by dragging it to the ‘Create a new layer’ icon in the Layers palette. Extend the image window so that all of the image edges can be clearly viewed (zoom out if necessary). Select the ‘Free Transform’ command from the Transform submenu located in the Image menu.

7. Click and drag the corner handles of the ‘Free Transform’ bounding box whilst holding down the Ctrl key. Use the grid lines to align the verticals within the image. Use the keyboard shortcuts to access the zoom tool (Control+Spacebar and Alt+Spacebar) if you need to zoom in on a vertical to check the accuracy of the correction.

PERFORMANCE TIP
You may need to raise the center handle of the ‘Free Transform’ bounding box to prevent the image looking too ‘squat’ after the verticals have been corrected.
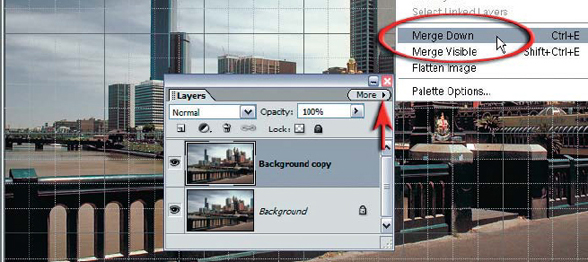
8. Commit the transformation by clicking on the tick in the Options bar and then ‘Merge’ the image if required by selecting the option in the More menu of the Layers palette.
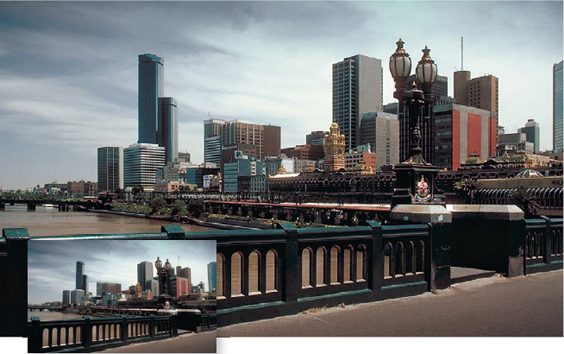
9. The before and after perspective correction reveals the effectiveness that can be achieved by using this simple technique to obtain a more professional result.
This project demonstrates how the Straighten, Crop and Transform tools can be used to size and shape your images so that they appear tailor-made every time.