
Panoramas
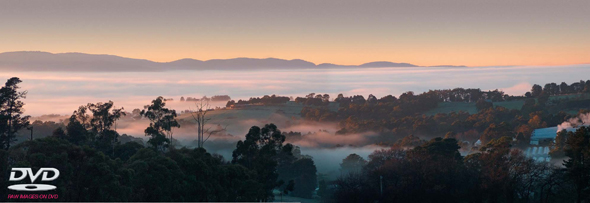
Spot the joins - upgrade from 6 to 12 megapixels with seamless stitching
Explore the advanced techniques for stitching images that Adobe’s Photomerge refuses to stitch seamlessly. Although Photomerge is an excellent tool for the alignment of images it often provides unsatisfactory transitions, especially in skies where the natural vignetting of the camera lens and the short transition zone used by Photomerge makes the visible step in color and tone inevitable.
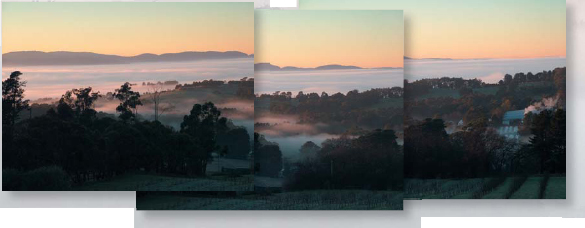
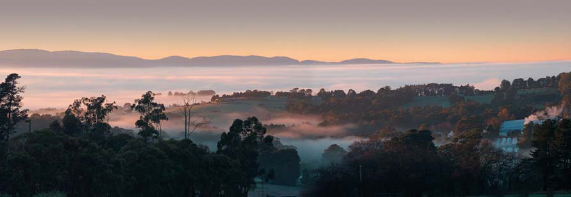
Save time in the post-production editing by photographing with a 30-50% overlap and manual exposure and white balance setting (or processed identically using the camera RAW plugin). Although this is not exactly a quick fix, the results can be truly seamless - an excellent way of widening your horizons or turning your 6 megapixel compact into a 12 megapixel blockbuster.
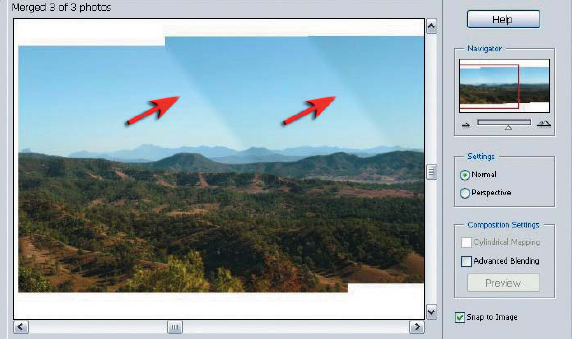
First port of call for stitching images is often Adobe’s Photomerge feature. If the results in Photomerge are less than impressive a manual stitch should be considered.
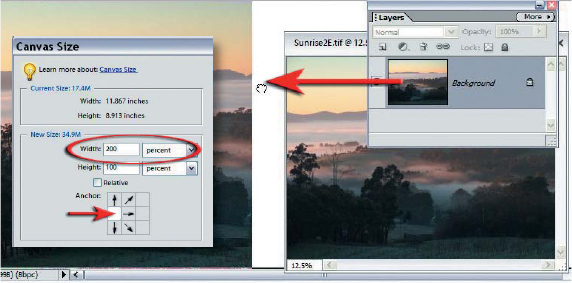
1. The first step in the process is to increase the canvas size (Image > Resize > Canvas Size) to accept the incoming images. When the canvas size has been increased drag in all the next image that requires stitching.
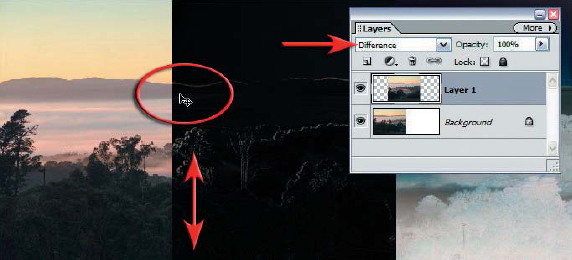
2. Switch the second image to ‘Difference’ mode in the layers palette and use the Move Tool to align the left edge. When the images are aligned on this edge the white lines will be reduced or eliminated.
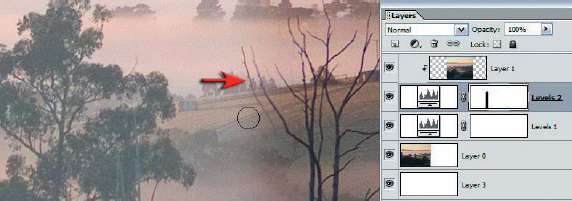
Note > Unless you use a specialized panoramic tripod head to capture your images you will only be able to align the foreground or background information - not both (this is due to parallax error). In the example above the distant hills is the target alignment point.
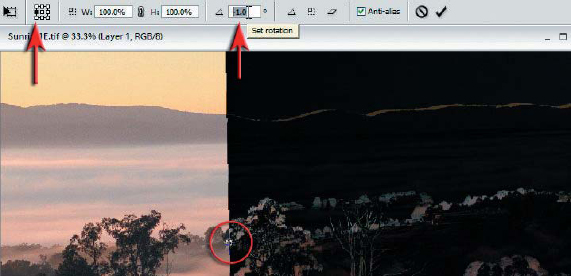
3. Choose the ‘Free Transform’ command (Image > Transform > Free transform or Ctrl+T). Move the reference point location in the Options bar to the left-hand side (the one that you have just aligned). Highlight (double-click) the figures in the rotation field in the Options bar and then use the up and down arrow keys on the keyboard to rotate the image to achieve perfect alignment.
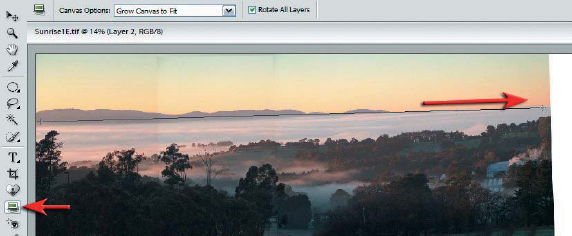
4. When alignment has been achieved with the first pair of images return the blend mode of the top layer to ‘Normal’. Then repeat the first three steps to add additional images to the panorama. When all images are in place use the new Straighten Tool to perfect the final rotation of the image. Users of Elements 3 can proceed straight to step 4 and rotate the crop marquee to achieve perfect alignment.
Note > Consider locking the layers that you have aligned to stop them being moved inadvertently.
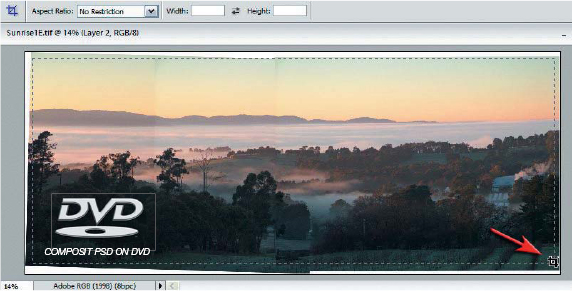
5. Select the ‘Crop Tool’ in the Tools palette and choose the ‘No Restriction’ option in the Options bar. Drag the crop marquee over the image to remove all of the white canvas background, leaving only the image. Hit the enter key or double-click inside the crop marquee to complete the crop.

6. Select the ‘Magic Wand’ Tool from the Tools palette and choose the ‘Add to selection’, ‘Contiguous’, and ‘Sample All Layers’ options. Create a selection of the sky by clicking as many times as required. If the selection invades the foreground area lower the Tolerance and repeat the process. Feather the selection by 1 or 2 pixels (Select > Feather) and then save your selection (Select > Save Selection) for use in the merging process later. Now choose ‘Deselect’ from the Select menu.
PERFORMANCE TIP
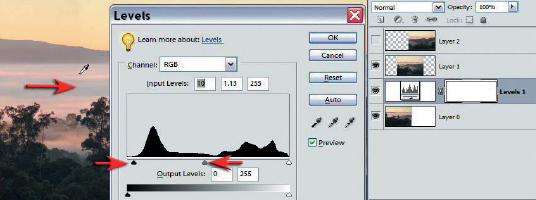
Even if the white balance and exposure were identical for the images to be stitched, it is still possible to get small differences in tone or color between a pair of layers. If this is the case, use a levels adjustment layer to create a closer match between the two. When working above the background layer you will need to group the levels adjustment layer to prevent the adjustment flowing down to all of the layers underneath the target layer.
PERFORMANCE TIP
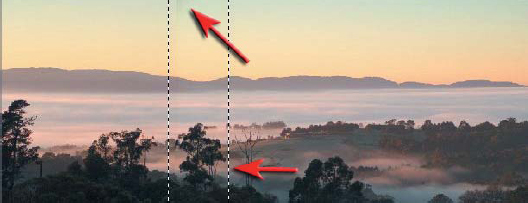
One of the problems contributing to the difficulty of obtaining a seamless stitch in the sky is a small amount of vignetting in the corners of the image. This darkening is even more obvious when placed in the center of the adjoining image. This problem can be eased by trimming off a small amount of the edge. First make a selection using the rectangular Marquee Tool and then use the backspace key to remove the selected pixels. Be careful not to place the new edge through significant detail that could also lead to problems in the stitching process.
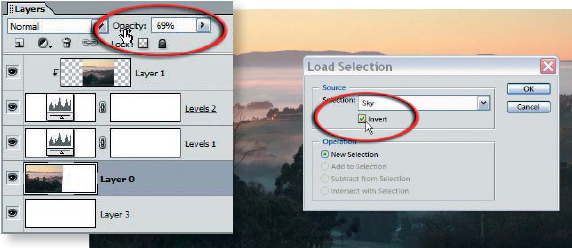
7. Prepare for the stitching process by creating a levels adjustment layer (no adjustment required) directly below the second image. Group the second image to this Levels adjustment layer. Doubleclick the background layer and click OK when the New Layer dialog box opens. This will allow you to lower the opacity of this layer which in turn will help in the merging process. Create a new layer, fill with white and drag this new layer to the bottom of the layers stack. Then go to the Select menu and choose ‘Load Selection’. Load your selection of the sky and check the ‘Invert’ box.
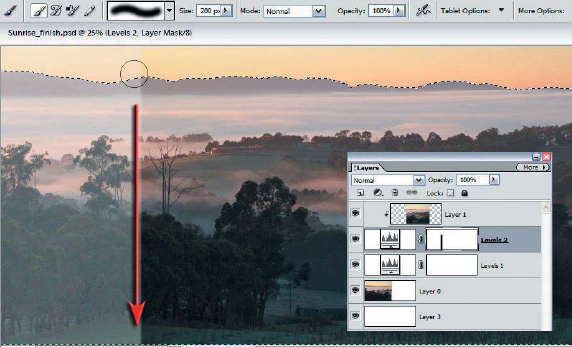
8. Make sure that black is the foreground color and then choose the Paintbrush Tool. Select a large soft-edged brush and set the opacity to 100%. Make sure the layer mask that is at the base of the clipping group is selected and then, whilst holding down the Shift key to constrain the brush stroke, click at the top and the bottom of the edge to be merged.
9. If you targeted the alignment in steps 2 and 3 on the background hills, then the foreground detail will not be 100% aligned. This will be apparent in the region of the brush stroke that you have just made, especially where there are strong graphic lines present that create the illusion of a ‘ghost image’. Select white as the foreground color, reduce the size of the brush and then paint into the mask to remove the most obvious aspects of this ghost image.
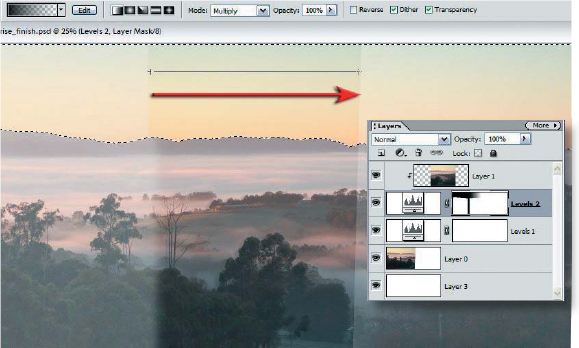
10. Invert the selection (Select > Inverse) and then choose the ‘Gradient Tool’. Choose either the ‘Foreground (Black) to Transparent’ gradient or the ‘Black, White’ gradient in ‘Multiply’ mode to ensure your second gradient does not remove the previous brush stroke. Lowering the opacity of the top layer will reveal the overlap between the two images. Drag your gradient the length of this overlap to ensure a slow transition. This slow transition in the sky will ensure the tell-tale banding that often results with Photomerge will not be evident. Now repeat the process for adding additional images until the merging process is complete.
11. When the merging process is complete the image-enhancement can start. Consider working the tonality or color, adding some gradients and last, but not least, the Unsharp Mask layer.
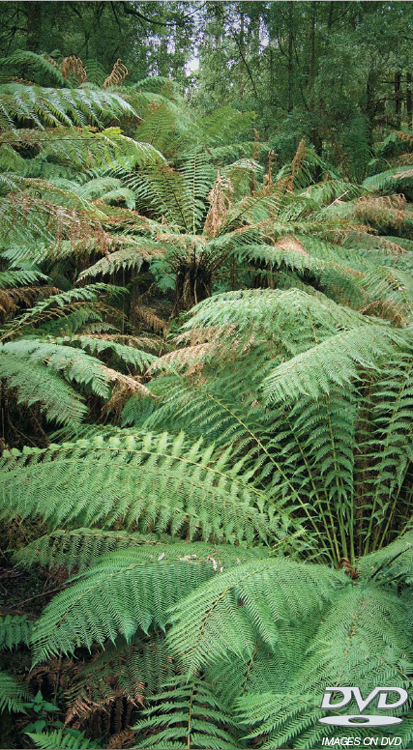
Create this vertical panorama using the resource images on the DVD