As you can see, Microsoft Dynamics CRM gives you the power to create a report that contains a set of records based on specific, user-defined criteria that is simple to put together. In addition to building your own search query, you can also format Advanced Find results to include additional data columns and sort, order, and size the results columns to meet your reporting needs. You can do the following:
Add any column you want to the results.
Adjust the order of the columns.
Modify the size of each column.
Define the sort order of the output.
For example, you might want to create a list of contacts that includes the contact name and primary address fields in a specific order. This can be accomplished with ease in Microsoft Dynamics CRM.
In this exercise, you will use the search query you created in the previous exercise, modifying the columns that appear in the output to include the Probability field for each opportunity as well as the Industry field for the customer account. In addition, you will sort and format your results.
Note
USE your own Microsoft Dynamics CRM installation in place of the Adventure Works Cycle site shown in this exercise.
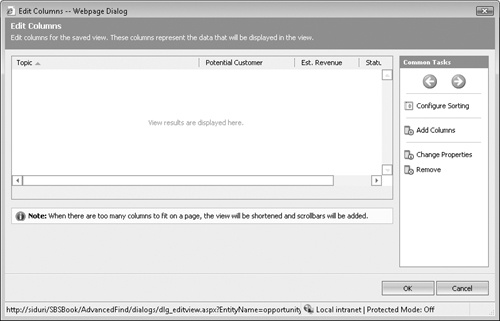
In the Advanced Find criteria screen, click the Edit Columns button.
The Edit Columns dialog box opens. Here you can modify the column order, set the column width, add or remove columns, and configure sorting.
In the Common Tasks area, click Add Columns.
The Add Columns dialog box opens.
Locate the Probability field, and select the check box next to it to add the field to your results.
In the Record Type list at the top of the form, change the record type to Potential Customer (Account).
Notice that you can add columns from related record types in addition to those from the primary record type.
Select the Industry check box, and then click OK.
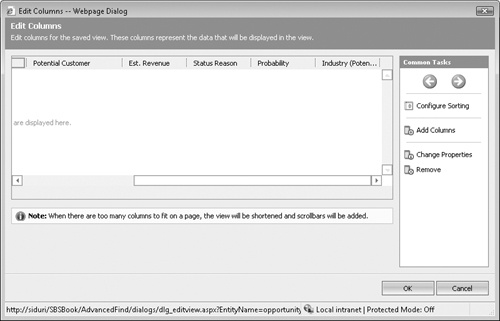
The newly added columns appear to the right of the original columns.
Important
For each record type in Microsoft Dynamics CRM, system administrators can configure the default columns that appear in each Advanced Find results set. The images in this chapter show the default view for opportunities in Microsoft Dynamics CRM. It’s possible that your results will include different columns. If there is a column you find yourself adding frequently to your searches, ask your system administrator about adding it to the default Advanced Find view.
In the Edit Columns dialog box, click (don’t double-click) the Industry column heading.
The border color changes to green.
In the Common Tasks area, click the left arrow until the Industry column is the first column in the results grid.
Double-click the Industry column.
Change the column width to 200 pixels by selecting 200px, and then click OK.
This setting doubles the column width from the 100-pixel default.
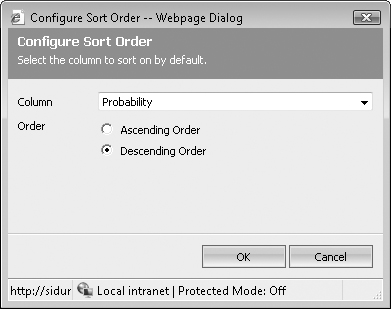
In the Edit Columns dialog box, in the Common Tasks pane, click Configure Sorting.
The Configure Sort Order dialog box opens.
In the Column list, select Probability, and in the Order field, select Descending Order, and then click OK.
This sorts the results so that the opportunities with the highest closing probability appear at the top of the report.
In the Edit Columns dialog box, click OK to close the dialog box.
On the Advanced Find query form, click Find. The search results appear with the new columns you added.


