
CHAPTER 7
Rock Rain Zune
The XNA 3.0 release added several interesting new features, but none as exciting as the provision for one more platform: the Zune! Now you can create games for this device using the same resources and facilities available to create games for the Windows and Xbox 360 platforms.
All the Zune devices have a fair amount in common. They have 16MB available for the game to run in; a 240 × 320 display, with varying dots per inch, depending on the device size; and some type of mass-storage capability, ranging from 4GB of flash to 80GB of hard drive. All the devices have built-in wireless networking as well, which is available to game developers through the XNA Framework network APIs.
Games on the Zune appear in their own category in the Zune user interface, and look and feel like other media on the device. The icon and description you provide in XNA Game Studio are copied to the device. This means browsing to games is as rich an experience as browsing to other media. When you "play" the game, it loads and runs just like other media. Once you deploy games to the Zune, you no longer need a PC connection to run them—they work just like any other media on the device.
To show how simple it is to make a game for the Zune, you will create a Rock Rain version for it, using code quite similar to that in the Windows/Xbox 360 version in Chapter 4. You'll just make some changes to accommodate the minor differences that exist between these platforms. In particular, you'll modify the game to work within the device's small display area.
Planning Rock Rain Zune
First, we want to emphasize two important points. One is that the game you'll create in this chapter has virtually the same code as you used earlier. This means you can take all the work you have done in the Rain Rock version of Chapter 4 and reuse it to create this new version of the game. XNA makes all the effort to create versions of multiplatform games simpler and cheaper. In fact, in this chapter, your work will involve mostly removing code, rather than adding code.
The second point is that the game will run on a mobile device. This may seem too obvious to you to mention, but it is very important for the design of the game itself, since the player will not play the game sitting on a couch with a joystick and a big screen. Keep in mind that people will probably play this version of Rock Rain standing up on a bus, while in a doctor's waiting room, and so on.
The usability issues related to games for mobile devices must be taken into account. Specifically, this version of Rock Rain will be designed to be played in a simple way, with only one hand, on any Zune device. The programming of the game is almost the same; however, the conception and design are somewhat different.
So, for the conceptual design of the Zune game, we can highlight three main differences:
- Lack of multiplayer support:
There's no way for two players to play at the same time on one Zune.
- Lower screen resolution:
With a smaller screen, some functions that depend on the size of the screen, such as the size of images, should be modified. The textures and sprites should also be changed to look better on the small screen of the Zune, which has a resolution of only 240 × 320 pixels.
- Lack of full controller support:
Some older versions of Zune did not have a touchpad; that is, they did not have any type of analog input, though they did have digital buttons. In the new generation of Zunes, the Zune pad simulates the analog thumbstick (actually, it looks like a mouse), but you must also add digital thumbstick support so that users of old Zune models can play your game. And there is no support for vibration, so your
GamePadRumbleclass will not be used.
The input APIs for the device behave like an Xbox 360 controller with some pieces missing. The Zune 1.0 device control pad works like the directional pad on the Xbox 360 controller, with the Play/Pause button mapped to the B button on the controller, and the Back button on the device mapped to the Back button on the controller.
With that in mind, we can identify the classes of the game that do not need to be modified, since they do not work with anything related to user input, assembly of scenes, or the game play itself. They are GameScene, ImageComponent, Sprite, AudioLibrary, and Score.
Organizing the Game
Begin by creating a new Zune Game project, naming it RockRainZune, as shown in Figure 7-1. Then copy the following classes from Chapter 4's version of the game: GameScene, ImageComponent, Sprite, AudioLibrary, and Score. Remember to rename the namespace of the classes for the namespace of your new project: RockRainZune.

Figure 7-1. Creating a Zune Game project
You also need new textures. These are practically the same as used for the game in Chapter 4, but resized to fit on Zune screen. Remember the Zune display is a screen with 240 × 320 pixels, and your PC/Xbox 360 can run this game on an 1280 × 720 pixel screen, so the sprites must be scaled to a smaller screen.
The audio is the same, so add the audio files and the sprite fonts setting files in the same way as you did in Chapter 4. Figure 7-2 shows the RockRainZune project in the Solution Explorer window.
Note Be aware of the space requirements for audio content in your game. Uncompressed WAV files can be used, but they need a lot of storage space on the device. If possible, use MP3 or WMA files for your sound bank to save some space.
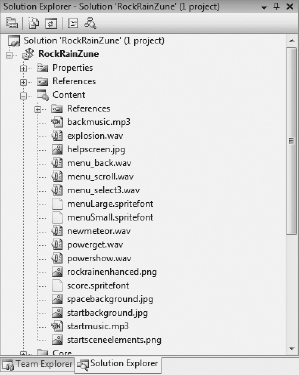
Figure 7-2. The Content folder for the Rock Rain Zune game
Modifying the Classes
You will now proceed with the necessary class modifications, starting with the simple adjustments and moving to the slightly harder ones.
Help Scene Changes
First, let's modify the HelpScene class, which implements the help screen of the game. It displays only a picture with the description of the controls and rules of the game. However, as in the Windows/Xbox 360 version, there is additional support for widescreen, which puts a background image behind the help image for better display on this type of screen. Obviously, the Zune does not need this feature, so you will simplify the class to display only a single image.
Copy the code from Chapter 4 (remembering to rename the namespace). Then remove the second parameter of the constructor method, for the background texture that is no longer necessary. Also remove the instantiation of the second ImageComponent, which would draw the texture. Your code should look as follows:
/// <summary>

/// This is a game component thats represents the Instructions scene

/// </summary>

public class HelpScene : GameScene

{

    public HelpScene(Game game, Texture2D textureBack)

            : base(game)

    {

        Components.Add(new ImageComponent(game, textureBack,

            ImageComponent.DrawMode.Stretch));

    }

}
Notice that you just removed some code so the class can draw the help screen on the Zune correctly. In essence, it is exactly the same as your Windows/Xbox 360 code! Simple, huh?
Menu Changes
Some of your changes are required because of the lack of a keyboard on the Zune. First, the keyboard support component TextMenuComponent should be removed. Add the Chapter 4 version of the class to your project (do not forget the namespace change!) and remove any lines of code that refer to the oldKeyboardState attribute (including the declaration of the attribute), since you do not need any keyboard support.
In the Update method, which is used to change the menu item, you do not need further testing of whether the user has pressed a key on the keyboard, since you can use only the Zune pad. Your first part should look like this:
GamePadState gamepadState = GamePad.GetState(PlayerIndex.One);


// Handle the D-Pad

bool down = (oldGamePadState.DPad.Down == ButtonState.Pressed) &&

    (gamepadState.DPad.Down == ButtonState.Released);

bool up = (oldGamePadState.DPad.Up == ButtonState.Pressed) &&


    (gamepadState.DPad.Up == ButtonState.Released);
Did you notice that you removed the keyboard support, but otherwise the handling of the Zune pad is exactly the same? This happens because the XNA maps the Zune pad to the same classes as those used for the Windows/Xbox 360 gamepad, facilitating your work.
Furthermore, the entire code for the Draw method, properties, and so on is exactly the same! You removed the code lines that do not make sense in the Zune, but ultimately, the class is the same, thanks to .NET and your managed code, which give game developers a complete abstraction of device implementation details.
Let's now discuss changes to your code that are due to the size of the Zune screen and the new positioning of the sprites in the new textures.
Power Source Changes
The PowerSource class has the same logic in the Zune version as it did in the previous version, but the frames of the sprites are different, because the sprites' texture is smaller. In this case, you must modify the constructor of the class to reflect these changes, as follows:
public PowerSource(Game game, ref Texture2D theTexture)

            : base(game, ref theTexture)


{

       texture = theTexture;


       Frames = new List<Rectangle>();

       Rectangle frame = new Rectangle();

       frame.X = 55;

       frame.Y = 15;

       frame.Width = 14;

       frame.Height = 12;

       Frames.Add(frame);


       frame.Y = 29;

       Frames.Add(frame);


       frame.Y = 42;

       Frames.Add(frame);


       frame.Y = 56;

       Frames.Add(frame);


       frame.Y = 69;

       Frames.Add(frame);


       frame.Y = 81;

       Frames.Add(frame);


       frameDelay = 200;


       // Initialize the random number generator and put the power source in your

       // start position

       random = new Random(GetHashCode());

       PutinStartPosition();

}
Note that except for the new attributes of the frames, the code is exactly the same.
Meteor Changes
The Meteor class also needs to have its constructor changed to reflect changes in the position of frames in the new texture. In fact, every aspect of the 2D graphics is exactly the same as for the Windows/Xbox 360 version, except for the safe area. On a Zune, you don't need to worry about the TV safe area, because the Zune screen is "flat," like an LCD or a plasma TV or PC monitor. Easier, right?
The modified Meteor class is as follows:
public Meteor(Game game, ref Texture2D theTexture) :

    base(game, ref theTexture)

{

    Frames = new List<Rectangle>();

    Rectangle frame = new Rectangle();

    frame.X = 15;

    frame.Y = 10;

    frame.Width = 23;

    frame.Height = 24;

    Frames.Add(frame);


    frame.Y = 37;

    Frames.Add(frame);


    frame.Y = 63;

    frame.Height = 24;

    Frames.Add(frame);


    frame.Y = 89;

    frame.Height = 27;

    Frames.Add(frame);


    frame.Y = 119;

    frame.Height = 24;

    Frames.Add(frame);


    frame.Y = 145;

    Frames.Add(frame);


    frame.Y = 171;

    Frames.Add(frame);


    frame.Y = 199;

    frame.Height = 26;

    Frames.Add(frame);


    // Initialize the random number generator and

    // put the meteor in your start position

    random = new Random(GetHashCode());

    PutinStartPosition();

}
Another aspect to consider is that the small size of the screen changes the game play a bit. You have little room to escape from meteors, and this can make the game too difficult. In this case, it is better to reduce the speed of the meteors, so it will be easier for the player to avoid them. Therefore, in the PutinStartPosition method in the Meteor class, modify the code that calculates the vertical velocity as follows:
YSpeed = 1 + random.Next(3);
By reducing the maximum speed from 10 to 4 pixels, you are a facilitating the player's game play.
Also reduce the delay between frames in the YSpeed property:
frameDelay = 200 - (Yspeed * 2);
Note You may wonder how we got these numbers. The answer is simple: through experience. You must experience the game play of your game and adjust it to make it fun on your target device—whether it is an Xbox 360, a PC, or a Zune. Through such tests, game designers adjust the difficulty of their game so that it is not so hard that the player does not want to play it anymore, but not so easy that the player loses interest in it. Remember that how you react to your game and your experience determine what type of game developer you are.
Player Changes
You will now work in the Player class, which implements the ship controlled by the player. For the Zune version, remove the multiplayer support and keyboard support. Then remove the HandlePlayer1KeyBoard and HandlePlayer2KeyBoard methods and their references. Also remove the playerIndex attribute, which indicates which player is associated with the object instance. Remember that since you now have only one player playing the game at a time, keeping track of which player is which is no longer necessary.
After that, you also need to update some methods that control the class behavior. The HandleInput method no longer needs to receive PlayerIndex as a parameter (because you have only one player) and no longer needs to call the methods for dealing with keyboard input. Because the HandleInput method happens to be where gamepad directions are set up, you will add the ability to move the ship with only the directional pad for the older versions of the Zune. You also need new movement values because of the screen size. After some tests, we discovered 3 is good enough. Your method should look as follows:
/// <summary>

/// Get the ship position

/// </summary>

protected void HandleInput()

{

    // Move the ship with Xbox controller

    GamePadState gamepadstatus = GamePad.GetState(PlayerIndex.One);

    if (gamepadstatus.DPad.Left == ButtonState.Pressed)

    {

        position.X -= 3;

    }

    if (gamepadstatus.DPad.Right == ButtonState.Pressed)

    {

        position.X += 3;

    }

    if (gamepadstatus.DPad.Down == ButtonState.Pressed)

    {

        position.Y += 3;

    }

    if (gamepadstatus.DPad.Up == ButtonState.Pressed)

    {

        position.Y -= 3;

    }

    // Check the thumbstick also

    position.Y += (int)((gamepadstatus.ThumbSticks.Left.Y * 3) * −2);

    position.X += (int)((gamepadstatus.ThumbSticks.Left.X * 3) * 2);

}
Similarly, the Update method no longer needs to inform the PlayerIndex (again, remember that you have only one player in this game), so it should be as follows:
/// <summary>

/// Update the ship position, points and power

/// </summary>

public override void Update(GameTime gameTime)

{

    HandleInput();

    UpdateShip(gameTime);


    base.Update(gameTime);

}
Again, you must change the class constructor to update the frames according to the new texture and remove the widescreen support used for the Xbox 360 version:
public Player (Game game, ref Texture2D theTexture) : base(game)

{

    texture = theTexture;

    position = new Vector2();


    // Create the source rectangle.

    // This represents where the sprite picture is in surface

    spriteRectangle = new Rectangle(86,11,24,22);


    screenBounds = new Rectangle(0, 0,

        Game.Window.ClientBounds.Width,

        Game.Window.ClientBounds.Height);

}
Core Game Changes
You are nearly finished. Your last changes to the game's code address the classes that represent the "soul" of the game: ActionScene, StartScene, MeteorsManager, and Game1. These classes run the core game code, such as the action scene (ActionScene), the opening scene (StartScene), and, of course, the main class, Game1, which contain all the game scene flow.
Start with the MeteorsManager class. This class does not handle sprites or the keyboard, but it has an important role in control of the game play: it sets the initial number of meteors and the time to add a new meteor to the game. Based on our tests of game play, we suggest you replace the values of the STARTMETEORCOUNT and ADDMETEORTIME properties as follows:
// Constant for initial meteor count

private const int STARTMETEORCOUNT = 5;

// Time for a new meteor

private const int ADDMETEORTIME = 6000;
This should make the game a little easier to be played on a small screen. You will experience a smaller number of meteors when the game starts, and a longer time between the appearance of new meteors.
For the class of the original scene, StartScene, you will have noticed that you must change the frames of the sprites that form the text "Rock Rain Enhanced" as well as their positions in the opening animation. First, change the frames of the sprites, as follows:
protected Rectangle rockRect = new Rectangle(3, 2, 197, 49);

protected Rectangle rainRect = new Rectangle(47, 63, 189, 48);

protected Rectangle enhancedRect = new Rectangle(7, 110, 122, 46);
In the Show method, modify the initial positions of these elements, as follows:
rockPosition.Y = 10;

rainPosition.Y = 60;

menu.Position = new Vector2((Game.Window.ClientBounds.Width -

       menu.Width)/2, 140);
The menu items will also be different, because you do not have multiplayer support. This is simple. Just change the menu items array, which is initialized in the constructor, for the items you have in this Zune version, and the drawing methods you've already coded in the previous version will take care of the rest:
// Create the menu

string[] items = {"Play!", "Help", "Quit"};
In the Update method, you need to update the position of the sprites to have them in the correct position during the animation, and you need to remove the widescreen support that you have for the Xbox 360:
/// <summary>

/// Allows the game component to update itself.

/// </summary>

/// <param name="gameTime">Provides a snapshot of timing values.</param>

public override void Update(GameTime gameTime)

{

    if (!menu.Visible)

    {

        if (rainPosition.X >= (Game.Window.ClientBounds.Width - rainRect.Width)/2)

        {

            rainPosition.X -= 5;

        }


        if (rockPosition.X <= (Game.Window.ClientBounds.Width - rockRect.Width)/2)

        {

            rockPosition.X += 5;

        }

        else

        {


            menu.Visible = true;

            menu.Enabled = true;


            MediaPlayer.Play(audio.StartMusic);


            enhancedPosition =

                new Vector2((rainPosition.X + rainRect.Width -

                enhancedRect.Width/2) - 40, rainPosition.Y+20);

            showEnhanced = true;

        }

    }

    else

    {

        elapsedTime += gameTime.ElapsedGameTime;


        if (elapsedTime > TimeSpan.FromSeconds(1))

        {

            elapsedTime -= TimeSpan.FromSeconds(1);

            showEnhanced = !showEnhanced;

        }

    }


    base.Update(gameTime);

}
Next, let's deal with the Game1 class. This class is responsible for overall control of the game. Here, you are concerned with only the keyboard treatment and the instantiation of the HelpScene class, which had its constructor changed a bit.
Start by removing all references to oldKeyboardState attribute (including its statement), which are used to manipulate keyboard entries. Also remove references to the helpForegroundTexture attribute, because as you saw earlier, it is no longer necessary since the HelpScene class needs only one texture for the Zune version of the game. After all these changes, the class constructor should look as follows:
public Game1()

{

    graphics = new GraphicsDeviceManager(this);

    Content.RootDirectory = "Content";


    // Used for input handling

    oldGamePadState = GamePad.GetState(PlayerIndex.One);

}
The CheckEnterA method checks if the Enter key or the A button of the Xbox 360 gamepad was pressed. Rename this method to CheckActionButton, which makes more sense in the Zune, and check only the gamepad status:
/// <summary>

/// Check if the Action button was pressed

/// </summary>

/// <returns>true, if button was pressed</returns>

private bool CheckActionButton()

{

    // Get the keyboard and gamepad state

    GamePadState gamepadState = GamePad.GetState(PlayerIndex.One);


    bool result = (oldGamePadState.Buttons.A == ButtonState.Pressed)

              && (gamepadState.Buttons.A == ButtonState.Released);


    oldGamePadState = gamepadState;


    return result;

}
As the menu items are different, you also need to update the HandleStartSceneInput method to show the correct scenes of the game:
/// <summary>

/// Handle buttons and keyboard in StartScene

/// </summary>

private void HandleStartSceneInput()

{

    if (CheckActionButton())

    {

        audio.MenuSelect.Play();

        switch (startScene.SelectedMenuIndex)

        {

            case 0:

                ShowScene(actionScene);

                break;

            case 1:

                ShowScene(helpScene);

                break;

            case 2:

                Exit();

                break;

        }

    }

}
Notice that the TwoPlayers attribute, from the ActionScene class, which indicates if the two-player mode is active, is not used anymore, because the game does not support this feature.
Your last changes are to the ActionScene class, which is actually the place where the game happens. Your work here will be just to remove the instances of objects that are not needed and adjust the frames of the sprites in accordance with the new textures. Let's go!
First, remove the declaration and references to the rumblePad, player2, scorePlayer2, and twoPlayers attributes. They are no longer needed, since you have only one player and do not have vibration support for the Zune. Also, remove the TwoPlayers property, which is no longer necessary.
Then, using the refactoring tool in Visual Studio, rename the player1 attribute to player and scorePlayer1 attribute to score, so that the code will be more readable.
Next, change the frames of the sprites to fit to the new texture, as follows:
protected Rectangle pauseRect = new Rectangle(84, 65, 99, 30);

protected Rectangle gameoverRect = new Rectangle(53, 108, 186, 30);
Note Don't worry about the coordinates changes here. You can see these coordinates using you preferred graphical tool. We like to use Windows Paint.
After that, the class constructor should look like this:
/// <summary>

/// Default constructor

/// </summary>

/// <param name="game">The main game object</param>

/// <param name="theTexture">Texture with the sprite elements</param>

/// <param name="backgroundTexture">Texture for the background</param>

/// <param name="font">Font used in the score</param>

public ActionScene(Game game, Texture2D theTexture,

    Texture2D backgroundTexture, SpriteFont font)

    : base(game)

{

    // Get the current audio component and play the background music

    audio = (AudioLibrary)Game.Services.GetService(typeof(AudioLibrary));


    background = new ImageComponent(game, backgroundTexture,

        ImageComponent.DrawMode.Stretch);

    Components.Add(background);

    actionTexture = theTexture;


    spriteBatch = (SpriteBatch)

        Game.Services.GetService(typeof (SpriteBatch));

    meteors = new MeteorsManager(Game, ref actionTexture);

    Components.Add(meteors);


    player = new Player(Game, ref actionTexture);

    player.Initialize();

    Components.Add(player);


    score = new Score(game, font, Color.LightGray);

    score.Position = new Vector2(1, 1);

    Components.Add(score);


    powerSource = new PowerSource(game, ref actionTexture);

    powerSource.Initialize();

    Components.Add(powerSource);

}
Without the two-player support, the code is much simpler. For example, here is the HandleDamages method:
/// <summary>

/// Handle collisions with a meteor

/// </summary>

private void HandleDamages()

{

    // Check collision for player 1

    if (meteors.CheckForCollisions(player.GetBounds()))

    {

        // Player penalty

        player.Power -= 10;

    }

}
And you're finished! You created a version of your game for a completely different platform in a short time, and now you have reached the best part: playing it.
Deploying the Game on the Zune
Just as you added your Xbox 360 in the XNA Game Studio Device Center, you should also add the Zune so you can send your game to it. Unlike the Xbox 360, your Zune does not need a LIVE connection to do this. The transfer will be made by the USB cable attached to the Zune.
After you've connected the Zune to your PC, in Visual Studio, select Tools ![]() Launch
Launch ![]() XNA Game Studio Device Center, and then click Add Device. It will automatically find the Zune connected to your computer, as shown in Figure 7-3, and will deploy XNA in the device. After that, the Zune will have a new option in the main menu called Games. Cool, right?
XNA Game Studio Device Center, and then click Add Device. It will automatically find the Zune connected to your computer, as shown in Figure 7-3, and will deploy XNA in the device. After that, the Zune will have a new option in the main menu called Games. Cool, right?
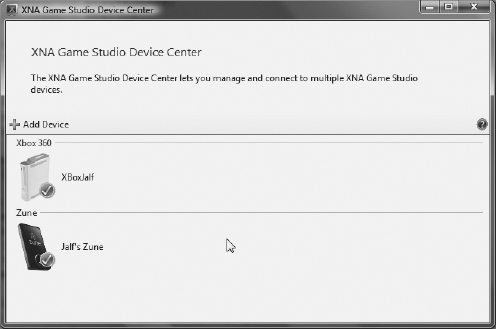
Figure 7-3. The XNA Game Studio Device Center with the Zune added
Now you can execute the game to check the result. Figure 7-4 shows some of the game screens on the Zune. Test and debug the game exactly as you would on your PC and the Xbox 360. Then have fun!
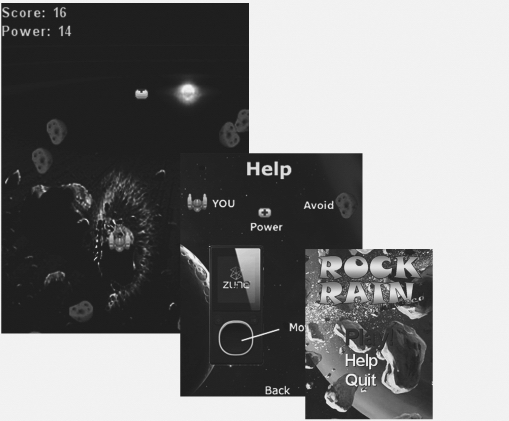
Figure 7-4. Rock Rain Zune screens
Summary
From this chapter's example, you saw that it's easy to create games for the Zune using XNA, as long as you limit the games to 2D (using SpriteBatch), since the Zune does not have hardware 3D acceleration. However, you have other important resources to use that we haven't touched on in this chapter. For instance, it's quite simple to use music stored on the Zune as the background music of your game. Also, since every Zune has built-in wireless support, which provides the exact same network APIs as those for Windows and Xbox 360, you can write multiplayer games for the Zune that use the equivalent of SystemLink. Then you can discover other games running nearby, create lobbies, add/remove players, and build a peer-to-peer or client/server multiplayer game as easily as you can build one for Windows or Xbox 360. For more information about developing XNA games for the Zune, see Zune Game Development Using XNA 3.0 by Dan Waters (Apress, 2009).