
When you installed your first Linux host, you accepted all defaults when it came to setting up disks and partitions. Now that you have some basic systems administration knowledge, let’s revisit the storage configuration and see how to change it to suit your needs. We’ll look at various types of storage hardware and the ways in which you can use storage management software to your advantage. A critical part of any business is its data, so you need to make sure it is both safe and accessible and stays that way.
In this chapter, we will explain how to create and manage disk partitions and RAID, how to make your storage accessible to applications, and how to recover from a crash.
Note
In Chapter 14, we’ll cover how to back up and restore your data.
Storage Basics
We’re going to start by looking at how Linux handles storage. We’ll do this by adding a variety of new disks, partitioning these disks, and then formatting and managing this storage.
Drives under Windows show up as a drive letter once you format them, but Linux works differently. It has no concept of drive letters, and formatting also doesn’t work quite in the same way. Instead, drives and storage appear as devices, which can be partitioned. These partitions can, in turn, be formatted or gathered into logical volumes and then formatted.
Let’s start by looking at devices, which are the basic building blocks of Linux storage. We’ll then move on to cover partitions and filesystems.
Devices
We briefly touched on device files in Chapter 4. These files are the way Linux makes hardware devices, such as hard disk drives, USBs, and DVD drives, accessible from within the operating system. Most, but not all, of the devices in a host are represented by files in the /dev directory.
The /dev directory is a special directory that’s populated by a service called udev. When the host boots and the kernel detects a device, it tells udev, which then creates a representation of that device in the /dev directory. These device files are the way the kernel provides access to devices for applications and services.
There are several kinds of device files, but in this chapter we’ll cover only the ones dealing with storage, which all fall into the category of block devices. This category covers hard disks, USB drives, tape drives, and CD and DVD drives. All types of hard disks—for example, ATA, Serial ATA, SCSI, SAS, and SSD—are represented by device files whose names start with sd, which stands for SCSI disk , as all these different types of drives are accessed as if they were SCSI drives.
Note
SCSI is an acronym that stands for Small Computer System Interface, a specification for how storage devices should be connected to and accessed by computers. You can read more about this specification at http://en.wikipedia.org/wiki/SCSI .
You can see which disk devices are available on your host by listing them using the ls command, as in Listing 9-1.
Listing 9-1. Listing Device Nodes
$ $ ll /dev/sda*brw-rw---- 1 root disk 8, 0 Jun 7 22:45 /dev/sdabrw-rw---- 1 root disk 8, 1 Jun 7 22:45 /dev/sda1brw-rw---- 1 root disk 8, 2 Jun 7 22:45 /dev/sda2brw-rw---- 1 root disk 8, 5 Jun 7 22:45 /dev/sda5
Listing 9-1 shows four block devices , or device nodes. They are readable and writable by the root user and the disk group. Next, where normally the file size would be displayed, are two numbers separated by a comma. These are the device major number and minor number. The major number tells the kernel which device driver to use to access the device, and the minor number gives the kernel specific information about the device, in this case the partition number. Finally, the date and time the device file was last modified are shown.
The actual device file name consists of the prefix sd and a letter indicating which disk it belongs to. The first detected disk is sda, the second is sdb, the third is sdc, and so on. Finally, each partition on the disk gets its own device node as well, and the partition number is the final part of the name. This means that sda1 is the first partition on disk sda, sdb2 is the second partition on disk sdb, and so on. We’ll discuss partitions shortly.
Other devices you may see are:
Device Name | Where you would find it |
|---|---|
/dev/xvda | Xen virtual machines |
/dev/vda | KVM virtual machines |
/dev/hda | KVM virtual machines, older ATA hosts |
/dev/md | Linux software raid |
/dev/sda | Physical servers with devices like SAS, SSD. |
Note
Older systems could not support many drives because device minor numbers ranged from 1 to 255, and each disk could only have 16 numbers, so Linux could accommodate 16 hard disks with 16 partitions each, /dev/sda1 through /dev/sdp16, before it ran out of device nodes. Now your system can theoretically support 10,000 drives ( https://access.redhat.com/articles/rhel-limits ). This is the definitive document on block and character devices in the Linux Kernel: www.kernel.org/doc/Documentation/devices.txt .
If you have a hardware RAID controller, it may name your array and any partitions differently. The RAID controller combines multiple disks into a Redundant Array of Inexpensive Disks (RAID) . We’ll talk more about RAID later on in this chapter. To find out what the device nodes for the RAID array are, you can list all block devices in the /dev/ directory with the following command:
$ ls -l /dev | grep ^bThis command will list only lines starting with b. It would, however, be more accurate to check the contents of the kernel internal log buffer. Whenever a kernel event occurs, it is added to the kernel internal log buffer. This buffer is then written to a log file by a logging daemon, and you can query it directly using the dmesg command.
$ dmesg |lessMost RAID controllers also use at least part of the kernel SCSI subsystem, and you can search for detected SCSI devices via the built‑in search function in less. Enter /scsi inside the less window and press Enter to search for any lines containing the string scsi. You can press n to jump to the next match.
Partitions
After you add a disk to your host, you need to perform a few steps to make it usable. First, you can create one or more partitions on that disk. If you create a partition, the system needs to be able to find the information about the partition geometry. It stores this information at the start of the disk (and sometimes has a copy stored elsewhere on the disk - more on this shortly).
We have previously described partitioning as slicing up a cake into smaller pieces and that is what we can do with the physical disk. We carve up the disk into smaller pieces. This way you can, for example, keep log and user data separate from the operating system, so logs or users cannot fill up your system disk and cause problems.
In Chapter 6 we introduced you to two different partition managers, the Master Boot Record (MBR) and GPT (GUID Partition Table ). You might remember that the MBR, stored in the first 446 bytes of the disk, describes the partition information, which is stored in the 64 bytes directly after the boot record. You can’t store a lot of data in 64 bytes, so the number of partitions a disk could hold was originally rather limited. GPT on the other hand, can hold up to 128 partitions.
You can create and delete partitions using the fdiskutility, or if you are using GPT, the gdisk or parted utility. Let’s start by having a look at what partitions are already there by listing the partitions on the first disk on our Ubuntu host (see Listing 9-2). Because only the root user is allowed to read from and write to the raw disk device, you need to use sudo.
Listing 9-2. Listing Partitions with fdisk
$ sudo fdisk -l /dev/sdaDisk /dev/sda: 8 GiB, 8589934592 bytes, 16777216 sectorsUnits: sectors of 1 * 512 = 512 bytesSector size (logical/physical): 512 bytes / 512 bytesI/O size (minimum/optimal): 512 bytes / 512 bytesDisklabel type: dosDisk identifier: 0x105922fdDevice Boot Start End Sectors Size Id Type/dev/sda1 * 2048 999423 997376 487M 83 Linux/dev/sda2 1001470 16775167 15773698 7.5G 5 Extended/dev/sda5 1001472 16775167 15773696 7.5G 83 LinuxAs you can see in the output of Listing 9-2), the installer created three partitions:
A physical partition for the boot partition
An extended partition to house other partitions
A logical partition for use with LVM
You don’t want to modify your system disk, but let’s say you bought a new hard disk and need to partition it, so you can start using it to store data. First, you need to check that the disk was detected by the operating system and what its device name is. The kernel prints information on all devices it detects when it boots up, and you can access that information via the dmesg command once you log in.
$ dmesg | grep sd[ 1.838874] sd 2:0:0:0: [sda] 16777216 512-byte logical blocks: (8.59 GB/8.00 GiB)[ 1.839510] sd 2:0:0:0: [sda] Write Protect is off[ 1.839824] sd 2:0:0:0: [sda] Mode Sense: 00 3a 00 00[ 1.839834] sd 2:0:0:0: Attached scsi generic sg1 type 0[ 1.840183] sd 2:0:0:0: [sda] Write cache: enabled, read cache: enabled, doesn't support DPO or FUA[ 1.842304] sda: sda1 sda2 < sda5 >[ 1.842784] sd 2:0:0:0: [sda] Attached SCSI disk[ 2.178862] sd 3:0:0:0: [sdb] 16777216 512-byte logical blocks: (8.59 GB/8.00 GiB)[ 2.179508] sd 3:0:0:0: [sdb] Write Protect is off[ 2.179863] sd 3:0:0:0: [sdb] Mode Sense: 00 3a 00 00[ 2.179874] sd 3:0:0:0: Attached scsi generic sg2 type 0[ 2.180268] sd 3:0:0:0: [sdb] Write cache: enabled, read cache: enabled, doesn't support DPO or FUA[ 2.181498] sd 3:0:0:0: [sdb] Attached SCSI disk[ 25.702112] EXT4-fs (sda1): mounting ext2 filesystem using the ext4 subsystem[ 25.711836] EXT4-fs (sda1): mounted filesystem without journal. Opts: (null)
By using grep to display only lines containing sd, you can limit the output to information about the SCSI disk subsystem.
In the output of dmesg we can see that the system has detected two disks, sda and sdb. When it detected sda, it also found the partitions sda1, sda2, and sda5. The angle brackets around partition sda5 (<sda5>) indicate this is a logical partition. The other disk is new and has no partition table (sdb), so let’s create one using the gdisk command.
$ sudo gdisk /dev/sdbsudo gdisk /dev/sdbGPT fdisk (gdisk) version 1.0.1Partition table scan:MBR: not presentBSD: not presentAPM: not presentGPT: not presentCreating new GPT entries.Command (? for help): ?B back up GPT data to a filec change a partition's named delete a partitioni show detailed information on a partitionl list known partition typesn add a new partitiono create a new empty GUID partition table (GPT)p print the partition tableq quit without saving changesr recovery and transformation options (experts only)s sort partitionst change a partition's type codev verify diskw write table to disk and exitx extra functionality (experts only)? print this menu
The gdisk utility mirrors many of the options that you can use in fdisk, if you are going to use a MBR partition table instead. If we us the ? option from the gdisk utility, we get the help output. Let’s quickly run through some of these options.
You can list the partitions on a device with the l option. The d option allows you to delete one (be careful, deleting partitions is dangerous). To erase the current partition map and create a new empty one, use the o option, which is more dangerous but sometimes necessary to delete partition map. This option will ruin any partitions you have on your disk.
To create a partition, use the n option, which will start a wizard to guide you through the creation process, as you’ll see in a moment.
To list the current partition table, press p. This lists the partition table as it exists in memory, not as it is on the disk.
If you made changes that you do not want to save, press q. This will quit gdisk without writing the modified partition table to the disk.
Partitions also hold information about the type of filesystem they contain. The hexadecimal identifiers we got from the l option can be set using the t option.
When you’re happy with a new partition map, you can press w to save it to the disk. Finally, x allows you to access advanced gdisk options, such as recovery and transformation options, changing GUID, changing the disk geometry and moving the data contained within a partition. We don’t cover the use of any of these rarely used expert options.
Now press p to print the listing of partitions on the current disk. You’ll see that it’s empty. Normally, we recommend creating only a single partition on a data storage disk, but let’s have some fun with this disk and create a few. We will create one 4 GiB partition and two 2 GiB.
Start by creating a partition, 2 GiB in size, by pressing n.
Command (? for help): nPartition number (1-128, default 1):First sector (34-16777182, default = 2048) or {+-}size{KMGTP}:Last sector (2048-16777182, default = 16777182) or {+-}size{KMGTP}: 2GCurrent type is 'Linux filesystem'Hex code or GUID (L to show codes, Enter = 8300):Changed type of partition to 'Linux filesystem'
First you are asked for the partition number, a number between 1 and 128. We will take the default, 1. We are asked next to select disk sectors, each sector being 512 bytes. Modern systems align on sector boundaries and here we choose to start at sector 2048, or at 1024 kibibyte. Next, enter 2G to indicate you want to create a partition that is 2 GiB in size. Finally, we select a partition ID, represented by a hex code, the default is 8300, or Linux filesystem.
Repeat the process to create another partititon.
Partition number (2-128, default 2):First sector (34-16777182, default = 4196352) or {+-}size{KMGTP}:Last sector (4196352-16777182, default = 16777182) or {+-}size{KMGTP}: +2G
For partition 2 again we took the defaults for partition number and first sector. For the last sector we have to add a +2G so that the utility will add an additional 2 GiB.
To create the last 4 GiB partition we again select the defaults for partition number, first sector, and last sector.
Partition number (3-128, default 3):First sector (34-16777182, default = 8390656) or {+-}size{KMGTP}:Last sector (8390656-16777182, default = 16777182) or {+-}size{KMGTP}:
This create a partition will all the remaining disk space. Now we can print what we have been doing by selecting the p option.
Command (? for help): pDisk /dev/sdb: 16777216 sectors, 8.0 GiBLogical sector size: 512 bytesDisk identifier (GUID): 1C42CAB1-754B-4B21-A7A9-D7CE87C8965BPartition table holds up to 128 entriesFirst usable sector is 34, last usable sector is 16777182Partitions will be aligned on 2048-sector boundariesTotal free space is 4061 sectors (2.0 MiB)Number Start (sector) End (sector) Size Code Name1 2048 4194304 2.0 GiB 8300 Linux filesystem2 4196352 8390655 2.0 GiB 8300 Linux filesystem3 8390656 16777182 4.0 GiB 8300 Linux filesystem
We haven’t written this partition table to the actual disk yet; if this doesn’t look right we can exit without a worry with the q option. If we are happy we select the w option to write our GPT table.
Command (? for help): wFinal checks complete. About to write GPT data. THIS WILL OVERWRITE EXISTINGPARTITIONS!!Do you want to proceed? (Y/N): yOK; writing new GUID partition table (GPT) to /dev/sdb.The operation has completed successfully.
Earlier we mentioned partition types and IDs . Linux itself doesn’t generally care what the partition type is, but to make management easier, we recommend you change the type to match the intended use. As we have said, the partition id is a hex code. You get a listing of all the possible choices by issuing a l. In Table 9-1 we are giving you a listing of just those relating to Linux.
Table 9-1. Linux Partition IDs and Types
Hex Code/Partition id | Partition type |
|---|---|
8200 | Linux swap |
8300 | Linux filesystem |
8301 | Linux reserved |
8302 | Linux /home |
8303 | Linux x86 root (/) |
8304 | Linux x86-64 root (/) |
8305 | Linux ARM64 root (/) |
8306 | Linux /srv |
8307 | Linux ARM32 root (/) |
8e00 | Linux LVM |
If you wanted to change your partition type you could do so by issuing the following commands. We will take a look at gdisk again on the /dev/sdb drive we have just partitioned. Here we are going to change the first 2 GiB partition from a Linux filesystem type to a Linux swap.
$ sudo gdisk /dev/sdbCommand (? for help): tPartition number (1-3): 1Current type is 'Linux filesystem'Hex code or GUID (L to show codes, Enter = 8300): 8200Changed type of partition to 'Linux swap'
Here we have used gdisk to manage our partition table and have issued the t option to change the partition’s type code. We select partition 1 and it displays our current type, ‘Linux filesystem’. Next we have entered the code 8200 and it has now changed the type to Linux swap. When we print that result we see the following:
Command (? for help): pDisk /dev/sdb: 16777216 sectors, 8.0 GiBLogical sector size: 512 bytesDisk identifier (GUID): 1C42CAB1-754B-4B21-A7A9-D7CE87C8965BPartition table holds up to 128 entriesFirst usable sector is 34, last usable sector is 16777182Partitions will be aligned on 2048-sector boundariesTotal free space is 4061 sectors (2.0 MiB)Number Start (sector) End (sector) Size Code Name1 2048 4194304 2.0 GiB 8200 Linux swap2 4196352 8390655 2.0 GiB 8300 Linux filesystem3 8390656 16777182 4.0 GiB 8300 Linux filesystem
We have to select w to write this change to the table and q to quit. The kernel now reloads the partition map and creates new device nodes for your partitions. You’ll see in the output from dmesg that the disk detection routine has run and found your new partitions. You can also check that their device nodes now exist on disk.
$ ls -l /dev/sdb*brw-rw---- 1 root disk 8, 16 Jun 16 23:56 /dev/sdbbrw-rw---- 1 root disk 8, 17 Jun 16 23:56 /dev/sdb1brw-rw---- 1 root disk 8, 18 Jun 16 23:56 /dev/sdb2brw-rw---- 1 root disk 8, 19 Jun 16 23:56 /dev/sdb3
Sometimes the kernel is not able to reread the partition table, which means you can’t get access to the new partition device files until you have rebooted the host. This can happen if one of the partitions on the disk you were editing was still mounted. To avoid having to reboot, make sure no partitions on the disk you’re partitioning are mounted. We’ll cover mounting a bit later in this chapter.
Note
You can also make the kernel redetect partitions—without rebooting—by running the partprobe command.
Another utility to create and delete partitions is parted. Unlike gdisk and fdisk, this utility allows you to edit the size and ordering of partitions. We recommend you don’t go down the road of resizing partitions with parted as these can be disastrous operations, but rather use LVM. We will cover LVM in detail later in this chapter. For more information about parted, visit www.gnu.org/software/parted/index.shtml .
Caution
Resizing partitions can cause unrecoverable data loss. Always back up your data first!
Filesystems
You’ve now created partitions, but you have not yet prepared them for use. The next thing you need to do is create a filesystem. You may know this as formatting.
A filesystem is a bit like a library. It stores large amounts of data and has a catalog to ensure you can find what you’re looking for. The layout of the aisles and shelves and the design of the catalog determine how long it takes to find and retrieve any particular piece of information. Creating a filesystem is like initializing the catalog and moving the shelves into an otherwise empty library.
Just as there is no optimal aisle and shelf layout for all libraries, there is no “best” filesystem for all uses. We won’t go into a lot of detail, but let’s look at some of the most commonly used Linux filesystems. They are listed in Table 9-2 with their main features.
Table 9-2. Linux Filesystems and Their Main Features
Filesystem | Features |
|---|---|
Ext2 | Stable, general use, can be shrunk or expanded |
Ext3 | Stable, general use, quick recovery, can be shrunk or expanded |
Ext4 | Stable, general use, quick recovery, improves on ext3 |
XFS | Stable, general use, quick recovery, can be expanded online |
Btrfs | Unstable, fault-tolerant, copy on write (COW), pooling, and multi-device spanning |
The ext2 and ext3 filesystems are older filesystems. The general use of these filesystems was for storing many small files on them. They were a good choice of filesystem for an e‑mail store, web site store, or office file store, as these usually consist of many files that are up to several hundreds of kilobytes in size. You don’t see ext3 much on newer systems, but you do see ext2 as the filesystem for the /boot partition on Ubuntu 16.04 by default.
One of the major differences between ext2 and ext3 was journaling support. With ext2, if there was a crash, you can expect very long fsck waits before you could mount the disk again. To combat this issue, the journaled filesystem was created. Ext3, ext4, and XFS are such journaled filesystems, and thus don’t have the long recovery wait time that ext2 does. See the sidebar “Journaled Filesystems” for more information.
With lessons learned from ext3, a further advancement, ext4, was developed. It offers some features not available in ext3, such as online defragmentation, better journal reliability, and faster filesystem checks. Ext4 is intended as an all‑round filesystem with excellent performance. It can support volumes up to 1 exbibyte and a max file size of 16 tebibtyes. It is the default choice for the Ubuntu 16.04 distribution.
Another option available to you for storing video, large images, or database files is the XFS filesystem. It offers some of the same advantages as ext4 ; however, you cannot shrink a XFS partition (online). It is as performant as ext4. It can support up to 8 exbibytes and file sizes of 8 exibytes. It is the default choice for the CentOS 7.
Finally, Btrfs is a more recent filesystem with different features to both XFS and ext4. First, it can support ridiculously large volumes (16 exbibytes) and a max file of the same (16 exbibytes). At such a large scale, the journaling on ext4 and XFS becomes enourmously slow and impossible. It aims to naturally support operations and organization like snapshotting and pooling. It also has features like automatic defragmenting and scrubbing, where it uses checksums to automatically detect and correct errors. Depending on the workload, Btrfs maybe a good choice, and at a certain scale it is the only choice. We have listed it as Unstable in Table 9-2 due to some recent write hole problems in Raid5/6 configurations. Check this page for the most up to date status of the filesystem: https://btrfs.wiki.kernel.org/index.php/Status .
Note
Btrfs is not the only large-scale filesystem, but it is the one that is available in the default install of Linux. Others like ZFS are also popular and performant, but ZFS cannot be redistributed due to its license (it cannot be part of a Linux distribution). You can still use it on Linux though; however, you need to download and install it yourself: http://zfsonlinux.org/ .
You can find an exhaustive list of filesystems and comparisons of their features at http://en.wikipedia.org/wiki/List_of_file_systems and http://en.wikipedia.org/wiki/Comparison_of_file_systems .
Most modern filesystems use journals, though some use the journal only for file metadata. A filesystem like Btrfs can handle metadata in different ways. You can choose to lay out your metadata differently to your file data (e.g., your metadata as raid1 and your data as raid10). And for frequently updating file data, Btrfs uses a log tree, which is a per sub volume journal that records changes to help maintain consistency in the event of crashes or reboots.
Creating Swap Filesystem
We are going to use the first partition you created earlier, /dev/sdb1, as a swap partition. The choice of filesystem for this one is easy, as there is only one swap filesystem format. Let’s set it up first using the mkswap command, as shown in Listing 9-3.
Listing 9-3. Setting Up Swap Space
$ sudo mkswap /dev/sdb1Setting up swapspace version 1, size = 2 GiB (2146430976 bytes)no label, UUID=6d0ce2f6-f9f6-4ac2-91f6-3099a40d5624
You’re using the mkswap utility to mark /dev/sdb1 as swap space. You can use the generated UUID to add an entry in the /etc/fstab file, which lists all filesystems to be used on the host (see the sidebar “UUID” to find out what a UUID is). We’ll come back to the /etc/fstab file later in this chapter. Technically speaking, you’re not formatting the partition; rather, you’re writing a small amount of information to indicate to the kernel that it can be used as swap space.
You can immediately activate the new swap partition via the swapon command. This command tells the kernel it can use the specified partition as swap space.
$ sudo swapon /dev/sdb1This command will complete without printing anything, but you can check dmesg for information on what happened. Pipe the output into tail, to limit the number of lines displayed to the specified number.
$ sudo dmesg | tail -n 1[13066.031700] Adding 2096124k swap on /dev/sdb1. Priority:-2 extents:1 across:2096124k FS
Another way of checking swap is seeing if the free command reports swap space. Specify the -h option to display sizes in human readable form.
$ sudo free -htotal used free shared buff/cache availableMem: 992M 520M 62M 12M 409M 321MSwap: 3.0G 0B 3.0G
Alternatively, you can use the swapon command:
$ swapon –sFilename Type Size Used Priority/dev/dm-1 partition 3145728000 0 -1
The command reports a total of 3.0 G of swap space, which is the original 1 G we already had plus the 2 G we just added. We’ll come back to the free command in Chapter 17, when we look at performance management.
Creating an Ext4 Partition
For your data partitions, start with the other new 2 GiB /dev/sdb2 partition. You will format this as ext4 using the mkfs.ext4 utility, as shown in Listing 9-4. If you wanted to create an ext2 filesystem, sometimes used for creating a boot partition, just run mkfs.ext2 instead.
Listing 9-4. Creating an Ext4 Filesystem
$ sudo mkfs.ext4 –L mail /dev/sdb2mke2fs 1.42.9 (28-Dec-2013)Filesystem label=mailOS type: LinuxBlock size=4096 (log=2)Fragment size=4096 (log=2)Stride=0 blocks, Stripe width=0 blocks131072 inodes, 524288 blocks26214 blocks (5.00%) reserved for the super userFirst data block=0Maximum filesystem blocks=53687091216 block groups32768 blocks per group, 32768 fragments per group8192 inodes per groupSuperblock backups stored on blocks:32768, 98304, 163840, 229376, 294912Allocating group tables: doneWriting inode tables: doneCreating journal (16384 blocks): doneWriting superblocks and filesystem accounting information: done
In Listing 9-4 we have created an ext4 filesystem and specified a label using the -L parameter . This label would then allow you to refer to the partition by the label name, as opposed to the device name or UUID. On systems without many formatted partitions (and the less chance of naming collisions), using labels can help readability. In this instance, we chose a label for what will be used for.
With Ext filesystems, you then see a series of statistics about the filesystem size and how storage space was allocated. In the output you can see the settings for “Block size,” “Maximum filesystem blocks,” and “Inodes,” which describe how your filesystem has been set up. Take a look at the sidebar “Blocks and Inodes” for a short explanation of these. Of Note are the blocks reserved for the superuser and the superblock backups.
26214 blocks (5.00%) reserved for the super user...<snip>...Superblock backups stored on blocks:32768, 98304, 163840, 229376, 294912
The superblock is part of the filesystem metadata. It contains information about the filesystem such as its size, the amount of free space in the filesystem, and where on the filesystem the data can be found. If a crash occurred and this superblock were damaged, you’d have no way of determining which parts of the filesystem contained your data. To help you in the event of such a problem, several backup copies of the superblock are maintained at well‑known block numbers. We’ll revisit recovery later in this chapter.
The reserved blocks for the superuser percentage exist so that a normal user cannot fill a filesystem to such an extent that the superuser (root) could no longer log in, or services running as the root user would be unable to write data to disk.
The 5% limit is historical and suitable, for instance, for the root filesystem '/', which is not normally larger than a few gibibytes. However, when you’re using a 1 TiB filesystem, this limit would equate to 50 GiB of space that you could not use for storage of user data, so changing or removing it makes sense on data storage volumes.
You could have specified the -m 0 option for mkfs.ext4to set this percentage of reserved blocks to 0 when creating the filesystem, or you can change this value later (more on this shortly).
Tweaking ext2, ext3, and ext4 Filesystem Options
To change ext2, ext3, and ext4 filesystem parameters after creation, you use the tune2fs utility. To get an overview of available options, first run the utility without any parameters. You can also pull up the entire manual via man tune2fs.
$ tune2fstune2fs 1.42.13 (17-May-2015)Usage: tune2fs [-c max_mounts_count] [-e errors_behavior] [-g group][-i interval[d|m|w]] [-j] [-J journal_options] [-l][-m reserved_blocks_percent] [-o [^]mount_options[,...]] [-p mmp_update_interval][-r reserved_blocks_count] [-u user] [-C mount_count] [-L volume_label][-M last_mounted_dir] [-O [^]feature[,...]][-Q quota_options][-E extended-option[,...]] [-T last_check_time] [-U UUID][ -I new_inode_size ] device
Though it doesn’t explicitly say so, the -l parameter lists current filesystem options. Let’s run it on your new ext4 partition (see Listing 9-5).
Listing 9-5. Displaying Ext2, Ext3, or Ext4 Filesystem Options
$ sudo tune2fs -l /dev/sdb2tune2fs 1.42.13 (17-May-2015)Filesystem volume name: mailLast mounted on: <not available>Filesystem UUID: 71bd5774-33cb-491b-8ffe-49cb33935001...<snip>...Filesystem features: has_journal ext_attr resize_inode dir_index filetype extent flex_bg sparse_super large_file huge_file uninit_bg dir_nlink extra_isizeFilesystem flags: signed_directory_hashDefault mount options: user_xattr aclFilesystem state: cleanErrors behavior: ContinueFilesystem OS type: LinuxInode count: 131072Block count: 524288Reserved block count: 26214Free blocks: 498900Free inodes: 131061First block: 0Block size: 4096Fragment size: 4096...<snip>...Last mount time: n/aLast write time: Sun Jun 19 10:42:04 2016Mount count: 0Maximum mount count: -1Last checked: Sun Jun 19 10:42:04 2016Check interval: 0 (<none>)...<snip>...Journal backup: inode blocks
A lot of information is displayed, but of most interest to us are the filesystem UUID and state which tell us how to refer to the filesystem and its health. The “Errors behaviour” indicates what will happen if there are filesystem errors. In this case, we “continue” if we detect errors, but the other options are “remount-ro” (remount the filesystem as read-only), or “panic,” which causes a kernel panic which halts the system. Other information that can be useful diagnosing capacity problems are “Free inodes” and “Free blocks.” “Last write time,” “Last mount time,” and “Last mounted on” can also be useful.
Note
We’ll take a closer look at some of the filesystem features in Chapter 17 when we cover capacity planning and performance.
We are now going to use tune2fs to set the reserved blocks percentage to 0, as we don’t need reserved space on this partition .
$ sudo tune2fs -m 0 /dev/sdb2tune2fs 1.42.9 (28-Dec-2013)Setting reserved blocks percentage to 0% (0 blocks)
Table 9-3 lists the options for tune2fs that you’re most likely to use.
Table 9-3. Commonly Used tune2fs Options
Option | Function |
|---|---|
-c N | Sets the number of mounts before a filesystem check is forced to N |
-l | Lists the current filesystem options |
-m N | Sets the reserved blocks percentage to N% of all blocks |
-r N | Sets the number of reserved blocks to N |
-j | Creates a journal on this filesystem (converts ext2 to ext3) |
-L label | Assigns the label “label” to the filesystem |
-Ofeat | Toggles the filesystem feature “feat ” on or off |
Note
We’ll come back to the -O option and advanced filesystem features in Chapter 17 when we discuss performance and capacity planning.
The XFS Filesystem
The XFS filesystem was originally proprietary and closed source. XFS was developed by Silicon Graphics, Inc., for its IRIX operating system.
The filesystem driver of XFS was open sourced some years ago and IRIX helped working on integrating it into the Linux kernel, as Linux lacked a journaling filesystem at the time. The community enthusiastically embraced these newly open source filesystems, as both offered new features and excellent performance. Now they are well accepted and supported on the Linux platform including being the default on CentOS 7.
XFS
You already created an ext4 partition to store some small files on. Let’s format the other partition using the XFS filesystem. To this end, we will use the mkfs.xfs tool. Depending on the distribution, you may not have the necessary utilities to manage XFS filesystems. These utilities are provided by the xfsprogs package, before you begin you should have this installed. On Ubuntu you install them as follows:
$ sudo aptitude install xfsprogsand on CentOS, you use the command (though it is installed as the default filesystem)
$ sudo yum install xfsprogsAfter installing the package, you can create your filesystem using the default options, as shown in Listing 9-6.
Listing 9-6. Creating an XFS Filesystem
$ sudo mkfs.xfs /dev/sdb3meta-data=/dev/sdb3 isize=512 agcount=4, agsize=262079 blks= ectsz=512 attr=2, projid32bit=1= crc=1 finobt=1, sparse=0data = bsize=4096 locks=1048315, imaxpct=25= sunit=0 swidth=0 blksnaming = version 2 bsize=4096 ascii-ci=0 ftype=1log = internal log bsize=4096 blocks=2560, version=2= sectsz=512 sunit=0 blks, lazy-count=1realtime = none extsz=4096 blocks=0, rtextents=0
As the filesystem is created, some information about its configuration is displayed. We’ll make use of this information further in Chapter 17 when we look at performance and capacity planning.
All these options, which, for instance, control block size and journal size, can be set when the filesystem is created, but the mkfs.xfs tool will choose sensible defaults based on the size of the partition it needs to format.
Note
XFS does not reserve 5% of its available space for the root user and also does not automatically force a filesystem check after a specific amount of time has passed.
The XFS filesystem can be managed via several commands. The commands begin with xfs_ and you can see the options available by typing xfs_ and hitting the tab key twice. Table 9-4 shows the main ones you will be interested.
Table 9-4. Common xfs_ Commands
Command | Purpose |
|---|---|
xfs_repair | Helps repair damaged or corrupt filesystems |
xfs_growfs | Expands an XFS filesystem. |
xfs_freeze | Useful when creating snapshots. |
The Btrfs Filesystem
We have already explained many of the benefits of the Btrfs filesystem and now we shall show you how to create and manage one. If you do not have the utility programs already installed, you can do so by installing the btrfs-progs package, similarly to the way we installed the XFS packages.
We have said that Btrfs uses COW (or copy on write). But what is that? When data is modified, rather than writing the modified data over the previously data location, the data is copied, modified, and then written to a new free location. The metadata, the location of the file, is then updated in the same way to reflect the new location of the data.
We will quickly demonstrate how create a Btrfs partition and mount it. We have a new disk that has been attached to our host. We have discovered via dmesg that this new disk has been given the device /dev/sdc. We are going to use the entire disk for this partition. To create the Btrfs
$ sudo mkfs.btrfs /dev/sdcbtrfs-progs v4.4See http://btrfs.wiki.kernel.org for more information.Label: (null)UUID: e1c6cbb0-4fbf-4a61-a912-0a9cda611128Node size: 16384Sector size: 4096Filesystem size: 8.00GiBBlock group profiles:Data: single 8.00MiBMetadata: DUP 417.56MiBSystem: DUP 12.00MiBSSD detected: noIncompat features: extref, skinny-metadataNumber of devices: 1Devices:ID SIZE PATH1 8.00GiB /dev/sdc
We can now simply mount that partition. We have created a directory called /data1 and we will mount it there.
$ mount /dev/sdc /data1We can see that the filesystem is mounted.
$ df -h /data1Filesystem Size Used Avail Use% Mounted on/dev/sdc 8.0G 60M 7.2G 1% /data1
Btrfs comes with a utility to manage Btrfs filesystems. We will show you a few of the features of the utility: the first is how to resize the filesystem. We are going to decrease our filesystem by 2 GiB and then add it back again.
$ sudo btrfs filesystem resize -2G /data1Resize '/data1' of '-2G'
One of the subcommands of the Btrfs utility is filesystem. Here we have passed the options resize -2G /data1 which tell the utility to decrease the filesystem by 2 GiB. Using the filesystem show subcommand, we can see the result.
$ sudo btrfs filesystem show /data1Label: none uuid: e1c6cbb0-4fbf-4a61-a912-0a9cda611128Total devices 1 FS bytes used 42.03MiBdevid 1 size 6.00GiB used 1.64GiB path /dev/sdc
We are now going to add the 2 GiB back. So we simply use the following:
$ sudo btrfs filesystem resize +2G /data1Resize '/data1' of '+2G'
In this next example we have four spare disks attached to our host. We are going to use these disks as one combined disk. The output of dmesg shows they have been assigned to the following devices:
[ 47.815498] sdb: unknown partition table[ 47.833520] sdc: unknown partition table[ 47.848420] sdd: unknown partition table[ 47.868448] sde: unknown partition table
With Btrfs we can group our devices with RAID. It uses Multidevice filesystems to do this, which we talk more about later in the section “RAID.” One of the possible RAID types we can use is RAID 10. This RAID type gives us mirroring and striping, meaning devices are pair mirrored and then striped. This will give us redundancy and speed.
To create the Btrfs RAID partition we issue the following:
$ sudo mkfs.btrfs -d raid10 -m raid10 /dev/sdb /dev/sdc /dev/sdd /dev/sdebtrfs-progs v3.19.1See http://btrfs.wiki.kernel.org for more information.Turning ON incompat feature 'extref': increased hardlink limit per file to 65536Turning ON incompat feature 'skinny-metadata': reduced-size metadata extent refsadding device /dev/sdc id 2adding device /dev/sdd id 3adding device /dev/sde id 4fs created label (null) on /dev/sdbnodesize 16384 leafsize 16384 sectorsize 4096 size 32.00GiB
Here we have issued the mkfs.btrfs command. We have specified the –d option which sets the profile for the data block groups. The –m option sets the profile for the metadata block group. Then we have specified the four disks we are using.
At the end it says we have created an fs label on /dev/sdb. Let’s get the UUID of that device so we can put it in our fstab.
$ sudo blkid /dev/sdb[sudo] password for jsmith:/dev/sdb: UUID="0cd0e135-feb8-4f99-a973-5751549d2e4f" UUID_SUB="4d327afb-1330-43e5-b392-0e676ebab1b5" TYPE="btrfs"
We add our line to our fstab as follows:
UUID=0cd0e135-feb8-4f99-a973-5751549d2e4f /data btrfs defaults 0 0Let’s know mount our disk using the mount command:
$ sudo mount /data2Finally let’s take a look at how much space we have on the /data2 partition with the df –h command:
$ df –h /data2Filesystem Size Used Avail Use% Mounted on/dev/sdb 16G 18M 14G 1% /data2
We have four 8 GiB disks combining for a 14 GiB usable partition. We are now going to show you briefly the ability to create a subvolume and to create a snapshot.
A subvolume is a “POSIX namespace” or a container. It is not a block device, like /dev/sda or an LVM (logical volume management) logical volume. That is, you can’t mount it on its own or create a different filesystem on it, but you can mount it as a subvolume and the Linux kernel can read and write to it.
You use subvolumes as you would a normal directory. They have the following benefits:
you can rename and remove subvolumes
you can easily and quickly snapshot subvolumes
you can mount snapshots
you can nest subvolumes
you can apply quotas to subvolumes
We are going to create a subvolume called mail and we will mount that.
$ sudo btrfs subvolume create /data2/mailCreate subvolume '/data2/mail'
We have now created a directory called /srv/mail and we are going to mount our mail subvolume there:
$ sudo mount -t btrfs -o subvol=mail /dev/sdc /srv/mailWe can now see that that filesystem is mounted.
$ df -h /srv/mailFilesystem Size Used Avail Use% Mounted on/dev/sdb 16G 18M 14G 1% /srv/mail
The great feature of BtrFS subvolumes is the speed of snapshotting. There are two types of snapshots we can create: a read-only subvolume snapshot or a writeable subvolume snapshot . Since this is a CoW filesystem, we don’t change disk space until we write a change to the data. Now, let’s create a snapshot of the subvolume and we can mount it elsewhere, in /mnt/snap_mail, for example.
$ sudo btrfs subvolume snapshot /data/mail /data2/snap_mailNow to mount that on /mnt/snap_mail.
$ sudo mount -t btrfs -o subvol=snap_mail /dev/sdc /mnt/snap_mail$ df -h /mnt/snap_mailFilesystem Size Used Avail Use% Mounted on/dev/sdb 16G 18M 14G 1% /mnt/snap_mail
A snapshot is a point-in-time copy of the subvolume. You can use it to copy off data on a busy filesystem or to take a point-in-time backup of the subvolume. To make a read-only snapshot you would issue the btrfs subvolume snapshot –r (vol_target) (vol_dest).
Filesystems for Data Sharing
So far, we’ve covered filesystems that are accessible only by Linux. If you need to transfer data between different operating systems—for instance, when you don’t have a network between your laptop and a client’s machine—you are likely to want to use a filesystem that can be accessed by Windows and Mac OS X as well as Linux.
The de facto standard for this purpose is the FAT filesystem, which was developed for MS‑DOS by Microsoft. FAT comes in a few flavors. The latest version is FAT32, which supports disk sizes over 32 GiB and file sizes of up to 4 GiB.
To create a FAT32 filesystem, you use the mkfs.vfat utility. This utility is provided on both Ubuntu and CentOS by the dosfstools package, so you need to ensure that dosfstools is installed.
After plugging in the USB drive you wish to format, check its device node name via the kernel log, as shown in Listing 9-7.
Listing 9-7. Determining the Device Node for a USB Key
$ dmesg[ 52.464662] usb 1-1: new high speed USB device using ehci_hcd and address 2[ 52.887506] usb 1-1: configuration #1 chosen from 1 choice[ 52.967324] usbcore: registered new interface driver libusual[ 52.981452] Initializing USB Mass Storage driver...[ 52.986046] scsi3 : SCSI emulation for USB Mass Storage devices[ 52.987804] usbcore: registered new interface driver usb-storage[ 52.987831] USB Mass Storage support registered.[ 52.988661] usb-storage: device found at 2[ 52.988687] usb-storage: waiting for device to settle before scanning[ 58.982976] usb-storage: device scan complete[ 59.350262] usb 1-1: reset high speed USB device using ehci_hcd and address 2[ 59.772402] scsi 3:0:0:0: Direct-Access SanDisk Cruzer8.01 PQ: 0 ANSI: 0 CCS[ 59.789834] sd 3:0:0:0: [sdg] 15682559 512-byte hardware sectors (8029 MB)[ 59.792747] sd 3:0:0:0: [sdg] Write Protect is off[ 59.792754] sd 3:0:0:0: [sdg] Mode Sense: 45 00 00 08[ 59.792766] sd 3:0:0:0: [sdg] Assuming drive cache: write through[ 59.805772] sd 3:0:0:0: [sdg] 15682559 512-byte hardware sectors (8029 MB)[ 59.815884] sd 3:0:0:0: [sdg] Write Protect is off[ 59.815891] sd 3:0:0:0: [sdg] Mode Sense: 45 00 00 08[ 59.815894] sd 3:0:0:0: [sdg] Assuming drive cache: write through[ 59.816480] sdg: sdg1[ 59.831448] sd 3:0:0:0: [sdg] Attached SCSI removable disk[ 59.831942] sd 3:0:0:0: Attached scsi generic sg7 type 0
In Listing 9-7, the SanDisk Cruzer USB drive was detected as /dev/sdg. Once you know which device node the USB drive is, you can create a primary partition of type c - W95 FAT32 (LBA), and you can then format this partition using mkfs.vfat. Use the -n option to label the partition and specify that you want a FAT32 filesystem via the -F 32 option.
$ sudo mkfs.vfat -n "USB Key" -F 32 /dev/sdg1mkfs.vfat 2.11 (12 Mar 2005)
Other Filesystems
A plethora of different filesystems are available for Linux, so you might ask why we covered only three of them. Though many other filesystems exist, we feel that most of them are not suitable or ready for use in a production environment. The foremost feature a filesystem needs to have is stability, and the filesystems we covered offer this, as well as excellent performance. If you choose ext4, XFS, or Btrfs based on the type of data you are storing, you should see excellent reliability and speed. Choosing a faster but less stable filesystem for your server is not going to be of help if as a result you need to spend time restoring your data from backups once a month.
For a brief overview of other filesystems supported by the Linux kernel, you can read the filesystems manual page.
Note
Linux can create NTFS filesystems via the mkntfs tool in the ntfsprogs package. However, we recommend you don’t use NTFS filesystems to store data under Linux.
Using Your Filesystem
You’ve now created partitions on your new disk, /dev/sdb, and you’ve formatted these partitions with the filesystem of your choice. However, before you can use the filesystem to store data, you need to mount it.
As we briefly explained in Chapter 4 and at the start of this chapter, filesystems on Linux do not get assigned a drive letter. Instead, they are mounted as a directory, somewhere under the root filesystem or a subdirectory. In Chapter 4, we mentioned that the /mnt directory is commonly used as a place to temporarily mount filesystems. Next, you’ll create a directory called /mnt/data, and you’ll use that for your new ext4 partition.
$ sudo mkdir /mnt/dataMounting a partition is done via the mount command. You specify the filesystem type using the -t option, then the device file, and then the directory on which you want the filesystem to become available.
$ sudo mount -t ext4 /dev/sdb2 /mnt/data/If all goes well, the mount command will not print any information, but simply exit. To verify that the partition is now mounted, use the df command.
$ df -hFilesystem Size Used Avail Use% Mounted onudev 478M 0 478M 0% /devtmpfs 100M 3.3M 96M 4% /run/dev/mapper/au--mel--ubuntu--1--vg-root 6.3G 2.6G 3.4G 44% /tmpfs 497M 0 497M 0% /dev/shmtmpfs 5.0M 0 5.0M 0% /run/locktmpfs 497M 0 497M 0% /sys/fs/cgroup/dev/sda1 472M 147M 301M 33% /boottmpfs 100M 0 100M 0% /run/user/1000/dev/sdb2 2.0G 3.0M 1.8G 1% /mnt/data
Our partition is listed at the bottom of the output, so the mount command has succeeded. We’ll revisit df later in this chapter and explain in more detail what this output means.
You can also check for some more detailed information by examining the kernel log via the dmesg command.
$ dmesg[37881.206060] EXT4-fs (sdb2): mounted filesystem with ordered data mode. Opts: (null)
The kernel detected an ext4 filesystem and mounted it with the default option of “ordered data mode” (which means we first write data to the main filesystem and then commit the metadata to the journal). It also started a kernel thread to flush data from the journal to the filesystem every five seconds—our librarian emptying the book chute.
Taking a look inside the newly mounted partition, we can use ls to see if it contains anything:
$ cd /mnt/data && ls -ltotal 16drwx------ 2 root root 16384 Jun 19 10:42 lost+found
Your brand‑new filesystem contains a single directory called lost+found, which you didn’t create! This is a special directory that exists on all ext2, ext3 and ext4 filesystems. This directory is used by Linux’s filesystem repair tools, which we’ll look at later in the section “Recovering from Failure.”
When you no longer need the filesystem, you can unmount it from your host using the umount command.
$ sudo umount /mnt/dataumount: /mnt/data: target is busy(In some cases useful info about processes thatuse the device is found by lsof(8) or fuser(1).)$ pwd/mnt/data
What is happening here? The command umount is refusing to unmount the directory because it contains files or directories that are in use. In this case, it’s because our current working directory is /mnt/data and our host can’t unmount the device while we’re in the directory—that is, we are sitting in the directory we are trying to unmount! A device could be busy for many reasons, and it’s not always clear which user or application has opened which files or directories. To help you find out, the lsof command lists open files and directories:
$ sudo lsof /mnt/dataCOMMAND PID USER FD TYPE DEVICE SIZE/OFF NODE NAMEbash 2750 jsmith cwd DIR 8,18 4096 2 /mnt/datasudo 3999 root cwd DIR 8,18 4096 2 /mnt/datalsof 4000 root cwd DIR 8,18 4096 2 /mnt/datalsof 4001 root cwd DIR 8,18 4096 2 /mnt/data
Apart from lsof itself, there is a bash process owned by the user jsmith. You can make this process stop using the directory by going back to your home directory. Type cd and the ∼ shortcut for your home directory, and then check /mnt/data again using lsof.
$ cd ∼$ lsof /mnt/data
This time the lsof command has returned no open files and directories, and as the directory is no longer listed as in use, you can now safely unmount it:
$ sudo umount /mnt/dataNote
Unmounting a filesystem properly will set the Filesystem state flag you saw in the tune2fs output to clean, because it will ask the kernel to process the entire journal file and make sure all data is written to the disk. This prevents an automated filesystem check the next time your host boots.
When you run lsof as a non-root user, it will only list processes owned by that user. Someone else might still be using a file or directory on the filesystem you’re trying to unmount. It is always a good idea to run lsof using sudo to check.
Note
If a mounted filesystem is being used by a system service, you will have to stop the service before you can unmount the filesystem.
Automating Mounts
You’ve probably noticed that your other partitions don’t need to be manually mounted. When you started your host they were already mounted. This was done as part of the startup process. Each partition you want to mount automatically at startup needs to be listed in the /etc/fstab file. Listing 9-8 shows the one from our Ubuntu host.
Listing 9-8. An fstab File
# /etc/fstab: static file system information.## Use 'blkid' to print the universally unique identifier for a# device; this may be used with UUID= as a more robust way to name devices# that works even if disks are added and removed. See fstab(5).## <file system> <mount point> <type> <options> <dump> <pass>/dev/mapper/au--mel--ubuntu--1--vg-root / ext4 errors=remount-ro 0 1# /boot was on /dev/sda1 during installationUUID=d036bc4a-6f9b-4989-a377-7778a29bf16c /boot ext2 defaults 0 2/dev/mapper/au--mel--ubuntu--1--vg-swap_1 none swap sw 0 0
Each line in the file consists of six fields, separated by spaces or tabs. These fields specify how and where each filesystem is mounted, and what to do if a check is to be performed. All lines starting with a hash mark (#) are comments.
The filesystem field contains the device node name of the filesystem you want to be mounted. You can also substitute a filesystem label by specifying LABEL=label or the filesystem UUID, as in the example. We’ll use UUID references, as they don’t change even when disks are detected in a different order and thus might be named differently. Ubuntu places the original device node name in a comment on the line directly above. Next is the mount point, which is simply a directory anywhere on the filesystem. The mount point can be on a partition that was also mounted separately.
Tip
Keep in mind that entries in the /etc/fstab file are processed in order from top to bottom.
The filesystem type tells the system which type to expect. If this does not match, the mount will fail. You can specify a comma‑separated list of types to try, as is the case with the DVD‑ROM drive, /dev/scd0. This tries the udf DVD filesystem first and then iso9660, which is used by CD‑ROMs.
Mount options are passed as a comma‑delimited list as well. In our example fstab, you can see two different options being used for the ext4 filesystems. The option, errors=remount-ro, controls what happens if a filesystem error occurs. In this case, the filesystem will be immediately mounted in read‑only mode. This prevents additional data corruption while keeping files readable to services and users.
The other two possible values for error behavior are continue, which would cause the system to write a log entry but otherwise ignore the problem, and panic, which would cause the system to crash ungracefully. The default error behavior can also be specified in the filesystem itself via the tune2fs -e command. In Listing 9-5 we showed you how to use tune2fs to list the options, and doing that of the root mount ‘/’ shows that the following default mount options are used:
Default mount options: user_xattr aclThe user_xattr is to allow support for ‘user.’ extended attributes (which can be used for greater filesystem security, see the man attr for more details). The acl option allows for posix acl’s to be used, which again can be used for fine-grained directory access (see man acl for details).
There are many more mount options that define things like access to files and directories on filesystems, that might tweak performance, and options for filesystems that don’t support Unix‑style file permissions, like FAT32 and NTFS. Options for each supported filesystem can be found in the mount manual page.
The dump field contains a digit (0 or 1), which tells the system whether or not to dump some filesystem meta-information when a filesystem check is to be performed. This dump information can be used by the filesystem repair tools. A 0 means that the filesystem does not need to be dumped. We’ll cover this in a bit more detail later on in the section “Recovering from Failure.”
Finally, the pass field is used to determine the order in which filesystems should be checked. In our fstab file, the root filesystem is listed as 1, so it is checked first. After that the /boot filesystem would be checked. Filesystems with a 0 in this column are checked last. You can find longer descriptions of these fields on the fstab manual page.
Adding a Partition to /etc/fstab
To add your new partition to our /etc/fstab, we will map our device id, which is device path, label, or UUID, to our mount point. We are going to use the UUID and so we will need to know its UUID.
You can find this in the tune2fs -l listing with Ext filesystems, xfs_admin -u for XFS filesystems, or btrfs filesystem show for BtrFS, or you can use the blkid utility. If you run the latter without any parameters, it prints the UUID for all detected block devices, as shown in Listing 9-9.
Listing 9-9. Displaying All UUIDs
$ sudo blkid/dev/mapper/sda5_crypt: UUID="MdUlYF-y6Ol-XcB5-mS9L-mxPN-jNLF-ATAImA" TYPE="LVM2_member"/dev/mapper/au--mel--ubuntu--1--vg-root: UUID="0b9eec02-06a4-46e4-b9ac-1e1ea871ff89" TYPE="ext4"/dev/sda1: UUID="d036bc4a-6f9b-4989-a377-7778a29bf16c" TYPE="ext2" PARTUUID="105922fd-01"/dev/sda5: UUID="33dcd288-27f0-4f09-ab74-617db851a552" TYPE="crypto_LUKS" PARTUUID="105922fd-05"/dev/mapper/au--mel--ubuntu--1--vg-swap_1: UUID="e45b953f-284f-45f5-b16d-8f5be5d5a970" TYPE="swap"/dev/sdb2: LABEL="mail" UUID="71bd5774-33cb-491b-8ffe-49cb33935001" TYPE="ext4" PARTLABEL="Linux filesystem" PARTUUID="b704ec19-833d-4727-a572-189f214f2ecf"/dev/sdb1: UUID="6d0ce2f6-f9f6-4ac2-91f6-3099a40d5624" TYPE="swap" PARTLABEL="Linux swap" PARTUUID="db962e77-53f3-4cfe-847c-f53133f063f7"/dev/sdb3: UUID="ccd60fc3-bbaf-40e5-a93e-43743f9176d9" TYPE="xfs" PARTLABEL="Linux filesystem" PARTUUID="f9d90e5f-0186-4cd5-a2be-9b89e7286abb"
To have it print the UUID for only a single device, pass the device node name as a parameter, like
$ sudo blkid /dev/sdb2To mount your ext4 partition (the uuid command will print the filesystem type too) with the default mount options, add the following line to the /etc/fstab file:
UUID="71bd5774-33cb-491b-8ffe-49cb33935001" /mnt/data ext4 defaults 0 0The options “defaults” provide us with the following mount options when mounting an ext4 filesystem. They are rw, which is read/write, relatime which means that the system updates inode access time relative to modify or change times (a performance improvement), and data=ordered means that the system will first write data to the main filesystem and then commit the metadata to the journal.
If you want to use the device node instead, you can do the following. However we prefer you use either a label or the UUID as device paths can change.
/dev/sdb2 /mnt/data ext4 defaults 0 0Now you can test this entry without the need to reboot. If you use the mount command and only pass the mount point as a parameter, it will check the /etc/fstab file for a matching entry and mount that, with the options specified in the file.
$ sudo mount /mnt/dataIf the mount command exited without printing any errors, the fstab entry is correct and your filesystem will be automatically mounted each time you boot your host. If you pass the filesystem type, like with a mount -t ext4, it will mount all the ext4 filesystems. You can mount all the mount points in the fstab file with a mount –a. You can double‑check that the filesystem is mounted by running the mount as in Listing 9-10.
Listing 9-10. All Mounted Filesystems
$ sudo mount –t ext4/dev/mapper/au--mel--ubuntu--1--vg-root on / type ext4 (rw,relatime,errors=remount-ro,data=ordered)/dev/sdb2 on /mnt/data type ext4 (rw,relatime,data=ordered)
We have used the parameter –t ext4 to only specify ext4 fs-types in our output and you can see our /dev/sdb2 is mount on /mnt/data. Alternatively, to add a XFS partition, create the mount point directory and add the correct UUID or device node name and filesystem type to /etc/fstab:
UUID="ccd60fc3-bbaf-40e5-a93e-43743f9176d9" /mnt/data2 xfs defaults 0 0Caution
A mistake in the fstab file might result in a system that cannot boot. If so, you may need to follow some of the steps discussed in the section “Recovering from Failure” or use single-user mode as described in Chapter 6 to boot and fix the error.
It’s possible for the kernel not to have registered that the UUID on a filesystem has changed. If this happens, attempting to mount the filesystem by using the UUID reference would result in an error like the following:
$ sudo mount /mnt/dataxmount: special device /dev/disk/by-uuid/ccd60fc3-bbaf-40e5-a93e-43743f9176d9does not exist
You can cause the UUID to be redetected and the correct symbolic link in /dev/disk/by-uuid to be created by reloading the udev service. We can do that with the following:
$ sudo udevadm control --reloadChecking Filesystem Usage
When you start using a filesystem for data storage, you’ll want to be able to keep an eye on the amount of available space. When a filesystem fills up, services that use it may refuse to start, stop working, or crash.
You can list space usage for an entire filesystem via the df command, which is usually used with the -h option. This option produces human‑readable output with numbers in KiB, MiB, GiB, or TiB instead of blocks, as shown in Listing 9-11.
Listing 9-11. Filesystem Usage
$ df -hFilesystem Size Used Avail Use% Mounted onudev 478M 0 478M 0% /devtmpfs 100M 4.6M 95M 5% /run/dev/mapper/au--mel--ubuntu--1--vg-root 6.3G 2.6G 3.4G 44% /tmpfs 497M 0 497M 0% /dev/shmtmpfs 5.0M 0 5.0M 0% /run/locktmpfs 497M 0 497M 0% /sys/fs/cgroup/dev/sda1 472M 147M 301M 33% /boottmpfs 100M 0 100M 0% /run/user/1000/dev/sdb2 2.0G 3.0M 1.8G 1% /mnt/data/dev/sdb3 4.0G 33M 4.0G 1% /mnt/data2
The output shows you the total size, the amounts of space used and still available, and the percentage this equates to for each mounted filesystem. This command is quick, as it simply queries the filesystem metadata. As you have seen you can also pass the mount path to only return the information for that mount.
$ df -h /dataFilesystem Size Used Avail Use% Mounted on/dev/sdb 16G 22M 14G 1% /data
Note
To check the number of inodes, use the df -i command. Use this command when applications report that the disk is full, even if there is apparently a lot of free space left.
You can check the cumulative size of a directory and all the files it contains with the du command. This command needs to recursively scan files under the directory you’re running it on, so it may take a long time to complete. We’ll use the -h option again to give us human‑readable output. By default, it will print the size for each subdirectory as well. To avoid this, we pass the -s option, so it shows us only the final total.
$ du -sh *2.5M Documents44G src
Here we are listing and calculating the files and directories in our home directory. We have two directories, Documents and src and we can see the total size of each of the files in those directories. What happens when we try one of the system directories like the /etc directory?
$ du -sh /etcdu: cannot read directory '/etc/ssl/private': Permission denieddu: cannot read directory '/etc/lvm/archive': Permission denieddu: cannot read directory '/etc/lvm/backup': Permission denieddu: cannot read directory '/etc/polkit-1/localauthority': Permission denied7.0M /etc
Because it scans the subdirectories in /etc, this command may encounter directories that you don’t have permission to access. It cannot calculate the size of these directories, so the total that it reports is not correct in this case. To always get the correct total, you can run du as the root user:
$ sudo du -sh /etc7.0M /etc
And while we have the same amount shown in our result (7.0 M) this is due to rounding. If we used a –k (for KiB) instead of –h, we see values of 7,084 and 7,116 respectively. This can be helpful when determining which directories to move to a partition of their own if a filesystem becomes full. An alternative solution would be to resize the filesystem, and we’ll get to that shortly.
RAID
Storing data on a hard disk is great to keep it accessible on your server, but when the disk fails, you lose your data. There are several ways to combat this. One is to use LVM which can group multiple disks and present them as one device, or you can use BtrFS which can do a similar thing. In this section we are going to show you another alternative, RAID.
RAID allows you to use multiple disks as if they were a single larger disk, with optional built‑in redundancy. The three broad types of RAID implementations are as follows:
Hardware RAID
Fake RAID
Software RAID
Hardware RAID uses specialized hardware controllers, often called RAID controllers, that manage RAID transparently from the operating system. Enterprise‑level servers often come with these specialized hardware controllers. On such systems, you would usually configure RAID via the BIOS (Basic Input/Output System) or UEFI ( Unified Extensible Firmware Interface) (which we discussed briefly in Chapter 6). Linux will then see a single RAID array, which you would use like a normal hard disk.
Fake RAID is a lesser form of hardware RAID used on smaller systems or desktop machines. Here the manufacturer may have added RAID functionality to the mainboard via a chip. We recommend you don’t use fake RAID, as any RAID array created with this implementation would work only on a host sharing an identical controller. Its performance also depends on proprietary code provided by the manufacturer. These controllers can usually be configured to run as simple Serial ATA controllers, instead of RAID. A short listing of the most common fake RAID controllers is available at https://raid.wiki.kernel.org/index.php/DDF_Fake_RAID .
Note
If you have fake RAID set up with Windows and want to dual boot, you can still use most fake RAID arrays under Linux via the dmraid system. Disabling fake RAID would cause Windows to stop working, and you might lose your data.
The third RAID implementation type is via software contained in the Linux kernel. This system is called md or multiple disk. The md system usually performs much better than fake RAID, and md RAID arrays are transferable between hosts. In this section, we’ll focus on using md RAID.
Types of RAID
There are several types—or levels—of RAID. The level you use depends on what is most important to you. The different levels offer a trade‑off between available disk space, reliability, and speed. Table 9-5 lists the most commonly used RAID levels.
Table 9-5. Commonly Used RAID Levels
Raid Level | Functionality | Storage capacity |
|---|---|---|
RAID 0 | Speed | N * size |
RAID 1 | Redundancy | N * size / 2 |
RAID 5 | Redundancy, speed | N ‑ 1 * size |
RAID 6 | Redundancy, reliability, speed | N ‑ 1 * size |
RAID 10 | Redundancy, reliability, speed | N / 2 * size |
RAID 50 | Redundancy, speed | N – 1 * size |
Storage capacity is calculated by the N (total number of disks) in the raid array (minus any parity disks) then multiplied by the size of the disk. You can find an exhaustive list and descriptions of RAID levels at http://en.wikipedia.org/wiki/Redundant_array_of_independent_disks .
It’s common to use one hard disk as a spare as well. Should a disk in an array fail, its place can be immediately taken over by the spare disk.
Note
It’s possible to run RAID without any spare devices, but you will then need to replace a failed device immediately, to avoid data loss.
Striping and Mirroring
The most basic way to use RAID is with two disks, which gives you the option to use either RAID level 0 or RAID level 1.
RAID 0, which is also known as striping, causes Linux to see the two disks as a combined disk of twice the size . When writing data to such a RAID array, parts of the data will end up on each of the disks. Since this is an operation Linux can execute simultaneously on both disks, writing to RAID 0 is faster than writing to a single disk. However, the drawback is that when one of the disks fails, arbitrary parts of files that were spread over both disks disappear. So you lose all your data.
Caution
Avoid using RAID 0 on a server or on any machine that holds persistent data.
RAID 1, also known as mirroring, allows you to store only as much data on the array as a single disk holds. It stores identical copies of all files on both disks, so if one disk fails, you can still retrieve your data from the other. Since all data needs to be written to each disk , RAID 1 does not offer any improved write performance.
Figure 9-1 shows how files are stored on disk when using RAID 0 or RAID 1. On RAID 1, each disk contains a full copy of each file. On RAID 0, each disk contains only a partial copy of each file.
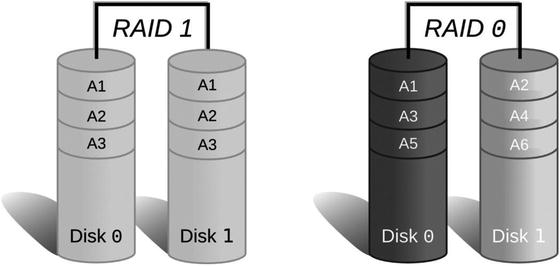
Figure 9-1. RAID 0 and RAID 1 file storage
When you have more disks to play with, you get more options to pick a RAID level that can give you improved performance as well as redundancy. The simplest extension is RAID 1+0 (RAID 10), which uses multiple RAID 1 mirrors as elements of a RAID 0 stripe. This way, all striped data is saved to at least two disks, which gives you the advantages of RAID 0 speed and RAID 1 redundancy. However, you can only store as much data as half the combined disk size. When disks are both large and cheap, and you have enough slots in your server to hold at least four disks, this might be a good option.
Processor to the Rescue
In order to get the best of all worlds—redundancy, storage size, and speed—you can call in the help of some processing power. RAID level 5 uses a minimum of three disks and gives you more efficient use of the available storage space and increased read and write speed. It accomplishes this by striping the data across multiple disks and also writing a checksum of each stripe to a different disk (also known as block parity - for details on how this is calcuated see http://searchstorage.techtarget.com/definition/parity ). Should a disk fail, the checksum can be used to reconstruct the data in the missing stripes.
The trade‑off is that this approach uses processing power to calculate the checksums. When data is written to the array, a checksum needs to be calculated and stored on one of the disks. If a disk fails, the checksum can then be used in combination with the data on the remaining disks to recalculate the missing parts of the data. The faster your CPU, the faster this process is.
Figure 9-2 shows a simple diagram illustrating how data and checksum are split between disks. B1, B2, and B3 are parts of file B. Bp is a checksum, or parity. If disk 1 fails, B2 can be computed from B1, B3, and Bp, so when a replacement disk is added, its contents can be restored.
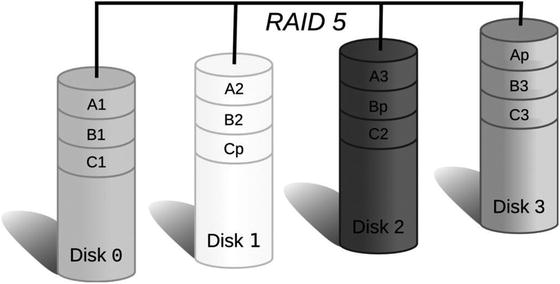
Figure 9-2. RAID 5 stripe layout across multiple disks
It’s important to keep in mind that using RAID is not a substitute for creating regular backups. It will protect you from hardware failure but not from intentional deletion. If you accidentally delete a file from the RAID array, it will be removed from all devices in the array. We’ll cover data backup and recovery in Chapter 14.
Creating an Array
You want to protect the data on your host from disk failure, so you will want to use RAID on it. To give a good overview of common RAID levels we will show you RAID 1 and RAID 5. The one you use depends on the number of hard disks you have available. First, you need to make sure you have at least three disks and create identically sized partitions on all of them.
Note
If you do not have enough disks to use RAID, you can create multiple identically sized partitions on a single disk and use them as components in your RAID array. This will allow you to test RAID installation and management. Note that performance in this configuration will be quite slow, as data will need to be written to different parts of the same disk multiple times. It also doesn’t provide much additional resilience against disk failures. If the single disk fails, then your RAID array will also fail.
On our example host we will again use three new disks, sdc, sdd, and sde, all of identical size. The disks need to be of identical size for RAID to work, if they are not the same size you need to create partitions on the disks of the same size. Here we create a 2 G partition and set the partition type to fd00 – Linux RAID, as shown in Listing 9-12.
Listing 9-12. Clearing the Partition Table and Creating a RAID Partition
$ sudo gdisk /dev/sdcGPT fdisk (gdisk) version 0.8.6Partition table scan:MBR: not presentBSD: not presentAPM: not presentGPT: not presentCreating new GPT entries.Command (? for help): nPartition number (1-128, default 1):First sector (34-16777182, default = 2048) or {+-}size{KMGTP}:Last sector (2048-16777182, default = 16777182) or {+-}size{KMGTP}: 2GCurrent type is 'Linux filesystem'Hex code or GUID (L to show codes, Enter = 8300): fd00Changed type of partition to 'Linux RAID'Command (? for help): wFinal checks complete. About to write GPT data. THIS WILL OVERWRITE EXISTINGPARTITIONS!!Do you want to proceed? (Y/N): yOK; writing new GUID partition table (GPT) to /dev/sdc.The operation has completed successfully.
You would need to repeat this process for /dev/sdd and /dev/sde. However, if your disks are all of the same size (it is best to have the same drives from the same manufacturer for this reason) you do not need to partition the drives at all. Since our drives are the same size, we will will not partition them first.
Now that you have prepared your three disks, you can create the RAID array. For this you will need the RAID management utilities, which are provided by the mdadm package.
The command that manages all aspects of the RAID configuration is also called mdadm, and you can specify what it should do with your array via the mode option. To create an array, you need to specify create mode, which RAID level you want to use, and which partitions need to become part of the array. Listing 9-13 shows how to create a RAID 1 array.
Listing 9-13. Creating a RAID 1 Array with a Hot Spare
$ sudo mdadm --create /dev/md0 --level=raid1 --raid-devices=2 /dev/sdc /dev/sdd--spare-devices=1 /dev/sdemdadm: Note: this array has metadata at the start andmay not be suitable as a boot device. If you plan tostore '/boot' on this device please ensure thatyour boot-loader understands md/v1.x metadata, or use--metadata=0.90Continue creating array? ymdadm: Defaulting to version 1.2 metadatamdadm: array /dev/md0 started.
Here we have created a device that we can mount called /dev/md0 and that is a RAID 1 device made up of two partitions /dev/sdc and /dev/sdd, with /dev/sde as a hot spare. If we were going to boot off this device (i.e., maybe create a MBR partition and install grub on it) we would need to change the metadata format we wish to use. We can do by specifying --metadata=0.90 (which is the original superblock format–see the man mdadm page for more details).
Creating or starting a RAID array will cause the md kernel modules to be loaded and display some status information. You can check the kernel log via dmesg, as shown in Listing 9-14.
Listing 9-14. Kernel RAID Information
$ sudo dmesg[ 9508.794689] md: bind<sdc>[ 9508.795609] md: bind<sdd>[ 9508.795996] md: bind<sde>[ 9508.806492] md: raid1 personality registered for level 1[ 9508.807304] md/raid1:md0: not clean -- starting background reconstruction[ 9508.807306] md/raid1:md0: active with 2 out of 2 mirrors[ 9508.807318] md0: detected capacity change from 0 to 8584626176[ 9508.809302] RAID1 conf printout:[ 9508.809305] --- wd:2 rd:2[ 9508.809306] disk 0, wo:0, o:1, dev:sdc[ 9508.809307] disk 1, wo:0, o:1, dev:sdd[ 9508.812318] md: resync of RAID array md0[ 9508.812320] md: minimum _guaranteed_ speed: 1000 KB/sec/disk.[ 9508.812321] md: using maximum available idle IO bandwidth (but not more than 200000 KB/sec) for resync.[ 9508.812323] md: using 128k window, over a total of 8383424k.[ 9508.821845] md0: unknown partition table[ 9550.509411] md: md0: resync done.[ 9550.516479] RAID1 conf printout:[ 9550.516481] --- wd:2 rd:2[ 9550.516483] disk 0, wo:0, o:1, dev:sdc[ 9550.516484] disk 1, wo:0, o:1, dev:sdd[ 9550.517712] RAID1 conf printout:[ 9550.517715] --- wd:2 rd:2[ 9550.517716] disk 0, wo:0, o:1, dev:sdc[ 9550.517717] disk 1, wo:0, o:1, dev:sdd
Because your new array was never synchronized, the kernel will start by ensuring the data on both disks is identical. It informs you it will perform the synchronization as fast as it can, but never slower than 1,000 KB per second per disk and never faster than 200,000 KB per second in total.
Tip
We’ll show you how to change the synchronization speed in Chapter 17.
To check on the status of our RAID device, you can use the mdadm utility in query mode with the --detail option. This displays a wealth of information about the specified RAID device, as shown in Listing 9-15.
Listing 9-15. Querying RAID Device Status
$ $ sudo mdadm --query --detail /dev/md0/dev/md0:Version : 1.2Creation Time : Mon Jun 20 09:41:18 2016Raid Level : raid1Array Size : 8383424 (8.00 GiB 8.58 GB)Used Dev Size : 8383424 (8.00 GiB 8.58 GB)Raid Devices : 2Total Devices : 3Persistence : Superblock is persistentUpdate Time : Mon Jun 20 09:42:00 2016State : cleanActive Devices : 2Working Devices : 3Failed Devices : 0Spare Devices : 1Name : au-mel-centos-1.example.com:0 (local to host gateway.example.com)UUID : ca66c4e2:49e8c87e:94d311de:01ca4f55Events : 17Number Major Minor RaidDevice State0 8 33 0 active sync /dev/sdc1 8 49 1 active sync /dev/sdd2 8 65 - spare /dev/sde
Listing 9-15 displays the metainformation about the array, as well as a detailed status for each component. In the case of our RAID 1 array, you can see that /dev/sdc and /dev/sdd are both active and in sync. This means any data written to the RAID device is immediately written to both /dev/sdc and /dev/sdd. If either of these devices should fail, our spare (/dev/sde) will be automatically activated and synchronized.
You can also quickly see your RAID device by querying the /proc filesystem:
$ cat /proc/mdstatPersonalities : [raid1]md0 : active raid1 sde[2](S) sdd[1] sdc[0]8383424 blocks super 1.2 [2/2] [UU]unused devices: <none>
We can see the [UU] and that tells us both devices [2/2] are Up. If one were degraded or down it might appear like this [U_]. The (S) after the device indicates it is being used as a spare.
At boot time, your Linux host will invoke the mdadm utility. Depending on its configuration, the utility will scan either all partitions or defined disks for RAID superblocks. If it finds any, it will analyze them and try to assemble and start all RAID arrays. You can also explicitly define your RAID arrays in the mdadm configuration file, to ensure their device node names do not change. The configuration file to define your arrays in is /etc/mdadm.conf on CentOS and /etc/mdadm/madadm.conf on Ubuntu. We’ve included a default mdadm.conf file from Ubuntu in Listing 9-16.
Listing 9-16. Default mdadm.conf
# mdadm.conf## Please refer to mdadm.conf(5) for information about this file.## by default (built-in), scan all partitions (/proc/partitions) and all# containers for MD superblocks. alternatively, specify devices to scan, using# wildcards if desired.#DEVICE partitions containers# auto-create devices with Debian standard permissionsCREATE owner=root group=disk mode=0660 auto=yes# automatically tag new arrays as belonging to the local systemHOMEHOST <system># instruct the monitoring daemon where to send mail alertsMAILADDR root# definitions of existing MD arrays# This file was auto-generated on Tue, 10 May 2016 21:55:12 +1000# by mkconf $Id$
This configuration file will cause the host to scan for arrays at boot time and create device nodes owned by the root user and disk groups, just like regular hard drives. It specifies that when mdadm is run in monitor mode, any e‑mails about device failures are sent to the root user.
Note
We’ll show you how to redirect all e-mail for the root user to a different address in Chapter 12.
Finally, there is a space to add the configurations for your RAID arrays. You’ll add a definition for your RAID 1 array here. According to the mdadm.conf manual page, you need the following:
ARRAY /dev/md0 level=raid1 num-devices=2 spares=1UUID=ca66c4e2:49e8c87e:94d311de:01ca4f55 devices=/dev/sdc,/dev/sdd,/dev/sde
Note that adding this array definition is not strictly necessary. mdadmwill automatically detect and assemble the array even if you leave this array definition out of the configuration file.
We already mentioned that mdadm will send an e‑mail to the root user if an event occurs. We’ll show you an example later on, when we start failing devices in our array.
If you have minimum of four hard disks, you can create a RAID 5 array instead. Doing so allows you to use the available storage space more efficiently and, in some cases, improve performance as well. To create a new RAID 5 array, you need to disassemble the RAID 1 array first. By stopping it, you release all devices it uses:
$ sudo mdadm --manage /dev/md0 --stopmdadm: stopped /dev/md0
You can now use these devices for the new RAID 5 array. Take care to remove the entry added to the mdadm.conf file as well. You’ll add a disk, /dev/sdf, and create a single primary partition of type “Linux RAID” on it.
When that’s done, you can create a RAID 5 array with three active devices and one spare, as shown in Listing 9-17.
Listing 9-17. Creating a RAID 5 Array
$ sudo mdadm --create /dev/md0 --level=raid5 --raid-devices=3 --spare-devices=1 /dev/sdc /dev/sdd /dev/sde /dev/sdfmdadm: /dev/sdc appears to be part of a raid array:level=raid1 devices=2 ctime=Mon Jun 20 09:41:18 2016mdadm: /dev/sdd appears to be part of a raid array:level=raid1 devices=2 ctime=Mon Jun 20 09:41:18 2016mdadm: /dev/sde appears to be part of a raid array:level=raid1 devices=2 ctime=Mon Jun 20 09:41:18 2016Continue creating array? ymdadm: Defaulting to version 1.2 metadatamdadm: array /dev/md0 started.
Some of these devices were part of the previous RAID 1 array, and they still contain the old RAID superblock with array information. You want to create a new array, overwriting the old data, so answer Y. Because the old RAID 1 array was synchronized, all devices also contain a filesystem now, even though you had initially created only one on /dev/sdc. You can check the array status again via /proc/mdstat.
$ cat /proc/mdstatPersonalities : [raid1] [raid6] [raid5] [raid4]md0 : active raid5 sde[4] sdf[3](S) sdd[1] sdc[0]16765952 blocks super 1.2 level 5, 512k chunk, algorithm 2 [3/2] [UU_][===>.................] recovery = 15.2% (1280840/8382976) finish=0.7min speed=160105K/sec
Here you can see that we have [3/2][UU_] which means two of the drives are functioning normally and the other is degraded but recovering, meaning it is getting a copy of the data it needs to bring it into the RAID array. It does not take long on this system until the array is up.
$ cat /proc/mdstatPersonalities : [raid1] [raid6] [raid5] [raid4]md0 : active raid5 sde[4] sdf[3](S) sdd[1] sdc[0]16765952 blocks super 1.2 level 5, 512k chunk, algorithm 2 [3/3] [UUU]
You now have a RAID 5 array with three active devices and one spare. Provided you have enough hard disks, you can grow the size of a RAID 5 array as well. This causes data to be shifted and checksums to be recalculated, so it will take some time to complete. You’ll add a sixth disk, /dev/sdg, to your host, so you can grow the array and still have a spare device available. Then you can add the new device to your array and grow the array using mdadm in manage mode via the --add option, as shown in Listing 9-18.
Listing 9-18. Expanding a RAID 5 Array
$ sudo mdadm --manage /dev/md0 --add /dev/sdgmdadm: added /dev/sdf
To add multiple devices in a single command, just list them all after the --add option. A quick check of /proc/mdstat now shows that both sde1 and sdf1 are listed as spares.
$ cat /proc/mdstatPersonalities : [raid1] [raid6] [raid5] [raid4]md0 : active raid5 sdg[5](S) sde[4] sdf[3](S) sdd[1] sdc[0]16765952 blocks super 1.2 level 5, 512k chunk, algorithm 2 [3/3] [UUU]unused devices: <none>
And now you can expand the array from three to four active disks with mdadm in grow mode. One of the spares will automatically be used for this. Part of this process is destructive, so if a power failure occurs while you’re expanding the array, you might lose data. To prevent this, specify the --backup-file option. Be sure not to store this backup file in the /tmp directory, which is emptied on boot!
$ sudo mdadm --grow /dev/md0 --raid-disks=4 --backup-file=/root/raid-backup-filemdadm: Need to backup 384K of critical section..mdadm: ... critical section passed.
You can keep an eye on the progress via the /proc/mdstat file again.
$ cat /proc/mdstatPersonalities : [linear] [multipath] [raid0] [raid1] [raid6] [raid5] [raid4][raid10]md0 : active raid5 sdg1[5](S) sde1[4] sdf1[3] sdd1[1] sdc1[0]16771584 blocks super 0.91 level 5, 64k chunk, algorithm 2 [4/4] [UUUU][=======>.............] reshape = 35.8% (3008512/8385792) finish=22.2minspeed=4022K/secunused devices: <none>
You now have four active devices and a single spare. The full new size of the array will not be accessible until the reshape has finished. As you can see, the reshape runs at a far slower rate than the RAID 1 re-sync.
Tip
Instead of rerunning the cat /proc/mdstat command manually, you can automatically run it at a specified interval via the watch command. Log in to a second console and run watch –n 5 cat /proc/ mdstat to automatically run the command every five seconds. Exit watch by pressing Ctrl+C.
We’ll revisit RAID and show you how to deal with disk failures in the section “Recovering from Failure.” For more information about md RAID on Linux, you can visit http://linux-raid.osdl.org/index.php/Linux_Raid .
Next we’ll show you how to make use of these RAID devices without the need to partition them.
Logical Volume Management
We have seen how we can partition a disk and create different filesystems on them. The problem is, once you partition a disk, it’s hard to resize the partitions or to add an additional one. Even if you do add disks and partitions, your data can become spread over a variety of locations and directories. This makes it harder to consolidate, back up, and manage your data, and it potentially makes it harder for your users to find their data. To overcome this issue, logical volume management (LVM) was created.
Rather than splitting a disk into a fixed number of partitions that are stored on a fixed area of the disk, LVM amalgamates one or more partitions or devices into a single logical volume group. You can then dynamically create, resize, and delete volumes in a volume group, removing the need to unmount volumes or reboot the system to update the partition map.
The LVM system has three layers. The bottom layer consists of physical volumes: disks, partitions, or RAID arrays. Physical volumes are used to create volume groups. A volume group can consist of one or more physical volumes. Finally, a volume group can contain any number of logical volumes, which are the LVM equivalent of partitions.
Both Ubuntu and CentOS have a graphical user interface (GUI) that you can use to manage disks, but they do not support LVM (there is an application called “Disks”). So what we’ll do is take you through administering via the command line, starting with LVM volumes and groups.
Creating Groups and Volumes
If you want to use a partition with LVM, you need to set its type to 8e00 - Linux LVM using gdisk. You can also use an entire disk or RAID array as storage for LVM. This is convenient, as you would not normally create partitions on a software RAID array.
For our examples, we’ll be setting up LVM on the RAID 5 array created earlier. The steps are identical when setting up LVM on RAID 1, individual partitions, or whole disks.
Each of these storage devices used by LVM is called a physical volume (PV) . You can mark a device as such via the pvcreate command.
$ sudo pvcreate /dev/md0Physical volume "/dev/md0" successfully created
This command writes a small watermark to the start of the device, identifying it for use with LVM. You can list all such devices on the system via the pvs command.
$ sudo pvsPV VG Fmt Attr PSize PFree/dev/md0 lvm2 --- 15.99g 15.99g/dev/sda2 centos lvm2 a-- 7.51g 40.00m
Note
You will get more detailed information about physical volumes if you use the pvdisplay command.
Recall that we chose to use LVM when we first installed our CentOS system. You can see now that it used the /dev/sda2 partition as a physical volume. The second column, labeled VG , refers to the volume group, which is the next layer in the LVM system.
You can list all volume groups on the system via the vgs command.
$ sudo vgsVG #PV #LV #SN Attr VSize VFreecentos 1 2 0 wz--n- 7.51g 40.00m
Note
You will get more detailed information about volume groups if you use the vgdisplay command.
There is one volume group, called centos, which was created by the installer. It spans one physical volume and contains two logical volumes. You can list these via the lvs command. There are currently two volumes, root and swap_1.
$ sudo lvsLV VG Attr LSize Pool Origin Data% Meta% Move Log Cpy%Sync Convertroot centos -wi-ao--- 6.67gswap centos -wi-ao--- 820.00m
Note
You will get more detailed information about logical volumes if you use the lvdisplay command.
You can now add your physical volume to an existing group via the vgextend command:
$ sudo vgextend centos /dev/md0Volume group "centos" successfully extended
And to check, you can display the physical volumes using pvs and vgs.
$ sudo pvsPV VG Fmt Attr PSize PFree/dev/md0 centos lvm2 a-- 15.99g 15.99g/dev/sda2 centos lvm2 a-- 7.51g 40.00m$ sudo vgsVG #PV #LV #SN Attr VSize VFreecentos 2 2 0 wz--n- 23.50g 16.03g
The new physical volume is now part of the centos volume group. Adding the new physical volume to the group means it now has 23.50 GiB of unallocated space.
The alternative would have been to create a new volume group and use your physical volume with that. You can still do so by removing /dev/md0 from the centos group via the vgreducecommand:
$ sudo vgreduce centos /dev/md0Removed "/dev/md0" from volume group "centos"
It is now available to be used for a different volume group, which you create using the vgcreate command. You will assign the /dev/md0 device to the new raid-volume volume group. When this is complete, you can check that the new volume group exists using the vgs command.
$ sudo vgcreate raid-volume /dev/md0Volume group "raid-volume" successfully created$ sudo vgsVG #PV #LV #SN Attr VSize VFreecentos 1 2 0 wz--n- 7.51g 40.00mraid-volume 1 0 0 wz--n- 15.99g 15.99g
You now have a new volume group that you can use to create logical volumes. In preparation for later chapters, why don’t we create a storage area for web sites? With LVM, we can easily give each of these functions its own dedicated area on disk.
First, you need to create a logical volume, which you do via the lvcreate command. You need to specify a name, a size, and the volume group to create the volume in. You can then list it via lvs.
$ sudo lvcreate --name www --size 2G raid-volumeLogical volume "www" created$ sudo lvsLV VG Attr LSize Pool Origin Data% Meta% Move Log Cpy%Sync Convertroot centos -wi-ao---- 6.67gswap centos -wi-ao---- 820.00mwww raid-volume -wi-a----- 2.00g
All that’s left to do now is create a filesystem on the logical volume and mount it somewhere. To do so, you need the device node name for the logical volume. This is managed by a driver called device-mapper , which creates a device node entry for any volume you create.
A logical volume is accessible via /dev/mapper/<vgname>-<lvname>, which is symlinked from /dev/<vgname>/<lvname>. So for the new “www” LV, you can use /dev/raid-volume/www. We shall create a XFS filesystem for this logical volume using the following:
$ sudo mkfs.xfs /dev/raid-volume/wwwYou can use the volume as if it were an ordinary partition and add it to the /etc/fstab file, so it is automatically mounted on /var/www when your host boots. For this, you can use either the device node name or the UUID of the filesystem just created. blkid will provide you with both. The /etc/fstab entry looks like this:
# /dev/mapper/raid--volume-wwwUUID=0814d564-b61c-407a-8483-9b176c684816 /var/www xfs defaults 0 0
After you create the /var/www directory you can mount it using the following:
$ sudo mount /var/wwwExpanding a Logical Volume
Thus far, using LVM has seemed just a more convoluted way of using your disks, but what if your web site grew beyond 2 GiB? Without LVM, you would need to create a partition on an unused disk, and then copy all data across and make sure /etc/fstab was updated. However, with LVM you can simply expand the logical volume and then resize the filesystem on it. If there was no space left in the volume group, you could add a physical volume to the group first.
You need to complete two steps to safely resize the filesystem contained in your logical volume. First, you need to resize the logical volume itself, and second, you need to resize the filesystem. LVM can do these for you and we will show you how shortly.
The volume can be expanded using the lvextend command. You need to specify either the new total size or the size increase you want, and the name of the volume. By prefixing the size parameter with +, you indicate you want the specified size added to the existing size.
$ sudo lvextend --size +2G --resizefs /dev/raid-volume/wwwSize of logical volume raid-volume/wwwl changed from 2.00 GiB (512 extents) to 4.00 GiB (1024 extents).Logical volume spool successfully resized.meta-data=/dev/mapper/raid--volume-www isize = 256 agcount=4, agsize=131072 blks= ectsz=512 attr=2, projid32bit=1= crc=0 finobt=0data = bsize=4096 blocks=524288, imaxpct=25= sunit=0 swidth=0 blksnaming = version 2 bsize=4096 ascii-ci=0 ftype=0log = internal bsize=4096 blocks=2560, version=2= sectsz=512 sunit=0 blks, lazy-count=1realtime = none extsz=4096 blocks=0, rtextents=0data blocks changed from 524288 to 1048576
As you can see we have specified that we want to add 2 G (+2G) to the /dev/raid-volume/www logical volume . We also want it to be resized (--resizefs) for us. This tells LVM to simply execute xfs_growfs after the resizing the logical volume.
Note
With resizing your filesystem you are limited by the capabilities of the filesystem – lvextend and lvreduce use the underlying filesystem tools to resize the filesystem and add nothing special. So you will be able to extend and reduce Ext family of filesystems using LVM but only extend XFS as you cannot reduce a XFS filesystem.
To specify the new total size, rather than adding 2G to the volume, you could also use the following:
$ sudo lvextend -s 4G /dev/raid-volume/wwwSize of logical volume raid-volume/www changed from 2.00 GiB (512 extents) to 4.00 GiB (1024 extents).Logical volume www successfully resized.
In this case, both approaches produce the same result: a logical volume 4 GiB. However in this case we have not told lvmextend to resize the filesystem so the filesystem size remains at 2 GiB. While we could have got lvextend to resize the filesystem using the –r (or --resize) option, we are going to do it ourselves manually.
We are now going to tell the filesystem about the new size of the device it is contained on, for which you use the xfs_growfs utility. If we had an Ext4 filesystem we would use the resize2fs utility instead. You’ll start with a 2 GiB filesystem, as you can see in Listing 9-19.
Listing 9-19. Resizing an Ext3 Filesystem
$ df -h /var/wwwFilesystem Size Used Avail Use% Mounted on/dev/mapper/raid--volume-www 2.0G 135M 1.9G 7% /var/www$ sudo xfs_growfs /dev/raid-volume/wwwmeta-data=/dev/mapper/raid--volume-www isize=256 agcount=8, agsize=65408 blks= sectsz=512 attr=2, projid32bit=1= crc=0 finobt=0data = bsize=4096 blocks=523264, imaxpct=25= sunit=128 swidth=256 blksnaming =version 2 bsize=4096 ascii-ci=0 ftype=0log =internal bsize=4096 blocks=2560, version=2= sectsz=512 sunit=8 blks, lazy-count=1realtime =none extsz=4096 blocks=0, rtextents=0data blocks changed from 523264 to 1048576$ df -h /var/wwwFilesystem Size Used Avail Use% Mounted on/dev/mapper/raid--volume-www 4.0G 136M 4.0G 3% /var/www
And you now have a 4 GiB filesystem .
Shrinking a Logical Volume
In addition to expanding a filesystem, there are some filesystems you can also shrink. To shrink a filesystem and a logical volume, you follow the previous steps in reverse and use the lvreduce command. Just make certain you do not shrink the logical volume to be smaller than the filesystem it contains.
We have created a new LVM group and LVM volume of 4 G. We have formatted it as an Ext4 filesystem and we are going to resize it to 2 G. Unlike growing the filesystem, if the volume you are reducing is mounted, the following command will umount and remount it.
$ sudo lvreduce --size -2G -r /dev/vg-mail/spoolDo you want to unmount "/tmp/block"? [Y|n] yfsck from util-linux 2.23.2/dev/mapper/vg--mail-spool: 11/262144 files (0.0% non-contiguous), 53326/1048576 blocksresize2fs 1.42.9 (28-Dec-2013)Resizing the filesystem on /dev/mapper/vg--mail-spool to 524288 (4k) blocks.The filesystem on /dev/mapper/vg--mail-spool is now 524288 blocks long.Size of logical volume vg-mail/spool changed from 4.00 GiB (1024 extents) to 2.00 GiB (512 extents).Logical volume spool successfully resized.
And now our filesystem has been reduced.
$ df -h /tmp/blockFilesystem Size Used Avail Use% Mounted on/dev/mapper/vg--mail-spool 1.9G 12M 1.8G 1% /var/spool
LVM Commands
Although it’s a little bit more work to set up than simple partitions, LVM allows you to use your storage space in a far more flexible manner. Table 9-6 lists the LVM commands you’ll most often use.
Table 9-6. Basic LVM Commands
Command | Used For |
|---|---|
pvcreate | Labeling devices for use with LVM |
pvremove | Removing the LVM label from a physical volume |
pvdisplay / pvs | Displaying information on the specified device or all physical volumes on the system |
vgcreate | Creating a new volume group |
vgremove | Removing (deleting) a volume group |
vgextend | Adding physical volumes to a volume group |
vgreduce | Removing physical volumes from a volume group |
vgdisplay / vgs | Displaying information about the specified group or all volume groups on the system |
lvcreate | Creating a new logical volume |
lvremove | Removing (deleting) a logical volume |
lvextend | Increasing the size of a logical volume |
lvreduce | Decreasing the size of a logical volume |
lvdisplay / lvs | Displaying all logical volumes on the system or in a specified volume group |
Recovering from Failure
If your host suffers a crash that leaves a filesystem in an inconsistent state, the system will automatically try to repair the problem at boot time. Figure 9-3 shows how the root filesystem on our host was automatically checked and the journal on /dev/mapper/au--mel--ubuntu--1--vg--root was replayed after a crash.
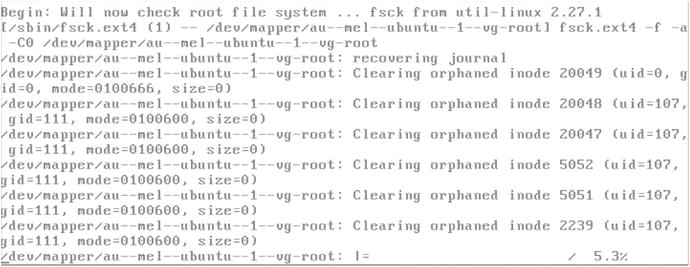
Figure 9-3. Automatic filesystem recovery
While we don’t recommend it, you can force your system to run a fsck on boot by adding fsck.mode=force to the kernel at boot, either permanently by editing grub or once off by interrupting the boot and adding it via the grub console. The fsck can take a substantial amount of time, depending on the size of your filesystem—up to hours! These automated recoveries will generally work, but on occasion the repair tools will find a problem they cannot fix automatically.
If this happens for the root filesystem, on which the repair utilities are stored, you can try to use the systemd emergency target (systemctl emergency) or you will need to boot from your installation DVD or USB. You may remember from Chapter 2, booting from the DVD or USB includes an option to boot in rescue or recovery mode. This mode boots to a minimal system running from the installation disk and drops you into a root shell. From this shell, you can then perform any steps needed to recover the filesystems. We explain boot to rescue mode in greater detail shortly.
The simplest step is to run the appropriate filesystem checker. Table 9-7 details the system check and repair tools for the filesystems you are most likely to use.
Table 9-7. Filesystem Check and Repair Tools
Filesystem(s) | repair tool |
|---|---|
Ext2, ext3 and ext4 | e2fsck or its aliases fsck.ext2, fsck.ext3 or fsck.ext4 |
XFS | xfs_repair |
Btrfs | btrfs check --repair <device> |
To run these repair tools , you will need to make sure the filesystem you’re checking is not mounted for writing. Repairing a filesystem that is mounted in read/write mode is guaranteed to destroy data, as the filesystem will be modified directly by the repair tool without the kernel knowing about it.
To check the filesystem, you pass the appropriate device node name as a parameter to the repair tool.
Note
When repairing the root filesystem by running a tool from the root filesystem itself, make sure to mount the filesystem read-only first.
Let’s take you through a problem with one of our disks. If there is a problem on a filesystem the system will inform you that the filesystem could not be mounted and drop into a maintenance mode , as shown in Figure 9-4.

Figure 9-4. A filesystem problem prevents an automatic mount
You can press enter to access the maintenance mode and on that we are going to look at the journal log (journalctl which is the systemd logging utility). By typing journalctl –xb we access we add more detail to messages (-x) and specify this boot (-b). In Figure 9-5 we see the reason we have stopped our system.
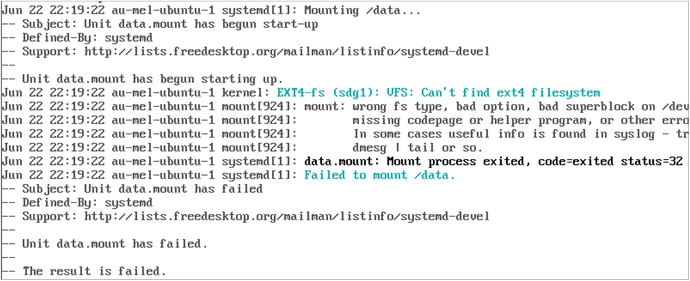
Figure 9-5. Error message on disk mount
We can see that we have failed to mount /dev/sdg1 on the /data directory. It is saying that it can’t find the filesystem. We will exit the journal and we will run the fsck check manually (see Figure 9-6).
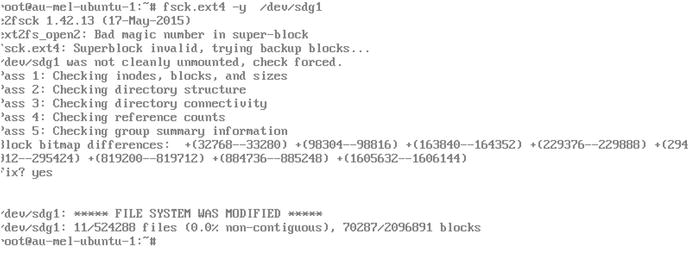
Figure 9-6. Manually running fsck
Here the fsck has called e2fsck and attempted to repair the filesystem. We have told it to “assume yes” (-y) to all questions and so it will automatically try to repair your filesystem. We can now reboot our system or continue booting with ctrl-d.
On occasion there is a problem with the superblock for an ext2, ext3, or ext4 filesystem, which means the filesystem–checking tools cannot locate the filesystem metadata they need in order to repair the filesystem. For this reason, these filesystems keep backup superblocks as well. You can use the dumpe2fs tool to display their location on the disk and then specify this location for e2fsck using the -b option (use an alternative superblock), as shown in Listing 9-20.
Listing 9-20. Finding Backup Superblocks
$ sudo dumpe2fs /dev/sdg1 | grep Backupdumpe2fs 1.42.13 (17-May-2015)Journal backup: inode blocksBackup superblock at 32768, Group descriptors at 32769-32769Backup superblock at 98304, Group descriptors at 98305-98305Backup superblock at 163840, Group descriptors at 163841-163841Backup superblock at 229376, Group descriptors at 229377-229377Backup superblock at 294912, Group descriptors at 294913-294913Backup superblock at 819200, Group descriptors at 819201-819201Backup superblock at 884736, Group descriptors at 884737-884737Backup superblock at 1605632, Group descriptors at 1605633-1605633
Once you know the location of a backup superblock, you can try running e2fsck and specifying the location of a backup superblock using the -b option.
$ sudo e2fsck -b 98304 -y /dev/sdg1e2fsck 1.42.13 (17-May-2015)/dev/sdg1 was not cleanly unmounted, check forced.Pass 1: Checking inodes, blocks, and sizesPass 2: Checking directory structurePass 3: Checking directory connectivityPass 4: Checking reference countsPass 5: Checking group summary information/dev/sdg1: ***** FILE SYSTEM WAS MODIFIED *****/dev/sdg1: 11/524288 files (0.0% non-contiguous), 70287/2096891 blocks
The e2fsck command can now run and repair the filesystem.
If there are problems and file data is found in inodes that e2fsckcannot place, this data will be stored in files in the lost+found directory on the filesystem you’re checking. The file name is the inode number that the data is associated with. Although this doesn’t tell you which files are no longer where they should be, you can inspect these numbered files manually and get some sense of which data might be missing. If a lot of corruption occurred and there are many hundreds of files in the lost+found directory, it is probably better to restore your data from a backup.
Boot Loader Problems
If a problem occurs with a hard disk, the system may fail to boot altogether because the boot sector was corrupted. In this case, the boot loader cannot be started, and you’ll see strange errors on the screen, as we showed you in Chapter 6.
Repairing the boot loader is fairly simple with the Rescue mode on the installation media. If you need to re-install your boot loader because of some issue you can use your installation media (DVD, USB) and enter the rescue section (see Figure 9-7).
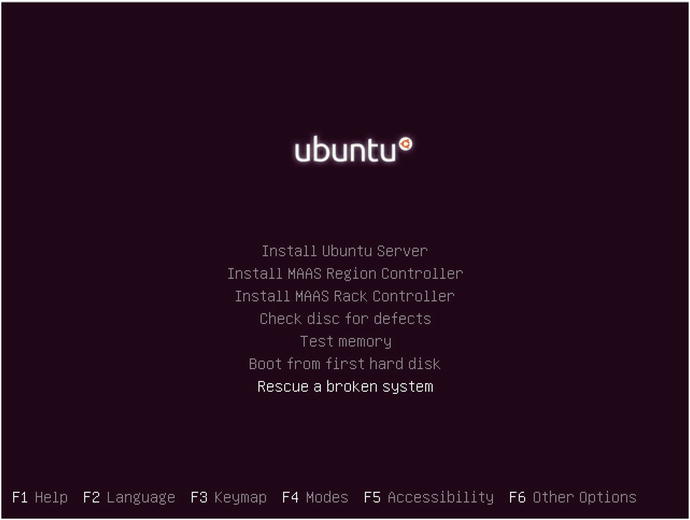
Figure 9-7. Enter Rescue Mode
From there we are taken through a similar installation process like the one we executed when we first installed out system, and note, this is an Ubuntu system. The CentOS procedure for entering the Rescue mode is fairly similar in concept.
The rescue process will eventually do a scan of your disks and present you with a list of possible root partitions you can choose to mount. On this Ubuntu system our root partition is similar to the one shown in Figure 9-8:

Figure 9-8. Selecting the root partition to mount
Our root partition is the LVM volume au-mel-ubuntu-1-vg/root. We select that and then we are taken to the rescue menu as in Figure 9-9.
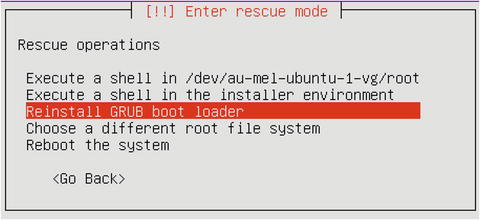
Figure 9-9. The rescue menu
We have selected the Reinstall GRUB boot loaderand on entering that we are presented with the next screen to select the disk we wish to install GRUB on (see Figure 9-10).
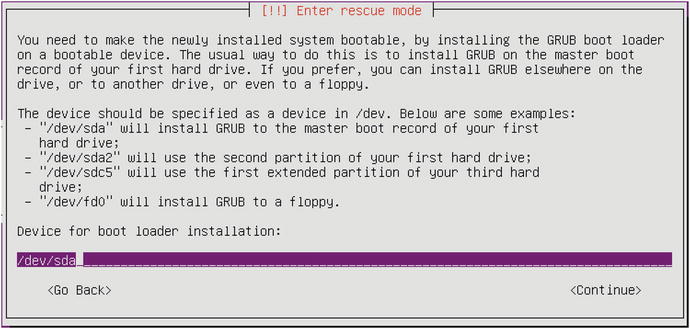
Figure 9-10. Re-installing the GRUB boot loader
We are going to re-install the boot loader onto our /dev/sda device. If we were using UEFI we would have a different partition to install the boot loader into.
You can also mount the root partition and execute a shell to fix other problems you might have, like execute other types of disk repair and maintenance.
You do that by choosing the following from the Rescue menu shown in Figure 9-11:

Figure 9-11. Opening a shell on the root partition
This asks us a few questions and tells us what it is doing (see Figure 9-12).

Figure 9-12. Mount /boot ?
Like it says, your separate boot partition may be corrupt and you may not want to mount it at this time. Instead you may want to leave unmounted and then run e2fsck against it to do any repairs. In this case we will mount our /boot partition though.
Figure 9-13 is informational and says that there may be other partitions that you need to mount, if you have partitions mounted into other areas of your filesystem. You can continue on here and take whatever action is necessary to mount any partitions.
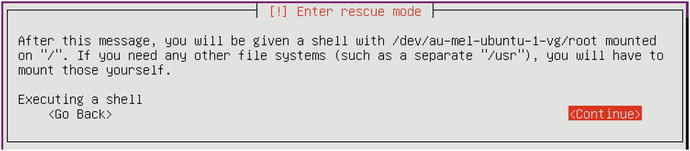
Figure 9-13. Information about other mounts
Now we have the rescue shell (see Figure 9-14). It is your system that been specially mounted via chroot. A chroot is a special mount we explain shortly.
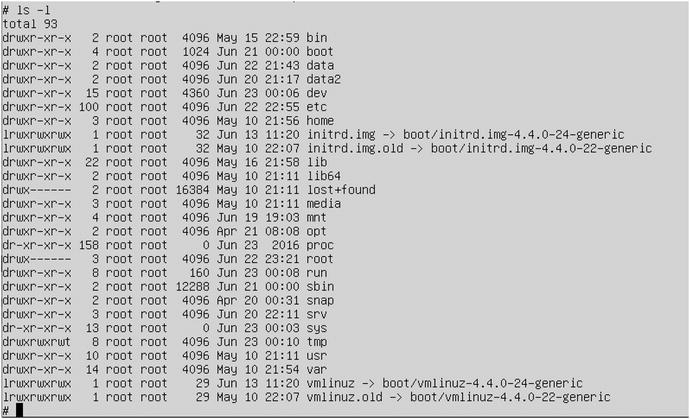
Figure 9-14. The rescue shell
Disk Failure
Sooner or later one of your hard disks will fail. When you’re using RAID, this is no longer a problem, but you will need to take action to ensure the array is fully working again before the next disk fails. As you’ve seen earlier in this chapter, you can keep a disk marked as a spare, and that automates part of this process.
To simulate a disk failure, we’ll use mdadm to tell the kernel that /dev/sdb1 has failed, as shown in Listing 9-21.
Listing 9-21. Testing Our RAID Array
$ sudo mdadm --manage /dev/md127 --fail /dev/sdd1mdadm: set /dev/sdd1 faulty in /dev/md127
The RAID subsystem now knows the device has failed. This is identical to what happens when the RAID drivers detect that an error has occurred on one of the devices in the array. Let’s have another look at the /proc/mdstat file.
$ cat /proc/mdstatPersonalities : [raid6] [raid5] [raid4] [linear] [multipath] [raid0] [raid1] [raid10]md127 : active raid5 sdc1[1] sde1[3] sdb1[0] sdf1[5] sdd1[4](F)25148928 blocks super 1.2 level 5, 512k chunk, algorithm 2 [4/3] [UU_U][======>..............] recovery = 34.0% (2852268/8382976) finish=2.3min speed=39764K/secunused devices: <none>
The sdd1 disk is now marked as failed with (F), and sdf1, which was our spare disk, is being brought up to date. We can check the system log to make sure the RAID monitor has picked up on these changes and acted appropriately. We can use the journalctl –xb command to see any messages.
Jun 23 01:06:01 au-mel-ubuntu-1 kernel: md/raid:md127: Disk failure on sdd1, disabling device.md/raid:md127: Operation continuing on 3 devices.Jun 23 01:06:01 au-mel-ubuntu-1 kernel: RAID conf printout:Jun 23 01:06:01 au-mel-ubuntu-1 kernel: --- level:5 rd:4 wd:3Jun 23 01:06:01 au-mel-ubuntu-1 kernel: disk 0, o:1, dev:sdb1Jun 23 01:06:01 au-mel-ubuntu-1 kernel: disk 1, o:1, dev:sdc1Jun 23 01:06:01 au-mel-ubuntu-1 kernel: disk 2, o:0, dev:sdd1Jun 23 01:06:01 au-mel-ubuntu-1 kernel: disk 3, o:1, dev:sdf1Jun 23 01:06:01 au-mel-ubuntu-1 kernel: RAID conf printout:Jun 23 01:06:01 au-mel-ubuntu-1 kernel: --- level:5 rd:4 wd:3Jun 23 01:06:01 au-mel-ubuntu-1 kernel: disk 0, o:1, dev:sdb1Jun 23 01:06:01 au-mel-ubuntu-1 kernel: disk 1, o:1, dev:sdc1Jun 23 01:06:01 au-mel-ubuntu-1 kernel: disk 3, o:1, dev:sdf1Jun 23 01:06:01 au-mel-ubuntu-1 kernel: RAID conf printout:Jun 23 01:06:01 au-mel-ubuntu-1 kernel: --- level:5 rd:4 wd:3Jun 23 01:06:01 au-mel-ubuntu-1 kernel: disk 0, o:1, dev:sdb1Jun 23 01:06:01 au-mel-ubuntu-1 kernel: disk 1, o:1, dev:sdc1Jun 23 01:06:01 au-mel-ubuntu-1 kernel: disk 2, o:1, dev:sde1Jun 23 01:06:01 au-mel-ubuntu-1 kernel: disk 3, o:1, dev:sdf1Jun 23 01:06:01 au-mel-ubuntu-1 kernel: md: recovery of RAID array md127Jun 23 01:06:01 au-mel-ubuntu-1 kernel: md: minimum _guaranteed_ speed: 1000 KB/sec/disk.Jun 23 01:06:01 au-mel-ubuntu-1 kernel: md: using maximum available idle IO bandwidth (but not more than 200000 KB/sec) for recovery.Jun 23 01:06:01 au-mel-ubuntu-1 kernel: md: using 128k window, over a total of 8382976k.
After the rebuild has complete we should see something similar to this:
Jun 23 01:09:21 au-mel-ubuntu-1 kernel: md: md127: recovery done.Jun 23 01:09:21 au-mel-ubuntu-1 kernel: RAID conf printout:Jun 23 01:09:21 au-mel-ubuntu-1 kernel: --- level:5 rd:4 wd:4Jun 23 01:09:21 au-mel-ubuntu-1 kernel: disk 0, o:1, dev:sdb1Jun 23 01:09:21 au-mel-ubuntu-1 kernel: disk 1, o:1, dev:sdc1Jun 23 01:09:21 au-mel-ubuntu-1 kernel: disk 2, o:1, dev:sde1Jun 23 01:09:21 au-mel-ubuntu-1 kernel: disk 3, o:1, dev:sdf1Jun 23 01:09:21 au-mel-ubuntu-1 mdadm[1341]: RebuildFinished event detected on md device /dev/md127Jun 23 01:09:21 au-mel-ubuntu-1 mdadm[1341]: SpareActive event detected on md device /dev/md127, component device /dev/sde1
Great! The monitor has picked up on the failure, activated the spare, started the rebuild, and completed rebuilding the array. The RAID system has acted to preserve our data and the array is still intact. All that’s left for us to do is remove the failed disk from the array and then replace it.
First, we’ll invoke mdadm to remove the failed disk from the RAID array.
$ sudo mdadm --manage /dev/md127 --remove /dev/sdd1mdadm: hot removed /dev/sdd1
The next step depends on your hard disk controller. If it supports hot‑swapping of drives, you could unplug the broken disk and replace it with a new one. If not, you will have to shut down the host to physically replace the drive.
When you’ve installed the new drive and started the host, you will need to partition the new disk as you have the other disks in the array. The new disk will likely have the same device node name as the disk it replaces. When partitioning is done, you can add the new partition to the array via mdadm, as shown in Listing 9-22.
Listing 9-22. Adding a New Device to a RAID Array
$ sudo mdadm --manage /dev/md127 --add /dev/sdd1mdadm: added /dev/sdd1$ cat /proc/mdstatPersonalities : [raid6] [raid5] [raid4] [linear] [multipath] [raid0] [raid1] [raid10]md127 : active raid5 sdd1[4](S) sde1[6] sdc1[1] sdb1[0] sdf1[5]25148928 blocks super 1.2 level 5, 512k chunk, algorithm 2 [4/4] [UUUU]unused devices: <none>
The new disk was added as the spare, ready to take over if another disk fails.
It’s possible that a problem might prevent a RAID array from automatically starting. If you are booting in rescue mode from DVD or USB, the array will likely not be detected and started either. If this happens, you can manually assemble the array. To re‑create a RAID array from existing components, use mdadm in assemble mode. This will try to assemble the array from the components you specify. Check the mdadm manual page for more information.
Summary
In this chapter, you learned how to manage storage on Linux and how you can most securely and flexibly store your data by making use of RAID and LVM.
We explored the different filesystems that come with Ubuntu and CentOS
We looked at ext4, XFS
We saw how to create Btrfs RAID volumes and subvolumes
We looked at mounting and auto mounting partitions
We learned how to set up software RAID
We looked at LVM, and resized volumes and filesystems.
In case of disk failure, you now know how to remove components from and add components to a RAID array
Now you can repair basic filesystem errors.
In Chapter 10, we will show you how set up infrastructure services such as an SSH server, discuss how to manage the time on your hosts using NTP (Network Time Protocol), and introduce DNS (Domain Name System) and DHCP (Dynamic Host Configuration Protocol).