
Now that you have learned how to build the components for a few systems, we are going to show you how you can build thousands of them quickly, at the same time, and all having the right configuration for each type of system! In the last 18 chapters we wanted to show you just how each part of the Linux system was configured, what switch applied to what command, and what outcome each switch had. All this was essential to understanding what automated provisioning and configuration management are now going to do for you.
In this chapter, we’re going to look at three facets of configuration management.
Automated provisioning and installation of new hosts
Automated management of your configuration including files, users, and packages
How to test your configuration as code
The first process we’re going to examine, automated provisioning or installation of new hosts, is sometimes called bootstrapping. In the CentOS world, bootstrapping is often referred to as kickstarting (after the Kickstart tool used to perform it). On Ubuntu and Debian, the process is called preseeding.
Provisioning is a way of automatically installing a distribution to a host. When we first looked at installing distributions in Chapter 2, we demonstrated how to do it manually. You inserted a DVD and followed the onscreen prompts to install your distribution. Automated provisioning is a way of installing a distribution without being prompted by the configuration questions. This makes provisioning quick and simple, and it also has the advantage of ensuring every build is identical.
Tip
You can use provisioning for both server hosts and desktop hosts. Not only is it a quick way of building (or rebuilding) server hosts, but it can also be a quick way to automatically install desktops for your users.
The second process we’re going to examine is configuration management and automation. By now you’ve seen that you can accumulate a lot of installed packages, users, configuration files, and other settings. Your environment can quickly get complicated and difficult to manage if you don’t take steps to control and automate it. Configuration management allows you to centralize your configuration, document it, and automate it. This allows you to manage and control changes to your environment and protects you against accidental or malicious configuration changes.
The third is testing your infrastructure just like you would your application code. Because configuration management is just code, this makes testing your configurations easier and helps to ensure fewer bugs creep into your production servers. This can lead to fewer administration mistakes as things can be tested and reviewed prior to being pushed into production. This can be all hooked into your normal Jenkins or other continuous integration/continuous deployment (CI/CD) infrastructure to make this a seamless operation.
Provisioning, configuration management, and testing are meant to be used in a workflow. In your system provisioning process you can install the operating system with Cobbler, or different provisioning system, and then use Ansible or Puppet to apply the tested configuration as part of that process. This means that by the time you first get access to your console, it has the right disk layout, it has the right operating system, it has the right network configuration, it has the right users and packages, it has the right configuration for services, and those services have been started. Not only that, but every system you build after that is also just right, even if it consists of thousands of them. And it can be done automatically for you after you have completed your CI builds!
Provisioning
We’ve talked a little about what provisioning is, but how you go about it varies between distributions. We are going to explain how to automatically provision both CentOS and Ubuntu hosts .
Provisioning is usually a two-stage process.
Boot your host and send it the files required for installation.
Automate the installation steps.
The process starts with a host booting up. Remember in Chapter 5 when we told you about the boot sequence? On many hosts, you can configure that boot sequence to look in alternative places to get its boot instructions; for example, you can boot from a DVD or a USB stick. In addition to these methods, you can also get your boot instructions from a network source.
The technology behind this boot process is called Preboot Execution Environment (PXE) . A network boot server is hence called a PXE boot (pronounced “pixie boot”) server. The host that we intend to build uses a network query to find a PXE boot server, usually a network query to a DHCP server, that might offer it the files required to boot and then transfers those files to the host using a file transfer protocol called Trivial File Transfer Protocol (TFTP) .
Note
You can read more about PXE at http://en.wikipedia.org/wiki/Preboot_Execution_Environment .
Once this initial boot takes place, your provisioning process continues by installing a prepackaged version of your distribution, usually with a series of automated scripted responses to the various configuration questions you are prompted for when installing.
Note
We’re using network-based provisioning to create our hosts rather than any of the alternatives, such as CD or DVD. This is because we believe network-based provisioning is the simplest, easiest, and most efficient way to automatically build hosts.
Provisioning with CentOS Cobbler
CentOS has a variety of tools for provisioning hosts, ranging from the most basic, Kickstart, which automates installations, to full-featured GUI management tools for host configuration such as Cobbler ( http://cobbler.github.io/ ) and Spacewalk ( http://spacewalk.redhat.com/ ).
We’re going to look at a combination of three tools:
Kickstart: An installation automation tool for Red Hat–based operating systems
Preseed: An installation automation tool for Debian-based operating systems
Cobbler: A provisioning server that provides a PXE boot server
We’ll take you through the process of creating a Cobbler server and a build to install. Later in this chapter, we’ll show you how to configure Kickstart to automate your configuration and installation options.
Installing Cobbler
Let’s start by installing Cobbler on your host. To run Cobbler, you need to install the EPEL repositories.
$ sudo yum install –y epel-releaseThen we need to install Cobbler.
$ sudo yum install –y cobblerThis will install some additional YUM utilities and the createrepo package , which assist in repository management. We’ve also installed some additional packages Cobbler uses: the DHCP daemon, a TFTP server, and the Apache web server. You may already have these packages installed, in which case YUM will skip them.
Once everything is installed, we need to enable cobblerd, the daemon process, at boot and start it.
$ sudo systemctl enable cobblerd httpd$ sudo systemctl start cobblerd$ sudo systemctl start httpd
Cobbler requires access to the Apache server to be started. Also, we need to ensure that the cobblerd service can access the httpd server port. SELinux by default will prevent this, so we need to issue the following:
$ sudo setsebool -P httpd_can_network_connect trueCobbler has some specific SELinux settings , and you can view them with the following command:
$ sudo getsebool -a|grep cobblercobbler_anon_write --> offcobbler_can_network_connect --> offcobbler_use_cifs --> offcobbler_use_nfs --> offhttpd_can_network_connect_cobbler --> offhttpd_serve_cobbler_files --> off
We will enable the following SELinux Booleans:
$ sudo setsebool -P httpd_serve_cobbler_files on$ sudo setsebool -P httpd_can_network_connect_cobbler on
Configuring Cobbler
After you’ve installed the required packages, you need to configure Cobbler. Cobbler comes with a handy check function that tells you what needs to be done to configure it. To see what needs to be done, run the following:
The following are potential configuration items that you may want to change:1 : The 'server' field in /etc/cobbler/settings must ... by all machines that will use it.2 : For PXE to be functional, the 'next_server' field ... the IP of the boot server on the PXE network.3 : SELinux is enabled. Please review the following ... https://github.com/cobbler/cobbler/wiki/Selinux4 : change 'disable' to 'no' in /etc/xinetd.d/tftp5 : some network boot-loaders are missing from /var/lib/cobbler/loaders, ...is the easiest way to resolve these requirements.6 : debmirror package is not installed, it will be required to manage debian deployments and repositories7 : ksvalidator was not found, install pykickstart8 : The default password used by the sample templates ... 'your-password-here'" to generate new one9 : fencing tools were not found, and are required to use ... cman or fence-agents to use themRestart cobblerd and then run 'cobbler sync' to apply changes.
You can see there are a few things you need to do to get Cobbler running. Let’s work through each of these issues.
First, you configure the /etc/cobbler/settings file . You need to update two fields in this file: server and next_server. You need to replace the existing values (usually 127.0.0.1) with the IP address of your host so a PXE-booted host can find your Cobbler host. In our case, we specify the following:
server 192.168.0.1next_server 192.168.0.1
To update Cobbler’s configuration, you then run this:
$ sudo cobbler syncNote
You need to run the $ sudo cobbler sync command any time you change the /etc/cobbler/settings file. Common errors include leaving trailing spaces after options in the settings file. Make sure you delete any extra spaces from the file.
You also need to configure a DHCP server (like the one we introduced in Chapter 10). You have two choices here: you can get Cobbler to manage your existing DHCP server, or you can tell your existing DHCP server to point to Cobbler.
After you have run cobbler sync and rerun cobbler check, you will notice the list of outstanding things to check has been reduced. We are going to now install the Cobbler loaders and debmirror binary.
$ sudo cobbler get-loadersFor debmirror, you need to download the file from Debian, untar it, and copy it to a common location (alternative, you could use FPM, like we showed you in Chapter 9, to create a package to do this for you in a repeatable way!).
We need at least these Perl modules installed:
$ sudo yum install -y perl-LockFile-Simple perl-IO-Zlib perl-Digest-MD5 perl-Net-INET6Glue perl-LWP-Protocol-httpsNext we will download and install the debmirror package , untar it, and place it in the /usr/local/bin directory.
$ curl -s http://archive.ubuntu.com/ubuntu/pool/universe/d/debmirror/debmirror_2.25ubuntu2.tar.xz -o debmirror_2.25.tar.xz$ tar xf debmirror_2.25.tar.xz && sudo cp debmirror-2.25ubuntu2/debmirror /usr/local/bin/
To test we have everything installed correctly for debmirror, run debmirror --help and make sure you don’t get any Perl module errors.
Lastly, we are going to change the default root password that gets placed on the hosts. First you can create a secure SHA-512 password using python3with the following:
python3 -c 'import crypt; print(crypt.crypt("yourpasswordhere", crypt.mksalt(crypt.METHOD_SHA512)))'$6$KnsQG.tEetSCSmid$HpqUNyEk1UPkt9Dc9MPcwPY...guKOGdUeNXoA7.ugUBGGaDIk8RY8FRYVOwzmsM.u01
Then you need to update the default_password_crypted: setting in the /etc/cobbler/settings file. Remember to run cobbler sync after each change.
Note
Python 3 is not installed by default on CentOS but can be available on Ubuntu. The previous script for generating the password can be run on any host that has Python 3 installed already and can be copied across.
Now when we run $ sudo cobbler check, the list contains only three items, which we don’t need to address.
Cobbler Managing Your DHCP
If you want to enable Cobbler to manage your DHCP server, then you need to enable another option in the /etc/cobbler/settings file.
manage_dhcp: 1You also need to update a template file that Cobbler will use to configure your DHCP server, /etc/cobbler/dhcp.template. Listing 19-1 shows an example of this file.
Listing 19-1. The /etc/cobbler/dhcp.template File
# ******************************************************************# Cobbler managed dhcpd.conf file## generated from cobbler dhcp.conf template ($date)# Do NOT make changes to /etc/dhcpd.conf. Instead, make your changes# in /etc/cobbler/dhcp.template, as /etc/dhcpd.conf will be# overwritten.## ******************************************************************ddns-update-style interim;allow booting;allow bootp;ignore client-updates;set vendorclass = option vendor-class-identifier;option pxe-system-type code 93 = unsigned integer 16;key dynamic-update-key {algorithm hmac-sha256;secret "RZqM/JutbhgHiBR8ICG0LDyN+9c1LpNU83ycuU9LPaY=";}zone 0.168.192.in-addr.arpa. {key dynamic-update-key;primary 192.168.0.1;}zone example.com. {key dynamic-update-key;primary 192.168.0.1;}subnet 192.168.0.0 netmask 255.255.255.0 {option routers 192.168.0.254;option domain-name "example.com";option domain-name-servers 192.168.0.1;option broadcast-address 192.168.0.255;next-server $next_server;filename "/pxelinux.0";group "static" {use-host-decl-names on;host au-mel-rhel-1 {hardware ethernet 00:16:3E:15:3C:C2;fixed-address au-mel-rhel-1.example.com;}}pool {range 192.168.0.101 192.168.0.150;deny unknown clients;}pool {range 192.168.0.151 192.168.0.200;allow unknown clients;default-lease-time 7200;max-lease-time 21600;}}
If you have an existing DHCP server with a configuration, you should update this template to reflect that configuration. You can see we’ve adjusted the template in Listing 19-1 to reflect the DHCP configuration we used in Chapter 10. We’ve added two settings.
allow booting;allow bootp;
These two options tell the DHCP server to respond to queries from hosts who request network boots.
The other two important settings to note in Listing 19-1 are next-server and filename configuration options. The next-server option is set to $next_server. This value will be replaced by the IP address we just configured in the next_server option in the /etc/cobbler/settings file. This tells our DHCP server where to route hosts that request a net boot.
The filename option is set to /pxelinux.0, which is the name of the boot file that PXE-booted hosts should look for to start their boot process. We’ll set up this file shortly.
Now, after changing these files, you need to run the following command:
$ sudo cobbler syncCaution
If you have an existing DHCP server, this template will overwrite its configuration by overwriting the /etc/dhcpd.conf configuration file. Only do this if you are sure you know what you are doing, and make a copy of your existing /etc/dhcpd.conf file before running the command.
Cobbler Not Managing Your DHCP
If you don’t want Cobbler to manage your DHCP, then you just need to adjust your existing DHCP configuration file, /etc/dhcpd.conf, to add the next-server and filename options. Let’s update the relevant portions of the configuration we created in Chapter 9 with this option, as shown in Listing 19-2.
Listing 19-2. Existing dhcpd.conf Configuration File
allow booting;allow bootp;subnet 192.168.0.0 netmask 255.255.255.0 {option routers 192.168.0.254;option domain-name "example.com";option domain-name-servers 192.168.0.1;option broadcast-address 192.168.0.255;filename "/pxelinux.0";next-server 192.168.0.1;group "static" {use-host-decl-names on;host au-mel-rhel-1 {hardware ethernet 00:16:3E:15:3C:C2;fixed-address au-mel-rhel-1.example.com;}}pool {range 192.168.0.101 192.168.0.150;deny unknown clients;}pool {range 192.168.0.151 192.168.0.200;allow unknown clients;default-lease-time 7200;max-lease-time 21600;}}
You can see we’ve added two options to the start of the DHCP section.
allow booting;allow bootp;
These two options tell the DHCP server to respond to queries from booting clients.
We’ve also added the next-server option to our subnet definition.
next-server 192.168.0.1The next-server option tells DHCP where to send hosts that request a PXE network boot. We need to specify the IP address of our Cobbler server.
Lastly, we’ve added the filename option, set to /pxelinux.0, which is the name of the boot file that PXE-booted hosts should look for to start their boot process. We’ll set up this file shortly.
Tip
After configuring your DHCP server, you will need to restart the Cobbler server for the new configuration to be applied.
Configuring TFTP
Once the daemon is started, you need to enable your TFTP server to send your boot file to the host to be installed. To do this, you edit the /etc/xinet.d/tftp file to enable a TFTP server. Inside this file, find this line:
disable = yesand change it to this:
disable = noNext, you enable the TFTP server like so:
$ sudo systemctl enable tftp$ sudo systemctl start tftp
You need to ensure your hosts can connect to the Cobbler server through your firewall by opening some required ports, 69, 80, 25150, and 25151, for example, by creating firewalld rules such as the following:
$ sudo firewall-cmd --zone=public --add-service=tftp --permanent$ sudo firewall-cmd --zone=public --add-service=httpd –permanent$ sudo firewall-cmd --zone=public --add-port=25150:25151/tcp –permanent
These rules allow access for any host on the 192.168.0.0/24 subnet to the boot server on the appropriate ports. You can find more information on firewall rules in Chapter 7.
Using Cobbler
Once you’ve configured Cobbler, you can start to make use of it. Cobbler allows you to specify a distribution you’d like to build hosts with, imports that distribution’s files, and then creates a profile. You can then build hosts using this distribution and profile.
We have mounted our ISO files to /mnt/centos and /mnt/ubuntu, respectively. This is done like so:
$ sudo mount –o loop /path/to/downloaded.iso /path/to/mountpointLet’s start by creating our first profile using the import command .
$ sudo cobbler import --path=/mnt/centos --name=CentOS7 --arch=x86_64task started: 2016-12-22_055922_importtask started (id=Media import, time=Thu Dec 22 05:59:22 2016)Found a candidate signature: breed=redhat, version=rhel6Found a candidate signature: breed=redhat, version=rhel7Found a matching signature: breed=redhat, version=rhel7Adding distros from path /var/www/cobbler/ks_mirror/CentOS7-x86_64:creating new distro: CentOS7-x86_64trying symlink: /var/www/cobbler/ks_mirror/CentOS7-x86_64 -> /var/www/cobbler/links/CentOS7-x86_64creating new profile: CentOS7-x86_64associating reposchecking for rsync repo(s)checking for rhn repo(s)checking for yum repo(s)starting descent into /var/www/cobbler/ks_mirror/CentOS7-x86_64 for CentOS7-x86_64processing repo at : /var/www/cobbler/ks_mirror/CentOS7-x86_64need to process repo/comps: /var/www/cobbler/ks_mirror/CentOS7-x86_64looking for /var/www/cobbler/ks_mirror/CentOS7-x86_64/repodata/*comps*.xmlKeeping repodata as-is :/var/www/cobbler/ks_mirror/CentOS7-x86_64/repodata*** TASK COMPLETE ***
We will import our Ubuntu ISO also.
$ sudo cobbler import --path=/mnt/ubuntu --name Ubuntu-16.04 --breed=ubuntu --os-version=xenialYou issue the cobbler command with the import option. The --path option specifies the source of the distribution you want to import—in our case, /mnt/ubuntu and /mnt/centos. The --name is any name you want to give the distribution, and you can add --breed and --os-version to help the import command find the right signature to match your distribution.
Note
If you get errors when doing an import, make sure you run $ sudo cobbler signature update and try again. Learn more about signatures here: http://cobbler.github.io/manuals/2.8.0/3/2/3_-_Distro_Signatures.html .
You can also sync with online repositories. Here’s an example:
$ sudo cobbler reposynctask started: 2016-12-22_063019_reposynctask started (id=Reposync, time=Thu Dec 22 06:30:19 2016)hello, reposyncrun, reposync, run!running: /usr/bin/debmirror --nocleanup --verbose --ignore-release-gpg --method=http --host=archive.ubuntu.com --root=/ubuntu --dist=xenial,xenial-updates,xenial-security --section=main,universe /var/www/cobbler/repo_mirror/Ubuntu-16.04-x86_64 --nosource -a amd64
This will sync with online repositories and, in this case, uses the debmirror binary we installed earlier to sync our Ubuntu Xenial release.
Tip
You will need sufficient disk space on your host to copy whatever distributions you want to keep. Hosting your own syncs of repositories will speed up your deployments greatly and reduce online network downloads.
Cobbler will run the import process and then return you to the prompt. Depending on the performance of your host (and, if you are importing over the network, the speed of your connection), this may take some time.
You can view the distributions install via this command:
$ sudo cobbler distro listCentOS7-x86_64Ubuntu-16.04-x86_64
The import will create two profiles as well; we can see them with this command:
$ sudo cobbler profile listCentOS7-x86_64Ubuntu-16.04-x86_64
After you’ve created your distribution and profile, you can see the full details in Cobbler using the report option, as shown in Listing 19-3.
Listing 19-3. A Cobbler Report
$ sudo cobbler reportdistros:==========Name : CentOS7-x86_64Architecture : x86_64TFTP Boot Files : {}Breed : redhatComment :Fetchable Files : {}Initrd : /var/www/cobbler/ks_mirror/CentOS7-x86_64/images/pxeboot/initrd.imgKernel : /var/www/cobbler/ks_mirror/CentOS7-x86_64/images/pxeboot/vmlinuzKernel Options : {}Kernel Options (Post Install) : {}Kickstart Metadata : {'tree': 'http://@@http_server@@/cblr/links/CentOS7-x86_64'}Management Classes : []OS Version : rhel7Owners : ['admin']Red Hat Management Key : <<inherit>>Red Hat Management Server : <<inherit>>Template Files : {}Name : Ubuntu-16.04-x86_64Architecture : x86_64TFTP Boot Files : {}Breed : ubuntuComment :Fetchable Files : {}Initrd : /var/www/cobbler/ks_mirror/Ubuntu-16.04/install/netboot/ubuntu-installer/amd64/initrd.gzKernel : /var/www/cobbler/ks_mirror/Ubuntu-16.04/install/netboot/ubuntu-installer/amd64/linuxKernel Options : {}Kernel Options (Post Install) : {}Kickstart Metadata : {'tree': 'http://@@http_server@@/cblr/links/Ubuntu-16.04-x86_64'}Management Classes : []OS Version : xenialOwners : ['admin']Red Hat Management Key : <<inherit>>Red Hat Management Server : <<inherit>>Template Files : {}
This option displays all the distributions, and their profiles are currently imported into Cobbler.
Note
You may see more than one distribution and profile created from importing a distribution.
Listing 19-3 shows our vanilla CentOS7-x86_64 distribution and the profile we created, CentOS7-x86_64. Most of the information in Listing 19-3 isn’t overly important to us; we are going to use these profiles to create a new system shortly.
Note
You can see the other options you can edit on your profile by looking at the cobbler command’s man page or visiting the documentation at http://cobbler.github.io/manuals/2.8.0/ .
Building a Host with Cobbler
Now that you’ve added a profile and a distribution, you can boot a host and install your distribution. Choose a host (or virtual machine) you want to build and reboot it. Your host may automatically search for a boot device on your network, but more likely you will need to adjust its BIOS settings to adjust the boot order. To boot from Cobbler, you need to specify that your host boots from the network first.
We have created a VirtualBox host on the same Host-only Adapter interface as our Cobbler server. We created VirtualBox hosts in Chapter 3 and created a basic host with an 8Gb hard drive. In the System settings, we are going to select Network for the boot device.
In Figure 19-1 we are selecting the Network Boot option. We will come back to here and set it to Hard Disk when we are finished. We now start the hosts like we would normally.

Figure 19-1. Setting Network Boot
When your host boots, it will request an IP address from the network and get an answer from your DHCP server, as you can see in Figure 19-2.

Figure 19-2. Requesting DHCP address
Your host will boot to the Cobbler boot menu. You can see an example of this menu in Figure 19-3.
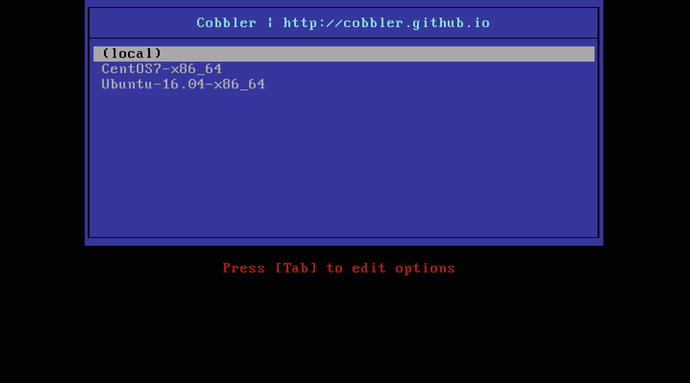
Figure 19-3. The Cobbler menu
From this menu, you can select the profile you’d like to install (e.g., CentOS7-x86_64). If you don’t select a profile to be installed, Cobbler will automatically launch the first item on the menu (local), which continues the boot process on the localhost.
Note
If you don’t have an operating system installed on this host, the local boot process will obviously fail.
We will select CentOS7-x86_64, which will automatically install CentOS onto our host. If we select Ubuntu-16.04-x86_64, we will install Ubuntu; Figures 19-4 through 19-6 tell that story.
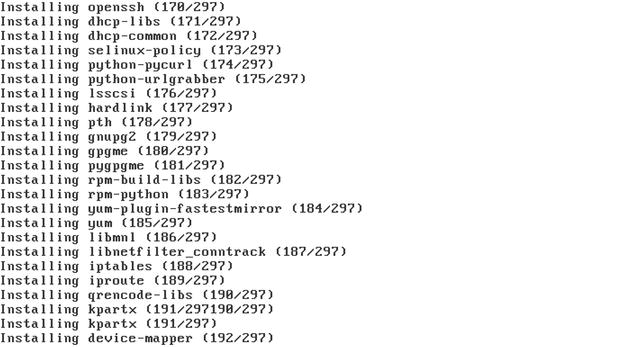
Figure 19-4. Installing CentOS

Figure 19-5. Installing Ubuntu
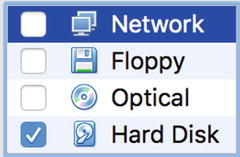
Figure 19-6. Selecting Boot from Hard Disk
Remember, when we have finished installing our host on VirtualBox, we need power on the host and need to change the boot device and then start the host again.
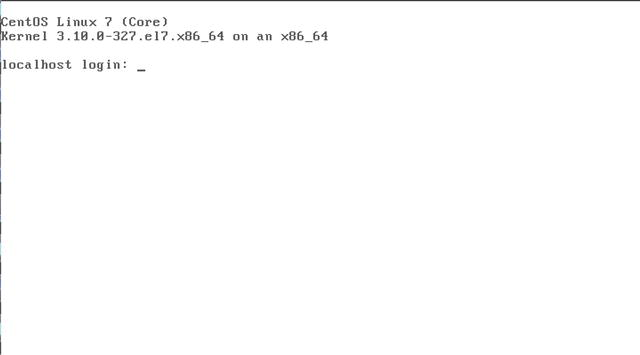
Figure 19-7. CentOS installed

Figure 19-8. Ubuntu installed
We selected a profile, and then this profile started the installation process using the instructions contained in the associated Kickstart or Preseed file. If you are watching your installation process, you will see the installation screens progress—all without requiring input from you to continue or select options.
Using Cobbler, you can also specify configuration options for particular hosts. You don’t need to do this, but it is useful if you have a specific role in mind for a host and want to specify a particular profile or Kickstart configuration.
To do this, you add hosts to Cobbler, identifying them via their MAC or IP addresses , using the system command.
$ sudo cobbler system add --name=web1.example.com --mac=08:00:27:66:EF:C2--profile=CentOS7-x86_64 --interface eth1
Here we’ve added a system named web1.example.com with the specified MAC address.
Note
You can usually see your MAC address during the network boot process, or you can often find it printed on a label on your network card. Alternatively, you may have a way of seeing your virtual interfaces, like you can in VirtualBox.
The new host uses the CentOS7-x86_64 profile . So far it is no different from the hosts we have built previously. If a host with the appropriate MAC address connects to our Cobbler host, then Cobbler will use these configuration settings to provision the host.
If you need to change the way you build a host, you can create a new profile. Your new profiles can inherit settings from other profiles, which are regarded as their parents. We are going to create a profile called centos-base that will inherit the distro and other settings from the parent CentOS7-x86_64.
$ sudo cobbler profile add --name centos-base --parent CentOS7-x86_64This is how we can use different common Kickstart or preseed files for different host groups. Kickstart and Preseed files may have different disk configurations or package lists that are tailored for particular profiles. To add a particular Kickstart or Preseed file, you first copy and modify any existing one to the way you like it and add it to the /var/lib/cobbler/kickstarts directory. Then you can add it to the profile with the --kickstart option.
You can list the configured hosts using the list and report options .
$ sudo cobbler system listweb1.example.com
A full listing of the gateway.example.com system definition can be seen using the report option.
$ sudo cobbler system report –name=web1.example.comWe can also delete a system using the remove command.
$ sudo cobbler system remove --name=web1.example.comNote
You can read about additional Cobbler capabilities on the cobbler command’s man page.
Cobbler Web Interface
Cobbler also has a simple web interface you can use to manage some of its options. It’s pretty simple at this stage, and the command-line interface is much more fully featured, but it is available if you want to implement it. You can find instructions at http://cobbler.github.io/manuals/2.8.0/5_-_Web_Interface.html .
Troubleshooting Cobbler
You can troubleshoot the network boot process by monitoring elements on your host, including your log files, and by using a network monitoring tool like the tcpdump or tshark command.
You can start by monitoring the output of the DHCP process by looking at the /var/log/messages log files. Cobbler also logs to the /var/log/cobbler/cobbler.log file and the files contained in the kicklog and syslog directories also under /var/log/cobbler.
You can also monitor the network traffic passing between your booting host and the boot server. You can use a variety of network monitoring tools for this.
$ sudo tcpdump port tftpCobbler has a wiki page available that contains documentation at http://cobbler.github.io/manuals . The documentation includes some useful tips for troubleshooting at http://cobbler.github.io/manuals/2.8.0/7_-_Troubleshooting.html . The Cobbler community also has a mailing list and other support channels that you can see here: http://cobbler.github.io/community.html .
Kickstart
On CentOS, the language used to automatically install your host is called Kickstart . On Ubuntu, it is called Preseed . For simplicity’s sake and because it’s an easier language to use, we’re going to show you how to use Kickstart to automate your installation for both CentOS and Ubuntu. Where something isn’t supported on Ubuntu, we’ll show you how to use Preseed to configure it.
A Kickstart configuration file contains the instructions required to automate the installation process. It’s a simple scripted process for most installation options, but it can be extended to do some complex configuration.
You can find the latest detailed documentation for Kickstart at http://pykickstart.readthedocs.io/en/latest/kickstart-docs.html .
You can find documentation on Preseed and its directives at https://wiki.debian.org/DebianInstaller/Preseed . We’ll work with a few of these directives later in this section.
You’ve already seen how to specify Kickstart files to your provisioning environments, using Cobbler. Let’s start by looking at some of the contents of a simple Kickstart file in Listing 19-4.
Listing 19-4. A Kickstart File
install# System authorization informationauth --enableshadow --passalgo sha512# System bootloader configurationbootloader --location=mbr# Partition clearing informationclearpart --all --initlabel# Use text mode installtext
Listing 19-4 shows a list of configuration directives starting with the install option, which dictates the behavior of the installation process by performing an installation.
You can then see configuration directives with options, for example, auth --enableshadow --passalgo sha512, which tell Kickstart how to answer particular installation questions. The auth statement has the values --enableshadow and --passalgo sha512 here, which enable shadow passwords and specify that passwords hashes must use the SHA512 password algorithm, respectively.
The option that follows, bootloaderwith a value of --location=mbr, tells Kickstart to install the boot loader into the MBR. Next is the directive clearpart, which clears all partitions on the host and creates default labels for them. The final option, text, specifies we should use text-based installation as opposed to the GUI.
Tip
You can use Kickstart to upgrade hosts as well as install them. If you have an existing host, you can network boot from a new version of your operating system and use a Kickstart file to script and upgrade.
There are too many directives to discuss them individually, so we show you in Table 19-1 the directives that must be specified and some of the other major directives that you may find useful.
Table 19-1. Required Kickstart Directives
Directive | Description |
|---|---|
auth | Configures authentication. |
bootloader | Configures the boot loader. |
keyboard | Configures the keyboard type. |
lang | Configures the language on the host. |
part | Configures partitions. This is required for installation, but not if upgrading. |
rootpw | Specifies the password of the root user. |
timezone | Specifies the time zone the host is in. |
You can also find a useful list of the available directives with explanations at http://pykickstart.readthedocs.io/en/latest/kickstart-docs.html#chapter-2-kickstart-commands-in-fedora .
Tip
If you are on CentOS, you can see an example Kickstart file that was created when you installed your host in the /root/anaconda-ks.cfg file. This will show you how your current host is built and can be used as an example to build similar hosts.
Installation Source
You’ve already seen the install and upgrade directives that specify the behavior of the installation. You can also specify the source of your installation files.
url --url http://192.168.0.1/centos/For Cobbler, we define a variable to specify the location of our installation source.
url --url=$treeThe url directive can also be used to specify an FTP server.
url --url ftp://jsmith:[email protected]/centosWe can specify some alternative sources, including cdrom, when installing from a locally mounted CD or DVD and hard drive to install from a local partition.
harddrive --dir=/centos --partition=/installsourceKeyboard, Language, and Time Zone
The next snippet we’re going to show you configures our keyboard, language, and time zone.
# System keyboardkeyboard us# System languagelang en_AU# System timezonetimezone Australia/Melbourne
Here we’ve specified us as the value for the keyboarddirective to indicate a U.S. keyboard. We’ve specified our language as en_AU (English Australian) and our time zone as Australia/ Melbourne.
Managing Users
You can also set the root user’s password with the Kickstart rootpw directive.
rootpw --iscrypted $6$D7CxLkSBeC9.k.k3$S8G9s3/Y5LJ4dio....S5GS78p2laxALxaJ.lCN9tzKB1zIpYz38Fs9/The rootpw directive is a required Kickstart option for all Kickstart files. It can take either a plain-text value or an encrypted value for the root user’s password when the --iscrtypted option is specified. You can lock the root user account so that no one can log in with it using the --lock option too (if --lock is specified, then you don’t need a password as well).
You can create a new user with Kickstart using the user directive.
user jsmith --password passwordThe preceding code creates a new user called jsmith, with a password of password. By adding the --iscrypted option, you can add a user with an encrypted password. We would create our encrypted password as we did with the rootpw directive.
Firewall and Network
On CentOS, you can configure your host’s initial firewall and network configuration.
# Firewall configurationfirewall --enabled --http --ssh --smtp# SELinux configurationselinux --enabled
Here we enabled the firewall with the firewall option and allowed access via HTTP, SSH, and SMTP. (You can disable the firewall with the --disabled option.) We also enabled SELinux—if you really need to, you can disable using the selinux --disabled option.
You can configure your network connections with Kickstart like so:
# Network informationnetwork --bootproto=static --device=eth0 --gateway=192.168.0.254--ip=192.168.0.1 --nameserver=192.168.0.1 --netmask=255.255.255.0 --onboot=on
You can also specify network configuration for one or more interfaces using the network option. You can see we’ve set the various options required to configure the eth0 interface. You can also specify DHCP, for example:
network --bootproto=dhcp --device=eth0 --onboot=onOn CentOS with Cobbler, if you’re working with a specific host (one created with the cobbler system command), you can pass specific network configuration values to the Cobbler system configuration.
$ sudo cobbler system edit --name=gateway.example.com --mac=00:0C:29:3B:22:46--profile=centos-base --interface=eth0 --ip=192.168.0.1 --subnet=255.255.255.0 --gateway=192.168.0.254 --hostname=gateway --bootproto=static
Here we’ve specified the edit command to change an existing Cobbler-defined system and passed network configuration values to our system. This would define a static network configuration for interface eth0. We specify that the boot protocol is static using the --static=1 option; we would specify --static=0 for a DHCP configuration. The interface to be configured is specified using the --interface=eth0 option.
Then, instead of specifying a network line, in our Kickstart file we specify what Cobbler calls a snippet.
$SNIPPET('network_config')When building your host, Cobbler passes the network configuration you’ve specified to this snippet and a template it contains. This is then converted into the appropriate network line, and your host is configured.
Tip
This snippet is a simple use of Cobbler’s snippet system. You can define a variety of other actions using snippets, and you can see a selection of these in the /var/lib/cobbler/snippets directory, including the network_config snippet we used in this section. You can see how to use these snippets in the sample.ks file, and you can find instructions on how to make use of templates and snippets at http://cobbler.github.io/manuals/2.8.0/3/5_-_Kickstart_Templating.html and http://cobbler.github.io/manuals/2.8.0/3/6_-_Snippets.html .
Disks and Partitions
You’ve already seen one option Kickstart uses to configure disks and partitions, clearpart, which clears the partitions on the host. You can then use the part option to configure partitions on the host like so:
# Partition clearing informationclearpart --all --initlabelpart /boot --asprimary --bytes-per-inode=4096 --fstype="ext4" --size=150part / --asprimary --bytes-per-inode=4096 --fstype="ext4" --size=4000part swap --bytes-per-inode=4096 --fstype="swap" --size=512
Note
On CentOS, you can create a similar configuration just by specifying the autopart option. The autopart option automatically creates three partitions. The first partition is a 1GB or larger root (/) partition, the second is a swap partition, and the third is an appropriate boot partition for the architecture. One or more of the default partition sizes can be redefined with the part directive.
You use the part option to create specific partitions. In the preceding code, we first created two partitions , /boot and /, both ext4. We specified a size of 150MB for the /boot partition and a size of 4000MB (or 4GB) for the / or root partition. We also created a swap partition with a size of 512MB.
Using Kickstart on CentOS, we can create software RAID configurations, for example:
part raid.01 --asprimary --bytes-per-inode=4096 --fstype="raid" --grow --ondisk=sda--size=1part raid.02 --asprimary --bytes-per-inode=4096 --fstype="raid" --grow --ondisk=sdb--size=1part raid.03 --asprimary --bytes-per-inode=4096 --fstype="raid" --grow --ondisk=sdc--size=1part raid.04 --asprimary --bytes-per-inode=4096 --fstype="raid" --grow --ondisk=sdd--size=1part raid.05 --asprimary --bytes-per-inode=4096 --fstype="raid" --grow --ondisk=sde--size=1raid / --bytes-per-inode=4096 --device=md0 --fstype="ext4" --level=5 raid.01 raid.02raid.03 raid.04 raid.05
We specified five RAID disks, and each disk uses its entire contents as indicated by the --grow option. The respective disk to be used is specified with the --ondisk option, here ranging from sda to sde. Lastly, we used the raid option to specify the md0 RAID disk as the / or root partition.
You can also create partitions using LVM during an automated installation. On CentOS, for example, you would create them like so:
part /boot --fstype ext4 --size=150part swap --size=1024part pv1 --size=1 --growvolgroup vg_root pv1logvol / --vgname=vg_root --size=81920 --name=lv_root
In the preceding sample, we created a 150MB boot partition, a 1GB swap partition, and a physical volume called pv1 on the remainder of the disk, using the --grow option to fill the rest of the disk. We then created an 80GB LVM logical volume called vg_root.
Package Management
Using Kickstart, you can specify the packages you want to install. On CentOS, you specify a section starting with %packages and then the list of package groups or packages you want to install.
%packages@ Administration Tools@ Server Configuration Tools@ System Tools@ Text-based Internetdhcp
We specify an at symbol (@), a space , and then the name of the package group we want to install, for example, Administration Tools. We can also specify individual packages by listing them by name without the @ symbol and space, as we have here with the dhcp package.
Ubuntu uses a similar setup.
%packages@ kubuntu-desktopdhcp-client
Here we’ve installed the Kubuntu-Desktop package group and the dhcp-client package. For more information, see http://pykickstart.readthedocs.io/en/latest/kickstart-docs.html#chapter-7-package-selection .
Note
We discuss package groups in Chapter 8.
Pre- and Post-installation
You can run scripts before and after Kickstart installs your host. The prerun scripts run after the Kickstart configuration file has been parsed, but before your host is configured. Any prerun script is specified at the end of the Kickstart file and prefixed with the line %pre.
Each %post and %pre section must have a corresponding %end.
The postrun scripts are triggered after your configuration is complete and your host is installed. They should also be specified at the end of the Kickstart file and prefixed by a %post line. This is the %post section from our sample.ks configuration file:
%post$SNIPPET('post_install_kernel_options')$SNIPPET('post_install_network_config')%end
Here we’ve specified two postrun Cobbler snippets that configure kernel and network options.
This postrun scripting space is useful to run any required setup applications or scripts.
Preseed
Preseed is the Debian installation automation tool. It is more opaque than Kickstart, but it performs the same function of automating an installation.
To provide some context , each d-i line that you see is a call to the Debian installer. The format of the file is the same as instructions passed to the debconf-set-selection command. It takes the following form:
<owner> <question name> <question type> <value>So something like setting the locale for your system would look something like this:
d-i debian-installer/locale string enThe owner is the debian-installer, the question is debian-installer/locale, the type is string, and the value is en, or English.
Installation Source
Cobbler is selected as the initial installation source via the live-installer question.
d-i live-installer/net-image string http://$http_server/cobbler/links/$distro_name/install/filesystem.squashfsDuring the install, you can set up your apt repositories. This points your apt sources to the Ubuntu mirrors.
d-i mirror/country string manuald-i mirror/http/hostname string archive.ubuntu.comd-i mirror/http/directory string /ubuntud-i mirror/http/proxy string
You can choose the different apt pools with these settings to get to packages available from backports and the like:
#d-i apt-setup/restricted boolean true#d-i apt-setup/universe boolean true#d-i apt-setup/backports boolean true
You can just uncomment what pool you would like.
Keyboard, Language, and Time Zone
Setting the keyboard and language can be a time-consuming process but not with the installer. You can select the following in Preseed:
d-i debian-installer/locale string end-i debian-installer/country string AUd-i debian-installer/locale string en_AU.UTF-8d-i debian-installer/language string end-i console-setup/ask_detect boolean falsed-i console-setup/layoutcode string usd-i console-setup/variantcode stringd-i keyboard-configuration/layoutcode string usd-i clock-setup/ntp boolean trued-i clock-setup/ntp-server string ntp.ubuntu.comd-i time/zone string UTCd-i clock-setup/utc boolean true
Here we set the locale and country, and we disabled the keyboard prompt to ask for our selection and answered all the questions concerning keyboard layout. Then we enable NTP for our clocks and set their time to UTC.
Managing Users
With Cobbler and Preseed we enable the root user, which Ubuntu doesn’t normally do.
d-i passwd/root-login boolean trued-i passwd/root-password-crypted password $default_password_cryptedd-i passwd/make-user boolean false
So when you build your hosts, you will need to sign in as root. To keep your familiar setup, you could add a user ubuntu either in the Preseed or in a SNIPPET at the end of the installation.
#d-i passwd/user-fullname string Ubuntu User#d-i passwd/username string ubuntu
Firewall and Network
You can set up the network in whichever fashion suits you with Preseed, but you cannot do any firewall configurations. You can also add firewall configurations in post-install scripts in Cobbler if that is a requirement.
# IPv4 example#d-i netcfg/get_ipaddress string 192.168.1.42#d-i netcfg/get_netmask string 255.255.255.0#d-i netcfg/get_gateway string 192.168.1.1#d-i netcfg/get_nameservers string 192.168.1.1#d-i netcfg/confirm_static boolean true
You can set a static IP or allow for DHCP in your network settings.
Disks and Partitions
Disk partition can be fairly complex in Preseed. Here we are just creating a simple LVM partition setup:
d-i partman-auto/method string lvmd-i partman-lvm/device_remove_lvm boolean trued-i partman-lvm/confirm boolean trued-i partman-auto/choose_recipe select atomicd-i partman/confirm_write_new_label boolean trued-i partman/choose_partition select finishd-i partman/confirm boolean true
Package Management
Using Preseed, you can specify the packages you want to install. For group packages, you can use tasksel (or task select owner) to multiselect a package group—like ubuntu-desktop.
tasksel tasksel/first multiselect ubuntu-desktopFor individual packages, you can just use the following:
d-i pkgsel/include string openssh-serverYou can have more than one package selected if you like.
d-i pkgsel/include string openssh-server build-essentialMAAS
We’re going to briefly introduce you to the MAAS tool—or Metal As A Service by Ubuntu. You may remember we saw “Install MAAS rack or region servers” in the initial splash screen when we first created our Ubuntu installation. This is an Ubuntu service used for managing bare metal, or physical computers, like you manage virtual computers. This service is able to install bare-metal Ubuntu and CentOS servers—as well as RHEL and Windows.
The MAAS service strives to provide cloud functionality on your metal servers. The technology underlying this tool is not new. It uses PXE, Trivial File Transfer Protocol (TFTP), and Debian Preseed to build up nodes. It is designed to manage physical data centers and is very scalable to manage thousands of nodes.
Once MAAS spins up a host, you can provision it with Juju, an Ubuntu provision framework. This can install software, user accounts, and other resources onto your server, or you can use other provisioning services like Puppet or Ansible. You can read more about that here: https://maas.ubuntu.com/docs/juju-quick-start.html .
You can see how it works here: https://maas.io/how-it-works . There is a quick get-started tutorial here: https://maas.io/get-started . You can even try to run up a Vagrant test suite here: https://github.com/battlemidget/vagrant-maas-in-a-box .
Configuration Management
We’ve shown you throughout this book that configuring a Linux server includes quite a few tasks, for example, configuring hosts; creating users; and managing applications, daemons, and services. These tasks can be repeated many times in the life cycle of one host in order to add new configurations or remedy a configuration that has changed through error, entropy, or development. They can also be time-consuming and are generally not an effective use of time and effort.
The usual first response to this issue is to try to automate the tasks, which leads to the development of custom-built scripts and applications. Few scripts developed in this ad hoc manner are ever published, documented, or reused, so the same tool is developed over and over again. These scripts also tend not to scale well, and they often require frequent maintenance.
Configuration management tools can automate these tasks efficiently and allow a consistent and repeatable life cycle for your hosts. We’re going to show you how to use one of these tools, Puppet, to automate your configuration.
Introducing Puppet
Puppet ( https://puppet.com/ , formerly Puppetlabs) is an open source configuration management tool that in most installations relies on a client/server deployment model. Puppet is as available as open source or the commercial enterprise product. The enterprise product combines the multiple Puppet open source products and provides an enterprise dashboard to coordinate and configure your resources as well as commercial support agreements. The open source version doesn’t have the fancy enterprise features, is community supported, and is licensed using the Apache 2.0 license. We’re going to give you an overview of Puppet and how to use it to configure your environment and your hosts.
Note
At the time of writing, the Puppet world is changing from version 3.x to version 4.x. Version 3.x will be end of lifed by the end of 2016, so you should be using version 4.x. Version 4 is substantially different under the hood than version 3. The current version at the time of writing is v4.8.
When using Puppet, central servers, called Puppet masters, are installed and configured. Client software is then installed on the target hosts, called nodes, that you want to manage. When a node connects to the Puppet master, a configuration manifest for that node is compiled on the master, sent to the node, and then applied on the node by the Puppet agent.
Tip
There is another way to apply the manifest to a node, and that is called master-less puppet, or a puppet apply. It does not rely on the Puppet master architecture and certificate signing.
To provide client/server connectivity, Puppet uses RESTful web services running over HTTPS on TCP port 8140. In version 4.x, the Puppet server is a JVM-based application. To provide security, the sessions are encrypted and authenticated with internally generated self-signed certificates. Each Puppet client generates a self-signed certificate that is then validated and authorized on the Puppet master.
Thereafter, each client contacts the server—by default every 30 minutes, but this interval is customizable—to confirm that its configuration is up-to-date. If a new configuration is available or the configuration has changed on the node, the configuration manifest is recompiled and then applied to the client. This way, if any existing configuration has varied on the client, it is corrected with the expected configuration from the server. The results of any activity are logged and transmitted to the master.
At the heart of how Puppet works is a language that allows you to articulate and express your configuration. This is called the Puppet Declarative Scripting Language (Puppet DSL). Your configuration components are organized into entities called resources, which in turn can be grouped together in collections. Resources consist of the following:
Type
Title
Attributes
Listing 19-5 shows an example of a simple resource.
Listing 19-5. A Puppet Resource
file { '/etc/passwd':owner => 'root',group => 'root',mode => '0644',}
The resource in Listing 19-5 is a file type resource. The file resource configures the attributes of files under management. In this case, it configures the /etc/passwd file and sets its owner and group to the root user and its permissions to 0644.
Tip
There is a style guide for writing your Puppet manifests that you should become familiar with early on. You can see it here: https://docs.puppet.com/guides/style_guide.html .
The resource type tells Puppet what kind of resource you are managing—for example, the user and file types are used for managing user and file operations on your nodes, respectively. Puppet comes with a number of resource types by default, including types to manage files, services, packages, cron jobs, and repositories, among others.
Tip
You can see a full list of the built-in resource types at https://docs.puppet.com/puppet/4.8/type.html . You can also develop your own types in the Ruby programming language.
The resource’s title identifies it to Puppet. Each title is made up of the name of the resource type (e.g., file) and the name of the resource (e.g., /etc/passwd). These two values are combined to make the resource’s title (e.g., File['/etc/passwd']).
Note
In a resource title, the name of the resource type is capitalized (File), and the name of the resource is encapsulated in block brackets and single quotes (['/etc/passwd']).
Here the name, /etc/passwd, also tells Puppet the path of the file to be managed. Each resource managed by Puppet must be unique—for example, there can be only one resource called File['/etc/passwd'].
The attributes of a resource describe the configuration details being managed, such as defining a particular user and the attributes of that user (e.g., the groups the user belongs to or the location of the user’s home directory). In Listing 19-5, we are managing the owner, group, and mode (or permissions) attributes of the file. Each attribute is separated from its value with the => symbols and is terminated with a comma.
Puppet also uses the concept of collections, which allow you to group together many resources. For example, an application such as Apache is made up of a package, a service, and a number of configuration files. In Puppet, each of these components would be represented as a resource (or resources) and then collected and applied to a node. We’ll look at some of these collection types later in this chapter.
Installing Puppet
Let’s start by installing Puppet. For Puppet, the client and server installations are slightly different, and we’ll show you how to install each.
The Puppet master will require at least 3Gb of memory for the JVM and operating system to have enough room. Also, TCP port 8140 needs to be open on the Puppet master.
CentOS Installation
With the latest packages from Puppet, all the required packages are installed by default when we install the server. On CentOS, on both servers and clients, you will need to add the Puppet repositories for Red Hat–based machines.
$ sudo yum install -y https://yum.puppetlabs.com/puppetlabs-release-pc1-el-7.noarch.rpmThere are several components that make up the Puppet ecosystem such as Facter, a tool for discovering system facts on nodes. System facts are things like operating system, IP addresses, and any custom facts. Another one is Hiera, a key/value lookup database for declaring Puppet configuration data. Finally, there’s MCollective, an orchestration tool for managing Puppet nodes.
On the master, you install the puppetserver, and this will install facter, hiera, the agent, and other required packages from the Puppet repository.
$ sudo yum install puppetserverOn the Puppet nodes, or clients, we can install the puppet-agent package by itself, and it will contain or require all that it needs to run.
$ sudo yum install –y puppet-agentThis of course will require the installation of the YUM repository, like earlier, first.
Ubuntu Installation
On Ubuntu, we again install the apt repository and then install puppetserver on the master server, which will bring down all the necessary Puppet components, like Facter and Hiera and the agent.
On the server or master, we need to do this:
$ wget https://apt.puppetlabs.com/puppetlabs-release-pc1-xenial.deb -O xenial.deb && sudo dpkg -i xenial.deb$ sudo apt-get update$ sudo apt-get install -y puppetserverOn the client, you need the following:$ sudo apt-get install –y puppet-agent
You will now have all the necessary components installed on your systems.
Configuring Puppet
We’ll start configuring Puppet by setting up our Puppet master. Our configuration for the Puppet master will be located under the /etc/puppetlabs directory.
As we have said, Puppet has several components that make up the ecosystem. Puppet’s principal server configuration file is located at /etc/puppetlabs/puppetserver/conf.d/puppetserver.conf. You will rarely need to edit this file, but it has things like various path settings and TLS ciphers being used.
The other main configuration file is on both the agent and the master. It is located at /etc/puppetlabs/puppet/puppet.conf. You can define global configuration settings or service-specific settings under the [service] sections, such as [main], [master], [agent], or [user].
Configuring the Master
Typically the master’s /etc/puppetlabs/puppet/puppet.conf will look something like this:
[main]certname = puppetmaster.example.comserver = puppetenvironment = productionruninterval = 30mstrict_variables = true[master]dns_alt_names = puppetmaster,puppet,puppet.example.com
The [main] section contains the defaults for both the master and agents. Here we determine the certname, which will be the common name specified in the TLS certificate that we will generate on startup. This is related to the dns_alt_names setting that provides alternative DNS names that agents can use to verify the Puppet master. The server = puppet is the name of the Puppet master this Puppet agent will try to connect to. You can see that this matches one of the dns_alt_names.
The Puppet agents can specify the environment that they should use to collect their catalog when they connect to the Puppet master. This is often used to test version control system (VCS) branches of your Puppet code or can be used to multihome your Puppet master for more than one organization.
Do not fall into the mistake of making environments that mirror the roles your hosts may perform. That is, don’t have an environment for development, UAT, staging, and production and assign relevant hosts to those environments. It is easier to treat all your hosts as production and handle the different roles and profiles these hosts may take on in the Puppet manifest itself. It often leads to a horrible divergence of your Puppet code between systems and VCS branches. By all means create an environment to test your Puppet code, but roll that as soon as you can into the production branch. Use alternatives like Hiera and the “roles and profiles” patterns to achieve this. See https://docs.puppet.com/hiera/3.2/ and https://docs.puppet.com/pe/2016.4/r_n_p_full_example.html .
The runinterval is the time between each Puppet run, that is, when the agent will call into the Puppet master for its catalog. strict_variables means that the parse will raise an error when referencing unknown variables.
In the [master] section, we define setting for the Puppet master server. We are not going to set anything here except the dns_alt_names value. Settings that might belong in here are codedir, where Puppet will look for the Puppet code, or the manifest, which we are going to write. However, we are going to take the defaults, which means our codedir will be /etc/puppetlabs/code.
It is in here you will set reporting settings and configuration for using PuppetDB. Using PuppetDB is a great idea as it allows you to do complex catalogs as it collects data from multiple nodes but is outside the scope of this exercise. See here for more details: https://docs.puppet.com/puppetdb/ .
We recommend you create a DNS CNAME for your Puppet host (e.g., puppet.example.com) or add it to your /etc/hosts file.
# /etc/hosts127.0.0.1 localhost192.168.0.1 au-mel-ubuntu-1 puppet puppetmaster puppet.example.com puppetmaster.example.com
Note
We cover how to create CNAMEs in Chapter 10.
Writing the Manifest
We’re going to store our actual configuration in a directory called manifestsunder the /etc/puppetlabs/code/environments/production directory. In this directory, you will most likely see the following directories and files:
ll /etc/puppetlabs/code/environments/production/-rw-r--r-- 1 root root 879 Dec 5 23:53 environment.confdrwxr-xr-x 2 root root 4096 Dec 5 23:53 hieradata/drwxr-xr-x 2 root root 4096 Dec 5 23:53 manifests/drwxr-xr-x 2 root root 4096 Dec 5 23:53 modules/
There is an environment.conf file that the Puppet server will read to determine the specific settings this environment will need. The hieradata directory will contain the Hiera database for variable lookups. The manifest directory is where the Puppet looks for the site.pp file. This file is used to create the root of our configuration. The modules directory is where we install Puppet modules. Modules are collections of Puppet files that perform a specific set of tasks. We will explain them in greater detail shortly.
The manifests directory needs to contain a file called site.pp that is the root of our configuration. Let’s create that now.
$ sudo touch /etc/puppetlabs/code/environments/production/manifests/site.ppNote
Manifest files containing configuration have a suffix of .pp.
We’re also going to create three more directories at the base of our production directory, first site and in that directory profile and role.
$ sudo mkdir -p /etc/puppetlabs/code/environments/production/site/{profile,role}The site directory is actually another module and, like role, will be used to contain specific role and profile information for this particular environment. We will need to edit our environment.conf file to get Puppet to see these. We need to add the following to the modulepath directive:
$ sudo vi /etc/puppetlabs/code/environments/production/environment.confmodulepath = ./sites:./modules:$basemodulepath
We are now going to create a node definition so that we can match each of our nodes to a profile. A profile can be described as the kind of host it is. A role in comparison is like the service that host performs. For example, we can have a role of web_server. We can have a profileof UAT web_server. That is, it is a web server that has things that the UAT people require that might make it slightly different from our production web servers—different database back-end configurations, different authentication requirements, or the like—but still essentially it still has a role of being a web server that might have our application deployed to it.
It can take a bit to get your head around, and there are no perfect answers for how you should implement this structure into your Puppet manifest. Individual companies will have different implementations based on practices that work best for their companies. For a greater discussion of the Role and Profile pattern, see https://www.youtube.com/watch?v=RYMNmfM6UHw .
We’ll continue our configuration by defining our site.pp file, as shown in Listing 19-6.
Listing 19-6. The site.pp File
sudo vi /etc/puppetlabs/code/environments/production/manifests/site.ppnode /^webd+.example.com$/ {include profile::web_server}
The node declaration in Listing 19-6 is how the Puppet master knows what to do with nodes when they “check in.” Here we have used a regular expression, but you can also use plan strings like the following:
node 'web1.example.com' { ... }node 'web1.example.com', 'web2.example.com' { ... }
In our declaration we are saying any node that checks in with a TLS certificate name starts with web (^ web) and has one or more numbers following that (^web d+) and then the domain name (.example.com) and nothing more (.com $). Then we provide this node with the profile::web_server profile.
There is a special node declaration for when there is no match, the default node definition.
node default { ... }You can use this default node declaration to notify people that a node has no definition or to apply a set of default security restrictions. If there is no default node, and no matching definition for a node, Puppet will fail to compile a manifest for this node.
Note
You can find more information on defining nodes here: https://docs.puppet.com/puppet/latest/lang_node_definitions.html .
Starting Puppet Server with the RAL
Here is a neat trick. You can use the Puppet resource command to start your Puppet master server (puppetserver). The Puppet resource command allows you to directly interact with the Puppet Resource Abstraction Layer (RAL) . The RAL is how Puppet interacts and manages the system. With the Puppet resource we will start puppetserver and make it start on boot like this:
sudo /opt/puppetlabs/bin/puppet resource service puppetserver ensure=running enable=trueWe have not yet described how Puppet manages resources, and you will get a deeper understanding of what this command is doing shortly, but briefly what this is doing is the following:
Starting a service (ensure=running)
Making the necessary changes to start a service at boot (enable=true)
Using whatever underlying system to start the service (service puppetserver)
In our case, it will use systemctl commands (start and enable) under the hood. You can run this same command on CentOS, Ubuntu, or any other supported system, and it will start the puppetserver process. If you were on a Mac and starting an Apache service, it would use launchctl—it uses whatever is appropriate for the system it is run on.
We can see if it has started using the normal systemctl command, and we can see the logs here:
$ sudo journalctl -u puppetserver -f-- Logs begin at Tue 2016-12-20 09:24:04 UTC. --Dec 21 09:25:29 puppetmaster systemd[1]: Starting puppetserver Service...Dec 21 09:25:29 puppetmaster puppetserver[4877]: OpenJDK 64-Bit Server VM warning: ignoring option MaxPermSize=256m; support was removed in 8.0Dec 21 09:26:30 puppetmaster systemd[1]: Started puppetserver Service.
Also, the running server logs can be found in /var/log/puppetlabs.
We can use this for keeping an eye on the tasks in the next section.
Connecting Our First Client
Once you have the Puppet master configured and started, you can configure and initiate your first client. On the client, as we mentioned earlier, you need to install the puppet-agent package using your distribution’s package management system. We’re going to install a client on the web.example.com host and then connect to our puppet.example.com host. This installation will also create a /etc/puppetlabs/puppet/ directory with a puppet.conf configuration file.
When connecting our client, we first want to run the Puppet client from the command line rather than as a service. This will allow us to see what is going on when we connect. The Puppet client binary is called puppet agent, and you can see a connection to the master initiated in Listing 19-7.
Listing 19-7. Puppet Client Connection to the Puppet Master
web$ sudo /opt/puppetlabs/bin/puppet agent --server puppet.example.com --test --waitforcert 15Info: Creating a new SSL key for web1.example.comInfo: Caching certificate for caInfo: csr_attributes file loading from /etc/puppetlabs/puppet/csr_attributes.yamlInfo: Creating a new SSL certificate request for web1.example.comInfo: Certificate Request fingerprint (SHA256): 3E:D9:02:08:98:79:FB:8C:40:65:75:4E:15:7C:51:89:4C:14:25:90:16:2A:DB:29:D6:3C:F4:82:64:7E:C8:62Info: Caching certificate for caNotice: Did not receive certificate
In Listing 19-7, we executed the puppet agent binary with a number of options. The first option, --server, specifies the name or address of the Puppet master to connect to. We can also specify this in the main section of the /etc/puppetlabs/puppet/puppet.conf configuration file on the client.
[main]server=puppet.example.com
The --test option runs the Puppet client in the foreground and prevents it from running as a daemon, which is the default behavior. The --test is commonly mistaken, and people think that it only “tests” a Puppet run and isn’t destructive. This sadly misnamed option is actually a meta parameter for onetime, verbose, no-daemonize, no-usecacheonfailure, detailed-exitcodes, no-splay, show_diff, and no-use_cached_catalog. If you want a nondestructive Puppet run, you need to specify --noop.
Tip
The --debug option provides further output that is useful for troubleshooting.
In Listing 19-7, you can see the output from our connection. The client has created a certificate signing request and a private key to secure our connection. Puppet uses TLS certificates to authenticate connections between the master and the client. The client is now waiting for the master to sign its certificate and enable the connection. At this point, the client is still running and awaiting the signed certificate. It will continue to check for a signed certificate every 15 seconds until it receives one or is canceled (using Ctrl+C or the like).
Note
You can change the time the Puppet client will wait using the --waitforcert option like we have done. You can specify a time in seconds or 0 to not wait for a certificate.
Now on the master, we need to sign the certificate. We do this using the puppet cert command.
puppet$ sudo /opt/puppetlabs/puppet/bin/puppet cert list"web1.example.com" (SHA256) 3E:D9:02:08:98:79:FB:8C:40:65:75:4E:15:7C:51:89:4C:14:25:90:16:2A:DB:29:D6:3C:F4:82:64:7E:C8:62
The --list option displays all the certificates waiting to be signed. We can then sign our certificate using the sign option. You can use the certificate fingerprint to verify you are signing the correct certificate.
puppet$ sudo /opt/puppetlabs/puppet/bin/puppet cert sign web1.example.comSigning Certificate Request for:"web1.example.com" (SHA256) 3E:D9:02:08:98:79:FB:8C:40:65:75:4E:15:7C:51:89:4C:14:25:90:16:2A:DB:29:D6:3C:F4:82:64:7E:C8:62Notice: Signed certificate request for web1.example.comNotice: Removing file Puppet::SSL::CertificateRequest web1.example.com at '/etc/puppetlabs/puppet/ssl/ca/requests/web1.example.com.pem'
Note
You can sign all waiting certificates with the puppet cert sign --all command.
On the client, after we’ve signed our certificate , we should see the following entries:
Notice: Did not receive certificateInfo: Caching certificate for web1.example.comInfo: Caching certificate_revocation_list for caInfo: Using configured environment 'production'Info: Retrieving pluginfactsInfo: Retrieving pluginInfo: Loading factsError: Could not retrieve catalog from remote server: Error 500 on SERVER: Server Error: Evaluation Error: Error while evaluating a Function Call, Could not find class ::profile::web_server for web1.example.com at /etc/puppetlabs/code/environments/production/manifests/site.pp:2:3 on node web1.example.comWarning: Not using cache on failed catalogError: Could not retrieve catalog; skipping run
The client is now authenticated with the master, but we have an error, and nothing has been applied.
Error: Could not retrieve catalog from remote server: Error 500 on SERVER: Server Error: Evaluation Error: Error while evaluating a Function Call, Could not find class ::profile::web_server for web1.example.com at /etc/puppetlabs/code/environments/production/manifests/site.pp:2:3 on node web1.example.comWarning: Not using cache on failed catalogError: Could not retrieve catalog; skipping run
The error is fairly detailed. We expected this error, so let’s see what it is telling us. It says that on line 2 in /etc/puppetlabs/code/environments/production/manifests/site.pp we could not find the class ::profile::web_server for web1.example.com. Looking on line 2 of the site.pp file we see the following:
include profile::web_serverWe have told it to include a profile that we have not created yet. We have to create it. Let’s do that next.
Tip
In the error do you notice that ::profile is preceded by ::? That indicates that the error is in the top scope in Puppet.
Creating Our First Configuration
Now our client has connected, and we’re going to add some configuration for it. On the Puppet master, we need to add our profile module and add some configuration to apply to our client.
A module should have the following structure:
modulename/|- manifests|- init.pp|- files|- templates
At the least, you need the manifests directory; you may see other modules with more directories, like spec and lib as well—for testing and module code, respectively.
We have created the profile module directory in /etc/puppetlabs/code/environments/production/sites already. Let’s create a manifests file inside the profile directory. In that directory we will create a file called init.pp. This file is not technically necessary and will not hold any configuration. You can see the contents of this file in Listing 19-8.
Listing 19-8. Our init.pp Configuration
class profile {}
It is simply an empty Puppet file. This is the standard format of a Puppet file. The class declaration is a Puppet type. The profile is a title. Then the class type expects the Puppet code in that class to be between curly braces {...}. See https://docs.puppet.com/puppet/4.8/lang_resources.html for the basics on the Puppet language.
Now inside the profile directory, we will create our web_server.pp file. The Puppet master autoloader, the mechanism that looks for and loads the Puppet files, will, when it sees include profile::web_server, look in its module path for first the directory profile and then in the manifests directory in that. Then it will load all the *.pp files until it finds the class profile::webserver { ... } directive like declared here:
$ sudo vi /etc/puppetlabs/code/environments/production/sites/profile/manifests/web_server.ppclass profile::web_server {}
In this file, between the {...} we are going to declare a resource. This resource is called notify, and a resource is declared like the following:
notify { "profile::webserver – loaded": }The notify is the resource type. The "profile::webserver – loaded": is the title. What it does is print a message in the runtime log of the Puppet run. As with all resource types, you can add attributes, and notify can take a name, message, and withpath attributes. So, you could write it like this:
notify { "profile::webserver – loaded":name => 'a name',message => 'this is our message'}
Feel free to experiment . You will find all the resources and their attributes at the following link: https://docs.puppet.com/puppet/latest/type.html . Save that file, and let’s run the Puppet agent on web1.example.com again.
$ sudo /opt/puppetlabs/bin/puppet agent --server puppet.example.com --testInfo: Using configured environment 'production'Info: Retrieving pluginfactsInfo: Retrieving pluginInfo: Loading factsInfo: Caching catalog for web1.example.comInfo: Applying configuration version '1482320904'Notice: profile::webserver – loadedNotice: /Stage[main]/Profile::Web_server/Notify[profile::webserver – loaded]/message: defined 'message' as 'profile::webserver – loaded'Notice: Applied catalog in 0.01 seconds
There you can see the output of our notify. Notify can be a handy way to debug your Puppet code as you can print out variables and the like to see that your code is working as you expect.
We now have our profile::web_server module working. Now inside this profile we are going to soon include the role apache_web. This is maybe starting to sound a little like Russian dolls, but the idea is that you abstract designation logic from the type of server it is. For the time being, let’s move on to configuring our role.
Create the following directory: /etc/puppetlabs/code/environments/production/sites/role/manifests. In there we create the file in Listing 19-9.
Listing 19-9. The role::apache_web Class
$ sudo vi /etc/puppetlabs/code/environments/production/sites/role/manifests/apache_web.ppclass role::apache_web (String $vhost_name,String $vhost_doc_root,Numeric $vhost_port) {include apacheapache::vhost { $vhost_name:port => $vhost_port,docroot => $vhost_doc_root,}}
This class has a bit more meat to it. Here we declare the class role::apache_web, and we provide a list of parameters we expect this class to be provided with when it is used. Class parameters in Puppet can either be declared when we create the class or be looked up from a key/value database like Hiera at the time this class is compiled for a node. They are declared right after the class name and inside parentheses separated by a comma. Read more about class parameters here: https://docs.puppet.com/puppet/4.8/lang_classes.html .
In Puppet you can define the data types of the variables you are passing in, and if they are not the correct types, Puppet will error. We have used String and Numeric, but the others, like Boolean, Array, and Hash are described here: https://docs.puppet.com/puppet/4.8/lang_data_type.html .
In Listing 9-11 we have included the apache module . This is a module we are now going to install using the Puppet module command like we described earlier, and it will be the puppetlab/apache module. Looking at the documentation, we can declare a virtual host by giving a name, a port, and doc_root, and we have used the parameters provided to the class.
The apache::vhost is what is called a defined resource type. Defined resource types are normal blocks of Puppet code that can be evaluated multiple times. You still cannot have multiple defined resources with the same name, so you could not have two declarations of apache::vhost {' www.example.com ': } for instance, but you can declare apache::vhost {' www.example.com ': } and apache::vhost {'api.example.com': } in the same manifest just fine.
Let’s install the puppetlabs-apache module on the Puppet server now.
$ sudo /opt/puppetlabs/puppet/bin/puppet module install puppetlabs-apacheNotice: Preparing to install into /etc/puppetlabs/code/environments/production/sites ...Notice: Created target directory /etc/puppetlabs/code/environments/production/sitesNotice: Downloading from https://forgeapi.puppet.com ...Notice: Installing -- do not interrupt .../etc/puppetlabs/code/environments/production/sites└─┬ puppetlabs-apache (v1.11.0)├── puppetlabs-concat (v2.2.0)└── puppetlabs-stdlib (v4.14.0)
This has installed the puppetlabs-apache module and the required concat and stdlib modules as well and installed them into the /etc/puppetlabs/code/environments/production/sites directory. You can see the documentation for that module here: https://forge.puppet.com/puppetlabs/apache .
Now let’s go to the profile::web_server class again and add in our virtual host we want to install.
sudo vi /etc/puppetlabs/code/environments/production/sites/profile/manifests/web_server.ppclass profile::web_server {class { role::apache_web:vhost_name => 'www.example.com',vhost_doc_root => '/var/www/html',vhost_port => 80}}
We have now called in the class role::apache_weband provided the vhost_ parameters that we required in the role::apache_web class. In this profile you may also include some Puppet code that deploys the site to /var/www/html.
Applying Our First Configuration
Let’s now run our Puppet agent on web1 and see what happens.
Caution
This next action is destructive and will purge any existing Apache configuration from your Puppet node .
$ sudo /opt/puppetlabs/bin/puppet agent --server puppet.example.com --testInfo: Using configured environment 'production'Info: Retrieving pluginfactsInfo: Retrieving pluginInfo: Loading factsInfo: Caching catalog for web1.example.comInfo: Applying configuration version '1482323449'Notice: profile::webserver – loadedNotice: /Stage[main]/Apache/Package[httpd]/ensure: createdInfo: /Stage[main]/Apache/Package[httpd]: Scheduling refresh of Class[Apache::Service]Info: Computing checksum on file /etc/httpd/conf.d/READMEInfo: /Stage[main]/Apache/File[/etc/httpd/conf.d/README]: Filebucketed /etc/httpd/conf.d/README to puppet with sum 20b886e8496027dcbc31ed28d404ebb1...Notice: /Stage[main]/Apache::Service/Service[httpd]/ensure: ensure changed 'stopped' to 'running'Info: /Stage[main]/Apache::Service/Service[httpd]: Unscheduling refresh on Service[httpd]Notice: Applied catalog in 20.26 seconds
That is a shortened output of our Puppet run. You can see that the Apache package was installed. We removed the README (and saved it to a file bucket; see https://docs.puppet.com/puppet/latest/man/filebucket.html ) and started the Apache service.
We can now test that the Apache service is up and running with the following command:
$ curl -I http://localhostHTTP/1.1 200 OKDate: Wed, 21 Dec 2016 13:07:46 GMTServer: Apache/2.4.6 (CentOS)Connection: closeContent-Type: text/html;charset=UTF-8
Every subsequent run of the Puppet agent will make sure the node stays in its current configuration. If you do another Puppet run, nothing will be changed. Try it yourself now. On our web server node we are going to remove the /etc/httpd/conf.d/25- www.example.com.conf file that was created during our Puppet run. Then we will run Puppet again on that node.
$ sudo rm –f /etc/httpd/conf.d/25-www.example.com.conf$ sudo /opt/puppetlabs/bin/puppet agent --server puppet.example.com --testInfo: Using configured environment 'production'...Notice: /Stage[main]/Role::Apache_web/Apache::Vhost[www.example.com]/Concat[25-www.example.com.conf]/File[/etc/httpd/conf.d/25-www.example.com.conf]/ensure: defined content as '{md5}6bee975590cb7b26b89cfd48d8d65bdf'Info: Concat[25-www.example.com.conf]: Scheduling refresh of Class[Apache::Service]Info: Class[Apache::Service]: Scheduling refresh of Service[httpd]Notice: /Stage[main]/Apache::Service/Service[httpd]: Triggered 'refresh' from 1 eventsNotice: Applied catalog in 1.71 seconds
Here you can see that the file was replaced and the Apache service was restarted.
Specifying Configuration for Multiple Hosts
We’ve barely scratched the surface of Puppet’s configuration capabilities, so let’s look at extending our current configuration to multiple clients or nodes. We’ll demonstrate how to differentiate configuration on two clients and apply a slightly different configuration to each.
To implement this differentiation, we’re going to use Puppet’s partner tool, Facter. Facter is a system inventory tool that returns facts about your hosts. We can run Facter from the command line using the facter binary to see what it knows about our web1.example.com client.
web1$ sudo /opt/puppetlabs/bin/facter -p...facterversion => 3.5.0filesystems => ext2,ext3,ext4identity => {gid => 0,group => ‘root’,privileged => true,uid => 0,user => ‘root’}is_virtual => truekernel => Linuxkernelmajversion => 3.10kernelrelease => 3.10.0-327.28.3.el7.x86_64kernelversion => 3.10.0load_averages => {15m => 0.05,1m => 0.05,5m => 0.04}...
We’ve shown you a small selection of the facts available in Facter, but you can see that it knows a lot about our host, including its name, network information, operating system, and even the release of the operating system.
So, how is this useful to Puppet? Well, each of these facts is available to Puppet as a variable. Puppet runs Facter prior to applying any configuration, collects the client’s facts, and then sends them to the Puppet master for use in configuring the client. For example, the hostname fact is available in our Puppet configuration as the variable $hostname – or as $fact['hostname']. Let’s look at an example in Listing 19-10.
Listing 19-10. Using Facts
class sudo {package { sudo:ensure => 'present',}file { '/etc/sudoers':source => ["puppet:///modules/sudo/sudo_${hostname}","puppet:///modules/sudo/sudo_${os['family']}",'puppet:///modules/sudo/sudo_default']owner => 'root',group => 'root',mode => '0440',}}
Here we are defining a class that provides sudo. You can see in this sudo class we have defined a file resource type that specifies the basic security requirements of that file and a source file, or a file local to the Puppet master that we will send to the node when the agent checks in.
When the agent checks in, the Puppet master will search in the sudo module for a file in the modules/sudo/files directory called sudo_web1; if it can’t find that, it will look for sudo_Redhat (for CentOS hosts, sudo_Debian for Ubuntu), and if it cannot find a match, then it will provide the sudo_default file.
Depending on which client connected, they would get a file appropriate to them. But this isn’t the only use for facts. We can also use facts to determine how to configure a particular node, as shown in Listing 19-11.
Listing 19-11. A Fact in a case Statement
node default {case $facts['os']['name'] {'CentOS', 'RedHat': { include centos } # include the centos/^(Ubuntu|Debian)$/: { include ubuntu } # include the ubuntu classdefault: { include common } # include the common class}}
Here we created our default node definition , which is the node configuration used for all nodes that don’t explicitly have a node defined. Inside this node definition, we used a feature of the Puppet language, a case statement. The case statement, a concept common to many programming languages, specifies a result based on the value of a variable—in this case we use the $facts['os']['name'] fact, which contains the name of the operating system running on the client (e.g., CentOS or Red Hat or Debian or Ubuntu).
Tip
Puppet has two other types of conditionals: selectors and if/else clauses. You can read about these at https://docs.puppet.com/puppet/4.8/lang_conditional.html .
In Listing 19-11, if the value of the $facts['os']['name'] is CentOS, then the centos class is included on this client. We can define more than one case, as long as they are strings separated by a comma. If the value is Ubuntu, then the ubuntu class is included; here you can see we can use a regular expression to match on Ubuntu or Debian. The last value, default, is the behavior if the value does not match either redhat or ubuntu. In this case, the common class is applied to the client.
We’ve used another Puppet conditional, a selector, in Listing 19-12.
Listing 19-12. A Selector
$ssh_service = $facts['os']['name'] ? {'CentOS' => 'sshd','Ubuntu' => 'ssh',default => 'ssh',}service { $ssh_service:ensure => ‘running’,}
In Listing 19-12, we introduced a new type, service, that manages services on hosts. We’ve titled our service resource $ssh_service, and we’ve defined that variable just above it. We’ve used a Puppet language construct called a selector, combined with the $fact['os']['name'] fact, to specify the name of the SSH service. This is because on each operating system we’ve specified, the SSH daemon is called something different. For example, on CentOS the SSH daemon is called sshd, while on Ubuntu it is called ssh.
The title attribute uses the value of the $ssh_service to specify what the daemon will be called on each distribution. Puppet, in turn, uses this to determine what service to start or stop. The default value is used when the value of $facts['os']['name'] is neither CentOS nor Ubuntu.
Lastly, the ensure attribute has been set to running to ensure the service will be started. We could set the ensure attribute to stopped to ensure it is not started.
Note
The Puppet language has a lot of useful features and lots of different ways you can express your code. Remember to consult the style guide for Puppet at https://docs.puppet.com/guides/style_guide.html .
Relating Resources
Resources in Puppet also have the concept of relationships. For example, a service resource can be connected to the package that installs it. Using this, we could trigger a restart of the service when a new version of the package is installed. This allows us to do some useful things. Consider the simple example in Listing 19-13.
Listing 19-13. Requiring Resources
class ssh {service { 'sshdaemon':name => $facts['os']['name'] ? {'CentOS' => 'sshd','Ubuntu' => 'ssh',default => 'ssh',},ensure => 'running',require => File['/etc/ssh/sshd_config'],}file { '/etc/ssh/sshd_config':owner => 'root',group => 'root',mode => '0644',source => 'puppet://modules/ssh/sshd_config',notify => Service['sshdaemon'],}}
Listing 19-13 shows a new class called ssh, which contains the service resource we created in Listing 19-12. We have created a file resource to manage the /etc/ssh/sshd_config file. We’ve created the ssh service a little differently here; we have made a selector on the name attribute to the service type. It works exactly the same as in Listing 19-12. You’ve seen almost all the attributes in these resources except require in the service resource and notify in the file resource. These are not, however, normal attributes—they are called metaparameters. Let’s look at each metaparameter and see what it does.
The require metaparameter allows you to build a relationship to one or more resources. Any resource you specify in the require metaparameter will be configured before this resource; hence, Puppet will process and configure the File['/etc/ssh/sshd_config'] resource before the Service['sshdaemon'] resource. This approach ensures that the appropriate configuration file is installed prior to starting the SSH daemon service. You could do a similar thing with a package resource.
class httpd {package { 'httpd':ensure => 'present',}service { 'httpd':ensure => 'running',enabled => true,require => Package['httpd'],}}
Here the package resource, Package['httpd'], must be installed before the Service['httpd'] service can be started.
Tip
We’ve also added the enabled attribute to the Service['http'] resource. When set to true, this attribute ensures our service starts when the host boots (similar to using the systemctl enable command).
We’ve also specified another metaparameter, this one called notify, in Listing 19-13. This metaparameter has been added to the File['/etc/ssh/sshd_config'] resource. The notify metaparameter tells other resources about changes and updates to a resource. In this case, if the File['/etc/ssh/sshd_config'] resource is changed (e.g., if the configuration file is updated), then Puppet will notify the Service['sshdaemon'] resource, causing it to be run and thus restarting the SSH daemon service.
Tip
Two other relationships you can construct are subscribe and before. You can see both of these at https://docs.puppet.com/puppet/latest/metaparameter.html and also read about other available metaparameters you may find useful.
Using Templates
In addition to retrieving files from the Puppet file server, you can also make use of a template function to apply specific values inside those files to configure a service or application. Puppet templates use a Ruby template language called EPP (see https://docs.puppet.com/puppet/latest/lang_template_epp.html ). It’s a function that happens during compilation on the Puppet master and is simple to use, as you can see in Listing 19-14.
Listing 19-14. Using Templates
file { '/etc/ssh/sshd_config':path => '/etc/ssh/sshd_config',owner => 'root',group => 'root',mode => '0644',content => epp('ssh/sshd_config.epp', { 'root_login' => 'no' }),notify => Service['sshdaemon'],}
In Listing 19-14, we used the same File['/etc/ssh/sshd_config']resource we created earlier, but we exchanged the source attribute for the content attribute. With the content attribute, rather than a file being retrieved from the Puppet file server, the contents of the file are populated from this attribute. The contents of the file can be specified in a string like so:
content => 'this is the content of a file',Or, as Listing 19-14 shows, we can use a special Puppet function called epp. To use the template function, we specify a template file, and Puppet populates any EPP code inside the template with appropriate values that have been passed in as a hash to the function. Listing 19-15 shows a simple template.
Listing 19-15. sshd_config Template
Port 22Protocol 2ListenAddress <%= $ipaddress %>SyslogFacility AUTHPRIVPermitRootLogin <%= $root_login %>PasswordAuthentication noChallengeResponseAuthentication noGSSAPIAuthentication yesGSSAPICleanupCredentials yesUsePAM yesX11Forwarding yesBanner /etc/motd
We’ve used only one piece of EPP in Listing 19-15, to specify the ListenAddress of our SSH daemon, <%= $ipaddress %>. The <%= $value %> syntax is how you specify variables in a template. Here we specified that Puppet should set ListenAddress to the value of the $ipaddress variable. This variable is, in turn, the value of the ipaddress fact, which contains the IP address of the eth0 interface. We also have passed in the { 'root_login' => 'no' } key/value as a hash. This is now available as a variable <%= $root_login %>.
When we now connect a client that applies the File['/etc/ssh/sshd_config'] resource, the value of the ipaddress fact on the client will be added to the template, and the root_login will be evaluated to no and then applied on the client in the /etc/ssh/sshd_config file.
You can perform a wide variety of functions in an EPP template—more than just specifying variables. You can read about how to use templates in more detail at https://docs.puppet.com/puppet/latest/lang_template_epp.html .
You can also explore the older style of Puppet templating using Ruby’s ERB templating language. It is similar EPP syntactically; you can see the page for it here: https://docs.puppet.com/puppet/latest/lang_template_erb.html .
More Puppet
We’ve barely touched on Puppet in this chapter—there’s a lot more to see. In the sections that follow, we’ll describe some of the topics we haven’t covered that you can explore further to make the best use of Puppet.
Functions
Puppet also has a collection of functions. Functionsare useful commands that can be run on the Puppet master to perform actions. You’ve already seen two functions: template, which we used to create a template configuration file, and include, which we used to specify the classes for our nodes. There are a number of other functions, including the generate function, which calls external commands and returns the result, and the notice function, which logs messages on the master and is useful for testing a configuration.
You can see a full list of functions at https://docs.puppet.com/puppet/latest/function.html .
Reports
Puppet has the ability to report on events that have occurred on your nodes or clients. Combined with PuppetDB, you can get extensive reports about your systems; if you have the enterprise version, you will be able to see these in the Puppet dashboard. You can read more about reporting at https://docs.puppet.com/puppet/latest/reporting_about.html .
External Nodes
As you might imagine, when you begin to have a lot of nodes, your configuration can become quite complex. If it becomes cumbersome to define all your nodes and their configuration in manifests, then you can use a feature known as external nodesto better scale this. External nodes allow you to store your nodes and their configuration in an external source.
The ENC runs as a command on the Puppet master and returns a YAML document describing the manifest for any particular node. It can be from any source, such as a database.
You can read more about external nodes classifiers at https://docs.puppet.com/guides/external_nodes.html .
Documenting Your Configuration
A bane of many system administrators is documentation , both needing to write it and needing to keep it up-to-date. However, Puppet has some suggestions on how to write the documentation for any modules you create and want to publish to the broader community via sites like Puppet Forge. You can read about manifest documentation at https://docs.puppet.com/puppet/latest/modules_documentation.html .
Troubleshooting Puppet
Puppet has a big and helpful community as well as extensive documentation. Start at these Puppet sites:
The following books are recommended:
Pro Puppet by Spencer Krum, William Van Hevelingen, Ben Kero, James Turnbull, and Jeffrey McCune (Apress, 2014)
Extending Puppet by Alessandro Franceschi and Jaime Soriano Pastor (Packt, 2016)
These and more can be found here: https://puppet.com/resources/books .
Introducing Ansible
Ansible has a different approach than Puppet. At its heart is the open source Ansible software that can orchestrate the provisioning of large-scale fleets. It was originally designed by Michael DeHaan, the same person who wrote Cobbler. The Ansible Inc. , the company that was formed for the commercial support of Ansible (the Tower product), was acquired by Red Hat, which continues to support the open source community as well as provide subscription-based commercial support service.
Written in Python , it was designed to be agentless. It uses SSH as its transport mechanism, which means there is no certificate management like with Puppet; instead, you use your existing SSH key management to provide secure transport. It works by sending an Ansible payload (a playbook) via SSH to the target server. The payload is a set of Python scripts, executed on the target system.
Note
At the time of writing, Ansible currently support versions 2.6 and 2.7 of Python. It has preliminary support for Python version 3 as of Ansible version 2.2.
Like Puppet, Ansible can install files and manage packages and many other resources, including creating cloud resources. It does this by calling playbooks. Ansible playbooks are made up of sequential tasks. As you step through each task, you execute a module.
A module is an action that should be performed on target node. There is an extensive set of core modules. They are called to manage files, packages, and services; they can also manage cloud service infrastructure. There are many core modules shipped with Ansible, and they are documented here: http://docs.ansible.com/ansible/modules_by_category.html .
The target systems, or inventory , are a collection of hosts and can be grouped together into groups. These can be static or dynamically collected with helper scripts. You can assign variables to these hosts and groups that can be used in your playbooks. You can see more about hosts and groups here: http://docs.ansible.com/ansible/intro_inventory.html .
Any variables that are declared in hosts or groups can be used throughout your playbooks. Ansible uses the Jinja2 Python templating engine to allow for complex filtering and playbook compilation. You can also declare variables on the command line or in the playbooks themselves.
You can also find system facts, like Puppet Facts, that can also be used by the templating engine inside your playbooks. We can also perform lookups that can be read from external services or from local files. You can find more information on variables at http://docs.ansible.com/ansible/playbooks_variables.html#variables .
In this section we are going to build up a web server. We are then going to use ServerSpec to validate our configuration.
Ansible Installation and Configuration
Ansible is simple to install and is available from either .deb or .rpm packages, Python Pip installation or tar files, and more, depending on your system. We are going to use the Debian package as we are running this on our Xenial server.
Let’s run the aptitude command like so:
$ sudo aptitude install –y ansibleIt is also available via yum install. You can also install it via Python Pip, which is a Python package manager. This is available on most operating systems.
$ sudo pip install ansibleOnce it’s installed, you can edit the global configuration file, ansible.cfg, that will be in the /etc/ansible directory. When Ansible starts, it looks for the configuration file, first in the environment variable ANSIBLE_CONFIG, then in ansible.cfg in the local directory, then in ∼/.ansible.cfg in the home directory, or lastly the system default in /etc/ansible/ansible.cfg.
When you start out, you don’t need to edit this file. If you have downloaded third-party Ansible modules to a particular location, you can declare that location in in the ansible.cfg file. Other things like SSH options that you want to use as defaults can also go in there.
inventory = /etc/ansible/hostslibrary = /usr/share/my_modules/roles_path = /etc/ansible/roleslog_path = /var/log/ansible.logfact_caching = memoryssh_args = -o ControlMaster=auto -o ControlPersist=60s -o ProxyCommand="ssh -W %h:%p -q jumphost"
Here you can see a small subset of things you may want to change or add to. The inventory is where Ansible expects to see you host list or a program that will dynamically gather your host list. The library is for your own or shared modules. The role_path is where you might install roles. Roles are collections of tasks, variables, templates, files, and handlers that can be used to configure a particular service, like Nginx (see https://galaxy.ansible.com/ for a whole bunch of roles that people have created and shared).
The fact_cachingcan be stored either in memory on your local host or in different shared service like Redis (Redis being an open source key/value store database). This can help to speed up fact collection for multiple users of Ansible.
For the ssh_args the default SSH options are ControlMaster=auto and ControlPersist=60s, which allow for the sharing of multiple sessions over the one connection (meaning we don’t need to connect the target host, execute a task, disconnect, connect again, execute another task, and so on). The option we have added here is how you can run your commands via a jump host, so any target hosts will be accessed via this SSH proxy server.
There is no ansible service to start. However, you may want to automate the process of running playbooks on your hosts; that is where Ansible Tower ( https://www.ansible.com/tower ) comes in. It is a commercial automation and job scheduling tool provided by Red Hat.
You can also, of course, automate your Ansible playbooks by using other continuous delivery (CD) solutions like executing runs as part of a build step in tools like Jenkins ( https://jenkins.io/ ).
Using the ansible Command
Ansible is great for running ad hoc command across multiple hosts. Any of the modules (documented at http://docs.ansible.com/ansible/modules_by_category.html ) can be used to execute ad hoc commands via the ansible command. If we bundle up the ad hoc tasks into a list of tasks, that is called a playbook, which is invoked with the ansible-playbook command .
Let’s look first at the ansible command to run a simple task. At the basic level, Ansible needs to know three things.
How to find the host to target
The host to target
The module to run and any arguments for that module
While there are many more options to the ansible command, we can apply this to run our first task. We are going to use the setup module, a module that gathers the facts that we can use in our tasks or playbooks.
$ ansible –c local localhost –m setuplocalhost | SUCCESS => {"ansible_facts": {"ansible_all_ipv4_addresses": ["192.168.0.61","10.0.2.15"],..."ansible_virtualization_type": "virtualbox","module_setup": true},"changed": false}
There is a long list of Ansible facts returned as a JSON string; we have shown only a small portion. The ansible command is using a local connection (-c local) and operating on the target host localhost. We executed on that host the setup module (-m setup).
Let’s now take it one step further; on this local host we will install the Nginx package. To do that, we use the apt or yum module, depending on which host operating system we are targeting.
$ ansible -c local localhost -m apt -a 'name=nginx state=latest update_cache=yes'localhost | FAILED! => {"changed": false,"cmd": "apt-get update '&&' apt-get install python-apt -y -q --force-yes","failed": true,"msg": "W: chmod 0700 of directory /var/lib/apt/lists/partial failed - SetupAPTPartialDirectory (1: Operation not permitted) E: Could not open lock file /var/lib/apt/lists/lock - open (13: Permission denied) E: Unable to lock directory /var/lib/apt/lists/ W: Problem unlinking the file /var/cache/apt/pkgcache.bin - RemoveCaches (13: Permission denied) W: Problem unlinking the file /var/cache/apt/srcpkgcache.bin - RemoveCaches (13: Permission denied) E: Could not open lock file /var/lib/dpkg/lock - open (13: Permission denied) E: Unable to lock the administration directory (/var/lib/dpkg/), are you root?","rc": 100,"stderr": "W: chmod 0700 of directory /var/lib/apt/lists/partial failed - SetupAPTPartialDirectory (1: Operation not permitted) E: Could not open lock file /var/lib/apt/lists/lock - open (13: Permission denied) E: Unable to lock directory /var/lib/apt/lists/ W: Problem unlinking the file /var/cache/apt/pkgcache.bin - RemoveCaches (13: Permission denied) W: Problem unlinking the file /var/cache/apt/srcpkgcache.bin - RemoveCaches (13: Permission denied) E: Could not open lock file /var/lib/dpkg/lock - open (13: Permission denied) E: Unable to lock the administration directory (/var/lib/dpkg/), are you root? ","stdout": "","stdout_lines": []}
We have an error! You can see from the output that we have tried to execute the "apt-get update '&&' apt-get install python-apt -y -q --force-yes" commands and we have been denied permission. This should not be a surprise; we don’t let unauthorized users install packages without appropriate sudo privileges. Let’s provide Ansible with the ability to use sudo with the request.
$ ansible -c local localhost --become -m apt -a 'name=nginx state=latest update_cache=yes'localhost | SUCCESS => {"cache_update_time": 1481951319,"cache_updated": true,"changed": true,"stderr": "","stdout": "....”}
Now we have added the --become argument to the ansible command, and now it will attempt to execute the commands via sudo. The output has again been shortened, but you can see that we have "change": true, which means that the task was executed on the system and the system was changed.
What happens if we run that ansible task again?
$ ansible -c local localhost --become -m apt -a 'name=nginx state=latest update_cache=yes'localhost | SUCCESS => {"cache_update_time": 1481951681,"cache_updated": true,"changed": false}
Again, we are successful but this time, because Nginx is already install there was nothing to change, so "changed" is false. That is installing one thing on one host, how do you do that on many hosts?
Ansible Inventory
Ansible inventory is a way of defining our list of hosts that we want to execute our commands over. This can be dynamically discovered with the help of scripts or as a plain static host list. We are going to show you how to configure the static host list. If you want, you can read about dynamic host lists here: http://docs.ansible.com/ansible/intro_dynamic_inventory.html .
The inventory file can be in the local directory or in the systemwide /etc/ansible/hosts file. In our host inventory we can define our hosts and host groups. Host groups are defined in square brackets and can have nested host groups in them.
$ sudo vi /etc/ansible/hostssomehost.example.com[all_centos]gateway.example.combackup.example.com[all_ubuntu]mail.example.commonitor.example.com[dbs]db.example.com[all_servers:children]all_centosall_ubuntudbs
In our host list we have defined a single host, somehost.example.com for an example. Then we have defined three host groups with the [] brackets. They include hosts that are of a particular operating system, either all CentOS or all Ubuntu, but the groups can be anything that makes sense to your installation. Lastly, we have a group of groups [all_servers:children] host group that contains the all_ubuntu and all_centos host groups as well as the [dbs] host.
Let’s see how we now execute something across a few hosts. We will assume that the user we are running this command as has had their public SSH key deployed to all the hosts already. In some situations, like running Vagrant hosts, you will find that the username you are using is different on each host. Xenial hosts will use the ubuntu user, and CentOS will use the vagrant user as defaults. We can cater for these kinds of differences in our host file by adding the following variable declaration:
[all_ubuntu:vars]ansible_user=ubuntu[all_centos:vars]ansible_user=vagrant
You will notice that hosts in the [dbs] group have not been declared as either Ubuntu or CentOS, so we can manage those hosts with this similar declaration.
[dbs]db.example.com ansible_user=vagrant
We may also want particular hosts to be reached via a particular jumphost (sometimes called a bastion or proxy). We can declare the following:
[remote:vars]ansible_ssh_common_args: '-o ProxyCommand="ssh -W %h:%p -q jumphost"'
In this way, all hosts classified in the [remote] group will reached via the host jumphost.
Tip
Not sure what the ProxyCommand does? Check out this page for this and other interesting SSH tricks: https://en.wikibooks.org/wiki/OpenSSH/Cookbook/Proxies_and_Jump_Hosts .
With that host configuration now in place, we can run a test to see that we can see all our hosts with the following ansible command:
$ ansible all_servers -m pinggateway.example.com | SUCCESS => {"changed": false,"ping": "pong"}...db.example.com | SUCCESS => {"changed": false,"ping": "pong"}
We have successfully connected, authenticated, and executed the module ping on the host. That module responds with pong if we are successful. If we are not able to get a successful connection, we will get an error similar to this:
mail.example.com | UNREACHABLE! => {"changed": false,"msg": "ERROR! SSH encountered an unknown error during the connection. We recommend you re-run the command using -vvvv, which will enable SSH debugging output to help diagnose the issue","unreachable": true}
Make sure you can SSH to the target host as the user executing ansible. You can use the –vvv option to increase the verbosity of the ansible command output, which should help you track down any connection issues.
Imagine we needed for some reason to restart sshd on all our hosts. That would be a difficult task to manage each host individually. We have only around five different hosts, but you could have thousands. With Ansible, it is the same command to do 1 as it is to do 1,000.
$ ansible all_servers --become –m service –a "name=sshd state=restarted"Here we have provided the hosts to target (all_servers), we will execute our command using sudo on the target host (--become), we want to use the service module (-m service), and that module will take the arguments -a "name=sshd state=restarted".
Each module has different arguments, and you can pass them as key/value pairs (key=value). They are all clearly listed in the module document link we gave earlier.
The --become option has further options available to it. The default --become-method is sudo, but depending on your system, you can choose su, pbrun, pfexec, runas, or doas. If you need to provide an authentication password with those options, you can with --ask-become-pass, which will prompt you for a password. If don’t run operations as the root user, you can choose a different user with the --become-user option.
You can now issue ad hoc commands across the entire fleet of systems or target just smaller groups or individual hosts. But how do we execute several tasks? Well, that’s where we use playbooks.
Ansible Playbooks
Now that we have configured Ansible and we can execute modules on our hosts, we are going to run several tasks to bring up a particular service. Ansible provides a command called ansible-playbook, and it is designed to connect to particular hosts and run a series of tasks. Playbooks are quite powerful, they can run in serial or parallel across your hosts, and they can delegate tasks to other hosts and wait for those to complete before moving on to the next task. In this way, you can build complex deployment playbooks.
Playbooks are YAML files. We have spoken previously about YAML files. YAML files are a markup language for data serialization that lets us describe key/values including lists and associative arrays. Playbooks can describe tasks to run on a collection of hosts or include other playbooks as well as Ansible roles. Let’s take a look at one now.
---- hosts: ahostgroupbecome: truegather_facts: truevars:- akey: avaluetasks:- name: do somethingmodule: module=argumentshandlers:- name: a handlermodule: module=arguments
This is a basic playbook layout. We declare the key hosts and give it a value of the hosts we want to run this on, either a group or an individual host. We can declare other key values like become and gather_facts, which are Boolean values that can be true or false.
The gather_facts option will trigger an initial request to all the target hosts and gather all their available facts. If you are not using any facts in your plays, you can set this to false, and it will speed up your runs. If you use it, you can then use those facts in your plays as conditionals or as values in your plays.
We can list our own variables in the vars key as an associate array. These key/value pairs can be used by our templating engine. Tasks and handlers are similar and are essentially tasks. The handlers are used to “handle” restarts of services mainly. You can notify a handler from a task to perform a task, such as restart a service.
Let’s take a look at the following playbook. In this example we are going to create a playbook that installs our backup software, Bareos. In this example, we are going to install Bareos and the MariaDB it requires on the same host. The first part of the playbook looks like this:
$ vi playbooks/backup.yml- hosts: backup.example.combecome: truegather_facts: truevars:url: http://download.bareos.org/bareos/release/latest/{{ ansible_distribution }}_{{ ansible_distribution_major_version }}bareos_db_packages: bareos-database-mysqlsql_import: '/usr/lib/bareos/scripts/ddl/creates/mysql.sql'
Here we have targeted one host, backup.example.com. We will actions that require escalated privileges with sudo (so the user executing this playbook must already have sudo privileges on the target host). We are going to gather facts about the host and use them in our playbook.
In the vars section we have specified some variables that we will use in our playbook. These can be seen and edited easily, making ongoing management of our playbook easier. You will notice the {{ words }}. This is our templating engine syntax. It tells Ansible that the values in {{ }} are variables, either facts or like the ones we have just created.
Remembering back to when we ran the setup module with the ansible command, the output list from there contained the key values for ansible_distribution and ansible_distribution_major_version.
"ansible_distribution": "CentOS","ansible_distribution_major_version": "7",
On a CentOS system, when we run the play, the Jinja2 templating engines will substitute the variables like this:
url: http://download.bareos.org/bareos/release/latest/CentOS/7DefiningPlaybook Tasks
Let’s move on to defining our playbook tasks. We have defined our hosts and our variables, and now we have to execute tasks in the order in which we want them to occur. In general, we want to make sure we have the necessary repositories installed, we download and install the right packages, and then we configure any services before finally starting them.
Let’s view the tasks required to install Bareos on our backup server.
tasks:- name: install epelyum: name=epel-release state=latest
In the first section we are using the yum module to install first the epel repository. We are specifying that we want the latest release. The name is optional but helps tell the story of each step. The yum and apt modules take similar arguments, but of course can be run only on systems that support either package managers. The format of a task is as follows:
- name: optional or descriptionmodule_name: module_arg1=value1.... module_argx=valuex
We can also install repositories this way.
- name: add bareosget_url:url: "{{ url }}/bareos.repo"dest: /etc/yum.repos.d/bareos.repomode: 0444
Of course, this can also apply to other types of files if you want. This time we are using the get_url that will make a http:// connection, download the URI, and copy the contents to the /etc/yum.repos.d/bareos.repo file. The contents, evidently, are the Bareos repository, and we have used the url variable listed in our variable section and combined that with /bareos.repo to complete the URI. We could use the yum_repository to create the repository for us using the details of the URI (you can add Apt repositories in a similar way too).
For more on managing packages and repositories, see http://docs.ansible.com/ansible/list_of_packaging_modules.html .
- name: install pipyum: name={{ item }} state=latest update_cache=yeswith_items:- python-pip- python-devel- name: install mariadbyum: name={{ item }} state=latestwith_items:- mariadb-devel- mariadb-servernotify: mariadb_restarted
This next tasks are similar to the first but use a loop. We are saying we want to use the yum module to install some packages. To install the packages, we could write out a task for each package saying install the latest package and make sure we have an up-to-date repository cache (update_cache=yes). But since this is repetitive, we will use a loop.
We say, loop through the items listed in the with_items: list and install them. Ansible will replace {{ item }} with those packages listed for us.
You can read more on loops here: http://docs.ansible.com/ansible/playbooks_loops.html .
You will also notice that there is a notify: mariadb_restartedcall to a handler. Handlers are just tasks that are run at the end of a block of playbook tasks. What this says is to tell the handler named mariadb_restarted to execute the task associated with it if these packages change. This does not immediately start the database, however, and we will do that shortly. The actual mariadb_restarted handler will be described a little later too.
- name: install pre-reqspip: name=mysql state=latest
In this task we are again installing a Pip package called mysql. Pip is a package manager for Python modules and takes similar arguments to both the apt and yum modules. Next we will start the database.
- name: start db serviceservice: name=mariadb enabled=yes state=started
The previous is an example of using the service module to start (started) the database. Other service states are stopped, restarted, and reloaded. The enabled here indicates that we would like this service started on boot. We require this step to run prior the create db step coming up.
Next we will continue installing the Bareos packages.
- name: install bareosyum: name={{ item }} state=installedwith_items:- bareos-database-mysql- bareos-client- bareos-director- bareos-storage- bareos-storage-glusterfs- bareos-bconsole- bareos-filedaemon
Here we are installing the Bareos packages and again using the with_items loop to avoid repetition. The bareos-database-mysql package will create the file in our {{ sql_import }} variable that we use in the next step to create our database.
- name: create dbmysql_db: login_user=root name=bareos state=import target={{ sql_import }}- name: create db user bareosmysql_user: login_user=root name=bareos password={{ backup_database_password }} encrypted=yes priv=bareos.*:ALL state=present
Next we will create the database for Bareos using the mysql_db module. We can import the database structure, and this is the purpose of the state=import and target={{ sql_import }}. We are using the default root user access in this instance, but we could also use a user/password combination in this module to gain access to the database. The sql_import variable is defined at the top of our playbook and is the import SQL script provided by the Bareos installation.
We go on to create the Bareos user on the MariaDB database. We provide the user, password, password type, and privileges for the user. The state is present, meaning we want to create the user; if we want to remove the user, we can choose absent.
The password variable (password={{ backup_database_password }}) we use here is interesting. This is a sensitive secret, so we need to make sure that we do not have it in plain text anywhere, but Ansible still needs access to it. With Ansible Vault we can provide that protection.
We have generated a strong password using a password generator and stored that successfully. Then, using an existing MySQL install, we created a mysql password hash.
SELECT PASSWORD(‘strongpasswordstring’);+---------------------------------------------------------+| password('strongpasswordstring') |+---------------------------------------------------------+| *35D93ADBD68F80D63FF0D744BA55CF920B2A45BD |+---------------------------------------------------------+
We then created a playbooks/group_vars/dbs directory and a vars.yml file and vault.yml file. In the vars.yml file, we will add the following:
backup_database_password: "{{ vault_backup_database_password }}"Then in the vault.yml file, we will add our hashed MySQL password like this:
vault_backup_database_password: '*35D93ADBD68F80D63FF0D744BA55CF920B2A45BD'The reason we do this is because once we encrypt this file, we will have no way of seeing the keys that we are using. By setting the plain-text variable (backup_database_password) to look at the encrypted variable (vault_backup_database_password), we make it easier for people following us to know how these variables are stored. So to be clear, when the ansible commands look for the backup_database_password, it will then do a lookup for the vault_backup_database_password and return that value.
We will now encrypt this file with the ansible-vault command.
$ ansible-vault encrypt playbooks/group_vars/dbs/vault.ymlWe are asked to create and enter a password, which we will also store securely.
Next we have the configuration files. We have created a playbooks/files directory, and in there we have added our bareos-*.conf files.
- name: add bareos-dir.confcopy: src=files/bareos-dir.conf dest=/etc/bareos/bareos-dir.conf owner=bareos group=bareos mode=0640- name: add bareos-sd.confcopy: src=files/bareos-sd.conf dest=/etc/bareos/bareos-sd.conf owner=bareos group=bareos mode=0640- name: add bareos-fd.confcopy: src=files/bareos-fd.conf dest=/etc/bareos/bareos-fd.conf owner=bareos group=bareos mode=0640- name: add bconsole.confcopy: src=files/bconsole.conf dest=/etc/bareos/bconsole.conf owner=root group=bareos mode=0640
We use the copy module to copy local files to the server and place them in the appropriate destination file. The copy module supports assigning owner, group, and mode permissions to the file we create. The path of src is relative to the playbooks directory.
In this simple playbook, we are not taking advantage of the templating engine that comes with Ansible. If you remember to Chapter 14 where we set up Bareos, we needed to add clients and passwords to our Bareos configuration files. We could use templating to create these values and make the coordination of setting up these files easier.
A template is like a file , but it is parsed by the templating engine to find and replace variables. So, values like the following:
$ vi playbooks/files/bareos-fd.confClient {Name = bareos-fdDescription = "Client resource of the Director itself."Address = localhostPassword = "YVcb9Ck0MvIXpZkZCM8wBV1qyEi1FD6kJjHUrk+39xun" # password for FileDaemon}
can be replaced with the following:
$ vi playbooks/templates/backup_bareos_fd.conf.j2Client {Name = bareos-fdDescription = "Client resource of the Director itself."Address = localhostPassword = "{{ bareos_fd_dir_password }}"}
The template files generally have the .j2 suffix to indicate the Jinja2 template engine. We would store that password value in our Ansible Vault–encrypted file, like we did the database password. The template module syntax is similar to the copy module. For more information on templating, please see http://docs.ansible.com/ansible/template_module.html .
There are other ways we can add values into files as well. We can search and replace lines and replace blocks of marked text in a file and more. More information on the different types of file modules can be found here: http://docs.ansible.com/ansible/list_of_files_modules.html .
- name: create backup directoryfile: path=/data/backups/FileStorage state=directory owner=bareos group=bareos mode=0750
Next we create the directory to store our backups using the file module. This directory path is on the target host, and the state can be absent to remove the file or directory, file to create a file, link to create a symlink, directory to create a directory, touch to create an empty file, and hard for creating hardlinks.
Lastly we have our handler. As we said, this will run at the end of the block of tasks in the playbook.
handlers:- name: mariadb_restartservice: name=mariadb state=restarted
So now if we run our playbook and we have a package change for our database, our database will automatically be restarted at the end of the playbook. You could add handlers for the Bareos component services as well.
Caution
With databases, automatically upgrading and restarting your database version may not be a sensible thing to do as package version updates can cause unpredictable behavior in your databases, which can be disastrous!
Running the Playbook
Running the playbook is fairly easy from this point. Ansible uses the ansible-playbook command to execute plays. It has similar command options to the ansible command. Let’s take a look at them now; see Table 19-2.
Table 19-2. ansible-playbook Options
-i | Path to the inventory file. |
--ask-become-pass | Prompt for the remote host password for escalation of privileges. |
--list-hosts | Shows you the hosts that your playbook will be acting upon. |
--list-tags | Lists tags that are available in your playbook. |
--list-tasks | Shows tasks that will be executed in your playbook. |
--module-path= | Adds a different module path. |
-v -vv –vvv | Increases verbosity for debugging. |
--syntax-check | Validates that the playbook syntax is correct. |
--user | Remote user to sign in as. |
--private-key= | Private SSH key of user. |
--connection= | Choose the connection type (paramiko, ssh, winrm, local); defaults to smart. |
--extra-vars= | You can add key/value pairs to the playbook at runtime as well as pass in any files containing variables (including ansible-vault files). |
--start-at-task= | Start at this task. |
--step | Step through each task asking for confirmation before proceeding to the next. |
--tags | Run only tasks with these tags. |
--skip-tags | Don’t run these tagged tasks. |
To make sure we are targeting the right hosts when we execute this playbook, let’s issue the following:
$ sudo ansible-playbook --list-hosts -b playbooks/backup.ymlERROR! Decryption failed
We have issued the --list-hosts, but we have a decryption failed message. That is because we have the encrypted Ansible Vault and we could not read it. Let’s add the prompt to add to the password.
$ sudo ansible-playbook --list-hosts --ask-vault-pass -b playbooks/backup.ymlVault password:playbook: playbooks/backup.ymlplay #1 (backup.example.com): TAGS: []pattern: [u'backup.example.com']hosts (1):backup.example.com
This should come as no surprise as we are targeting this host in the host: section of our playbook. If we were using a group or a regular expression to define our host, this listing would be more immediately useful.
There is still one thing we need to do before we can run our playbook command, and this is not obvious. We have created our database secrets in a group vars directory called dbs, which means that the backup.example.com host must be a member of that host group. If we don’t add it, we will see an error like this when we run our playbook.
TASK [create db user bareos] ***************************************************fatal: [backup.example.com]: FAILED! => {"failed": true, "msg": "ERROR! 'backup_database_password' is undefined"}
So, we will add backup.example.com to the [dbs] host group in the /etc/ansible/hosts file.
[dbs]db.example.com ansible_user=vagrantbackup.example.com
A host can be part of more than one group, and this will enable Ansible to see the vars for that host group. Now we are ready to run the playbook.
$ sudo ansible-playbook --ask-vault-pass -b playbooks/backup.ymlVault password:PLAY ***************************************************************************TASK [setup] *******************************************************************ok: [backup.example.com]TASK [install epel] ************************************************************changed: [backup.example.com]TASK [install pip] *************************************************************changed: [backup.example.com] => (item=[u'python-pip', u'python-devel'])TASK [add bareos] **************************************************************changed: [backup.example.com]TASK [install mariadb] *********************************************************changed: [backup.example.com] => (item=[u'mariadb-devel', u'mariadb-server'])TASK [install pre-reqs] ********************************************************changed: [backup.example.com]TASK [start db service] ********************************************************changed: [backup.example.com]TASK [install bareos] **********************************************************changed: [backup.example.com] => (item=[u'bareos-client', u'bareos-director', u'bareos-storage', u'bareos-storage-glusterfs', u'bareos-bconsole', u'bareos-filedaemon'])TASK [create db] ***************************************************************changed: [backup.example.com]TASK [create db user bareos] ***************************************************changed: [backup.example.com]TASK [install bareos-database-mysql CentOS] ************************************changed: [backup.example.com]TASK [add bareos-dir.conf] *****************************************************changed: [backup.example.com]TASK [add bareos-sd.conf] ******************************************************changed: [backup.example.com]TASK [add bareos-fd.conf] ******************************************************changed: [backup.example.com]TASK [add bconsole.conf] *******************************************************changed: [backup.example.com]TASK [create backup directory] *************************************************ok: [backup.example.com]PLAY RECAP *********************************************************************backup.example.com : ok=2 changed=14 unreachable=0 failed=0
We have successfully run our playbook . When a task executes and makes a change to your system, it will be changed and be added to the final recap line. Where there was no need to execute the task, it will be ok and added to the recap line. If there are no failed tasks, then we consider this a success.
Serverspec Testing
We can now automate the building of our hosts, but how do we know if we make a change to one of our tasks that it doesn’t unintentionally break some other important configuration? If we have some basic compliance requirements, how do we know that we are still meeting those obligations with each new build? Well, just like normal code, we can write tests that give us assurance that the hosts we build meet the defined requirements specified in our tests.
Both Ansible and Puppet lend themselves to being tested. We are going to show you how to use a tool called ServerSpec to help your testing, but you can use other testing frameworks in any of the scripting languages to help test your code. In fact, you can use Test Driven Development (TDD) practices to first write your tests that define success and failure scenarios and then write your Ansible or Puppet code to pass those tests.
Serverspec is written in Ruby and uses the RSpec framework run the tests. While we will not attempt to explain RSpec in any depth, you can visit a number of tutorial sites online. The main RSpec web site is here: http://rspec.info/ .
If you don’t like to install Ruby and RSpec, you can use this alternative Python-based framework, which is designed to be the Python equivalent of Serverspec; see https://testinfra.readthedocs.io/en/latest/ . If you were using Ansible, then this might be the better option for you. We are going to test both Puppet and Ansible side by side, so we will choose Serverspec.
Installing Serverspec
In this testing scenario, we have checked out a particular Git repository that will have our configuration management files we want to test. We are going to use Vagrant to help bring up and test how our configurations are applied to our hosts. We use Serverspec to start our Vagrant hosts if they are not started, apply our provisioning instructions, and then test the results of those instructions.
Note
We explained Git and how to set up Vagrant in Chapter 3, so now would be a good time to revisit that chapter if you have forgotten.
Let’s assume we have a Git repository already created, and we will clone to our local system.
$ git clone [email protected]:/ouruser/ourrepo.git$ cd ourrepo
In this checkout, we already have a Vagrantfile that contains the following:
$ vi VagrantfileVagrant.configure(2) do |config|config.vm.provider "virtualbox" do |vb|vb.memory = "1024"endconfig.vm.define "ansible" do |xenial|xenial.vm.box = "ubuntu/xenial64"xenial.vm.hostname = "ansible"xenial.vm.provision :shell do |shell|shell.path = "bootscript.sh"endxenial.vm.provision :ansible do |ansible|ansible.playbook = 'ansible/playbooks/ansible.yml'endendconfig.vm.define "puppet" do |centos|centos.vm.box = "centos/7"centos.vm.hostname = "puppet"centos.vm.provision :shell do |shell|shell.path = "bootscript.sh"endcentos.vm.provision "puppet"endend
This Vagrantfile will allow us to run up a Xenial Ubuntu host and a CentOS 7 host. The Xenial host will apply an Ansible playbook while the CentOS host will run a Puppet apply. We will create the provisioning files shortly. We will then test that both hosts have the same configuration, which will be a HTTPD server listening on port 80.
Tip
Remember that using Vagrant is a great way to share your configuration environments because you can share the same code to build your hosts.
Now let’s talk about Serverspec. Serverspec is available as a Ruby gem. You can use another Ruby gem called Bundler ( http://bundler.io/ ) to keep track of your installed gems for a particular application in a file called a Gemfile. We are going to use that to install our required gems as we go along. This also helps us pin particular version of gems to our git commits and helps us track changes to the gem release versions we are using.
$ sudo yum install –y ruby rubygems && gem install bundler --no-ri --no-rdocHere we are using a CentOS host and install the ruby and rubygems packages and then install into the local account the gem bundler (without the associated docs and help for a faster install).
With the Bundler gem installed, we will now create a gem file with the following in our repository directory like so:
$ vi Gemfilesource 'https://rubygems.org'gem 'serverspec'
Here we have added the Serverspec gem to the gemfile. The source statement is where we will be downloading the gem from, which is the public rubygems.org server where people publish their Ruby gems.
Now we can use the bundle command to install the gem locally.
$ bundle install --path vendor/cacheFetching gem metadata from https://rubygems.org/.......Fetching version metadata from https://rubygems.org/.Resolving dependencies...Installing diff-lcs 1.2.5Installing multi_json 1.12.1Installing net-ssh 3.2.0...
This will install the serverspec gem and any serverspec gem requirements. We are now ready to initialize serverspec for our currently checked-out repository, which is the equivalent of running a setup script. We do that with the serverspec-init command.
$ serverspec-initSelect OS type:1) UN*X2) WindowsSelect number: 1
We are asked what type of OS we are going to test; here we choose 1) UN*X.
Select a backend type:1) SSH2) Exec (local)Select number: 1
We can now choose how we are going to access the host: either run serverspec commands locally or use SSH to sign into a host and run commands from inside that host. We are going to use SSH, so choose 1.
Vagrant instance y/n: yAuto-configure Vagrant from Vagrantfile? y/n: y0) ansible1) puppetChoose a VM from the Vagrantfile: 0+ spec/+ spec/ansible/+ spec/ansible/sample_spec.rb+ spec/spec_helper.rb
Serverspec has detected the Vagrantfile and now wants to know whether we want to configure one of those hosts automatically for us. Choosing either puppet or ansible is fine here, so we will use the copy command to add the other.
We have now set up Serverspec . There is a spec directory that has been created, and Serverspec is managed via the spec/spec_helper.rb file. Serverspec will look for a directory in the spec directory that matches a host declared in the Vagrantfile and run any tests it finds in those directories that end in *_spec.rb. So, we can now copy the spec/ansible directory to spec/puppet, and now both hosts will be tested.
$ cp –r spec/ansible spec/puppetIf we take a look at the sample_spec.rb file, it will show us our Serverspec tests.
require 'spec_helper'describe package('httpd'), :if => os[:family] == 'redhat' doit { should be_installed }enddescribe package('apache2'), :if => os[:family] == 'ubuntu' doit { should be_installed }enddescribe service('httpd'), :if => os[:family] == 'redhat' doit { should be_enabled }it { should be_running }enddescribe service('apache2'), :if => os[:family] == 'ubuntu' doit { should be_enabled }it { should be_running }enddescribe service('org.apache.httpd'), :if => os[:family] == 'darwin' doit { should be_enabled }it { should be_running }enddescribe port(80) doit { should be_listening }end
The _spec.rb file should be easily read, which is one of the design goals of RSpec to make testing clear. The first line is Ruby; the require is similar to a Python import statement and is just making the spec_helper available to us.
The next lines read like this. We want to describe a package called httpd. If we are on a redhat family host, that package should be installed. Now you can read the others, and they are similar and describe what we expect to find when we run Serverspec. Serverspec will take these plain descriptions and handle how it will validate our tests.
We will remove the second last test describing a Darwin family operating system (Mac OS), but the rest of the tests suit our purpose well.
Running Tests
Let’s start by running our tests; we can then see the work we need to do to get our tests to pass. We do this using some tools that came when we installed Serverspec.
$ rake spec:ansiblePackage "apache2"should be installed (FAILED - 1)Service "apache2"should be enabled (FAILED - 2)should be running (FAILED - 3)Port "80"should be listening (FAILED - 4)
To run our tests, we are going to execute what’s called a rake task. rake is a Ruby version of the make utility; you can see more about it here: https://github.com/ruby/rake . The task we are going to run is called spec:ansible, and that will fire up the Ansible Vagrant host and then run the Serverspec tests.
You can see why the tests failed in the Failures: section.
Failures:1) Package "httpd" should be installedOn host `puppet'Failure/Error: it { should be_installed }expected Package "httpd" to be installedsudo -p 'Password: ' /bin/sh -c rpm -q httpdpackage httpd is not installed# ./spec/puppet/sample_spec.rb:4:in `block (2 levels) in <top (required)>'
You can see that Serverspec tried to run the rpm –q httpd command but could not find httpd installed. This is as expected as we haven’t installed it yet. We are now going to write the Ansible code to install it and have it provisioned on our Vagrant host.
$ vi ansible/playbooks/ansible.yml---- hosts: allgather_facts: truebecome: truetasks:- name: install apache2apt: name=apache2 state=latest
We will do the same for Puppet now too.
$ vi manifests/site.ppclass httpd {package {'httpd': ensure => 'latest' }}include httpd
We are going to provision our hosts now using the vagrant provision command. Let’s run the Serverspec test again.
$ rake specPackage "apache2"should be installedService "apache2"should be enabledshould be runningPort "80"should be listeningFinished in 0.06987 seconds (files took 11.03 seconds to load)4 examples, 0 failures...Package "httpd"should be installedService "httpd"should be enabled (FAILED - 1)should be running (FAILED - 2)Port "80"should be listening (FAILED - 3)
Running rake spec will run the tests over any of the hosts in our spec/ folder. Our tests for the Ansible host is already all green. That is because on Ubuntu when you install service packages they can be started automatically. With CentOS, they won’t do this until they are told. Let’s make the CentOS host green.
$ vi manifests/site.ppclass httpd {package {'httpd': ensure => 'latest' }service { ‘httpd’: enable => true, ensure => true }}include httpd
Running the provision and the rake spec again, and we can now see we are green in both Ansible and Puppet.
Package "apache2"should be installedService "apache2"should be enabledshould be runningPort "80"should be listeningFinished in 0.06992 seconds (files took 8.41 seconds to load)4 examples, 0 failures-----Package "httpd"should be installedService "httpd"should be enabledshould be runningPort "80"should be listeningFinished in 0.11897 seconds (files took 7.98 seconds to load)4 examples, 0 failures
There are many more tests that you can run, and these were very basic, but we now get the idea how helpful this can be when you are making lots of changes to systems. You should now hook these tests up to your Jenkins or CI testing infrastructure and get it to run prior to any commit to your master VCS branch.
There is a tutorial for Serverspec here: http://serverspec.org/tutorial.html .
You can see more resource types to test here: http://serverspec.org/resource_types.html .
Summary
In this chapter, we introduced you to some simple provisioning tools that make the process of building and installing your hosts quick and easy. You learned how to do the following:
Install and configure Cobbler
Automatically boot a host with a chosen operating system
Install a chosen operating system and automatically answer the installation questions
We also introduced a configuration management tool, Puppet, that will help you consistently and accurately manage your environment. You learned how to do the following:
Install Puppet
Configure Puppet
Use Puppet to manage the configuration of your hosts
Use the more advanced features of Puppet
Install and configure Ansible
Run Ansible playbooks
Install and run Serverspec to test your configurations