Life in a stop-motion studio is very exciting. Most studios are very unassuming from the outside, usually tucked away in a warehouse district or downtown corner. Inside, the typical studio is a business like any other, often with a reception desk, offices, computers, and a little kitchen area, but also with intricate tiny stages, a maze of lights and cables, and strange beings called “animators” hunched over miniature puppets and pushing them around. It may sound like a playground, but this is hard work. The employees of these companies, large or small, put in long hours and toil under tight deadlines. A feature film made in stop-motion takes an average of 3 to 5 years from start to finish. The meticulous quality of the work involved is no easy feat, but it is all worth it in the end for creative teams of artists doing what they love. Some of the interview subjects in this book provide their own detailed stories about how studio productions are run, but first I will provide a basic overview of the whole process.
In an animation studio, one of the most common terms used to describe any particular production is a “show.” Whether it is a feature film, TV series episode, or commercial, industry insiders still use this word. The procedure for creating the show is executed by a team of people working in different departments, each with his own set of skills, talents, and experience. Following is an overview of the production workflow.
Every show has to start with an idea. Ideas can come from anywhere, sometimes from the strangest places. From the age of 16, author C.S. Lewis had an image in his head of a faun carrying an umbrella, standing in a snowy wood. Many years later, this picture would provide the inspiration for his book, The Lion, The Witch, and The Wardrobe. Where this picture came from is a mystery, but we all have images like this that often make their way into our creative work. Many of the best ideas also come from personal experiences we’ve had or people we know. Part of Nick Park’s inspiration for the character of Wallace came from his own father. Other story ideas trace their roots back to ancient myths and religions. George Lucas derived many of the themes in his Star Wars films by incorporating similar patterns from myths in all different cultures throughout history.
Wherever the inspiration comes from, in a studio environment these ideas are discussed among a team of writers and artists all working toward a common vision. The idea may originate from the person who directs the show, or the studio may decide to hire a director whose personal style matches the idea perfectly. If the production is a commercial, the idea may come from company executives who want to sell their product. The company becomes a client of the animation studio team, who are hired to use their creative skills to find the best way to grab the public’s attention. Ultimately, there must be some kind of motivation behind the idea that is being discussed. Is it to sell a product, educate children, teach a moral lesson, or just simply entertain the audience? Once these agendas are agreed upon, a story treatment or script may be written to flesh out the ideas on paper and provide a framework for the show.
Once an idea has been brainstormed, the next step is to translate that idea into visuals. Often, the idea itself will come from a drawing or design (for example, the drawing in Figure 2.1), and this design merely needs to be developed further. Concept artists and illustrators create a series of drawings and paintings to find a look for their idea.
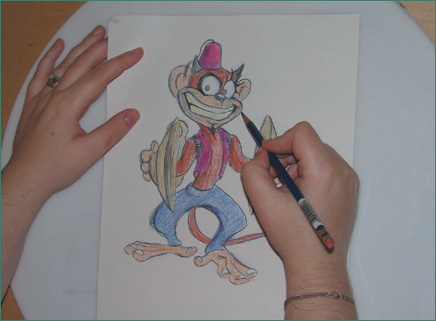
Characters, backgrounds, props, and vehicles go through a series of different variations until they finally arrive at a design that works perfectly. Much attention is paid to color schemes and the mood of the show. In some productions, like The Nightmare Before Christmas, there are different worlds that have their own design sense: the dark, expressionistic look of Halloween Town is a totally different design from the colorful softness of Christmas Town, yet both worlds had to be used in the same film and fit in with the overall vision of the director. Much of the concept art created in these early stages will not likely be used for the final look of the show, but it is necessary to go through this evolutionary process to arrive at the best design possible. The concept art can be shown to the studio’s clients to give them a sense of what the finished product will look like and to give them the opportunity to offer their opinion. The concept artists must be willing to compromise their own creative ideas to please the client or the director.
The script and final concept design for the show is translated into a series of static drawings called a storyboard. A storyboard is similar to a comic book, consisting of square panels that tell the story visually rather than using only words. Storyboard artists draw each of the scenes and post them up in sequence on a huge bulletin board, which often takes up the entire wall of a room (see Figure 2.2). In this room, the writers and artists have story meetings with the director, where they describe the action taking place in the storyboard. A commercial client can sit in on story meetings so that they can be taken through the entire show and get a real sense of how it will look, and suggest any changes of their own. The concept of storyboards and story meetings is one of the many innovations of the Walt Disney studio in animation’s Golden Age, and it has since been used even for live-action productions.
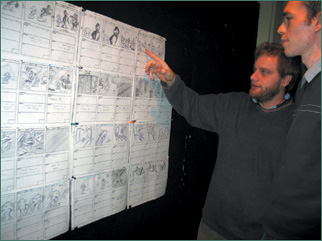
The storyboard phase is the most important part of any animated production. Any changes to the story must be decided upon and confirmed before production begins. This ensures that no time or money will be wasted on animating any scenes that eventually may end up slowing down the story. Because the individual storyboard panels are small, they do not take much time to draw, so changes can be made quickly. The end goal of the storyboard is to provide a visual blueprint for all of the production stages to follow.
While characters are being designed and storyboards created, dialogue is also recorded by professional actors or voice artists (see Figure 2.3).
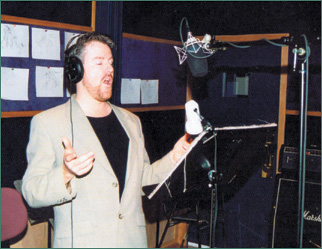
There is often a strong correlation between the design and voice of a character. The voice of a particular actor may provide the inspiration for how the character is designed, or the opposite may occur, where the actor creates a voice based on the design. After going through several takes to find the right inflection and acting for each scene, the best takes are edited together to create the final soundtrack. Any musical numbers in the show are also written and recorded at this stage.
The soundtrack is broken down frame by frame onto exposure sheets (also referred to as “dope sheets”), which will serve as a kind of road map for the animator during production. Every syllable or musical beat is broken down so that the animator will know the exact frame in which to place a particular mouth position or to plan movements to synchronize with a musical number.
The storyboard drawings can then be synced up with the soundtrack to create a story reel. This is the earliest version of the actual show, and it provides a blueprint for the timing of each scene, the camera movement, and editing. Story reels have traditionally been created with static storyboard drawings that change in sync with the soundtrack, but in more recent years, new developments for storyboarding have become an industry standard. Many studios now embellish their static storyboard drawings by scanning in different levels of artwork to create simple character movements that more closely imitate the actual animation to be created later. Studios are also using 3D computer animation software to create simple low-resolution versions of their scenes. Simple models or stickmen are moved around to give a sense of how the scene will look. Different camera angles or movements can be explored and changed to achieve the best possible dramatic effect for the action. The results are crude and not meant to be anything more than that, for their goal is to provide a guide for the animator as to how each shot should look. This kind of “moving storyboard” is also referred to as an animatic.
While storyboards are being finalized and sound is being recorded, the approved concept designs are given to craftsmen who now have to translate 2D sketches and paintings into three dimensions (see Figure 2.4). Sets need to be built so that the animators have easy access to the puppets they are animating. Oftentimes, a miniature mock-up version of the set will be built out of cardboard or foam so that the director can evaluate it before the actual set is built. Most stop-motion sets are built on steady wooden platforms to prevent them from being moved.
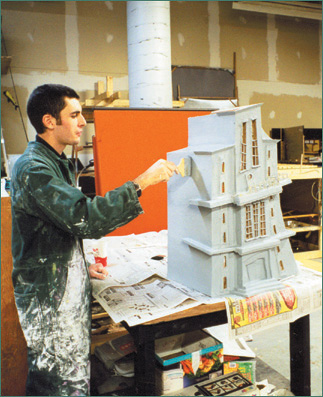
Figure 2.4. Cole Campbell paints a set piece for Twisteeria, 1998. (Courtesy of Bowes Productions Inc.)
If the set needs to be large enough to accommodate several puppets in a group shot, trapdoors may need to be hidden within the set so that the animator can enter the set from underneath and reach the puppets. Everything is planned out very carefully based on the shots dictated in the animatic and the actions of the characters. Backgrounds may be painted on giant backdrops behind the set, or the sets may be shot in front of a green screen so that a live-action or computer-generated background can be composited in later.
Puppets are created by an entire team of artists working on different stages of production (see Figure 2.5). Puppet armatures and materials are created based on the movements that need to be performed by the puppet. Decisions are made as to which materials will allow the best freedom of movement for the animator, whether they be plasticine or foam latex materials. Most studio productions build their puppets using foam latex around a metal ball-and-socket armature, because this process allows for several different copies of a character to be created. This is useful, since the puppets go through a lot of abuse by the animator. It also makes it possible for several different animators to be working on scenes with the same character on different sets at the same time. If the show’s design calls for a clay animation look, as for shows such as Gumby or the Creature Comforts series, molds may be created from which to shape the characters so that artists can duplicate the characters and still have them made out of clay. Oftentimes, the only part of the puppet that will be replicated in clay will be the hands and faces, since these are the most expressive parts of the character. Their bodies, or any other parts of the set that do not have to be manipulated, can be made out of Sculpey or other hardened clay material, so that the whole character still has a clay “look.” Or, foam latex over an armature may be used, with the head and hands remaining clay.
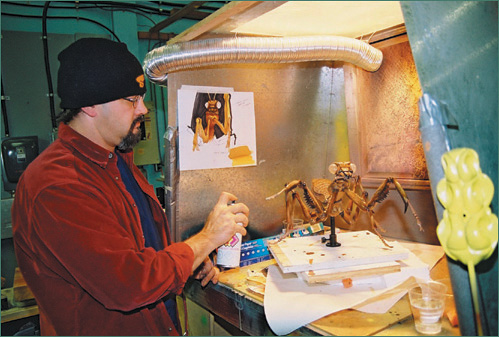
Figure 2.5. Puppet supervisor Rob Ronning paints a puppet for MTV/Insight Films’ Monster Island, 2004. (Courtesy of Bowes Productions Inc.)
Whatever materials are used, the puppet-making process has an assembly-line procedure, starting with the armature and sculpture departments. Armatures are assembled by machinists based on the design and movement requirements of the character. Meanwhile, the sculptor creates a clay model of the character that will fit exactly over the armature. A mold of the clay model is cast by the molding department, and the armature is laid inside and filled with latex to create the final puppet. The puppet is then sent to the fabrication department for painting and application of any textures such as hair, fur, or clothing that are needed.
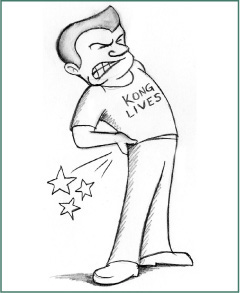
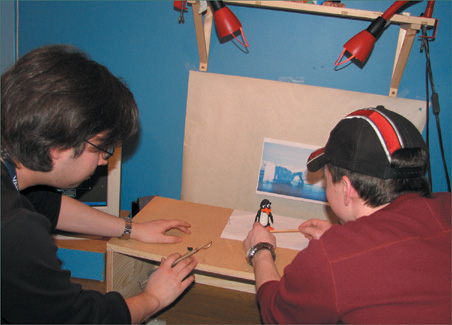
With the sets and puppets ready to go, cameras and lights are set up for each shot. The puppets are placed into position on stage, and the animators begin bringing them to life (see Figure 2.6). If time and budget allow, they can go through a series of test shots with the puppet, simply moving them into the key positions of the scene. This allows the animator to discuss the shot with the director to make sure that the acting and posing are exactly the way they want them. This process is accomplished in a daily screening routine called “dailies,” where the team gathers to watch the previous day’s shots. Once a shot has been approved, the animator can move on to the “hero shot,” which will be used in the final show. Most stop-motion animators in a studio setting will create only 3 to 4 seconds of animation in a single day’s work. By the end of the day, after hunching over puppets under hot lights for hours on end, the toll it can take on the animator’s body can be painful (as depicted in Figure 2.7). It’s common for some major productions to hire a massage therapist for this reason.
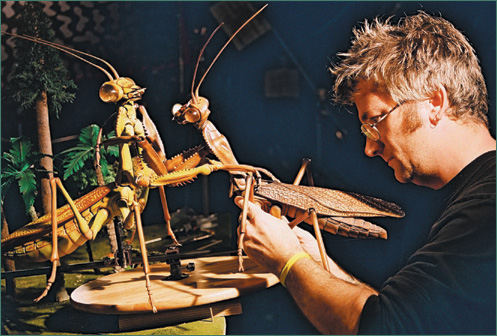
Figure 2.6. Key animator Chris Calvi at work on MTV/Insight Films’ Monster Island, 2004. (Courtesy of Bowes Productions Inc.)
Depending on the production, the animation may be shot in several different ways. Throughout history, most professional stop-motion has been shot on 16mm or 35mm film. The animator checks his animation by looking through the viewfinder of the camera and visualizing the movement with his mind’s eye. A device called a surface gauge is often used by the animator to keep track of the movements. A surface gauge is simply a metal pointer on a stand that is lined up with the appendage of the puppet being animated (see Figure 2.8). By moving the puppet away from the gauge into its next position (see Figure 2.9), the animator has a reference point for the last position it was in and can measure this distance to make sure the movements are properly registered.
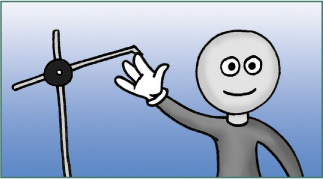
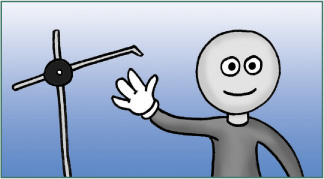
Figure 2.9. After the puppet’s position is changed, the gauge provides a reference for how far it has moved.
Until the hard work is done and the film is sent to the lab to be developed, the animator has no idea what the shot looks like until the film is sent back from the lab and projected in dailies. If the shot is not usable, it must be completely redone, which can often disrupt the production schedule and budget. A great deal of concentration is needed for every frame, and the entire crew must be very careful not to disturb elements of the set or equipment. One little mistake, like bumping the camera, knocking over a light, or breaking a puppet, can destroy hours of hard work, which is very stressful.
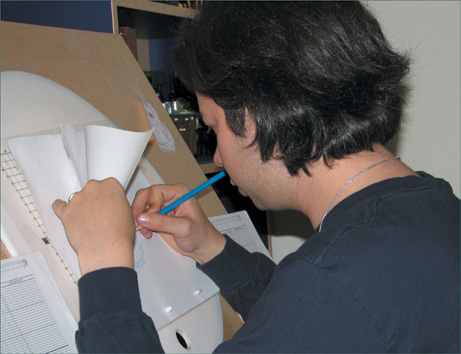
In more recent years, technology has changed the face of stop-motion animation, making it much less unpredictable and easier on production. One of the first innovations was placing a video camera next to the film camera so that the animator could see his puppet on a TV monitor rather than needing to look through the viewfinder. The animator could make marks directly on the monitor screen with a grease pencil or dry-erase marker to plan out the movements and register them (see Figure 2.10).

Figure 2.10. Drawing on a TV monitor is one way to plan the animation. (Courtesy of Nick Hilligoss.)
This method led to a video-assist device that actually fed a video image directly from the viewfinder of the film camera, which allowed the animator to see on a monitor exactly what the camera would record on film. An even further aid to the animator began with the use of a frame-grabbing system. This allowed animators to store a captured image of each frame, which they could then compare to the frame they were currently working on. With the touch of a button or flick of a switch, they could “flip” their movements in the same way that a 2D animator flips two sequential drawings.
Eventually, computer technology and specialized software allowed several frames to be stored so that the animator could play back more than just the previous frame, and see the animation develop without needing to wait until the whole thing was finished and then hope it worked. This innovation allowed for more accurate registration of movements and smoother results.
All of these breakthrough methods have now been combined with other handy tools into dozens of computer applications developed specifically for stop-motion animation (which I will talk about in more detail in Chapter 4, “What You Need”). These stop-motion frame-grabbing applications are allowing some industry productions to be shot digitally with high-definition video or still cameras, storing all the frames inside the computer with no need for film. The footage can always be transferred to film later on for theater distribution. The medium used to shoot the animation ultimately depends on the final output of the show, and sometimes the budget.
As animation shots are completed, they can be placed into their proper sequence in the animatic, and the final look of the film gradually unfolds until all shots are completed. If each shot has been created with the exact number of frames as indicated by the exposure sheets, very little editing will need to be done. At this post-production stage, digital effects can be composited into the shot if needed. In a recording studio, sound effects are created by special technicians called Foley artists. Background music is composed, recorded, and edited into the footage. Once all of these procedures are complete, the final show is finished and ready for marketing and distribution.
Now that you have a sense of how these productions are made, you may be wondering, “How can I get a job doing stop-motion animation?”
First of all, there is no cookie-cutter way of breaking into the animation world. Every artist is unique. We all come from different backgrounds and have had different experiences that have shaped us into who we are. We all have different skills, tastes, and beliefs. Every single person working in animation today has a different story of how he got there, even though many have taken the same steps. So the best thing to do is to evaluate which of these steps are the most important, embrace them, and then see where life takes you. Often it’s just a matter of being in the right place at the right time.
There are probably more studios doing stop-motion today than in most of its history, but compared to those in exclusively 2D or CG production, they are still few and far-between. Depending on the state of the industry, the few studios that do stop-motion today will not always have a steady flow of projects. Some of them do not actually have a permanent studio space, but rather rent a space when working on a show and then move out when it’s over. The competition is growing all the time, and many stop-motion studios are still feeling the pinch from the CG revolution. Many studios have succumbed to the pressure to add CG production to their repertoire just to keep the doors open. The current boom for computer-generated effects and animation is part of the reason why stop-motion remains the black sheep of the animation community. Many stop-motion animators have been forced to learn computer animation just to keep their careers going and their families fed. Plus, the practical realities of stop-motion—extreme costs, shortage of skilled artists who know the medium well, and the time-consuming nature of the medium—make it a very difficult area to establish a full-time career. Many animators have been lucky enough to have a prolific career doing stop-motion professionally, but many more simply make it a hobby or produce independent films. They are much like superheroes, with a day job as their secret identity and making films by night.
History has shown us that the animation industry in general, which includes 2D and CG, goes through ups and downs just like any other business. At one moment, everyone seems to be hiring, and then a few months later, studios are closing, productions are shut down, and employees are laid off. Much of the work is contract based, so if a studio hires you for a project, your employment may last only as long as that production does, and unless the studio has another project in the pipeline, you’re left looking for your next job. Working in animation can be a gypsy lifestyle for most, moving back and forth between different studios, cities, and even countries. You never really know where you will end up, because things are always changing. So, in many ways, the unpredictability of the industry can be exciting, and it’s a good business to be in if you like to travel, but it can also be nerve-wracking not always having a strong sense of job security. Despite the cyclical nature of the industry, there is still an incredible demand right now for artists and animators, especially with the massive explosion of video games, visual effects, and computer-animation feature films. Video games are raking in billions of dollars every year, and films are ramping up to compete with them. We are currently in one of those “up” phases for the industry as a whole, and stop-motion will continue as part of this high demand for animated content.
With the competition being what it is, anyone wanting to work professionally as an animator should consider some formal art or animation training. I often like to describe the process of learning animation as becoming a Jedi. You need to find an opportunity to apprentice at the feet of a master who knows the craft and can guide you. Sometimes you must “unlearn what you have learned” from working in other art forms, and establishing the patience required to finish a scene takes discipline. Before today’s hundreds of animation schools existed, animators generally were hired by a studio based on their artistic abilities and were then trained on the job. Now, with so many more studios and more artists wanting to break in, this rarely happens. It has become more important to find a specialized full-time program or a mentor who will train you to learn the craft and business of animation (see Figure 2.11).
For stop-motion specifically, there are not many options in the area of schooling. Some art colleges do have a dedicated space for stop-motion production, complete with sets and cameras, and will offer workshops or part-time courses in puppet building or animation. However, it’s very difficult to find a full-time program for stop-motion, and those that do exist are mostly experimental in nature or border on independent study. The issue of space and equipment is a challenge for most schools, especially when compared to the practicality of offering programs for 2D or CG animation. It’s far easier to fill a lab with 20 drawing tables or 20 computer stations than to set up that many individual sets, each with its own camera and light kit. In Chapter 10, “An Interview with Larry Larson,” and Chapter 14, “An Interview with Lynne Pritchard,” instructors Larson and Pritchard describe the challenges of teaching stop-motion to a class full of students.
Stop-motion is a very individualistic and self-taught craft, and the way it is taught in schools reflects this fact. The finer points of the medium will be learned through trial and error and your own practical experimentation, whether it’s in a school or in your own homemade studio space. If your school provides the space and equipment to create student projects in stop-motion animation and good instructors to mentor you, that is a rare find and an excellent way to get started. The best way to get the most out of a program like this is to complement it with other subjects as well, because stop-motion is a combination of many different skills.
If you pursue a formal education with the intention of applying it toward stop-motion production, I would recommend studying 2D animation, drawing, sculpture, film production and theory, photography, art history, acting, and computer graphics. 2D animation is one of the easiest and fastest ways to learn the principles of animation, because the only tools at your disposal are a pencil and paper, and space and time (see Figure 2.12). Learning how to animate on a computer puts a technical barrier between yourself and the animation, in that you have to wrap your head around the software to get anywhere. Sitting down and drawing your animation by hand allows you not only to develop a sense of volume and timing, but also to fix mistakes easily by simply changing, removing, or adding drawings.
Learning to animate in 2D is a great benefit to animating in stop-motion. For my stop-motion student project Bad News, I animated my entire dialogue scene in rough 2D drawings so that I could work out all of my posing and facial expressions beforehand. Then I simply referred to my drawings while animating my puppet, making the puppet match what I had animated previously.
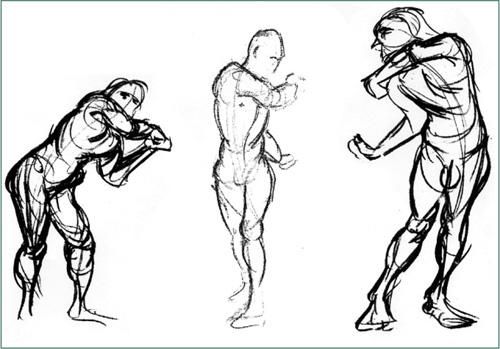
Learning 2D animation obviously means knowing how to draw, and this is always a great skill to have, especially in a studio environment. The stop-motion animation process itself may not involve drawing, but as you have seen, the preproduction steps that happen before the animation do. Plus, in a studio, if you’re communicating with a director about ideas or concepts, knowing how to express your idea with a simple quick sketch will get your idea across much quicker than creating it any other way. Drawing is the most basic method of communication there is, and it is usually the first thing studio recruiters want to see. Life drawing (drawing objects, landscapes, or people from real-life observation) is the key skill that every animator should have. Drawing the human figure (see Figure 2.13) allows you to analyze movement, anatomy, posing, and how the body is designed for movement. The more you understand real life, the more believable your fantasy characters will be. Understanding real anatomy and how a body moves will help when you are building and animating your puppets.
Sculpture is also an obvious subject to pay attention to, because it teaches you how to realize anatomy and structure in 3D dimensions. In a sculpture class, you can also get formal training in creating molds, which can be applied to puppet-building. If you want to create elaborate puppets and sets, you should consider taking courses in woodworking, metalworking, or mechanics.
The other subjects mentioned are important too, as they all relate to stop-motion animation. Film production and photography will both introduce you to camera operation: how to set your exposure properly, load the film, create zooms and tracking shots, and so on. You also learn about how to properly light a scene for different conditions and moods. Film production teaches you how to write, plan, shoot, and edit a film in a team setting, which is very important for getting into studio production. Courses in film theory and the “art of the film” teach you how different directors in different film genres reach their audiences on an emotional level by the way they use the language of cinema: lighting, editing, music, and composition. Studying and analyzing films shows you that there is much more under the surface than just moving images on-screen, and this knowledge will inspire you to make your film projects into true works of art. Learning art history is beneficial for the same reasons, since it broadens your knowledge of the techniques, styles, and inspiration behind centuries of past artists.
Acting is another great skill to master if you want to work in animation. The essence of animation is creating a performance with your character and making the audience believe that your puppet has a life of its own. Your character should be able to express a wide range of emotions through its body language, facial expressions, and speech. Every animator is an actor who creates a performance through his character. Animators are sometimes referred to as “shy actors” who would rather let their animation do the acting for them. The animators I know who create the most outrageous performances are often very quiet and introverted in real life. They would never act silly or violent themselves, but their characters do the craziest things, and you wonder where it all comes from! But if you are willing to break out of your shell momentarily, acting classes will help you become aware of the way your body moves and the real-time thought processes that go into becoming a different person.
Finally, in this day and age, it’s becoming more crucial to have a good knowledge of computer graphics or computer animation. Computers, despite all of their frustrations and hard-drive crashes, are the reason that stop-motion animation has been allowed to flourish, due to the advancement of stop-motion software, so it’s important for the animator to become friends with the virtual world. For editing, compositing, and post-production, the most common software in the animation industry is Photoshop, After Effects, Shake, Combustion, Flame, Premiere, and Final Cut Pro. Popular packages for computer animation include Maya, 3ds Max, LightWave, and SOFTIMAGE XSI. The main thing to remember is that the computer is just a tool that is still dependent on the discipline of a skilled artist. In the realm of CG character animation, the best animators are typically those who have first learned how to animate in the 2D or stop-motion mediums. While the technology for computer animation is rapidly changing, the principles of believable movement and acting do not change. Other foundations of color theory, anatomy, storytelling, and design never change either. Only the methods through which these principles are used will continue to change and grow into the future. So it’s important to be able to adapt to the technology of the future while having a firm grasp on the past foundations of animation.
The other big advantage to going to school to learn anything related to animation is the opportunity to meet other students who have the same interests and passions as you. Keeping in touch with your classmates is the most valuable resource for your career, as they might be the ones who will hire you some day. When looking to expand their crew, most studios will seek internal references before they release job postings. They ask the people who already work for them if they know anyone they would recommend to join the team. One of the things you learn about the industry right away is that everybody knows everybody, whether they know them from working at studios or going to school together. So it’s important to establish a good reputation while you’re in school, because you want people to remember you as someone who not only has talent, but is also a team player, and reliable and generous. There are lots of artists out there who cannot advance in their careers because nobody will recommend them, despite their talent. Making enemies in a creative environment will haunt you for a lifetime, so play nice!
In addition to meeting people at school, for any field you choose to pursue as a hobby or career, the most valuable way to get ahead is to network. Seek out people who have that dream job you want, and talk to them. Ask them how they got started, and ask them for feedback on your own work, but realize also that these people often have busy schedules, so respect them enough not to become a pest. As you become interested in any subject and start experimenting with it, life has a way of putting the right people in your path to give you further advice or, ideally, offer you a job. Other ways to find people who do stop-motion are by looking for organizations, events, and Web sites. There are no official clubs or organizations for stop-motion exclusively, but the animation industry has the ASIFA (International Animated Film Association), Women in Animation, and many other organizations for connecting with animators, some of which are professionals in stop-motion.
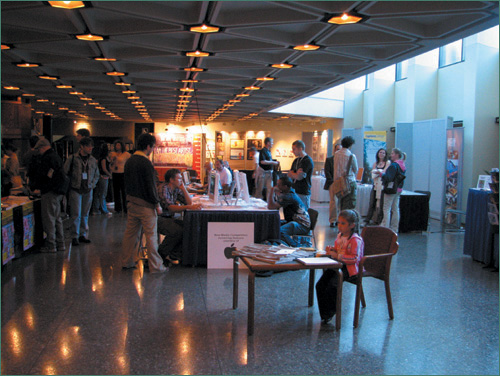
ACM SIGGRAPH (Association for Computing Machinery’s Special Interest Group on Graphics and Interactive Techniques)is an annual event in the U.S. that focuses mainly on computer graphics, but many schools and studios are represented there, and it’s a great way to meet industry people. It’s also useful to attend film festivals, most of which have an animation category, and the animators themselves will often be present for you to chat with. There are even festivals for animation only, where the opportunity to network is the best you can get: Studio reps and independent filmmakers alike gather to watch films, attend seminars, offer workshops, and party! The three biggest festivals for animation are the Zagreb, Annecy, and Ottawa festivals (see Figure 2.14), and many other smaller ones are spread out all over the world.
The biggest and best online resource for the animation industry is the Animation World Network (www.awn.com). There you will find articles, job postings, school listings, a studio database, and many other resources for keeping your finger on the pulse of the industry. For stop-motion specifically, Anthony Scott’s Web site, www.stopmotionanimation.com (see Chapter 8), has the ultimate online community for newbies and professionals to share ideas on an extensive message board that covers all topics related to the stop-motion craft. There is also a long list of links to practically every other stop-motion site on the Web. The Internet is fast becoming an incredible showcase for stop-motion and the close-knit group of artists who love it. You’ll find more details on festivals and the Internet in Chapter 15, “Distribution.”
With all of these resources at your fingertips, the way to get into stop-motion is just to get your hands dirty and go for it! Making your own stop-motion, and going through its trials and errors, will tell you pretty quickly whether you want to continue it as a hobby or attempt to make it into a career. Once you learn the craft, either on your own or in a school, you can make a demo reel or a short film, show it off on the Internet or at a festival, and see what happens. The opportunities are there, and they’re changing all the time. So if you’re still game, let’s get started....