
We've now reached the final stage of development of our sample SPA. In this chapter, we will look at some important points involving all processes of web applications, such as version control, deployment in the cloud, and continuous application deployment. We will cover the following topics:
- Hosting the project on GitHub
- Continuous application deployment
- Automatic deployment from GitHub
- Hands-on deployment
- Some final notes about SPA
Before we proceed with the deployment to the cloud, we need to review some important points in our sample application. As mentioned earlier, we need to host our source code on http://github.com. Since we already use Git as our version control system, uploading our code to the GitHub service is very simple.
Git is a powerful version control system and has many GUI clients for Windows and Mac OS X. If you are on Mac OS X, we recommend the use of https://mac.github.com/ and for Windows users https://windows.github.com/; both are free tools.
In the following examples, we are using terminal; to have the Git commands available on terminal, you need to install Git on your system.
Tip
You can find more information on how to install Git at the following URL: http://git-scm.com/.
As we already have everything configured, we just need to commit the last changes with the following command:
git commit -m"refactoring adding Protractor testing Framework"
Now we need a GitHub account to host our source code. If you already have one, go straight to step 13.
- Open your browser and go to www.github.com to create your free account. After the registration process, you will be redirected to the home screen; now it's time to create a repository to store the source code.
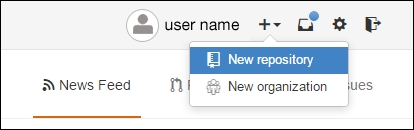
- Click on the plus (+) sign to the right of your username and click on New repository in the pop-up menu, as shown in the following screenshot:
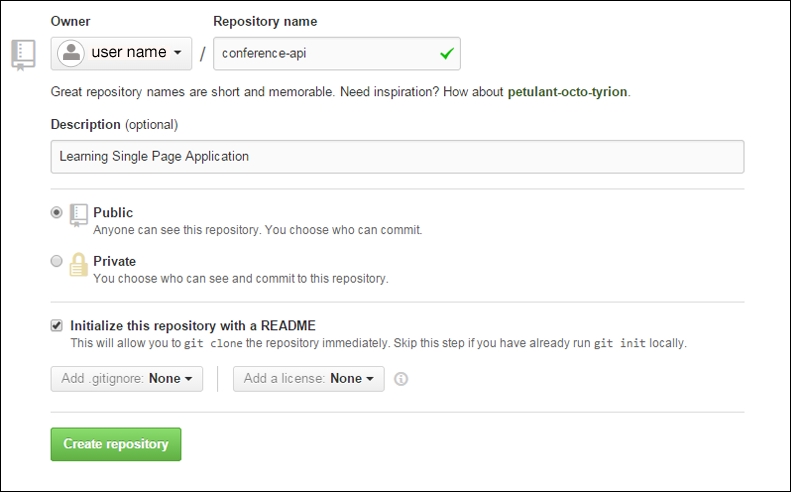
- You need to give a name and description to the new repository. Type the name and description as shown in the following screenshot:
Tip
You can find more about starting with GitHub at https://help.github.com/articles/create-a-repo/.
- Now it's time to configure the connection between Git and GitHub. To do this, open your Git shell application. Type the following command into the Git shell:
git config --global user.name "YOUR NAME"
git config --global user.email "YOUR EMAIL ADDRESS"
Both commands' servers inform GitHub who are you and print your name on each commit you made.
- The next step is to configure an SSH key between your computer and the GitHub repository. Type the following command into your Git shell:
ssh-keygen -t rsa -C "[email protected]" - Replace the default e-mail address with your own e-mail address and follow the instructions on the Git shell. Next, you'll be asked to enter a passphrase.
- You will see something similar to the following result:
Your identification has been saved in /c/Users/you/.ssh/id_rsa.
# Your public key has been saved in /c/Users/you/.ssh/id_rsa.pub.
# The key fingerprint is:
# 01:0f:f4:3b:ca:85:d6:17:a1:7d:f0:68:9d:f0:a2:db [email protected]
- Then add your new key to
ssh-agent:ssh-agent -s ssh-add ~/.ssh/id_rsa
- Now it is time to place the key on your GitHub account, so type the following command into the Git shell to copy the key:
clip < ~/.ssh/id_rsa.pub - Go back to your GitHub account and click on the settings tool to the right of your username.
- On the users side bar, click on SSH Keys and add the SSH keys.
- Paste your key inside the Key input field.
With this step, we have finished setting up your computer and the GitHub account with secure SSH keys.
- One last action is required: testing to make sure everything works.
- Open your Git shell and type the following command:
ssh -T [email protected]You may see the following output:
The authenticity of host 'github.com (207.97.227.239)' can't be established.
# RSA key fingerprint is 16:27:ac:a5:76:28:2d:36:63:1b:56:4d:eb:df:a6:48.
# Are you sure you want to continue connecting (yes/no)?
- Confirm the message and check the output message; you should have something like the following:
Hi username! You've successfully authenticated, but GitHub does not
# provide shell access.
This message indicates success.
- After that, upload the following code to the repository:
git push origin master
Tip
All source code of the project can be found at https://github.com/newaeonweb/conference-api. There are four prereleases and a final release.
To follow the next examples, you can download the 0.0.4 release at https://github.com/newaeonweb/conference-api/releases/tag/0.0.4. This contains the commits from the last chapter where we implemented Protractor for e2e testing.
GitHub is a great alternative to store the version control of the source code in a safe place.
It's free for open source projects and is used by many companies. Moreover, it is highly integrated with several other web platforms, as discussed in the following section on continuous integration and automated builds.