
Now that we are armed with all this knowledge about Android Intents, we can add another screen (Activity) to our Note To Self app.
We will first create a new Activity and see what effect that has on the AndroidManifest.xml file. We will then create a layout for our Settings screen and add the Java code to switch from MainActivity to the new one. We will, however, defer wiring up our settings screen with Java until we have learned how to save those settings to disk. We will do this later in this chapter and then come back to the settings screen to make the data persist.
First, let's create that new Activity.
This will be a screen where the user can turn on or off the sound effects as well as choose the speed of animations. Clearly, our app does not yet have sound and animations, but we can still fully code this screen and see how to save data to the device's permanent storage by following the given steps:
- In the project explorer, right-click on the folder that contains all your
.javafiles and has the same name as your package. From the pop-up context menu, select New | Activity | Blank Activity. - In the Activity Name field, enter
SettingsActivity. - Leave all the other options at their defaults and left-click on Finish.
Android Studio has created a new Activity for us and its associated .java file. Let's take a quick peek at some of the work that was done behind the scenes for us because it is useful to know what is going on.
Open the AndroidManifest.xml file from within the manifests folder in the project explorer. Notice the following four lines of code near the end of this file:
<activity
  android:name=".SettingsActivity"
  android:label="@string/title_activity_settings" >
</activity>
This is how an Activity is registered with the operating system. If an Activity is not registered, then an attempt to run it will crash the app. We could create an Activity simply by creating a class that extends the Activity class (or AppCompatActivity) in a new .java file. However, we would then have had to add the previous code ourselves. Also, by using the new Activity wizard, we got both a layout XML file and menu XML file all automatically generated for us.
We will quickly build a user interface for our Settings screen, and the following steps and image should make this straightforward:
- Open the
activity_settings.xmlfile, switch to the Design tab, and we will quickly lay out our Settings screen. - Delete the Hello world! widget that was put in automatically.
- Use this next image as a guide while following the rest of the steps:

- Drag and drop a LargeText widget onto the center-top of the layout.
- Drag and drop a Plain TextView widget and place it on the left and slightly below the previous widget.
- Drag and drop a CheckBox widget immediately below the previous widget.
- Drag a Plain TextView widget below the previous CheckBox widget, and leave a small space as shown in the previous image.
- Drag and drop a RadioGroup widget from the Palette and place it immediately below the widget in the previous step.
- Drag three RadioButton widgets and place them one below the other inside of the RadioGroup widget.
- Use the following table to set the properties on the layout elements we have just added. In case there is any doubt which widget I am referring to in the table, we are working from the top to bottom of the layout:
|
Widget type |
Property |
Value to set to |
|---|---|---|
|
LargeText |
|
|
|
Plain TextView |
|
|
|
CheckBox |
|
|
|
CheckBox |
|
|
|
Plain TextView |
|
|
|
RadioGroup |
|
|
|
RadioButton (top) |
|
|
|
RadioButton (top) |
|
|
|
RadioButton (middle) |
|
|
|
RadioButton (middle) |
|
|
|
RadioButton (bottom) |
|
|
|
RadioButton (bottom) |
|
|
We now have a nice new layout for our Settings screen and the id properties are in place, ready for when we wire it up with our Java code later in the chapter.
We already know how to switch to SettingsActivity. Also, as we won't be passing any data to it or from it, we can get this working with just two lines of Java.
You might have noticed that in the action bar of our app, there is the menu icon. It is indicated in the following image:
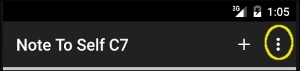
If you tap it, there is already a menu option in there for Settings, provided by default when we first created the app. And all we need to do is place our code to switch to SettingsActivity within the onOptionsItemSelected method. Android Studio even provided an if block for us to paste our code into with the assumption we would one day want to add a Settings menu. How thoughtful!
Find the following block of code in the onOptionsItemSelected method in MainActivity.java:
//noinspection SimplifiableIfStatement
if (id == R.id.action_settings) {
  return true;
}
Add this code into the if block shown previously, just before the return true statement:
Intent intent = new Intent(this, SettingsActivity.class);
startActivity(intent);
You can now run the app and visit the new Settings screen by tapping the Settings screen's menu option.
To return from SettingsActivity to MainActivity, you can tap the back button on the device. We will be making this a bit more intuitive for the user later in the chapter in the section Specifying a parent Activity.