
Chapter 3: Installing Wireshark
To start capturing and analyzing packets, you'll first have to download and install Wireshark on your computer or laptop. The good news is that Wireshark can be installed on a variety of different platforms. In this chapter, we'll start by learning how Wireshark provides support for different Operating Systems (OSes). We'll also review the importance of a capture engine, and how it is a critical component when gathering network traffic.
When installing Wireshark on a PC, you'll be presented with a variety of choices. So that you can confidently navigate the installation and make the correct selections, we'll review the different options. Once installed, you can then begin capturing and analyzing traffic. Wireshark is open source with constant enhancements and improvements. You'll discover many online resources where you can see the latest news and updates that can help improve your workflow, along with several download options.
This chapter will cover the following:
- Discovering support for different OSes
- Comparing the different capture engines
- Performing a standard Windows installation
- Reviewing the resources available at Wireshark.org
Discovering support for different OSes
Wireshark is an open source packet analysis tool developed as a cross-platform application. Wireshark uses the Qt Graphical User Interface (GUI) library, which can run on a variety of hardware and software platforms with little or no modification to the underlying code. For most OSes, it can be installed with ease using a standard installation.
Wireshark is capable of working with most modern default system capabilities. For example, a system with a 64-bit AMD64/x86-64 processor along with ample memory and disk space will perform well with minimal problems. However, gathering captures that are larger than a few hundred megabytes (MB) may consume too much memory and cause the system to crash.
In this section, we'll outline how Wireshark can be used on either Microsoft Windows, Linux, or macOS. Let's start with how developers provide support for the Windows OS family.
Using Wireshark on Windows
Of all the OSes today, Windows has the highest market share. Wireshark will run on most Windows systems, as it natively interacts with the Windows Application Programming Interface (API). Currently, Wireshark can run on Windows 8.1 and and above, along with Server 2012 R2, 2016, and 2019.
Important Note
Wireshark is no longer supported on older Windows OSes. Because of this, if you are still using Wireshark on an older version of Windows, it may not perform as expected.
Now that we have discussed how Wireshark operates in a Windows environment, let's take our discussion further and explore how Wireshark functions on a Unix platform.
Running Wireshark on Unix
In addition to standard Windows options, Wireshark can be installed and run on several Unix systems, such as Oracle Solaris 11, FreeBSD, and NetBSD. For those and other OSes that do not have a standard install, you can access Wireshark packages for most platforms by going to https://www.wireshark.org/download.html. Once there, scroll to third-party packages where you can see the options available for many other platforms.
In addition to Unix, the following section outlines how Wireshark provides support for macOS.
Installing Wireshark on macOS
On Wireshark.org, you will find an installation for macOS 10.13 and later. You can download and install Wireshark on a macOS just like any other OS. The installer will guide you through the process in much the same manner as installing on a Windows machine. This has made Wireshark more user-friendly to the growing population of macOS users.
Important Note
Prior to capturing packets on your macOS, you may need to install Change mode Berkeley Packet Filter (ChmodBPF), which will allow Wireshark to access the capture devices.
Because of the widespread use of Linux, the following section provides information on how Wireshark is also easy to install and use on a Linux machine.
Deploying Wireshark on Linux
Wireshark is supported on many Linux platforms, including Ubuntu, Debian, SUSE, and Red Hat. However, you may run into errors during the build and installation phases.
Common problems that can arise include the following:
- You don't have the necessary development package on your system.
- The development package is outdated.
- You are missing the libpcap capture engine.
If you are able to install Wireshark, there may be an issue with capturing packets and the system might display an error, as shown here:
No interface can be used for capturing in this system with the current configuration. (Couldn't run /usr/bin/dumpcap in child process: Permission denied)
If you see this error, this is most likely because dumpcap needs elevated permissions and advanced configuration is required to capture traffic. Running the following command often resolves this issue:
dumpcap setuid root
In addition, running Wireshark as a root user can also cause problems. Linux systems defend themselves against what is perceived as risky behavior, which can cause harm to the OS. As a result, Wireshark may not run while in root mode, and further configuration may be necessary to make this possible.
As new OSes enter the market, it's nice to know that Wireshark evolves to keep up with the changing demands in today's networked environment.
The following section outlines how versatile Wireshark is when working with a variety of OSes.
Working with Wireshark on other systems
Wireshark can be used on network devices and servers to monitor and analyze traffic. For example, several Cisco devices are Wireshark-capable and provide the network specialist with comprehensive documentation on best practices while capturing network traffic. Some guidelines while on a Cisco networking device include the following:
- Prior to capture, make sure the CPU is not overburdened and that you have at least 200 MB of free memory.
- When possible, limit captures by either size or duration.
In addition to Cisco, IBM provides extensive documentation on how to obtain a Wireshark trace file. When done, technicians are encouraged to send their trace files to IBM support for further analysis.
Many other companies have found the value of packet analysis using Wireshark and have integrated the software within their respective products.
If you need to become familiar with working with Wireshark on a Linux machine, then there are other options. The following section provides guidance on how to easily download and begin using a premade Linux Virtual Machine (VM).
Downloading premade virtual images
A VM can be used to get a feel of how to use Wireshark on a Linux OS for training or testing purposes. Premade virtual images are available at https://www.osboxes.org/, where you'll find you can choose from many Linux OSes.
In some cases, you can find a Linux OS that has Wireshark preinstalled and ready to run. Examples include BackBox and Kali Linux, which include not only Wireshark but other tools used during penetration testing.
Using the premade images for testing on a production network is not practical, as the VM doesn't have the same visibility as the host. However, using a VM is beneficial when learning about how to use Wireshark on a Linux OS in a classroom setting for training or testing purposes.
Another option when using Wireshark is to capture using a portable application (app).
Utilizing a portable app
Wireshark has had an option to download Windows PortableApps for a 32-bit operating system for many years. As time has passed, developers have now made Windows PortableApps for a 64-bit OS available.
The portable app option makes it easy to run Wireshark on portable media. Instead of installing on a traditional computer, you can use the portable app on a thumb drive and/or a cloud drive, such as Google Docs.
Once you download, install, and launch the portable app, it will appear the same as using the standard installation. For example, I selected WiresharkPortable64_3.6.0.paf and uploaded the app to my cloud drive. Once installed, I opened the app, as shown in the following screenshot:
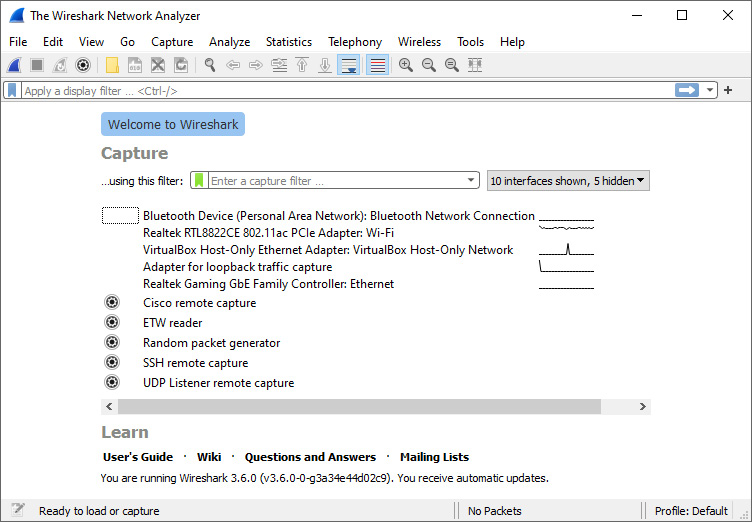
Figure 3.1 – Using the Wireshark portable app
Using the portable app makes it convenient to run Wireshark on a Windows system from either a removable drive or cloud storage. Once you are done, you can disconnect without leaving any data.
Important Note
Even though you don't have to install Wireshark on the host, you will need to install Npcap in order to capture packets.
Regardless of what OS Wireshark runs on, the OS will need a way to gather or capture the raw bits from the network. A capture engine pulls or captures the network traffic so that it can be sent to the OS for dissection and analysis. The next section provides a comparison of the capture engines available today.
Comparing different capture engines
To effectively capture and analyze traffic, there must be a way to gather the raw traffic from the network before being processed by the OS. A Packet Capture (PCAP) engine provides an API to capture traffic. Wireshark uses one of several capture engines, such as libpcap, WinPCap, and Npcap. Let's begin with outlining libpcap.
Understanding libpcap
Libpcap is a capture engine that was originally developed for a Unix-like OS. Libpcap is incorporated into tcpdump, Snort, and other packet analyzers to grab packets as they come off the network interface.
Wireshark and tshark work with libpcap and generate pcapng files by default. Libpcap and tcpdump are developed and maintained at http://www.tcpdump.org/. In the late 1990s, a version of libpcap was adapted for Windows called WinPcap, as we'll discuss next.
Examining WinPcap
WinPcap is a capture engine that uses drivers specific to a Windows OS and can be found at https://www.winpcap.org/. WinPcap enables packet capture right from a network adapter and presents it to Wireshark before any processing is done by the OS.
WinPcap has worked well in a Windows environment, specifically the Windows NT family, for many years. When installing Wireshark, you will see the option to use WinPcap. However, it has not been recently updated and may not perform well on certain versions of Windows 10.
To overcome performance issues, users are directed to use Npcap, which might perform better, as outlined in the next section.
Grasping Npcap
Prior to using Wireshark on a Windows OS to capture packets, you must install a capture engine. As a result, during the installation process, users will see an option to install Npcap. Npcap comes from the Nmap project and is the packet sniffing library for Windows. Npcap is based on WinPcap/libpcap but has improved features and enhanced ability to capture.
Npcap provides support for Network Driver Interface Specification (NDIS) 6.0, which is a major version enhancement. Having this support overcomes the limitations of WinPcap and will most likely improve capture on Windows 8.1 and later machines.
Npcap is compatible with WinPcap and can run alongside it, or you can uninstall WinPcap and use the Npcap driver exclusively. However, Wireshark documentation suggests using Npcap if you are using Windows 10 or later versions.
Npcap also includes several features that help improve functionality, as we'll learn next.
Recognizing Npcap features
Some of the other Npcap features include loopback packet capture, which can be helpful during troubleshooting, along with support for the libpcap API. Npcap can also ensure enhanced security in that it can be set to restrict access to admin only on a Windows machine. If this option is set, then the user will have to authorize using the driver in the Windows User Account Control (UAC) dialog box.
A standard Wi-Fi card on a Windows machine can only be put into promiscuous mode, not monitor mode. As a result, when capturing traffic, you won't see raw 802.11 traffic or radiotap headers. Wireshark will wrap the traffic so that they look like an Ethernet packet; as such, they are sometimes called fake Ethernet packets.
However, with Npcap, users can capture raw 802.11 packets when using a supported wireless adapter. This is easily achieved by selecting the following option during the installation of Npcap:
Support raw 802.11 traffic (and monitor mode) for wireless adapters
Once selected, Npcap will then have two modes:
- Managed mode: Captures Ethernet packets only
- Monitor mode: Uses wlanhelper.exe, which will allow you to switch into monitor mode and gather all 802.11 traffic, including data, control, and management packets that have radiotap headers
Because wireless networks are so prevalent, radiotap headers give us the ability to visualize information while troubleshooting wireless traffic. Let's explore this concept.
Troubleshooting radiotap headers
Radiotap headers can be used when troubleshooting Wi-Fi, as they can provide a lot of information associated with each 802.11 frame. For example, you can assess signal strength and antennae noise, which are both shown in negative decibels per milliwatt (-dBm). Other indicators found in radiotap headers include the following:
- Channel frequency
- Data rate
To see an example of what you might see in a radiotap header, go to: https://www.cloudshark.org/captures/ca7828d13464?filter=frame%20and%20radiotap%20and%20wlan%20and%20wlan_aggregate.
Once you're on CloudShark, select Export | Download File from the menu found on the right-hand side of the screen, as shown in the following screenshot:

Figure 3.2 – Downloading the file from CloudShark
When the Download window opens, choose Download the original file and open it in Wireshark. Select Frame 1 and expand the radiotap header to see the details, as shown in the following screenshot:

Figure 3.3 – Radiotap header
When troubleshooting a wireless connection, the signal strength will attenuate (or weaken) as the device moves farther away from the access point. If the signal is too weak, the device will be unable to effectively receive traffic.
Some suggested values for signal strength would be as follows:
- -30 dBm is an optimal level and the data rate will most likely be strong.
- -67 dBm is an appropriate level and the data rate is acceptable for most applications.
- -70 dBm is a less optimal signal, and the data rate will most likely suffer.
- Greater than -80 dBm is unacceptable.
As shown in Figure 3.3, the antennae signal is -69 dBm, which is at the edge of a less optimal signal and can result in a diminished data rate.
Important Note
Keep in mind when evaluating values such as signal strength and noise that these will represent an estimation and not an exact value.
Now that we have learned about the different capture engines, let's explore the various options to choose from while installing Wireshark on a Windows OS.
Performing a standard Windows installation
The Windows installation is a straightforward process that presents the user with a series of prompts, which offer default values that the user may choose to accept or decline. Prior to installing, make sure you meet any system requirements. In most cases, User Access Control (UAC) will dim the screen and ask for confirmation to run the program.
With each new version, the components, options, and order of installation may change. The following is a list of dialog boxes you should expect to see when doing a routine setup. We'll start with the first two you will typically see, the welcome and the license agreement.
Beginning the installation
As you begin the installation, Wireshark displays a series of prompts. The following are generally the first two screens you will see:
- Welcome screen: The Wireshark installation begins with a warning to make sure Wireshark is not running before launching the wizard, which will guide you through the installation.
- License agreement: The next screen outlines the terms of the license, which must be read and agreed upon before moving on to the next step.
Note
It might be worthwhile to read the license, as it provides a detailed overview of the license agreement, specifically that Wireshark is distributed under the GNU General Public License and not Unix's.
The first two prompts are fairly straightforward. This next section provides detailed information on what components to select during installation.
Choosing components
During the installation, you may be given the choice to accept or reject certain components. Choose Components has a number of choices. The user may accept all choices or select specific components to install, as shown in the following screenshot:

Figure 3.4 – The Choose Components screen
The first choice when selecting a component to install is whether to install Wireshark. While this may be obvious, the user may only want to install tshark, a lightweight CLI tool that is not as resource-intensive as the full Wireshark GUI.
The next section includes extra features and protocol dissectors for Wireshark and tshark. Let's take a look.
Selecting plugins and extensions
The section includes plugins and extensions that can improve functionality. Within this section, you'll find many options, outlined as follows:
- Dissector plugins: Plugins that include extended dissections
- Tree statistics plugins: Provides extended statistics
- Meta Analysis and Tracing Engine (MATE): Provides the ability to filter frames that are related to one another
- Transum: Computes response time with a number of different protocols
- File type plugins: Capture file support
- Codec plugins: Provides additional support for codecs
- Configuration profiles: Create a customized profile that is specific to a user or protocol
- Simple Network Monitor Protocol (SNMP) MIBs: Provide a more extensive dissection of SNMP.
In addition to plugins, Wireshark includes a set of tools, which we'll learn about next.
Choosing tools
Wireshark has a list of over a dozen command-line tools to select. The first part of the list includes tools that enhance functionality when working with packets, as follows:
- Editcap: Allows you to adjust timestamps, delete packets, and convert file formats.
- Text2pcap: Provides the ability to take an ASCII hexdump and convert the file to a libpcap-format capture file.
- Mergecap: Used when you need to combine capture files, as it merges two or more files into one, either by appending or by merging by timestamp.
- Reordercap: Rearranges packets from an input file by sorting the timestamps and converting them to an output file.
- DFTest: Used when you have to debug a display filter (dfilter), DFTest will show the display filter byte code.
- Capinfos: Provides information such as the number of packets, duration, and other information about a capture file.
- CapType: Will recognize one of the many supported file formats and then print the type of file
- Rawshark: Will output and analyze raw pcap data when required for external (third-party) integration or exports.
- MMDBResolve: Will identify and print a packet's geolocation by an IPv4 and IPv6 address using a GeoLite2 database
The second half of the list has tools that work with external data, which include the following:
- Androiddump: Used when it's necessary to capture from an Android device. You'll need to have the Android Software Development Kit (SDK) along with permission to access the device.
- Sshdump and Ciscodump: These provide an interface to remotely capture traffic from a Cisco router via a Secure Shell (SSH) connection.
- UDPdump: Offers a capture interface that pulls User Datagram Protocol (UDP) packets from network devices when debugging applications that run over UDP.
- Randpktdump: Enables access to the random packet generator (randpkt) during testing or for educational purposes.
- Etwdump: Provides access to an Event Trace Log (ETL) file, which is a log file generated by Microsoft Tracelog.
In addition to the plugins, extensions, and tools, you will have the option to obtain the user guide.
Obtaining the user guide
While there are plenty of resources available, selecting this option will include a copy of the user guide that you can access offline.
As you can see, there are many components that you can select during the Wireshark installation. Keep in mind that these options periodically change.
The next two prompts offer choices on shortcuts, outlining file extensions, and deciding where to house the install folder.
Creating shortcuts and selecting an install location
Within the installation, you'll have choices on whether you would like some shortcuts for Wireshark Start Menu Item, Wireshark Desktop Icon, or Wireshark Quick Launch Icon, as shown here:

Figure 3.5 – The Additional Tasks screen
In addition, you will be able to include all of the available file extensions.
The next prompt will give you a Choose install location option. At this point, you can select the default location or browse to a user-defined folder. Wireshark will provide information on how much space is required.
In addition to those listed earlier, you will have a few more decisions to make. Those include selecting a capture engine and whether or not to use USB capture before completing the installation.
Capturing packets and completing the installation
Wireshark needs a capture engine to gather network traffic and will query the system to see whether one is present.
The following prompts deal with capturing traffic, along with what you should expect to see when Wireshark completes the installation.
Checking for a capture engine
At this point, Wireshark will check whether Npcap or WinPcap is installed. You are then presented with a Packet Capture screen that states Wireshark requires either Npcap or WinPcap to capture live network data, as shown in the following screenshot:

Figure 3.6 – The Packet Capture screen
If you have Windows 8.1 or higher, then Npcap is most likely an appropriate choice. Wireshark presents links for the user to do the following:
- Get Npcap if needed
- Learn more about Npcap and WinPcap
Wireshark also offers USB Capture, which is optional.
Using a USB interface
At times, it is necessary to capture USB traffic. This option checks to make sure you have USBPcap currently installed and, if not, gives you an option to install it, as shown in the following screenshot:

Figure 3.7 —The USB Capture screen
You may find the need to use USB Capture, for example, for troubleshooting or monitoring transactions. If you choose not to install USB Capture, then you can install it at a later date.
Once you have made all of your selections, Wireshark will present a notification that the process has been completed.
Completing the Wireshark setup
Once complete, the screen will show the output of the files extracted during the installation. At this time, you can choose to run Wireshark. In addition, you can also select Show News, which will bring up the latest Wireshark news and information.
Because of the variety of options available, it may seem overwhelming. There is help. The next section provides an overview of many of the resources found on the Wireshark home page.
Reviewing available resources
When you first visit https://www.wireshark.org/, you are presented with a splash page that offers download options. In addition, across the top, there are several hyperlinks to resources such as news, where to find help, and where to go to meet other Wireshark users.
Let's see where you can find the latest news.
Viewing news and help topics
The News section is where you will find the latest on Wireshark improvements, vulnerabilities, and bug fixes. Once there, you can drill down to specific versions of release notes and find more information.
On the lower part of the page, you will find links to archived news events for past Wireshark releases, as shown in the following screenshot:

Figure 3.8 – The News section at Wireshark.org
The Get Acquainted menu choice provides a link to the About page, where you will find general information on Wireshark, including features, authors, awards, and accolades. Additionally, you'll find another link to download Wireshark, but you will also find a blog. It's worth visiting the blog because there are personal insights from developers, including Gerald Combs, the original developer.
The Get Help menu lists many opportunities to ask questions, using the following links:
- Ask a Question
- FAQs
- Documentation
- Mailing Lists
- Online tools
- Wiki
- Issue Tracker
The resources will help you keep up to date with Wireshark. The Wireshark community is very helpful in trying to assist users and novices with issues. Guests are encouraged to visit the Ask a Question forum, where you can view some of the questions and registered users can post a response. As shown in the following screenshot, there are several topics to investigate:

Figure 3.9 — Questions in a Wireshark forum
While most of us are Wireshark users, there are hundreds of developers that have worked hard to improve Wireshark over the years. The Develop menu choice lists various links – Get Involved, Developers Guide, Browse the Code, and Latest Builds.
The SharkFest menu choice will point to the Wireshark conference, SharkFest. The conference is where you can undergo training, gain practical experience, and network among the Wireshark community and the developers that make Wireshark possible.
Everyone needs a sponsor. The Our Sponsor menu choice takes you to the sponsors that make SharkFest possible.
Because most of the time you visit the Wireshark home page to download Wireshark, the following sections explore options you may find when downloading Wireshark.
Evaluating download options
Once on the Download page at Wireshark.org, you will see options for the type of file you want, along with what release. You can choose from stable, old stable, and documentation. The following screenshot shows the choices for downloads under Stable Release:

Figure 3. 9 — Choices for downloads under Stable Release
In most cases, you will select an option under Stable Release, which is the most recent version of Wireshark. The stable release will have most of the bugs resolved and will function at an optimal level. The following lists the available choices:
- Windows Installer: This provides a standard download for either a 64-bit or 32-bit Windows OS.
- Windows PortableApps (64-bit) or (32-bit): This is an option that you can run from a flash drive for troubleshooting without having to install on a system.
- macOS Arm 64-bit .dmg or Intel 64-bit .dmg: This is an option for macOS users to install, download, and unpack the Disk Image (DMG) and then run the install. In some cases, you may have to complete additional configuration options in Wireshark to resolve any errors.
- Source Code: This provides an archive of the source code, where you can study the various files. The following is a screenshot of the result when selecting the Source Code option on the Download page:
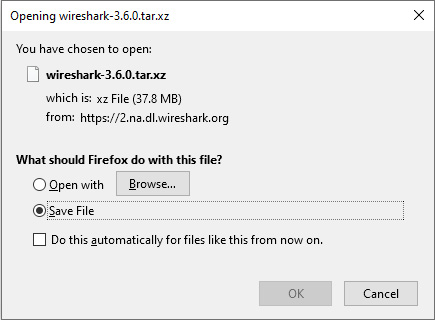
Figure 3.11 – The Source Code option on the download page
Important Note
If you are serious about development, then you should obtain and update your code from Wireshark's Git repository. Git will automatically merge changes into your personal source so that you can keep your source updated.
It's worth taking the time to explore all the resources on https://www.wireshark.org/ to help you learn more about packet analysis and find the latest information on Wireshark.
Summary
In this chapter, we covered how you can easily download and install Wireshark on a variety of different OSes. By now, you have a better understanding of the different capture engines and how they provide a way to gather the traffic from the network. In addition, you can now appreciate Npcap, the newest capture engine. We learned how Npcap provides enhanced features, such as the ability to capture raw 802.11 packets when using a supported wireless adapter.
When you're ready to install Wireshark on a Windows machine, you'll be more confident as you step through all the prompts, from launching the installer to completing the installation. As with most software installations, the user is given some choices. So that you are more aware of the many choices when downloading Wireshark, we reviewed the various options for the file you want, along with what type of release. And finally, you now understand that if you do run into trouble, there is help available, as evidenced by the many resources at Wireshark.org.
Now that you understand what's involved during the installation process, you're ready for the next chapter, where we will explore the Wireshark interface. We'll take a look at all the elements to help you navigate better as you begin capturing and analyzing packets. We will then examine the Wireshark welcome screen and go through the various icons and shortcuts. Finally, we'll explore the three most commonly used access menu choices, File, Edit, and View, all of which will help improve your workflow.
Questions
Now, it's time to check your knowledge. Fill in the blanks from the multiple choices and then check your answers, which can be found in the Assessments appendix:
- _____ is a capture engine originally developed for Unix-like OSes and is baked into Snort, TCPDUMP, and other packet analyzers to grab packets as they come off the network interface:
- Capinfos
- MATE
- libpcap
- Transum
- Radiotap headers can be used when troubleshooting Wi-Fi, as they can provide a lot of information associated with each _____frame:
- 802.3
- 802.15
- 802.11
- 802.8
- _____ is a program that will identify and print a packet's geolocation by using IPv4 and IPv6 addresses:
- dftest
- tshark
- mergecap
- mmdbresolve
- _____ is the newest capture engine option for Wireshark, with many benefits and features to enhance your packet capture:
- AirPcap
- Npcap
- WinPcap
- libpcap
- One of Wireshark's tools, _____ allows you to adjust timestamps, delete packets, and convert file formats:
- Editcap
- Capinfos
- dftest
- Reordercap
- One of the tools available during download is _____, which computes response time with a number of different protocols:
- Rawshark
- Transum
- Randpktdump
- MATE
- Once at Wireshark.org, the _____ section is where you will find the latest on Wireshark improvements, vulnerabilities, and bug fixes:
- Get acquainted
- Get help
- News
- Windows Installer
Further reading
Please refer to the following links for more information:
- For more information on signal strength, visit https://www.securedgenetworks.com/blog/wifi-signal-strength.
- For more information on radiotap headers, visit https://www.intuitibits.com/2015/04/06/link-layer-header-types/.
- To read the user guide for Transum, visit https://gitlab.com/wireshark/wireshark/-/wikis/TRANSUM-User-Guide.
- To obtain the latest GeoLite2 database, go to https://dev.maxmind.com/geoip/geoip2/geolite2/.
- For more information on using Wireshark on a macOS, visit https://www.wireshark.org/docs/wsug_html_chunked/ChBuildInstallOSXInstall.html.
- You can compare the features of WinPcap or Npcap by going to https://nmap.org/npcap/vs-winpcap.html.