
Chapter 13
Microsoft Office Word 2003
This chapter is penned to provide a foundation to the reader to harness the power of word processing using Microsoft Office Word 2003. Word enables the user to effectively create documents quickly and efficiently. In this chapter, the reader will learn to create and format documents using various in-built features of Word. The chapter also covers various tools and features such as bullets and numbering, headers and footers, spelling and grammar checking, and many more through which text-based document can be enhanced. The chapter provides a broad discussion on inserting tables and graphics in a document. The chapter concludes with an explanation on previewing and printing a Word document.
After reading this chapter, you will be able to understand:
The basic concepts of word processing with Microsoft Office Word 2003
The steps required to create a word document from scratch
How to select and format the text to make a document more attractive to a reader
How tables present information in an aligned and organized manner by displaying the text in a grid of rows and columns
How to check spelling and grammar in Microsoft Office Word 2003
The types of graphics that Microsoft Office Word 2003 uses to add emphasis and visual impact on documents
The different options of printing a document offered by Microsoft Office Word 2003
13.1 INTRODUCTION
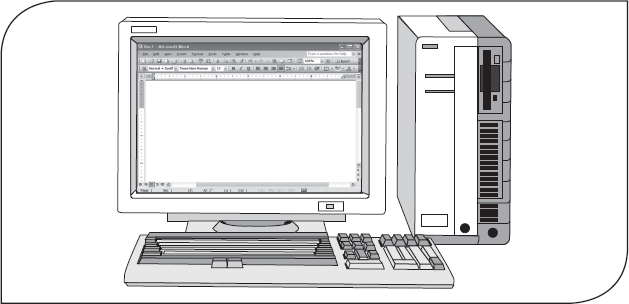
Word processing is the manipulation of characters, words, text, numbers, sentences, and paragraphs in the document so that it is error-free and looks attractive. Initially, the work of preparing and formatting a document was done manually with the help of typewriter, which was time consuming and could not be modified or used again. These days, this task is performed with the help of computers, making it much easier. A word processor is an application software for word processing. It deals with character codes in the same objective way as a computer deals with number/codes. This results in reduced retyping time for error-free hard copy, facilitation of document revision, change before committing to paper, faster output speed, reduced proofreading, and elimination of stationary wastage. Almost everyone has a need for this type of software because it can be used for common tasks.
With a word-processing program, you can create letters, tables, newsletters, and academic papers that are easy to revise and much more aesthetically pleasing than documents created by a typewriter. The various word-processor packages that are being used are Word Perfect, Word Star, and Microsoft Word, etc. Of all these word-processing packages, Microsoft Word has a wide variety of features that make it one of the most popular and widely used applications. Microsoft Word produces professional documents quickly and efficiently.
13.2 STARTING MICROSOFT OFFICE WORD 2003
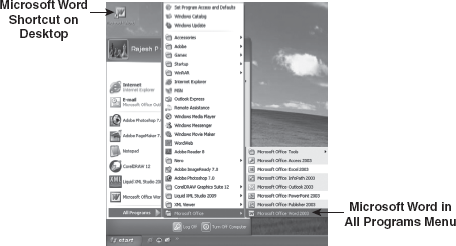
To open Microsoft Word, perform any one of the following steps.
- Double-click the Microsoft Word icon located on the desktop.
- Click start, point to All Programs, point to Microsoft Office, and then select Microsoft Office Word 2003 (Figure 13.1).
13.2.1 Microsoft Word Environment
When Microsoft Word is opened, the main screen of the program appears. This main window has different components, which are described below in detail.
Title Bar: The title bar is located at the top of the Word window and displays the names of the application and active document. It also tells you which Microsoft Word application is currently active. At the extreme upper-left corner of the title bar, there is a small Word icon (![]() ) (refferred as the Control menu). Clicking this icon displays a pull-down menu, which contains options to change the size of the window and placement of the document. On the right end of the title bar, there are Minimize, Restore Down/Maximize, and Close buttons (Figure 13.2).
) (refferred as the Control menu). Clicking this icon displays a pull-down menu, which contains options to change the size of the window and placement of the document. On the right end of the title bar, there are Minimize, Restore Down/Maximize, and Close buttons (Figure 13.2).
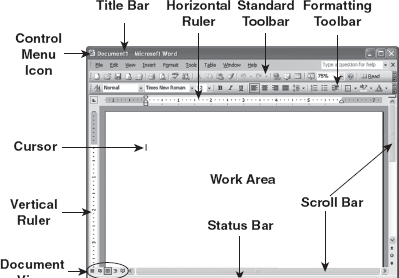
Figure 13.2 Main Microsoft Word Window
Menu Bar: The menu bar has many different menus, which control all options, functions, and commands for the entire Microsoft Word application. Each menu can be activated by pressing Alt+ the underlined letter of the menu from the keyboard. By default, Microsoft Word 2003 contains nine menus, which have an associated pull-down menu. For example, the File menu contains commands to open, create, and print a document.
Toolbars: Generally, a toolbar is positioned just below the menu bar. Toolbar contains command buttons that provide single-click entry to carry out many text-processing tasks. Word 2003 has 21 toolbars, each having its own functions. By default, only Standard and Formatting toolbars are displayed in the Word environment. Additional toolbars like Drawing and Picture toolbars can be added by right-clicking on the menu bar and selecting the desired toolbar(s) from the pop-up menu, as shown in Figure 13.3. Alternatively, select Toolbars from the View menu, and then select the desired toolbar(s) from the pop-up menu.
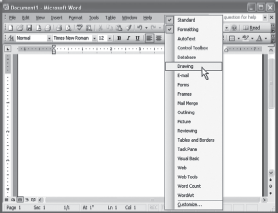
Figure 13.3 Various Toolbars
Ruler: Microsoft Word has two rulers, Horizontal and Vertical. These rulers are used to change the format of a document by adjusting the indents, margins, tab stops, and table columns. You can hide or view rulers by clicking the Ruler option from the View menu.
Status Bar: The status bar is located at the bottom of the Word window, and it provides information related to current cursor location, current page number, total number of pages, and program status notes (like Spelling and Grammar status, overtype mode indicators, etc.).
Work Area: The work area is the area in the middle of the Word window that allows you to type text, insert images, tables, and perform many more such actions. Within this area, small blinking vertical line (known as cursor) appears, which marks the position where the next typed character will appear in the work area.
Document View: Word can display the documents with varying levels of details through different views. The main difference between these views is your personal preference as to how you wish to work with the document. Microsoft Word provides the following views:
- Normal View: It displays text with character and paragraph formatting, but does not show headers and footers. This view separates pages with a dotted line, dividing the last line of one page from the first line of the next.
- Web Layout View: In this view, the document appears in a large font and with more space in between lines. The page layout is determined based on the computer screen rather than by the paper. This view is used to create documents for the Web.
- Print Layout View: This view displays a document in almost full WYSIWYG (what you see is what you get) preview mode. All character, paragraph, and document formatting options are displayed, along with headers and footers. The document is separated on-screen into what appear to be real pages.
- Outline View: This view displays a document as an outline with expandable and collapsible heading levels. It is used for rearranging entire sections of a document or for moving to specific section in a long document quickly.
- Reading Layout View: This view increases the readability of the content of the document. Pages represented in this view are designed to fit well on the screen. It hides all toolbars except for the Reading Layout and Reviewing toolbars.
- Document Map: In this view, a separate pane (known as Document Map) that shows a list of headings in the document is displayed. When you click a heading in the document map, the corresponding content is displayed in the work area. This view helps to navigate through the document quickly and keep track of your location in it.
- Thumbnails: In this view, small renderings of each page in your document are displayed in a separate pane. Using this view, you can get a visual impression of the content of each page. To jump directly to a page, you can click the corresponding thumbnail image.
Note: A pane is a part of the document window bounded by and separated from other parts by vertical or horizontal bars.
13.2.2 Getting Help
Microsoft Office provides an exhaustive help system to provide assistance when you are experiencing difficulty using any Office application. To get help, follow any one of the steps given below:
- Press the F1 key.
- Select Microsoft Office Word Help from the Help menu.
- Click the Microsoft Office Word Help button (
 ) on the Standard toolbar.
When you perform any of the abovementioned actions, Word Help task pane appears (Figure 13.4).
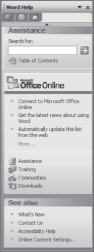
Figure 13.4 Word Help Task Pane
In this task pane, simply type your question or keyword relevant to your topic in Search for box and click the (![]() ) button. Word will search through its help database and list topics related to the question you entered. If one of the topics listed appears to be what you are looking for, click on that topic to read its contents. Word will display the help topic alongside the Word window where you can read the topic or access any of the other help information (see Figure 13.5).
) button. Word will search through its help database and list topics related to the question you entered. If one of the topics listed appears to be what you are looking for, click on that topic to read its contents. Word will display the help topic alongside the Word window where you can read the topic or access any of the other help information (see Figure 13.5).
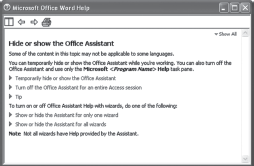
Figure 13.5 Getting Help
Once you have viewed the help information, click the Close button (located at the top-right corner) to close the help window and return to the document.
Note: A task pane is a window within an office application that provides commonly used commands. You can use these commands while working on your document.
ScreenTips: A very handy feature provided by the Office applications is the ScreenTips. A ScreenTip is a message that appears on the screen to provide information about a toolbar button. The tip is displayed when the user rests the mouse pointer Figure 13.6 ScreenTip on the button, as shown in Figure 13.6. To hide the ScreenTip,simply move the mouse away from the button.
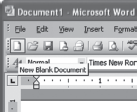
Figure 13.6 Screen Tip
13.3 WORKING WITH WORD 2003 DOCUMENTS
In this section, you will learn the steps required to perform the following in Word 2003.
- Creating a new document
- Opening an existing document
- Saving a document and making a backup copy
- Closing the document and Word application
13.3.1 Creating a New Document
Whenever you start Word, it opens a new untitled document window so that you can begin a new project. If Word is already running, and you want to create a new document, click on New Blank Document button (![]() ) on the Standard toolbar. A new document can also be opened by following the steps given below:
) on the Standard toolbar. A new document can also be opened by following the steps given below:
- Select New from the File menu to display the New Document task pane.
- Select Blank Document (
 ) under the New section. Word opens a new document, which is sequentially numbered like Document1, Document2, and so on. Similarly, you can also create an XML document, a Web page, an E-mail message, and a document from the existing document by selecting appropriate options (Figure 13.7).
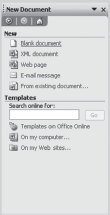
Figure 13.7 New Document Task Pane
13.3.2 Opening an Existing Document
To open an existing document, follow any of the steps given below:
- Select Open from the File menu to display the Open dialog box. You can also open the Open dialog box by clicking on the Open button () on the Standard toolbar. The Open dialog box allows you to specify the name of the desired file in the File name drop-down box. If the desired file is not in the current location, you can locate it by navigating through Look in drop-down box. Once the file is found, select the file and click the Open button.
- Word document can also be opened by double-clicking the Word file icon, placed on the specified location (Figure 13.8).
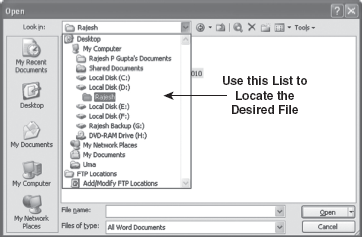
Figure 13.8 Open Dialog Box
THINGS TO REMEMBER
Saving a File
Once you have saved the new document, clicking on the Save button does not display any dialog box because Word assumes that you do not want to specify the name or the location of the document again. Word assumes that you just want to update the originally saved copy by overwriting it with this new version of the same file. If you do want to put a copy of this same file in a new location, create a new copy with a new name, or change the file type, you must go to the File menu and choose Save As. This way, you can save your file at different stages and keep multiple versions on your hard drive.
13.3.3 Saving a Document
Once a document is created, you can start typing the text and insert graphics and tables. When this is done, you must save the document for future references. To save the document, Microsoft Word provides two menu options, namely, Save and Save As. Although both these commands have similar functions, yet they differ in one aspect. When you create a new document and click the Save button (![]() ) on the Standard toolbar or choose Save from File menu, the Save As dialog box is displayed. This dialog box allows you to specify the name of the file, where to save the file, and the file type of the document (whether to save it as a web page or in rich text format) (Figure 13.9).
) on the Standard toolbar or choose Save from File menu, the Save As dialog box is displayed. This dialog box allows you to specify the name of the file, where to save the file, and the file type of the document (whether to save it as a web page or in rich text format) (Figure 13.9).
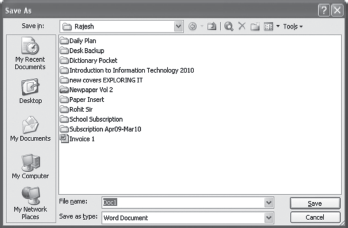
Figure 13.9 Save As Dialog Box
In the Save As dialog box, you can use the drop-down box at the top, labelled Save in, to select the location where the new copy is to be saved. You can also change the name of the copy by typing new name in File name box and then save it either in a new location or in the same location as the original (because this new copy now has a different name). Furthermore, you can change the file type by selecting a file type from the Save as type drop-down box at the bottom of the Save As dialog box.
Note: By default, Microsoft Word documents are saved with .DOC extension, although it can also be saved in other file formats like .TXT, .RTF, and .HTML
13.3.4 Closing a Document and Exiting Microsoft Word
After finishing all the word-processing activities, you may want to close the document and exit Word. For this, follow any of the steps given below:
- Select Close from File menu to close the document and select Exit from File menu to close the Word program (Figure 13.10).
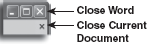
Figure 13.10 Closing a Document and Exiting Microsoft Word
- Click on the Close Window button at the upper-right corner of the Word window to close the current document. Note that when a single document is opened in Word, then there are two close buttons. One is located at the top of the application window, which closes the Word application while the second (lower) one present on the document closes only the current file. If a user makes changes to a file and has not saved those changes, Word will ask whether to save the changes before closing the file.
13.4 WORKING WITH TEXT
In the previous section, we discussed how to create and save a Word document. Now let us learn how to enter, select, and format text. Apart from these activities, you will also learn how to align and indent the text, copying and moving text, finding and replacing words, undo and redo operations, making lists, and inserting headers and footers.
FACT FILE
The tab is designed to make it easier to align text easily and precisely. Each time the TAB key is pressed, the cursor moves 0.5” along the line of text by default. When the TAB key is pressed, the text to the right of the cursor is moved to the right.
13.4.1 Inserting Text
Before Word can perform operations on text such as moving and copying, it is necessary that some text is present or typed in a document. To enter the text, just create or open a document and start typing. Note that the text appears where the blinking cursor (![]() ) is located. If you want to type in capitals (like ITLESL instead of itlesl), activate the Caps Lock key by pressing it once. You can also use the Shift key to type the text in capitals.
) is located. If you want to type in capitals (like ITLESL instead of itlesl), activate the Caps Lock key by pressing it once. You can also use the Shift key to type the text in capitals.
In Word, there are two typing modes, namely, insert mode and overtyping mode. In the insert mode, the newly typed text does not replace the already written text, instead the existing text is pushed forward. On the other hand, in overtyping mode, the newly typed text replaces the already written text. To check whether you are in the insert mode or not, look at the status bar located at the bottom of the screen. If the letters OVR are in grey, you are in the insert mode and if they are in black, you are in the overtype mode (Figure 13.11).

Figure 13.11 Typing Modes
By default, the insert mode is automatically activated. To change to the overtyping mode, double-click the letters OVR on the status bar. You can toggle between insert and overtype mode by double-clicking it again and again. Let us consider an example of inserting text in the overtyping mode. Suppose, you want to edit the content in a document from “Jenny has a large blue car” to “Jenny has a large pink car,” follow the steps given below:
- Type the text “Jenny has a large blue car.”
- Place the cursor before the letter “b” in “blue.”
- Enable the overtype mode.
- Type the word pink.
- The sentence should now read—“Jenny has a large pink car” (Figure 13.12).
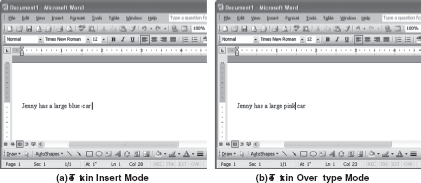
Figure 13.12 Using Overtyping Mode
13.4.2 Selecting Text
Before performing any operation on text such as moving, copying, formatting, etc., the text must be selected. Whenever you select a text, it gets highlighted (Figure 13.13).
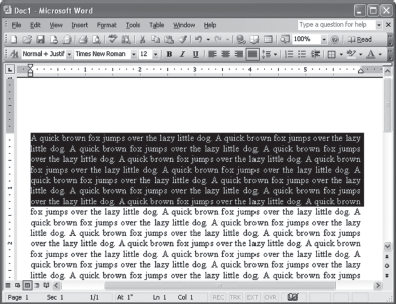
Figure 13.13 Selected Text
Depending on your requirement, you can select a word, a line, or multiple lines, etc. Selection can be done either using a mouse or keyboard shortcuts as listed in Table 13.1.
Table 13.1 Selecting Text
| To Select | Mouse Action | Keyboard Shortcuts |
|---|---|---|
| A Word | Double-click anywhere on the word | Ctrl+Shift+Right Arrow or Ctrl+Shift+Left Arrow |
| A Line | Click on the left margin next to the line. Note that the mouse cursor will change to arrow | Shift+End or Shift+Home |
| Multiple Lines | Click on the left margin and keep on dragging till the desired lines are selected | Shift+Up Arrow or Shift+Down Arrow |
| Paragraph | Triple-click anywhere in the paragraph | Ctrl+Shift+Up Arrow or Ctrl+Shift+Down Arrow |
| Entire Document | Triple-click in the left margin | Ctrl+A |
| Rectangular Area | Press Alt key and then drag the mouse | Ctrl+Shift+F8 and use Arrow keys |
13.4.3 Formatting the Text
As you enter and edit a text, you can change its appearance to add emphasis and make the document easier to read. This is known as formatting. It is the process of determining how the typed text will appear on a printed page. Formatting is applied by altering the appearance of text by setting the typeface (font), size, line spacing, and colour. Formatting can be done by using the Formatting toolbar or by using the Format menu (Figure 13.14). To format a text, follow the steps given below:
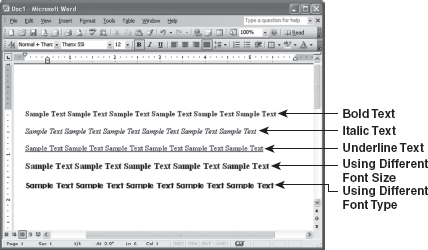
Figure 13.14 Formatting Text
- Select the text to be formatted.
- Use buttons on the Formatting toolbar to format the selected text. Some of the buttons used in formatting text are given in Table 13.2.
Table 13.2 Formatting Text
| Command | Button | Description |
|---|---|---|
| Font | Changes the font of the selected text | |
| Font Size | Changes the font size of the selected text | |
| Bold | Bolds the selected text | |
| Italic | Italicizes the selected text | |
| Underline | Underlines the selected text | |
| Highlight | Highlights the selected text | |
| Font Color | Changes the font colour of the selected text |
Text can also be formatted using the Font dialog box. For this, follow the steps given below:
- Select the text to be formatted.
- Select Font from the Format menu to menu to display the Font dialog box.
- From this dialog box, the font, font style, and text size can be specified. This dialog box also allows you to apply underline, colour, and other effects to the selected text.
- Note that formatting is displayed in the Preview box at the bottom of the Font dialog box. Once formatting is done, click OK to apply the formatting changes to the selected text (Figure 13.15).
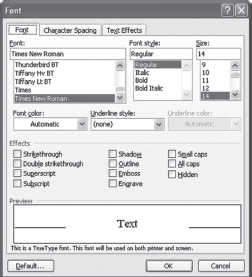
Figure 13.15 Font Dialog Box
Highlighting and Changing Text Colours: While working in Microsoft Office applications like Word, Excel, and PowerPoint, you may wish to change the attributes of some important phrases or words. This can be done by changing the font size, making them appear bold, italic, or underlined. Apart from these formatting techniques, Microsoft Office also allows you to emphasize important words or sentences by changing their font and/or background colour.
To highlight the text, just as you would do with a highlighter pen in the case of textbooks, Microsoft Office provides you with a Highlight tool. To highlight the existing text, follow the steps given below:
- Click on the down arrow beside the Highlight button (
 ) on the Formatting toolbar (Figure 13.16).

Figure 13.16 Highlight Colours
- Select the desired colour from the drop-down list to highlight text.
- When you move on to the document, the mouse pointer changes to (
 ). Now, click and drag the mouse to select the text to be highlighted.
 - After finishing with text highlighting, click on the Highlight button again to turn it off, or simply press the Esc key.
By default, Microsoft Word displays and prints the text in black. In case you want to change the colour of the text, follow the steps given below:
- Select the text for which you want to change the colour.
- Click on the down arrow beside the Font Color button (
 ) from the Formatting toolbar.
 - Select the desired colour from the pull-down list for the selected text (Figure 13.17).
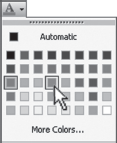
Figure 13.17 Font Colours
Text Manipulation with Scientific Notation: You might have observed various mathematical expressions like 5x3 + 4x2 + 7x + 6 and chemical formulas like CO2. In the expression 5x3 + 4x2 + 7x + 6, the digits 3 and 2 appears slightly above the normal baseline, and in the formula CO2, the digit 2 appears slightly below the baseline. A character appearing above the baseline is known as a superscript and a character appearing below the baseline is known as a subscript. Subscript and superscript formats can be easily applied to the text in the Word.
To apply a subscript or a superscript format to a character (or text) in a document, follow these steps:
- Select the character (or text) on which subscript or superscript format is to be applied.
- Select Font from the Format menu to display the Font dialog box (see Figure 13.18).
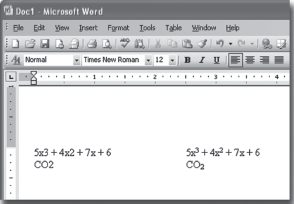
Figure 13.18 Changing Text to Subscript and Superscript
- In the Effects section, select the Superscript checkbox or the Subscript checkbox according to the requirement.
- Click OK to close the Font dialog box and apply the formatting changes to the selected text.
Inserting Symbols: Special characters that generally cannot be typed from the keyboard are known as symbols. These are the characters like summation symbol (Σ), alpha (α), pi (π), etc. that are mostly used in mathematical and scientifc formulas. Word also allows you to insert many more symbols other than mathematical and scientifc symbols in a document.
To insert a symbol in a document, follow these steps:
- Select Symbol from the Insert menu to display the Symbol dialog box in which Symbols is the active tab (Figure 13.19).
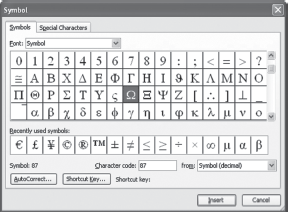
Figure 13.19 Inserting a Symbol
- Select the desired symbol from the Font drop-down box and click Insert. The selected symbol is inserted in your document. After insertion, the Cancel button changes to Close button.
- Click Close to close the Symbol dialog box.
13.4.4 Aligning and Indenting Text
Alignment and indentation operations are a part of paragraph formatting. These operations are performed to give a well-defined “structure” to the document. This gives the document a professional look (Figure 13.20). To align or indent a paragraph, follow the steps given below:
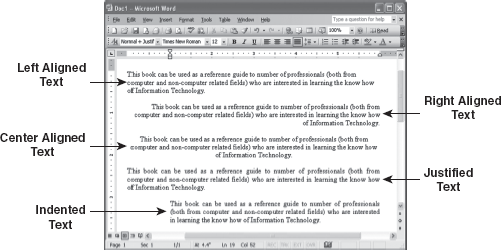
Figure 13.20 Paragraph Formatting
- Select the paragraph to be aligned or indented.
- Use buttons on the Formatting toolbar to align or indent the paragraph. Some of the buttons used in aligning or indenting paragraph are given in Table 13.3.
Table 13.3 Paragraph Formatting
| Command | Button | Description |
|---|---|---|
| Align Left | Left aligns the paragraph or selected text | |
| Center | Centre aligns the paragraph or selected text | |
| Align Right | Right aligns the paragraph or the selected text | |
| Justify | Justifies the paragraph or selected text | |
| Decrease Indent | Decreases the indent of the selected paragraph | |
| Increase Indent | Increases the indent of the selected paragraph |
A paragraph can also be formatted using the Paragraph dialog box. For this, follow these steps:
- Select the paragraph to be formatted.
- Select Paragraph from the Format menu to display the Paragraph dialog box (Figure 13.21).
- Specify the desired alignment and indentation for the selected paragraph.
- Note that the formatting is displayed in the Preview box at the bottom of the Paragraph dialog box. Once formatting is completed, click OK to apply the formatting changes to the selected paragraph.

FACT FILE
Style
A style is a set of formatting specifications that can automatically be applied to the text. In smaller documents, you can alter the appearance of text by changing the font size and colour, adjusting paragraph settings, aligning and indenting text. These settings can be applied one at a time by clicking toolbar buttons and using the keyboard or dialog boxes. Instead of applying these settings one at a time, a combination of different character and paragraph formats can be incorporated into a style.
13.4.5 Formatting Style
Formatting the text using various menu options and toolbar buttons is viable for small documents with only a few pages. However, when a document contains many pages, or when consistent formatting is crucial, you should use Styles instead.
Styles can significantly reduce the time it takes to format a document. For example, if a document is divided into sections with headings (like this book has), it is a good idea to use heading styles. It is much easier to maintain consistency in a document if styles are used. For example, if a heading style is used in a document and you want to change the appearance of the heading, just alter the definition of the style. This change will be cascaded through all headings in the documents that were created using the style, so you do not have to select each one and make the formatting changes individually.
To apply a style, follow the steps given below:
- Place the cursor in the paragraph where the style is to be applied.
- Click the Style drop-down box on the Formatting toolbar and select a style by clicking on it (Figure 13.22).
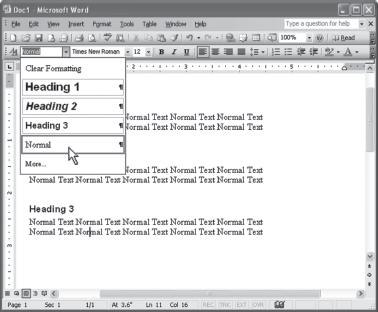
Figure 13.22 Style Box
Accessing All Available Styles: For simplicity, Microsoft Word 2003 only displays a small number of the built-in styles in the Style box of a new document. If you want any of the other styles to be available, you have to open the Style dialog box. This can be done by following the steps given below:
- Select Styles and Formatting from the Format menu to display the Styles and Formatting task pane.
- Select All styles from Show drop-down box to display all the styles (Figure 13.23).

Figure 13.23 Styles and Formatting Task Pane
- Click on the style you want to apply on the text.
13.4.6 Format Painter
A handy feature for formatting text is the Format Painter. For example, if you are formatting a paragraph heading with a certain font face, size, and style, and you want to format another heading the same way, you need not manually add each attribute to the new headline. Instead, you can use the Format Painter, which is a time-saving feature for quickly copying the format of a block of text. This can be done by following the steps given below:
- Select the text containing the formatting you wish to copy.
- To copy formatting to a single location, click once on Format Painter button (
 ) on the Standard toolbar. To copy it to multiple locations, double-click on Format Painter button. Notice that the mouse pointer changes to resemble a paintbrush (
 ).
). - Now click and drag the mouse to select the text you wish to format, and then release the mouse.
- If the format painter is copied by double-clicking, press the Esc key to come out of painter mode.
13.4.7 Using Cut, Copy, and Paste in Word
When you are working on a document, sometimes you may decide to move a certain portion of text (or even images), or copy the same text or image into some other area or in some other document. If the text is to be moved within the same document or to another document, it should be first cut and then pasted. When you choose to cut the text, Word removes it from the current document and places it in the clipboard, a temporary storage area in computer memory. Now to place the text stored in the clipboard, you will have to perform the paste action. Copying the text is similar to the cut operation, except that copy retains the text at the original place, but in case of cut, the text is removed from the original location. To perform the cut, copy, and paste, follow the steps given below:
- Select the text that is to be moved or copied.
- In case you want to move the text, choose Cut from the Edit menu or click the Cut button (
 ) on the Standard toolbar. If you want to copy the text, choose Copy from the Edit menu or click the Copy button (
 ) on the Standard toolbar.
 - Click the mouse on the place in the document where you want to insert the text.
- Choose Paste from the Edit menu or click the Paste button (
 ) on the Standard toolbar. The text that you copied to the clipboard is pasted to the place where the mouse is clicked.
13.4.8 Finding and Replacing Text
Find and replace option in Microsoft Word is used to locate a particular word, phrase, or set of characters in a document, and replace it with something else. Although you could manually scan through the document for find and replace purposes, it takes time and there is always the possibility that you might miss the text in question on a first or second pass. Microsoft Word's Find and Replace feature swiftly and unerringly locates anything you are looking for, and once the desired text is located, it can automatically be replaced by the new text. For example, if you have used word, say “January 2004” in the document and later want it to be replaced with “January 2005,” Word finds all instances of “January 2004” and replaces it with “January 2005.” Microsoft Word also finds and replaces all grammatically wrong word(s). For example, if you want to replace the word “narrow” with the word “broad” throughout a document, Word intelligently changes not only “narrow” to “broad,” but also words like “narrower” to “broader.”
To find and replace a text within the document, follow the steps given below:
- Select Find from the Edit menu to display the Find and Replace dialog box.
- Click on the Find tab if you want to find the desired word in the document, or click Replace tab to find a word and replace it with new word.
- Type the text that you want to search in the Find what box.
- Click Find Next button to find the first occurrence of the text. If you want to replace the text, then select the Replace tab and type the replacement text in the Replace with box (Figure 13.24).
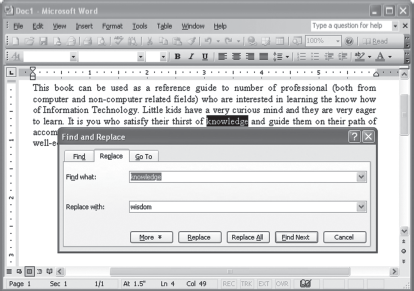
Figure 13.24 Find and Replace Dialog Box
- Select Replace button to replace each occurrence of the word individually or click Replace All to replace all occurrences of the word at once. Word will display a message when it has replaced all occurrences.
- Keep on pressing the Find Next and Replace button until you are finished with finding and replacing the text.
- To close the Find and Replace dialog box, click the Cancel button or press the Esc key.
13.4.9 Undo and Redo
Microsoft Office is a very powerful suite of applications. These applications remember all the actions that you performed on a file. If a portion of a document is deleted or changed, you can revert to the original state by using the Undo command. This feature instructs the application to ignore the last action (whether it was deleting, copying, or moving). Word 2003 has virtually unlimited capacity of performing undo action, as long as you do not close the document. However, certain actions like saving a file or printing a page cannot be undone.
To undo the last action(s), click the Undo button (![]() ) on the Standard toolbar, or select Undo from the Edit menu. If you want to undo a number of actions at the same time, then click the down arrow (
) on the Standard toolbar, or select Undo from the Edit menu. If you want to undo a number of actions at the same time, then click the down arrow (![]() ) beside the Undo button to display a list of actions that can be undone [see Figure 13.25(a)].
) beside the Undo button to display a list of actions that can be undone [see Figure 13.25(a)].

Figure 13.25 Undo and Redo Actions
If an undo action is set and then you want to reverse it, then Redo command can be used to reverse the undo action. To redo the last undo action, click on the Redo button (![]() ) on the Standard toolbar, or select Redo from the Edit menu. If you want to redo a number of actions at the same time, then click the down arrow (
) on the Standard toolbar, or select Redo from the Edit menu. If you want to redo a number of actions at the same time, then click the down arrow (![]() ) beside the Redo button to display a list of actions that can be redone [see Figure 13.25(b)].
) beside the Redo button to display a list of actions that can be redone [see Figure 13.25(b)].
13.4.10 Bullets and Numbering
In many situations, you need to prepare a list of actions. For example, while writing an algorithm, it is always advisable to use bullets and numbering to list all the steps. If these steps are written in a paragraph form, separated only by colons or commas, it may become difficult to understand the text. Microsoft Word 2003 supports list-makers with its bullets and numbering features. To use bullets and numbering, first select the text you want to format. Next, use the Bullets (![]() ) or Numbering (
) or Numbering (![]() ) button on the Formatting toolbar to apply bullets or numbering (Figure 13.26).
) button on the Formatting toolbar to apply bullets or numbering (Figure 13.26).
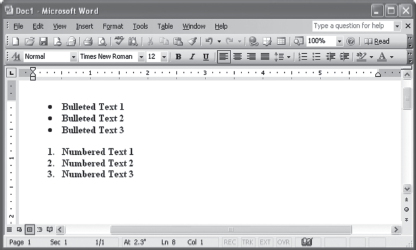
Figure 13.26 Bulleted and Numbered Text
Bullets and numbering can also be applied to text by selecting Bullets and Numbering from the Format menu. This will display the Bullets and Numbering dialog box (see Figure 13.27). To apply bullets, use the Bulleted tab, and if a numbered list is to be made, use the Numbered tab. There are seven default bullet formats (and seven default numbering formats) available in the dialog box. You can modify any of these to create your own formats.
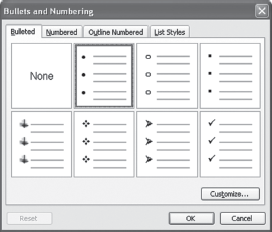
If you want to remove the bullets or numbering, select he text and click the Bullets or Numbering button on the Formatting toolbar.
13.4.11 Header and Footer
Headers are text that appears at the top of every page, and footers contain text that appears at the bottom of each page. Every Word document contains header and footer areas where you can put a document title, author name, page number, graphics, and any other essentials that you want to repeat over several (or all) pages in the document. If nothing is inserted in the headers and footers, they still exist, but are left blank and take up no space on the page. What you put in the header or footer appears on every page of the document.
To create a header and footer in a document, follow the steps given below:
- Select Header and Footer from the View menu. This displays the Header and Footer toolbar with a dotted box for header at the top of the page and a dotted box for footer at the bottom of the page (Figure 13.28).
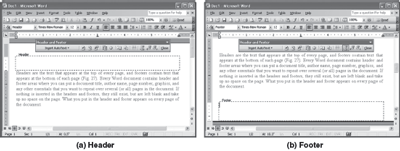
Figure 13.28 Header and Footer
- Type the text in Header and/or Footer box. Note that headers and footers can be formatted (like changing font colour, size, etc.) just like any other text.
- If necessary, use appropriate options from the Header and Footer toolbar to add time, insert page number, date, etc., as listed in Table 13.4.
Table 13.4 Header and Footer Toolbar Options
Command Button Description Insert Page Number 
Inserts page numbers that automatically update when pages are added or deleted Insert Number of Pages 
Prints the total number of pages in the active document Format Page Number 
Formats the page numbers in the current section Insert Date 
Inserts date that automatically updates so that the current date is displayed Insert Time 
Inserts time that automatically updates so that the current time is displayed Switch Between Header and Footer 
Switches the insertion point between the header and footer areasorMoves the insertion point from header to footer area or vice versa - After the text or graphic has been entered, click Close button on the Header and Footer toolbar or double-click in the work area to return to work there.
13.5 WORKING WITH TABLES
Tables are one of the most powerful features of Microsoft Word. They provide a means of presenting information in an organized and attractive manner that displays text in a grid of rows and columns of cells.
In Microsoft Word 2003, tables can be created in number of ways.
- Select Insert from the Table menu and then choose Table from the pop-up menu to display the Insert Table dialog box, from where you can choose the number of columns and rows required in the document. Note that you can always add or delete columns and rows at a later stage (Figure 13.29).
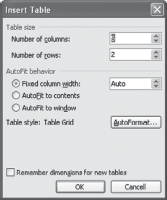
Figure 13.29 Insert Table Dialog Box
- Another way of creating a table is to click the Insert Table button (
 ) on the Standard toolbar. Drag the mouse along the grid, highlighting the number of rows and columns for the table (Figure 13.30).
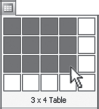
Figure 13.30 Inserting Table by Dragging
When you select any of the above two methods, the table will be inserted into the document as shown in the Figure 13.31.

Figure 13.31 Creating a Table
- A table can also be drawn onto the document. To draw a table, select Draw Table from the Table menu or click the Tables and Borders button (
 ) on the Standard toolbar. The cursor is now the image of a pencil (
 ) and the Tables and Borders toolbar has appeared. Draw the cells of the table with the mouse. Figure 13.32 displays an example of creating a table using the drawing method.
After creating the table, enter the text into the table by pointing to the cell. Press the Tab key to move to the next cell. When you reach the last cell of the table you can press the Tab key again to create a new row in the table. To move to a previous cell press Shift+Tab.
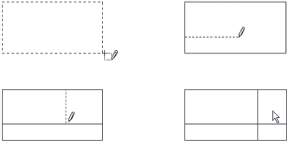
Figure 13.32 Drawing a Table
Tables and Borders Toolbar: The Tables and Borders toolbar allows you to add border styles, shading, text effects, alignment, and more options to your table (Figure 13.33).
Figure 13.33 Tables and Borders Toolbar
Table 13.5 lists all the available buttons on the Tables and Borders toolbar.
Table 13.5 Tables and Borders Toolbar Options
| Command | Button | Description |
|---|---|---|
| Draw Table | Inserts a table by dragging onto the document | |
| Eraser | "Removes any line in the table. This is mainly used to merge cells by removing the dividers between them | |
| Line Style | Defines the style and thickness of the table border | |
| Line Weight | Defines the width for table’s border | |
| Border Color | Defines the colour of the table’s border | |
| Outside Border | Applies line style, line weight, and border colour settings to the outside border of the cell with the insertion point or to any selected part of the table | |
| Shading Color | Opens a palette of colours from where you can select a colour to apply it as a background shading to the cell containing the insertion point or to any selected part of the table | |
| Insert Table | Displays the Insert Table dialog box | |
| Merge Cells | It is only available if two or more cells are selected. Use it to remove the dividing borders of the cells and merge them into a single cell | |
| Split Cells | Splits a cell into more than one cell | |
| Align Top Left | Defines the horizontal and vertical alignment of the text within a cell | |
| Distribute Rows Evenly | Makes the selected rows or cells to equal row height | |
| Distribute Columns Evenly | Makes the selected columns or cells to equal column width | |
| Table AutoFormat | Opens the Table AutoFormat dialog box from where you can choose from predetermined table styles | |
| Change Text Direction | Toggles the direction of text in a cell between vertical and horizontal | |
| Sort Ascending | Sorts the rows in a table in ascending order | |
| Sort Descending | Sorts the rows in a table in descending order | |
| AutoSum | Adds the content of a range of cells |
Selecting Parts of a Table: For working with the tables, one must have to select the different parts of the table. Selection allows formatting or deleting different parts of the table. Moreover, it also allows adding extra rows and columns in the table.
Different parts of a table can be selected either by using mouse or by using the shortcuts listed in Table 13.6.
Table 13.6 Shortcuts Used to Select a Table
| For Selecting | Using Table Menu | Using Mouse |
|---|---|---|
| Single Cell | Position the cursor in the cell. Click the Table menu, point to Select, and then click Cell | Click the bottom-left corner of the cell when a black arrow |
| Single Row | Position the cursor in the row. Click the Table menu, point to Select and then click Row | Click outside the table to the left of the row when a white arrow |
| Single Column | Position the cursor in the column. Click the Table menu, point to Select and then click Column | Click outside the table above the column when a black down arrow |
| Multiple Rows | None | Click outside the table to the left of the row and drag the mouse down |
| Multiple Columns | None | Click outside the table above the column and drag the mouse to select the desired columns |
| Whole Table | Position the cursor in the table. Click the Table menu, point to Select and then click Table | Hold down the Alt key. Double-click inside the table when the mouse looks like an I bar |
13.5.1 Table Properties
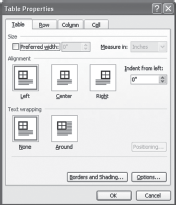
The Table Properties dialog box is used to modify the alignment of the table with the body text and the text within the table. This dialog box can be displayed by right-clicking in any cell and choosing Table Properties from the pop-up menu. This dialog box shows the current settings for the selected table. These settings appear as options in four different tabs: Table, Row, Column, and Cell (Figure 13.34).
 w
w
Figure 13.34 Table Properties Dialog Box
Click on Table tab to format size, alignment, and text wrapping. The Row tab is used to change the cell's height and alignment. To format the columns, just click on the Column tab. Here you can set the width of each column according to the requirement. Every column can be of the same width, or of different width. Note that the formatting will be applied only to the sections that have been selected. When you finish making changes to the table, click on OK button to close the dialog box.
13.5.2 Moving and Resizing Table
When you place the mouse over the table, a move handle and a resize handle will appear on the top-left and bottom-right corners of the table respectively. Click and drag the move handle to move the table and release the mouse button when the table is positioned where you want it. Click and drag the resize handle to resize the table. You can also change the column width and row height. Move the mouse pointer onto the column line at the right of the column whose width you wish to alter. The pointer will change to (![]() ). Click and drag this to the right to increase the column width or to the left to decrease the column width. Similarly, you can also change the height of cells on a row or rows within the table by dragging the row resizer (
). Click and drag this to the right to increase the column width or to the left to decrease the column width. Similarly, you can also change the height of cells on a row or rows within the table by dragging the row resizer (![]() ) in upward or downward direction (Figure 13.35).
) in upward or downward direction (Figure 13.35).

Figure 13.35 Moving and Resizing Table
13.5.3 Formatting Text in Table
Like word paragraphs, text stored in table cells can also be formatted. All the usual formatting options, such as text alignment, bullets and numbering, indentation, spacing, tab stops, font colors, font styles, borders and shading, etc., work well within tables and cells. To make the text stored in a row of the table bold and italic, follow the steps given below:
- Select the row to be formatted (Figure 13.36).
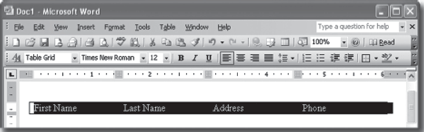
Figure 13.36 Row Selected in a Table
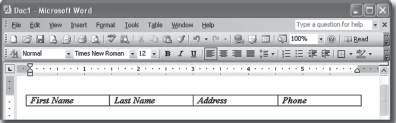
- Click appropriate buttons on the Formatting toolbar to format the text in the selected row (Figure 13.37).
Aligning Text: Whenever you create a new table and enter a text, by default, it is left aligned. However, you can change the text alignment if required. The text in the table can be justified and aligned to the centre or right side. To change the alignment of the text, follow the steps given below:
- Select a cell or a series of cells or an entire row or column.
- Click the appropriate alignment button on the Formatting toolbar to align the selected text (Figure 13.38).

Figure 13.38 Aligning Text in Table
Positioning Text: When you enter a text in tables, by default it is positioned horizontally in the table cells. However, Microsoft Word allows you to change the text orientation in table cells so that it can be positioned in a vertical direction. To perform this, follow the steps given below:
- Place the cursor in the cell where the text is to be typed.
- Select Text Direction from the Format menu to display the Text Direction dialog box.
- Select the desired text style and click OK. Now, if you type a text in the cell, it appears in the same orientation as you selected (Figure 13.39).
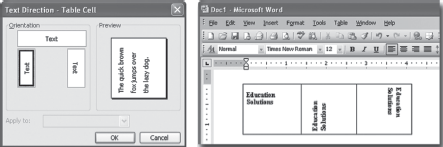
Figure 13.39 Changing the Orientation of the Text in the Table
Using Table AutoFormat: To make a table more presentable, Microsoft Word provides Table AutoFormat feature that allows one to apply different formats, such as borders, shading, special fonts and colour, etc., to a table in a quick and easy manner. To apply an AutoFormat to a table, follow the steps given below:
- Place the cursor anywhere in the table.
- Select Table AutoFormat from the Table menu or click Table AutoFormat (
 ) button on the Tables and Borders toolbar to display the Table AutoFormat dialog box (Figure 13.40).
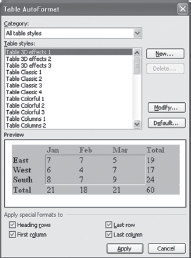
Figure 13.40 Table AutoFormat Dialog Box
- Click on the desired format from the Table styles section. Note that you can preview the selected format in the Preview box.
- To apply special formats, click the checkboxes under the Apply special formats to section. The options included in this section indicate where AutoFormat will place distinctive formatting for the headings or for the entire text in the table.
- Click Apply to apply the formatting and close the Table AutoFormat dialog box (Figure 13.41).

Figure 13.41 Using Table AutoFormat
13.5.4 Adding and Deleting Rows and Columns
New rows can be added to an existing table. The simplest way to do this is to move the cursor to the last column of the last row and press the Tab key. You can also insert rows by using the Table menu. On the Table menu, point to Insert and then choose Rows Above or Rows Below. Similarly, columns can be added by selecting the Columns to the Left or Columns to the Right.
For deleting rows and columns from the table, click inside the row or column that you wish to delete or select several rows or columns to delete. On the Table menu, point to Delete, and then click Rows or Columns.
13.5.5 Converting Text to Table
You can convert any text, whether it is a tabbed list or a series of paragraphs, into a table using the Convert Text to Table feature of the Word. To perform this, follow the steps given below:
- Select the text to be converted into table.
- Select Convert from the Table menu and choose Text to Table option to display the Convert Text to Table dialog box.
- Enter the required number of columns and rows in the Table size section.
- Click the desired options in the AutoFit behavior section to specify the columns’ sizing.
- Select the desired delimiter or separator in the Separate text at section in order to specify what text to be added in an individual cell (Figure 13.42).
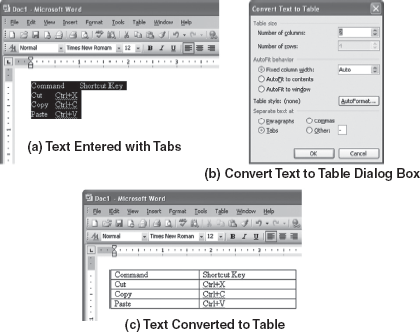
Figure 13.42 Converting Text to Table
13.5.6 Converting Table to Text
You can also convert an existing table to text using the Convert Table to Text feature of the Word. To convert a table to text, follow the steps given below:
- Select the text in table.
- Select Convert from the Table menu and choose Table to Text option to display the Convert Table to Text dialog box.
- Select the desired delimiter or the separator in the Separate text with section that will separate the different columns (Figure 13.43).
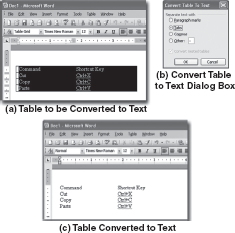
Figure 13.43 Converting Table to Text
13.6 CHECKING SPELLING AND GRAMMAR
Microsoft Word allows you to check spelling and grammar in the desired text in a document. Before printing or reading a document, you should always check for typing errors. Spelling and grammar errors are highlighted in the document with a red and green underlines, respectively, and may provide corrective suggestions. It can thus help you become better spellers, even broaden your vocabulary if you are curious enough to check out the meanings of the many words you have never come across before.
13.6.1 Using the Auto Spell and Auto Grammar Features
Microsoft Word automatically checks the spelling and grammar as you type the text and provides visual clues about the spelling and grammar unless this feature is turned off. Misspelled words are underlined in red, while sentences with grammatical flaws are underlined in green. Note that these lines are for viewing purposes only and will not be printed.
Although spelling and grammatical errors can be corrected manually, Word provides easy-to-use assistance when you right-click on the error, as shown in Figure 13.44. When you right-click on a spelling or grammatical error, Word displays a popup menu with suggestive corrections. Select the desired correction and Word will automatically make the correction.
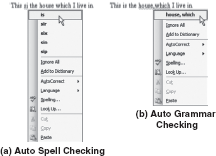
Figure 13.44 Auto Spell and Grammar Checking
13.6.2 Using Spelling and Grammar Dialog Box
To start the spell check process, perform any of the following steps:
- Click the Spelling and Grammar button (
 ) on the Standard toolbar.
 - Select Spelling and Grammar from the Tools menu.
When you perform any of the above actions, Word 2003 will stop at words that it does not recognize, as well as repeated words, such as, “this this is a mistake”, in the Spelling and Grammar dialog box. You can choose from the choices Microsoft Word offers, type in your own change, or ask to ignore that instance or all instances of the word in the document (see Figure 13.45).
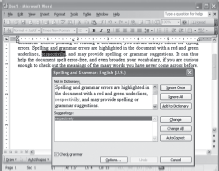
Figure 13.45 Spelling and Grammar Dialog Box
The top section of the dialog box contains the first unrecognized word—shown in red with its accompanying sentence so you can see how you have used the word within the document. The bottom section contains suggestions for correcting the word. If the word should remain as it is, select the Ignore Once button. Word also offers the option of Ignore All if the word in question appears throughout the document. If one of the suggestions is correct, double-click on the correct spelling or highlight the word and choose the Change button. If you are afraid you misspelled a word more than once, click on the Change All button. If the word should be added to the custom dictionary, click the Add to Dictionary button. You can use the AutoCorrect button to add the word to the AutoCorrect list. In the future, when you misspell this word while typing, Word will automatically correct it— without you having to access the spell checker. When you click the just mentioned buttons, Word will continue the spelling and grammar checking until it finds the next mistake or when there are no mistakes left in the document or the selected text.
13.6.3 Using AutoCorrect Options
The AutoCorrect Options feature automatically detects common errors like misspelled words, grammatical errors, and incorrect capitalization and replaces them with the correct text. For example, “grammer” can be rectified as “grammar.” You can also use AutoCorrect to quickly insert text, graphics, or symbols. For example, type (c) to insert ©, or type asap to insert as soon as possible. There are several words available in the AutoCorrect dictionary; however, you can also enter a word that is commonly misspelled in the dictionary by selecting AutoCorrect Options from the Tools menu. This will display the AutoCorrect dialog box. In this dialog box, type in the misspelling in the Replace textbox and the corrected spelling in the With textbox. After that click the Add button and then close the dialog box by clicking the OK button (Figure 13.46).
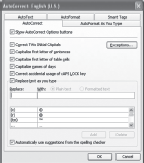
Figure 13.46 AutoCorrect Dialog Box
13.6.4 Using Synonyms and Thesaurus
Sometimes you may wish to replace a word with its synonym. Microsoft Word has the Thesaurus feature, which does just the same. To use this feature, follow the steps given below:
- Place the cursor on the word that is to be looked up.
- On the Tools menu, select Language and then select Thesaurus to display the Research task pane.
- A listing of similar words is provided under the Thesaurus: English (U.S.) section. To use a word from the list, point to it, click the down arrow, and then click Insert or Copy. You can also view the similar words of any word in the list by clicking that word (Figure 13.47).
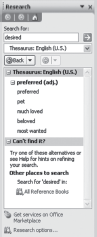
Figure 13.47 Research Task Pane
You can also quickly look up a word directly from within your document. To do this, select the word in contention, right-click it, and then choose Synonyms from the pop-up menu. From the list of suggested words, choose any one you like or select the Thesaurus option to display the Research task pane (Figure 13.48).
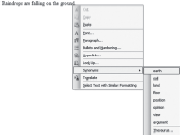
Figure 13.48 Finding a Synonym
13.7 ADDING GRAPHICS TO DOCUMENT
Graphics are frequently used with text to add emphasis and visual impact in Word documents. Microsoft Word 2003 uses two basic types of graphics: pictures and drawing objects.
13.7.1 Pictures
Pictures are used in the document to enhance its readability and understandability. These include bitmaps, scanned pictures, photographs, and clip art. You can use any image editing software to create photographs, line drawings, and other graphics, as long as you can save the file in a format that Word 2003 recognizes. Some common formats are .BMP, .GIF, .JPG, and .WMF.
Inserting Picture from a File: Word allows you to insert pictures or scanned photographs from other programs and locations into the Word document. To add photographs or graphics to an existing file, follow the steps given below:
- Click on the desired location, where the picture is to be inserted.
- On the Insert menu, click Picture and select From File. This opens the Insert Picture dialog box as shown in Figure 13.49.
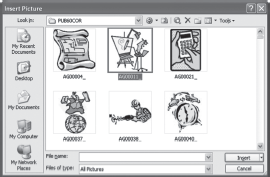
Figure 13.49 Insert Picture Dialog Box
- Use the Look in drop-down box to find the image to be inserted.
- Select the file name from the list and click the Insert button.
Clip Art: Microsoft Word comes with its own set of pictures in the Clip Gallery. The Clip Gallery includes a wide variety of clip art that makes it easy for you to enhance your documents with professionally designed images. Most clip art images are in metafile format, which means you must ungroup an image and convert it to a drawing object in order to enhance it. To add a Clip Art from the Clip Gallery, follow the steps given below:
- Click on the desired location, where the clip image is to be inserted.
- On the Insert menu, click Picture and select Clip Art to display the Clip Art task pane. You can also open Clip Art Gallery by clicking the Insert Clip Art button (
 ) on the Drawing toolbar (Figure 13.50).
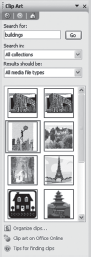
Figure 13.50 Insert Clip Art Task Pane
- To find an image, click in the box following Search for and enter keywords describing the image you want to use and Click on Go button.
- Move the mouse on the image to be inserted and click drop-down arrow alongside the image. This opens the pop-up menu, which is shown in Figure 13.51.
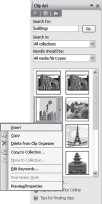
Figure 13.51 Inserting Clip Art
- Click Insert from the menu to insert the image. You can also drag a picture or other clip from the Clip Gallery to your document.
- To add multiple images, continue selecting images to be added to the document. When you are finished using the Clip Gallery, click the Close button on the Clip Gallery title bar to close Clip Art task pane.
13.7.2 Editing a Picture
Once an image is inserted, it can be changed and enhanced by using the Picture toolbar. To edit an image, follow the steps given below:
- Select the graphic by clicking on it so the selection handles appear on the sides and corners of the picture. Click and drag these handles to resize the image. To resize the object, place the mouse pointer over one of the selection handles until it becomes a double-headed arrow (
 ). The picture can be resized in three ways: horizontally, vertically, or in proportion.
- To stretch horizontally, drag either of the side handles.
- To stretch vertically, drag the handle to either the top or the bottom.
- To resize proportionally, drag one of the corner handles.
Image effects can also be changed by using the Picture toolbar. When you select a picture, the Picture toolbar appears with tools that you can use to crop the picture, add a border to it, or adjust its brightness and contrast. If the Picture toolbar does not appear, right-click the picture and select Show Picture Toolbar from the shortcut menu (Figure 13.52).
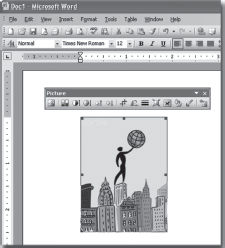
Figure 13.52 Selecting Picture for Editing
Table 13.7 lists all the available buttons on the Picture toolbar.
Table 13.7 Picture Toolbar Options
| Command | Button | Description |
|---|---|---|
| Insert Picture | Displays the image selection window and allows the user to change the image | |
| Color | Allows making the image in greyscale, black and white, or a watermark | |
| More/less Contrast | Modifies the contrast between the colours of the image | |
| More/less Brightness | Darkens or brightens the image | |
| Rotate Left 90° | Rotates the picture 90° to the left | |
| Crop | Deletes outer portions of the image | |
| Line Style | Adds a variety of borders to the graphic | |
| Compress Pictures | Reduces the picture’s file size | |
| Text Wrapping | Modifies the way the document text wraps around the graphic | |
| Format Picture | Displays all the image properties in a separate window | |
| Set Transparent Color | Sets transparent colour on the object | |
| Reset Picture | Deletes all the modifications made to the image |
13.7.3 Drawing Objects
Word allows you to add objects such as lines, curves, and WordArt. The drawing objects include:
- AutoShapes: It comprises lines, curves, basic shapes, and many such objects.
- WordArt: It comprises text written using special effects.
AutoShapes: Microsoft Word comes with a set of ready-made AutoShapes containing several categories of shapes, including lines, basic shapes, flowchart elements, stars and banners, and callouts that you can use in your documents. You can resize, rotate, flip, colour, and combine the shapes with other shapes such as circles and squares to make shapes that are more complex. To use AutoShapes, follow the steps given below:
- On the Insert menu, click Picture and then select AutoShapes.
Or
On the View menu, click Toolbars and then select Drawing to display the Drawing toolbar. This toolbar contains the AutoShapes menu (Figure 13.53).
Table 13.8 lists all the available buttons on the AutoShapes menu.
Table 13.8 AutoShapes Menu Options
Command Button Description Lines 
Draws a straight line, arrow, or double-headed arrow Connectors 
Connects the shapes and keeps them connected Basic Shapes 
Draws many two- and three-dimensional shapes, braces, and brackets Block Arrows 
Draws block arrows from many types of two- and three-dimensional arrows Flowchart 
Draws flowchart Stars and Banners 
Draws stars, bursts, banners, and scrolls Callouts 
Draws callouts which are used to label some text on the document More AutoShapes 
Used to choose more AutoShapes that are available - Select the required shape on the toolbar. Use the drag-and-drop method to draw the shape in a document (Figure 13.54).
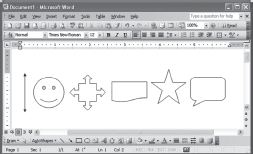
Figure 13.54 Inserting AutoShapes
- When the shape has been made, it can be resized using the sizing handle, and other adjustments specific to each shape can be modified using the yellow diamond handles. Each AutoShape can be rotated by clicking and dragging the green handles around the image to rotate it (Figure 13.55).
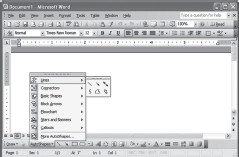
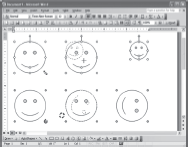
Figure 13.55 Resizing and Rotating AutoShapes
WordArt: Using WordArt Gallery, you can create many text effects. You can create shadowed, skewed, rotated, and stretched text, as well as text that can be fitted to pre-defined shapes. To insert a WordArt drawing object, follow the steps given below:
- Click Insert WordArt button (
 ) on the Drawing toolbar. Alternatively, select Picture from the Insert menu and then select WordArt. When you perform any of these actions, the WordArt Gallery dialog box is displayed (Figure 13.56).
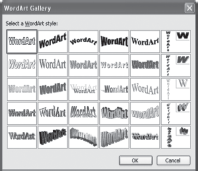
Figure 13.56 WordArt Gallery Dialog Box
- Select a WordArt style to apply to the document and click OK to close the dialog box. This opens Edit WordArt Text dialog box, where the text is entered for the chosen style (Figure 13.57).
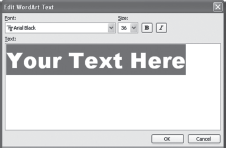
Figure 13.57 Edit WordArt Text Dialog Box
- Select a font by clicking the down arrow next to the Font list. The font size can also be selected by clicking the down arrow next to the Size box. To make the text bold, click the (
 ) button, and to make the text italics, click the (
 ) button.
 - When text has been entered and font selection made, click OK. The WordArt now appears in the document. With the selection handles visible on the WordArt, you can resize, move, and rotate the WordArt (Figure 13.58).

Figure 13.58 WordArt in Document
To add or change effects to the text, use the buttons on the WordArt and Drawing toolbars. The WordArt toolbar appears when you click the WordArt special text. Table 13.9 lists all the available buttons on the WordArt toolbar.
Table 13.9 WordArt Toolbar Options
| Command | Button | Description |
|---|---|---|
| Insert WordArt | Opens the WordArt Gallery dialog box, allowing you to create a new WordArt object | |
| Edit Text | Opens the Edit WordArt Text dialog box, allowing you to edit and format WordArt text | |
| WordArt Gallery | Opens the WordArt Gallery dialog box, allowing you to select a different WordArt style | |
| Format Object | Opens the Format WordArt dialog box, allowing you to format a WordArt object so that you can add colours and lines (borders) and adjust the size and layout | |
| WordArt Shape | Displays a palette of WordArt shapes, allowing you to select a different object shape such as changing the slopes, curves, and arches | |
| Text Wrapping | Displays a palette of wrapping styles that affect how you can move the object on a page | |
| WordArt Same Letter Heights | Changes all the letters in WordArt text to the same height within the defined shape | |
| WordArt Vertical Text | Changes the appearance of the text by making it either vertical (up/down) or horizontal (left/right) | |
| WordArt Alignment | Displays a menu from which you can select a desired alignment option | |
| WordArt Character Spacing | Displays a menu from which you can select the desired character spacing between letters such as loose, tight, and normal |
Drawing Toolbar: The Drawing toolbar is used to change and enhance the drawing objects with colours, patterns, borders, and other effects. The drawing toolbar includes the following options Table 13.10:
Table 13.10 Drawing Toolbar Options
| Command | Button | Description |
|---|---|---|
| Draw | Gives you options to group images, move items forward or back, move or rotate images, and set AutoShape defaults | |
| Select Objects | Used to select objects in the document. To select a single object, click the object with the arrow. To select one or more objects, drag the arrow over the objects you want to select | |
| AutoShapes | Displays the in-built shapes | |
| Line | Draws a straight line where you click or drag in the document | |
| Arrow | Draws an arrow-headed line where you click or drag in the document | |
| Rectangle | Draws a rectangle or a square where you click or drag in the document | |
| Oval | Draws an oval or a circle where you click or drag in the document | |
| Text Box | Draws a text box where you click or drag in the document | |
| Insert WordArt | Activates the WordArt Gallery using which you can insert WordArt objects | |
| Insert Diagram or Organization Chart | Allows you to insert a diagram or organization chart from the Diagram Gallery | |
| Insert Clip Art | Opens the Clip Art task pane using which you can insert the desired clip art image | |
| Insert Picture | Lets you select and insert the picture at the specified location | |
| Fill Color | Adds, modifies, or removes the fill colour or fill effect from the selected object | |
| Line Color | Adds, modifies, or removes the line colour from the selected object | |
| Font Color | Adds, modifies, or removes the text colour from the selected text | |
| Line Style | Lets you choose the thickness and style of the line | |
| Dash Style | Lets you make various dashed line styles | |
| Arrow Style | Determines the look and type of arrows | |
| Shadow Style | Allows you to give images a shadow and format that shadow | |
| 3-D Style | Allows you to give images a three-dimensional (3-D) look and format it |
13.8 MAIL MERGE
Mail merge feature of Word allows you to merge generic information which is to be repeated in each letter, mailing label, or, envelope, etc., with varying information like, a list of names and addresses of employees. This allows having almost identical documents in which the content of the documents is the same for each employee; however, each of it can be customized for a particular individual in the list. For example, if one wants to send a form letter to five or five hundred different people, Word can be used to personalize each one and create envelopes or mailing labels.
13.8.1 Components of a Mail Merge
The components of the mail merge are as follows:
- The main document comprises the generic information in the form of text and graphics. It also determines the format of the resultant merged document. The five types of main documents are:
- Letters: To create letters that can be sent to a group of people.
- E-mail messages: To create e-mail messages that can be sent to a group of people.
- Envelopes: To create addressed envelopes for a group mailing.
- Labels: To create address for a group mailing.
- Directory: To create a directory containing a printed list of addresses or a catalogue.
- A data source comprises varying information in which records representing individual items are stored. Each record consists of fields, for example, a record of an employee may consist of name and address, where a name may consist of fields, FirstName and LastName and the address may contain fields HouseNo, City, and State. A data source contains multiple records, representing information for numerous employees.
- The merged document comprises the combination of generic text and variable information. In the main document, you can insert merge fields indicating the place where you want to place the variable information. When the information in the data source is merged with the main document, the merge fields are replaced with the variable information representing the data for each individual.
13.8.2 Mail Merge Steps
To perform mail merge, follow the steps given below:
- Click New (
 ) on the Standard toolbar to create a document and type the desired text. For example, enter the text in the new file as shown in Figure 13.59 and save it. An already existing file can also be used as the main document. If you already have a document containing the desired text, open it.
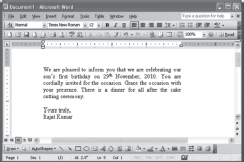
Figure 13.59 Sample Text
- Click the Tools menu, point to Letters and Mailings, and then click Mail Merge to display the Mail Merge task pane (Figure 13.60).

Figure 13.60 Step 1: Select Document Type
- Select the appropriate option under the Select document type section. For example, select the option Letters to create a letter.
- Click Next: Starting document button to perform the next step of mail merge (Figure 13.61).
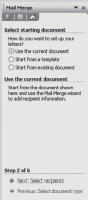
Figure 13.61 Step 2: Select Starting Document
- Click Use the current document option under the Select starting document section to use the currently opened document as the main document.
- Click Next: Select recipients to perform the next step of the mail merge. You can click Previous: Select document type to return to previous step and change the selection options (Figure 13.62).
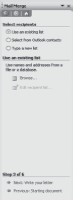
Figure 13.62 Step 3: Select Recipients
- Select Type a new list under the Select recipients section to create the address list (Figure 13.63).
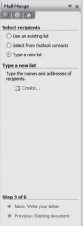
Figure 13.63 Step 3: Type a New List Option Selected
- Click Create button to display the New Address List dialog box (Figure 13.64).
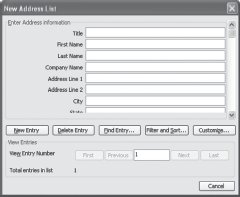
Figure 13.64 New Address List Dialog Box
- In the New Address List dialog box, type the appropriate information you want to include for the first entry in the boxes under Enter Address information section. Note that as you start entering the information, the Cancel button changes to Close button.
- Click New Entry button to complete the first entry and enter a new entry.
- Repeat steps 9 and 10 until you have added all the address entries and click the Close button to display the Save Address List dialog box (Figure 13.65).
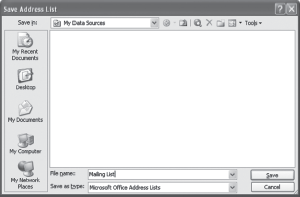
Figure 13.65 Save Address List Dialog Box
- Specify the name of the file, the location of the file, and the file type.
- Click Save button to display the Mail Merge Recipients dialog box (Figure 13.66).
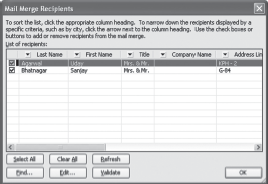
Figure 13.66 Mail Merge Recipients Dialog Box
- In the Mail Merge Recipients dialog box, click the heading of the column you want to use to sort the list. You can also add or remove the recipients from the mail merge list by clicking the checkbox beside the name of the recipient. Click OK button to close the Mail Merge Recipients dialog box and return to the Mail Merge task pane.
- Click Next: Write your letter to perform next step of the mail merge and to display the mail merge toolbar (Figure 13.67). Some of the tools are listed in Table 13.11.
Table 13.11 Mail Merge Toolbar Options
Command Button Description Main Document Setup 
Creates a main document Open Data Source 
Opens the existing list from which recipients are selected Mail Merge Recipients 
Allows to add or remove the recipients from the mail merge list Insert Address Block 
Inserts a merge field for the address in the main document at the specified location. This merge field will be replaced with an address from the mailing list Insert Greeting Line 
Inserts a merge field for the greeting line in the main document at the specified location Insert Merge Fields 
Inserts a merged field at the insertion point Insert Word Field 
Inserts a word field at the insertion point View Merged Data 
Switches between merge fields and the data that appear in them Highlight Merge Fields 
Highlights the merge fields First Record 
Shows the first record in the data store Previous Record 
Shows the previous record in the data store Go to Record 
Moves to the record specified in the box Next Record 
Shows the next record in the data store Last Record 
Shows the last record in the data store Find Entry 
Finds a specified entry Check for Errors 
Checks and reports errors Merge to New Document 
Merges the main document and data Merge to Printer 
Merges the document and prints it 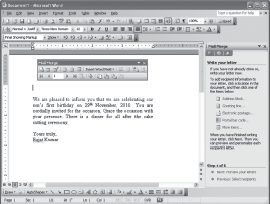
Figure 13.67 Step 4: of Mail Merge
- Place the cursor at the location in the main document where you want to insert the merge fields, that is, where you want to merge name, addresses, etc. from the data source.
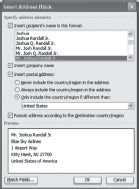
- Click the Address block under the Write your letter section to display the Insert Address Block dialog box (Figure 13.68).
 w
wFigure 13.68 Insert Address Block
- Select the desired format and click OK button. A merge field for the address appears in the letter. This merge field will be replaced with an address from the address list (Figure 13.69).
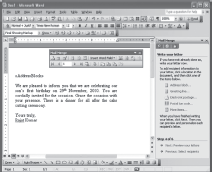
Figure 13.69 Merge Field for Address
- Similarly, you can add Greeting Line if you want to add a greeting in the letter.
- Click Next: Preview your letters to perform the next step of the mail merge (Figure 13.70).
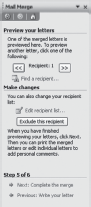
Figure 13.70 Step 5: of Mail Merge
- Click Next: Complete the merge to finish the mail merge (Figure 13.71).

Figure 13.71 Step 6: of Mail Merge
- Click Edit individual letters under the Merge section to merge the main document with the information from the mailing list. The Merge to New Document dialog box appears (Figure 13.72).
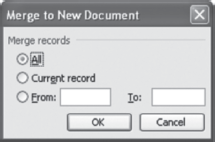
Figure 13.72 Merge to New Document Dialog Box
- Click the appropriate option to specify the records you want to merge.
- Click OK to create letters (Figure 13.73).
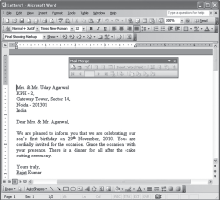
Figure 13.73 Merged Document
13.9 PRINTING A DOCUMENT
A major part of any word-processing software is to print a document. Microsoft Word allows you to choose what part of the document to print (such as the current page, multiple pages, or the entire file). In addition, you can specify which printer to use and how many copies to print.
13.9.1 Setting Page Margins
Page margins determine the distance between the text and the edge of the paper. To specify the margins in the document, choose Page Setup from the File menu to display the Page Setup dialog box. As shown in Figure 13.74, Microsoft Word 2003's default margins are 1.25 inches on the left and right and 1 inch on the top and bottom. If required, change the margin from the top, bottom, left, and right. To change the orientation (whether to print the document in landscape or portrait mode), select the option from the Orientation section. If you plan to print on both sides of the page, select the Mirror margins option from the Multiple pages drop-down list under Pages sections so that the margins on facing pages mirror each other. The Preview box at the right of the Page Setup dialog box displays thumbnail-sized representation of a sample page in your document. Be sure that your margins are appropriate for your document.

Figure 13.74 Page Setup Dialog Box
The Page Setup dialog box also allows you to format the size and orientation of the paper. To change the size of the paper, click the Paper tab and select the desired size (letter, A4, etc.) from the Paper_size list.
13.9.2 Print Preview
Print preview is a way to view the appearance of the printed document on-screen before printing the final output. Previewing the document is a great way to catch formatting errors, such as incorrect margins, overlapped text, boldfaced text, and other text enhancements. This helps in saving costly printer paper, ink, and time. To view the document in print preview mode, choose Print Preview from File menu or click the Print Preview button (![]() ) on the Standard toolbar. In the print preview mode, the document appears as a reduced image in the Print Preview screen. The Zoom feature can be used to magnify the image for readability. To magnify the text for a larger view, click the Magnifier button (
) on the Standard toolbar. In the print preview mode, the document appears as a reduced image in the Print Preview screen. The Zoom feature can be used to magnify the image for readability. To magnify the text for a larger view, click the Magnifier button (![]() ) and place the cursor over the text you wish to enlarge. When the cursor resembles a magnifying glass encircling a + sign (
) and place the cursor over the text you wish to enlarge. When the cursor resembles a magnifying glass encircling a + sign (![]() ), click the text and the text will be zoomed in. You can magnify any portion of the page. To return to the original view size, position the cursor over the text again and when the cursor resembles a magnifying glass encircling a – sign (
), click the text and the text will be zoomed in. You can magnify any portion of the page. To return to the original view size, position the cursor over the text again and when the cursor resembles a magnifying glass encircling a – sign (![]() ), click to reduce the text to a smaller magnification. Click Close to return to the document (Figure 13.75).
), click to reduce the text to a smaller magnification. Click Close to return to the document (Figure 13.75).

13.9.3 Printing the Document
Once you are ready with all the formatting and editing, you can print the document. To print a document, click the Print button (![]() ) on the Standard toolbar, or select Print from the File menu to display the Print dialog box (see Figure 13.76). This dialog box allows you to select the number of copies and how many pages of the document you want to print. You can also specify the range of the document to print by choosing:
) on the Standard toolbar, or select Print from the File menu to display the Print dialog box (see Figure 13.76). This dialog box allows you to select the number of copies and how many pages of the document you want to print. You can also specify the range of the document to print by choosing:
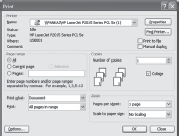
Figure 13.76 Print Dialog Box
- All: To print all the pages of the document.
- Current page: To print the current page in the document.
- Pages: To print a certain number of pages.
- Selection: To print the selected portion of the document.
The Number of copies list allows you to enter the number of copies you want to print. If you want to print multiple copies, select the Collate checkbox to print a complete copy of the document before the first page of the next copy is printed. Now, the copies will come out in the order page 1, 2, 3; page 1, 2, 3, etc. The Pages per sheet list offers you to select the number of pages in the document that you want to print on each sheet of paper. Once all the printer settings have been set, click OK and Word will begin printing the document (Figure 13.76).
Important Keyboard Shortcuts
Document Actions
| Action | Shortcut Key |
|---|---|
| Open a Document | CTRL+O |
| Create a New Document | CTRL+N |
| Close a Document | CTRL+W |
| Save As | F12 |
| Save | CTRL+S |
| Help | F1 |
| Print Preview | CTRL+F2 |
| CTRL+P | |
| Close Word Application | ALT+F4 |
| Action | Shortcut Key |
|---|---|
| Font Face | CTRL+SHIFT+F |
| Font Size | CTRL+SHIFT+P |
| Style | CTRL+SHIFT+S |
| Bold | CTRL+B |
| Italic | CTRL+I |
| Underline | CTRL+U |
| Change Case | SHIFT+F3 |
| Font Dialog Box | CTRL+D |
| Left Alignment | CTRL+L |
| Center Alignment | CTRL+E |
| Right Alignment | CTRL+R |
| Justified Alignment | CTRL+J |
| Indent | CTRL+M |
| Apply Bulleted List | CTRL+SHIFT+L |
| Undo | CTRL+Z |
| Redo | CTRL+Y |
| Cut | CTRL+X |
| Copy | CTRL+C |
| Paste | CTRL+V |
Text Formatting Actions
| Action | Shortcut Key |
|---|---|
| Delete Previous Word | CTRL+Backspace |
| Find | CTRL+F |
| Replace | CTRL+H |
| Go To | CTRL+G |
Table Actions
| Action | Shortcut Key |
|---|---|
| Next Cell | Tab |
| Previous Cell | SHIFT+Tab |
| Beginning of Column | ALT+PageUp |
| End of Column | ALT+PageDown |
| Select Table | ALT+ (Num 5) (keeping NumLock OFF) |
Miscellaneous Actions
| Action | Shortcut Key |
|---|---|
| Thesaurus | SHIFT+F7 |
| Spellchecker | F7 |
Let Us Summarize
- Word processing is the manipulation of characters, words, text, numbers, sentences, and paragraphs in the document so that they are error-free and looks attractive.
- To open Microsoft Word, click start, point to All Programs, and then select Microsoft Word.
- To get help, click the Microsoft Word Help button (
 ) on the Standard toolbar. Alternatively, select Microsoft Office Word Help from the Help menu.
 - To create a new document, click on New Blank Document button (
 ) on the Standard toolbar. Alternatively, select New from the File menu.
 - To open an existing document, click on the Open button () on the Standard toolbar. Alternatively, select Open from the File menu.
- To save the document, Microsoft Word provides two menu options, namely, Save and Save As. By default, Microsoft Word document files are saved with .DOC extension, although it can also be saved in other file formats like .TXT, .RTF, and .HTML.
- To close the document, select Close from the File menu.
- Formatting is the process of determining how the typed text will appear on a printed page. It is applied by altering the appearance of text by setting the font type and font size, line spacing, and colour. To format the text, first select the text to be formatted and then use various buttons on the Formatting toolbar. Text can also be formatted by using the Font dialog box, which can be displayed by selecting Font from the Format menu.
- To highlight the text use the Highlight button (
 ) from the Formatting toolbar. In case you want to change the colour of the text, use the Font Color button () from the Formatting toolbar.
 - To align or indent a paragraph, use the appropriate buttons on the Formatting toolbar. A paragraph can also be formatted using the Paragraph dialog box, which can be displayed by selecting Paragraph from the Format menu.
- A style is a set of formatting specifications that can automatically be applied to the text. To apply a style, place the cursor in the paragraph where the style is to be applied. Then click the Style drop-down box on the Formatting toolbar and select a style by clicking on it.
- The Format Painter is a time-saving feature for quickly copying the format of a block of text. This tool can be used by clicking the Format Painter button () on the Standard toolbar.
- To move the text, choose Cut from the Edit menu. To copy the text, choose Copy from the Edit menu. To paste the cut or copied text or image, choose Paste from the Edit menu.
- To find and replace text within the document use the Find and Replace dialog box, which can be displayed by selecting Find from Edit menu.
- To undo the last action, select Undo from the Edit menu. To redo the last undo action, select Redo from the Edit menu. You can also use the Undo button (
 ) and Redo button (
 ) from the Standard toolbar.
 - To use bullets and numbering, first select the text you want to format. Next, use the Bullets (
 ) or Numbering (
 ) button on the Formatting toolbar.
 - Headers are text that appears at the top of every page, and footers contain text that appears at the bottom of each page. To create a header and footer in a document, select Header and Footer from the View menu, or double-click on the header area of the document.
- Tables can be created by using the Insert Table dialog box, which can be displayed by selecting Insert and then Table from the Table menu. Another way of creating a table is to click the Insert Table button () on the Standard toolbar and then dragging the mouse along the grid to highlight the number of rows and columns for the table.
- Microsoft Word automatically checks the spelling and grammar as you type the text and provides visual clues about the spelling and grammar. Misspelled words are underlined in red, while sentences with grammatical flaws are underlined in green.
- Microsoft Word has the Thesaurus feature to replace a word with its synonym or antonym. This feature can be used by selecting Language and then Thesaurus from the Tools menu.
- To add a picture from an existing file, use the Insert Picture dialog box, which can be displayed by selecting Picture and then From File from the Insert menu.
- Microsoft Word comes with its own set of pictures in the Clip Gallery. This gallery includes a wide variety of clip art that makes it easy for you to enhance your documents with professionally designed images. To add a Clip Art from the Clip Gallery use the Insert ClipArt dialog box, which can be displayed by selecting Picture and then Clip Art from the Insert menu.
- To use AutoShapes, select Picture and then AutoShapes from the Insert menu. Alternatively, use the AutoShapes menu from the Drawing toolbar.
- To use WordArt, select Picture and then WordArt from the Insert menu. Alternatively, use the WordArt button () from the Drawing toolbar.
- Page margins determine the distance between the text and the edge of the paper. To specify the margins in the document use the Page Setup dialog box, which can be displayed by selecting Page Setup from the File menu.
- Print preview is a way to review the appearance of the printed document on-screen before printing the final output. To view the document in print preview mode, choose Print Preview from File menu or click the Print Preview button (
 ) on the Standard toolbar.
 - To print a document, click the Print button (
 ) on the Standard toolbar. Alternatively, use the Print dialog box, which can be displayed by selecting Print from the File menu.
Exercises
Fill in the Blanks
- ................button from the Standard toolbar is used to see how a document looks before it is printed.
- A red line under a word in a document means that there is a ........................ error.
- To select a complete document, use the .................. keyboard shortcut.
- To cancel the last text modified, ............... button is used.
- ............... bar displays the name of the document.
- ............... and .............. are two basic toolbars in Word.
- A .................. is the message that appears on the screen to provide information about toolbar button.
- To save the document, Microsoft Word provides two options, namely, ................ and .....................
- .................. and .................... option in Microsoft Word is used to locate a particular word, phrase, or set of characters in a document and replace it with something else.
- The Print button appears on ................... toolbar.
- Every Word document contains .................and ................ areas where you can put a document title, author name, page number, and graphics.
- ..................... provide means of presenting information in an organized and attractive manner that displays text in grid of rows and columns of cells.
- ..................... contains command buttons that provides single-click entry to carry out many text-processing tasks.
- ..................... is a time-saving feature for quickly copying the format of a block of text.
- ..................... toolbar allows you to add border styles, shading, text effects, alignment, and more option to a table.
Multiple-choice Questions
- The toolbar that contains buttons for formatting a text and paragraph is .................
- Drawing
- Formatting
- Standard
- Drawing
- To move data from one part of the document to another, following combination is used:..................
- Cut and Paste
- Cut and Delete
- Copy and Undo
- Cut and Insert
- To save a document for the first time ................. option is used.
- Save As
- Cut
- Save
- Paste
- To see the document before the printout is taken, the following option should be used:.................
- Insert Table
- Print Preview
- Paste
- Format Painter
- Two basic types of graphics used in Word 2003 documents are ..................
- Drawing Objects and Pictures
- AutoShapes and Clip Art
- Header and Footer
- Spelling and Grammar
- Tables can be created in a number of ways, one of the most commonly used method is to create table by clicking on the ................ menu.
- Format
- Window
- Help
- Table
- A user can use the ................ and .................. commands to search for and correct words in a document.
- Find and Replace
- Print and Print Preview
- Header and Footer
- Spelling and Grammar
- The feature which automatically detects common errors, that is, misspelled words, grammatical errors is called ..................
- Goto
- Thesaurus
- AutoCorrect
- Spelling and Grammer
- Which of the following options is used to display information such as page numbers, title of the document, and page number in Word?
- Insert Table
- Header and Footer
- AutoCorrect
- Thesaurus
- A user can specify the margins (top, bottom, left, and right margins) in a document, by choosing Page Setup from the ............... menu.
- Format
- Table
- AutoCorrect
- File
- Which type of justification aligns text on both the right and left margins of a document?
- Justify
- Center
- Right
- Balanced
- To advance to the next cell in a table press the ..................... key.
- Enter
- Tab
- End
- Insert
- When you cut and paste something, it is temporarily transferred to: .......................
- Another partition on the hard drive
- Virtual Memory
- Swap File
- Clipboard
- A misspelled word is marked by ................
- Enclosing the word in a grey bar
- Changing the display to a blinking word
- Underlining the word with a solid black line
- Underlining the word with a wavy red line
- The Print Preview icon ...............
- Prints the document without page breaks
- Displays statistics about the document
- Saves the document in a print format
- None of these
State True or False
- Microsoft Word is a part of Microsoft Office suite.
- Word facilitates working in more than one document at the same time.
- Office Assistant helps the user to write text in Word 2003.
- The status bar shows information like page number, total number of pages, and so on.
- The green line under the text indicates a grammatical error.
- Underlining a word is an example of text formatting.
- When a document is saved, it cannot be modified.
- The printed copy of a document is called a hardcopy.
- Headings are used to provide style to the font.
- Bullets and Numbering buttons are available on the Standard toolbar.
- Microsoft Word 2003 is an operating system.
- The Office Assistant button is on the Standard toolbar.
- The insertion point indicates where text will be inserted as you type.
- To centre selected paragraphs, click the Center button on the formatting toolbar.
- Word processor developed by Microsoft is Word Perfect.
Descriptive Questions
- What are the components of Print Preview toolbar?
- What do you understand by character and paragraph format?
- Give description of View menu.
- Differentiate between Save and Save As option.
- Differentiate between Undo and Redo command.
- Give the steps to use Thesaurus.
- Write short notes on:
- Document view
- Redo command
- Thesaurus
- Give the steps involved in inserting a picture into a file.
- What are Headers and Footers in Word?
- Describe table and its parts briefly.
- Give steps for creating an invitation letter for your birthday party.
ANSWERS
Fill in the Blanks
- Print Preview
- Spelling
- Ctrl+A
- Undo
- Title
- Standard and Formatting
- ScreenTip
- Save and Save As
- Find and Replace
- Standard
- Headers and Footers
- Tables
- Toolbar
- Format Painter
- Tables and Borders
Multiple-choice Questions
- (b)
- (a)
- (a)
- (b)
- (a)
- (d)
- (a)
- (c)
- (b)
- (d)
- (a)
- (b)
- (d)
- (d)
- (d)
State True or False
- True
- True
- True
- True
- True
- True
- False
- True
- True
- False
- False
- True
- True
- True
- False