
In the postproduction work we do at my company, we deal with a variety of formats, which can be either tape-based or tapeless. Once the project is complete and the client or the network has the final materials, we are faced with a mountain of files used to create the final product (taking up valuable storage space). How do we archive?
Note
Before I jump into our solution for archiving, I recommend that you include archiving in the quote stage to your client. Ask them if they would like the project to be permanently archived for future re-edits and then build the archive fee as a separate item on the quote. Almost every time, they will want their project stored in a state that can be retrieved easily without having to reload camera tapes (taking up more edit time) and worry about missing elements.
There are many items to take into consideration when choosing your method of archiving, and I would suggest that you spend the time researching various archiving solutions, searching the forums, and speaking with your insurance company to decide how important a safe and secure archive is for you and your clients.
If you choose Blu-ray or external FireWire as your backup choice, I suggest that you also make a clone of your backup and store it offsite so that you’re prepared for the worst. Also, make sure to purchase “archival-quality” Blu-ray media. Not all optical discs are created the same.
We have had our own share of external FireWire drive failures, and the final straw was having one self-destruct while it sat on a desk. We were making a clone of that drive, and it died during the copy process. Luckily, all the build files (graphics and so on) were already moved over, and it was just the camera footage that was lost.
We began to research tape backups as a result. In the past, DLT and AIT tape drives were good solutions for us, but we needed a tape solution that would hold hundreds of GB per tape.
First, we experimented with the Quantum LTO-3 (400 GB) connected via gigabit Ethernet. For various reasons, this product didn’t leave us feeling secure with archiving our projects, so we turned to the Tandberg LTO-4 with Retrospect. There was only one minor snag with this method in that it connects via SCSI, requiring us to add an Atto ExpressPCI UL5D card into our Mac Pro. The problem with this, however, was that our main system already had a Fibre Channel card, Radeon X1900, and Kona. As a result, we were only able to give that lane 1x using the Expansion Slot Utility, which severely restricted the data transfer speed.
Instead, we installed the Tandberg LTO-4 into our other Mac Pro, which was an identical unit, less the Kona. We made sure to assign the correct lane configuration, and that’s it for the install. After that, we installed Retrospect, read the manual, and were all set to archive.
Here are the steps to follow to begin the backup process:
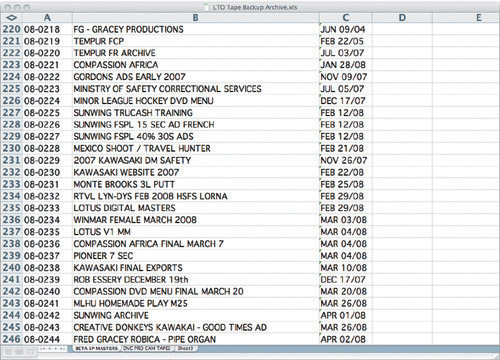
Once you begin an editing project, assign a job number, let’s say 080243, in our Excel archive log file (FIGURE 6.1).
This number will be needed for the archive at the end of the project. Then the Final Cut project is built, edited, and approved.
Run Media Manager and include all media outside the edit by deselecting “Delete unused media from duplicated items.” This assures that you’ll archive all project media in the event you need to make changes in the future.
All of the media-managed files and any other loose items you may want to include are stored in a folder tagged with the job number and the project name; for example, 080243 “CREATIVE DONKEYS KAWASAKI - GOOD TIMES AD.”
Once the contents of the project folder are complete, open the project file from another edit suite to confirm that all media connects properly. Then move that folder into the Archive folder on the XRaid, in our case, or other large hard drive.
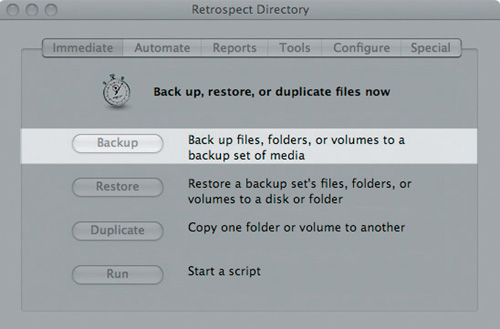
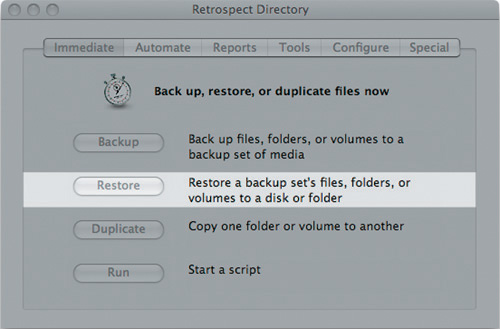
Launch Retrospect and select the Immediate tab (FIGURE 6.2). This tab contains the heart of the backup process that Retrospect offers.
Click the Backup button (shown in Figure 6.2). The Immediate Backup pop-up menu appears (FIGURE 6.3).
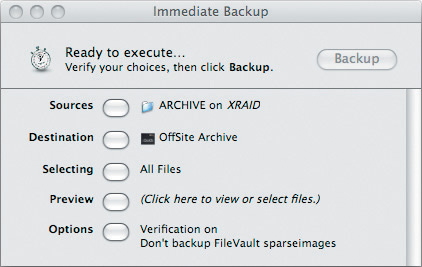
Sources tells Retrospect what folder you want to back up. We have set a specific folder on our XRaid named Archive, which helps keep the catalog files (explained below) organized. If you decide to back up the files straight from the original source, you’ll notice that the catalog file will get messy quite quickly, with many folders.
Destination tells Retrospect where you want to back up. I recommend keeping two catalog files, one for onsite and another for offsite. This will be explained later.
Selecting is more of a preference option, but it’s easier to keep it at “All Files” to cover all your bases.
Preview is where you view and select the files you want to back up from your Archive folder. You can use the mark and unmark options to tell Retrospect what files you want to back up.
Options describes what kind of backup you want to create. We select Normal Backup with Verification on. Verification is good because it goes through after your backup and compares the files on the LTO-4 tape with the original files on the HD. This option adds a second level of comfort when you back up your files.
Now that these steps are taken care of, it’s time to start the backing up process. Notice that Retrospect tells you that it’s ready to start (see callout in FIGURE 6.3). Follow these steps to begin the backup:
Click Backup.
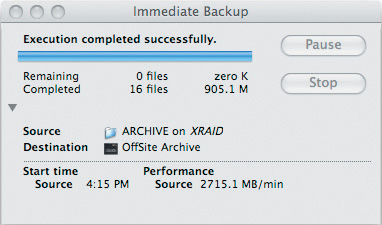
A progress bar pops up that shows how fast you are backing up your data. Once Retrospect starts verifying, it will show you a second progress bar.
Once the backup is complete, you are rewarded with a sound. I recommend changing the default sound in Special > Preferences > Sounds. The default sound sounds like the buzzer when someone loses a game show or when a serious system error occurs.
Retrospect makes the backup process easy and does a great job of securing the backups of your projects (FIGURE 6.4). It’s a good idea to go through this process again, but this time select the destination to an offsite catalog and the media to a new tape.
Note
Retrospect will fill the tape. So, Retrospect handles the file structure and will ask you to insert a new tape when full. Projects can span multiple tapes as necessary.
Once the onsite and offsite archives are complete, we store the tapes in molded turtle cases and keep the onsite tapes in the studio. I keep the offsite at home. This is a good idea in case of theft, fire, or an unexpected Godzilla attack that leaves the studio in shambles.
Our archive solution costs came in around $5,500. Each 800 GB LTO-4 tape costs around $100; it seems to be the best archive method and most cost-effective per GB. The security of this system helps us sleep at night, and having a second copy of each backup at a separate location is a double layer of comfort. The Retrospect software is very user-friendly and has many more options that can be customized for any user.
Let’s say the time has come to restore your project. This process is very similar to the backup process:
In the Immediate tab, click Restore (FIGURE 6.5).
Select the Search for files and folders option (see FIGURE 6.6).
This option is great because it lets you view all the files on a backup set. The next step shows all your backup sets.
Select the backup set you want to restore and click OK (FIGURE 6.7).
Retrospect then lets you select where you want to restore the project files. I created a folder on our RAID named Restore. This process is very similar to what we did in the backup process. By making a restore folder, you know exactly where the files are going to go when the process is finished.
Once you have your restore folder selected, click OK.
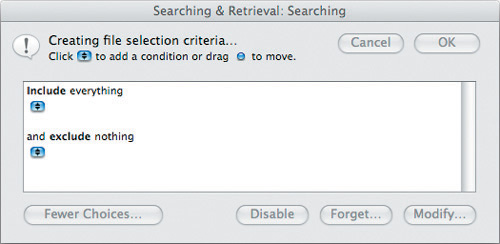
In the next dialog, shown in FIGURE 6.8, you can select what you want to include and exclude. It’s best to include everything and exclude nothing. Click OK to move on.
The Searching & Retrieval dialog appears, which is identical to the backup window except most of the selections are already made for you (FIGURE 6.9). The main concern here is to make sure you select the project you want to restore. Do this by selecting the Files Chosen option and click the Unmark button so you don’t restore terabytes of material you don’t need (FIGURE 6.10).
Open the archive folder, find your project, then highlight the files you want to restore and click the Mark button (FIGURE 6.11).


Archiving is critical now that we don’t have video tape anymore. After a lot of experimentation, this is the system that works the best for us. We are really focused on our archives and also store a backup of the catalog file and client/project spreadsheet on our iDisk as a backup. Believe me, you can rest a lot easier at night knowing your assets are safe.