A good feature of GateIn is that the skin is divided in modules. You can therefore update the skin of just a part of the site, for example the toolbar, the breadcrumbs, the logo, or the footer. The build of the skin is highly complex, so in this recipe, we will describe how to create a skin and how to take an existing skin from a site and import it. We will use the Google toolbar as an example.
A skin is a graphic work, so you will need a graphic tool. The open source software program GIMP is recommended. As an example, we will use the theme of iGoogle simply by connecting to http://www.google.com.
Note
GIMP is the GNU Image Manipulation Program. It is a freely distributed piece of software for tasks such as photo retouching, image composition, and image authoring. It works on many operating systems, and in many languages. For more information visit http://www.gimp.org
Follow these steps to create a new toolbar to add in your portal:
- The first step is to create the skin. The skin can be a Maven project or simply a resource folder to put in the
deploydirectory of the application server as WAR file. This is the scheme of the application:
- The
web.xmlfile is needed for GateIn applications:<web-app xmlns="http://java.sun.com/xml/ns/j2ee" xmlns:xsi="http://www.w3.org/2001/XMLSchema-instance" xsi:schemaLocation="http://java.sun.com/xml/ns/j2ee http://java.sun.com/xml/ns/j2ee/web-app_2_4.xsd" version="2.4"> <display-name>google-skin</display-name> <filter> <filter-name>ResourceRequestFilter</filter-name> <filter-class>org.exoplatform.portal.application.ResourceRequestFilter</filter-class> </filter> <filter-mapping> <filter-name>ResourceRequestFilter</filter-name> <url-pattern>/*</url-pattern> </filter-mapping> <servlet> <servlet-name>GateInServlet</servlet-name> <servlet-class>org.gatein.wci.api.GateInServlet</servlet-class> <load-on-startup>0</load-on-startup> </servlet> <servlet-mapping> <servlet-name>GateInServlet</servlet-name> <url-pattern>/gateinservlet</url-pattern> </servlet-mapping> </web-app> - Here is
gatein-resources.xml:… <portal-skin> <skin-name>GoogleSkin</skin-name> <css-path>/skin/Stylesheet.css</css-path> <css-priority>0</css-priority> </portal-skin> <portlet-skin> <application-name>web</application-name> <portlet-name>BannerPortlet</portlet-name> <skin-name>GoogleSkin</skin-name> <css-path> /skin/webPortlet/webui/component/ UIBannerPortlet/Stylesheet.css </css-path> </portlet-skin> … - Add the
/skin/Stylesheet.css:@import url(/eXoResources/skin/DefaultSkin/webui/component/Stylesheet.css); @import url(/eXoResources/skin/PortletThemes/Stylesheet.css); @import url(GoogleSkin/portal/webui/component/UIPortalApplicationSkin.css);
- Add
/skin/GoogleSkin/portal/webui/component/UIPortalApplicationSkin.css:@import url(/eXoResources/skin/DefaultSkin/portal/webui/component/control/Stylesheet.css); @import url(/eXoResources/skin/DefaultSkin/portal/webui/component/customization/Stylesheet.css); @import url(/eXoResources/skin/DefaultSkin/portal/webui/component/view/Stylesheet.css); @import url(view/Stylesheet.css); body { background: #eeeeee; margin: 0px; padding: 0px; font-family: Tahoma,Verdana, Arial, Helvetica, sans-serif; font-size: 11px; overflow-x: hidden; } a { text-decoration: none; color: black; } - Create the directory
/skin/GoogleSkin/portal/webui/component/view/UIToolbarContainer/background.This directory contains the images used for the
UIToolbarContainer, the tool bar that we are customizing. - Move the following three images from
/eXoResources/skin/DefaultSkin/portal/webui/component/view/UIToolbarContainer/backgroundto a new folder:ToolbarContainer.jpg: Contains all the images used by the toolbar.UserIcon.png: An image for the logged-in user.GateinLogo.jpg: The button used to change the language and the skin. Google doesn't support these features in the toolbar so you will see nothing if this is omitted.
Google shows the personal user image while GateIn, by default, is configured with an image that represents all users, so the
UserIcon.pngwill not be modified. - Modify
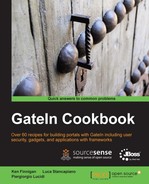
ToolbarContainer.jpgusing GIMP, the image-manipulation tool. In the end, the result will be something like the following screenshot:
Google has only one image in the toolbar, so you must delete the other images shown above to make it similar. The Google image can be taken from: http://ssl.gstatic.com/gb/images/h_bedf916a.png
- ect to www.google.com and take a screenshot of the website as shown in the following screenshot, whatever program your operating system provides with this functionality.

This will be used as the cover when you will choose the skin in GateIn. Name it
GoogleTheme.jpg. - Go to
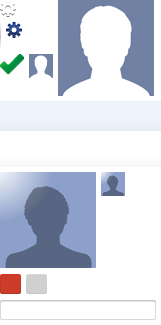
/eXoResources/skin/DefaultSkin/portal/webui/component/customization/UIChangeSkinFormand create a new image namedGoogleSkinForm.jpg. This image must be divided in 4 parts of the same dimension, with respect to theChangeSkinForm.jpgfile but with a different theme. Using GIMP, you must substitute the four skins with the image created earlier. Here is an example of the two images:ChangeSkinForm.jpgon the left andGoogleSkinForm.jpgon the right:
- Now create the style of the
GoogleSkinImagecover in theUIChangeSkinFormpage using the file/eXoResources/skin/DefaultSkin/portal/webui/component/customization/UIChangeSkinForm/Stylesheet.css, and add it under the old cover,SimpleSkinImage:.UIChangeSkinForm .UIItemSelector .TemplateContainer .SimpleSkinImage { margin: auto; width: 329px; height: 204px; background: url('background/ChangeSkinForm.jpg') no-repeat center -615px; cursor: pointer ; } .UIChangeSkinForm .UIItemSelector .TemplateContainer .GoogleSkinImage { margin: auto; width: 329px; height: 204px; background: url('background/GoogleSkinForm.jpg') no-repeat center -615px; cursor: pointer ; } - Now connect to GateIn and change the skin. In the change skin form, you will see the newly created skin:

- Now click on Apply and you will see the following result:

We created a theme similar to iGoogle. The world of web graphics is too complex to demand a plugged import of a theme. It is important to study all the relevant components of the portal and the related CSS files before organizing a migration.
- The Handling different skins in a portlet recipe in Chapter 7, Developing Using Components API