
In this task, we remove the boxes that we no longer need by using tweens. A box can be removed either when it passes the boundary at the bottom of the game or when the player matches the calculation's result.
We will need two additional files for this task. First, add the circle.png file to the images folder. You can find the images from the code bundle.
We also need the
TweenJS library from the CreateJS suite. Download the TweenJS file from the CreateJS code repository (https://github.com/CreateJS/TweenJS/tags) or locate the file from the code bundle.
Copy the tweenjs-0.5.1.min.js file and put it into the vendors folder; the same folder where we put the EaselJS file.
Next, we import the TweenJS library in HTML before we import our game.js file; refer to the following code:
<script src="vendors/tweenjs-0.5.1.min.js"></script>
Let's add the following code for the box-removing logic:
- First, we work on the falling boundary because it is easier. Define where the y position of the boundary is in the setting object:
game.setting = { boundaryY: 320, // existing settings go here. } - Then, we draw the boundary line when
gameViewinitializes:game.gameView = { init: function() { // boundary line var line = new game.RectShape(game.setting.gameWidth, 3, {fillColor:'#600'}); line.y = game.setting.lineY; game.stage.addChild(line); // existing init code goes here. }, } - Once a box falls below the boundary, we will remove it. Add the following function to the game view so that we can remove a specific box:
game.gameView = { removeNumberBox: function(target) { for (var i=0, len=this.numberBoxes.length; i<len; i++) { var box = this.numberBoxes[i]; if (box === target) { this.numberBoxes.splice(i, 1); game.stage.removeChild(box); return; } } }, // existing gameView code goes here }; - Now, after the game loop makes the boxes fall, we loop through each object and remove any boxes that are below the boundary line:
game.gameView = { moveObjects: function() { // existing move objects code goes here. for (var i=0, len=this.numberBoxes.length; i<len; i++) { var box = this.numberBoxes[i]; // remove the box when it is below deadline if (box.y>game.setting.boundaryY) { this.removeNumberBox(box); } } }, // existing gameView code goes here }; - The other case to remove a box is when the player successfully matches a box with the calculation's result. We need to find a box with the given number. Let's add the following function to the
gameViewobject:game.gameView = { findNumberBoxWithValue: function(value) { for (var i=0, len=this.numberBoxes.length; i<len; i++) { var box = this.numberBoxes[i]; if (box.value === value) { return box; } } }, // existing gameView code goes here }; - On every player's input, we will tell the game logic to check the matching. Put the following
checkResultcall inside the input click handlers:control.onclick = function() { // existing code goes here. game.checkResult(); }; - The game logic will ask the game view to find a box with the given value. If this box exists, the game removes the box with a success signal:
game.checkResult = function() { var box = game.gameView.findNumberBoxWithValue(game.calculation.result); if (box) { game.gameView.showCircle(box.x, box.y); game.gameView.removeNumberBox(box); game.calculation.clearInputs(); } }; - When removing tiles, we want to make it clear and obvious. We will show a circle for a few seconds to let players know they did something correctly:
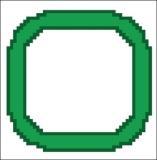
game.gameView = {
  showCircle: function(x, y) {
    var circle = new createjs.Bitmap('images/circle.png'),
    circle.x = x || 0;
    circle.y = y || 0;
    game.stage.addChild(circle);
    createjs.Tween.get(circle).wait(500).to({alpha:0}, 1000).call(function(){
      game.stage.removeChild(circle);
    });
  },
  // existing gameView code goes here
};
The green circle displays and hides for just a short moment. It would be too troublesome to have dedicated logic that keeps track of them. We will use TweenJS to help us here.
TweenJS is similar to the transition in CSS that animates between keyframes, but TweenJS is for a canvas object. We define the target and it animates the properties for us by interpolating the steps in between. It makes it easy to select an EaselJS display object, change its property over time, and execute the logic after the animation is completed.
The following code is an example that selects the circle, sets the x position to 0, and uses a second to animate it to 300 px x position in the bounceIn easing function. The to method takes three arguments. They are the properties object, duration, and easing function, shown as follows:
createjs.Tween.get(circle).to({x:0}, 0).to({x:300}, 1000, Ease.bounceIn);The properties object can be any property changes that are made for the selected display object. The duration is how long it takes to transform from the current state to the target properties. When the duration is 0, it changes to the target properties immediately. The easing function is optional and is used to define how the animation spreads within the duration. By default, the easing function is linear.
In our code based on the green circle, we first show the circle, wait for a while, fade out the circle, and then make the circle remove itself once the animation is over:
createjs.Tween.get(circle).wait(500).to({alpha:0}, 1000).call(function(){
  game.stage.removeChild(circle);
});In EaselJS, we can add a stage as one of the Ticker-listener events directly. The default tick function inside stage will invoke the stage.update method for us, as shown in the following code:
createjs.Ticker.addEventListener("tick", stage);In some cases where we don't have the custom game-loop logic, we can make use of this technique.
The easing function often defines the animation style. We have different choices on how tweening values are calculated. Linear may look boring; however, ease-out ends the interpolation subtly. A bouncing effect may make it look lively. We can set the animation mood with a proper easing function. The following link to the TweenJS documentation lists all the built-in easing functions:
http://www.createjs.com/Docs/TweenJS/classes/Ease.html
The following link to the TweenJS example provides an interaction chart that demonstrates the difference among the easing functions: