
Chapter 15
Microsoft Office PowerPoint 2003
This chapter is penned to provide a foundation to harness the power of creating presentations using Microsoft Office PowerPoint 2003. PowerPoint enables the user to effectively create presentations quickly and efficiently. The reader will learn to create and format slides using various in-built features of PowerPoint. The chapter also covers various tools and features such as animation effects, and transition effects, through which a presentation can be greatly enhanced. The chapter concludes by discussing how to pack and print a PowerPoint presentation.
After reading this chapter, you will be able to understand:
How a good presentation communicates effectively and efficiently to convince, motivate, inspire, and educate the audience
The steps required for creating a PowerPoint presentation from scratch using AutoContent Wizard, Design Template, and so on
The different types of screen layouts and views provided by PowerPoint
How PowerPoint presentation is created with the help of Design Templates and Masters for consistent appearance of the slides
How PowerPoint enables AutoLayouts to create slides using placeholders for text and WordArt and Clip Art to insert graphics for visual impact and emphasis on the presentation
How multimedia effects can be added to make the presentation more interactive and interesting
The different options of printing documents offered by PowerPoint
15.1 INTRODUCTION
In today's highly competitive world, representing ideas effectively has become the need of the hour. No matter how good the product or for that matter a project is, if the idea of the project or the product is not communicated effectively and efficiently, failure is guaranteed. One is also better heard if the ideas are presented stylistically. One of the best ways of expressing the ideas is visual images, which includes usage of graphics and pictures. Graphics, when used to convey ideas, expression, or thoughts are known as presentation graphics or business graphics. A good presentation can truly convince, motivate, inspire, and educate its audience.
THINGS TO REMEMBER
Features of PowerPoint 2003
PowerPoint 2003 combines slides, outlines, and notes into one view which makes it easy to add slides, text, notes, and navigate.
In PowerPoint, text is automatically resized to fit into a place holder. Slides automatically resize to fit the display resolution and window.
You can create tables directly in PowerPoint 2003 instead of importing from Word or Excel.
You can create mini-presentations within a single file that are tailored to different audiences.
The new Slide Show menu consolidates everything you need to deliver presentations electronically.
PowerPoint 2003 provides with every output options: slides, colour and black-and-white, speaker's notes, and on-screen electronic presentations.
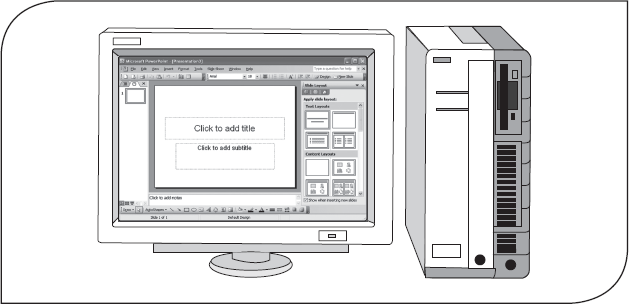
Microsoft Office PowerPoint 2003 is a powerful, yet easy-to-use presentation package which is a part of Microsoft Office 2003 suite of products. Its primary purpose is to help you design professional-style presentations quickly and easily. PowerPoint offers the tools to create a basic presentation and to enhance and customize it to meet its goal. The tri-pane feature of PowerPoint 2003 allows you to view the slides, outline, and notes simultaneously,so that you can easily organize the information to present in the slides.
15.2 STARTING MICROSOFT OFFICE POWERPOINT 2003
To open Microsoft PowerPoint, perform any one of the following steps:
- Double-click the Microsoft PowerPoint icon located on the desktop.
- Click start, point to All Programs, then point to Microsoft Office, and then select Microsoft Office PowerPoint 2003 (Figure 15.1).
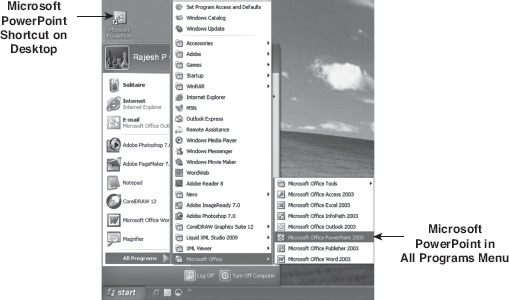
Figure 15.1 Starting Microsoft PowerPoint
15.2.1 Microsoft PowerPoint Environment
When Microsoft PowerPoint is opened, the main screen of the program appears. This main window contains many parts; these parts are described in detail below (Figure 15.2).
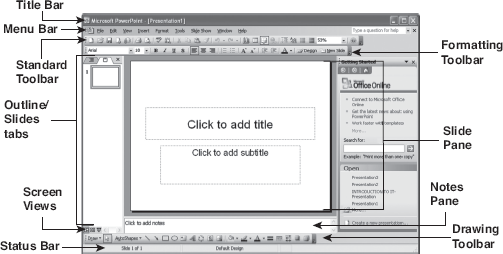
Figure 15.2 Main Microsoft PowerPoint Window
The title bar is located at the very top of the PowerPoint window and it displays the name of the application and active presentation. Below this bar is the menu bar, which contains different menus that control all options, functions, and commands for the entire Microsoft PowerPoint application. By default, Microsoft Office PowerPoint 2003 contains nine menus, each of which has an associated pull-down menu. For example, the File menu contains commands to open, create, and print a presentation. Generally, a toolbar is positioned just below the menu bar. Toolbar contains command buttons that provide single-click entry to carry out many tasks. By default, Standard and Formatting toolbars are displayed in the PowerPoint environment. Additional toolbars like Drawing and Picture toolbars can be added by right-clicking on the menu bar and selecting the desired toolbar(s) from the pop-up menu, as shown in Figure 15.3.
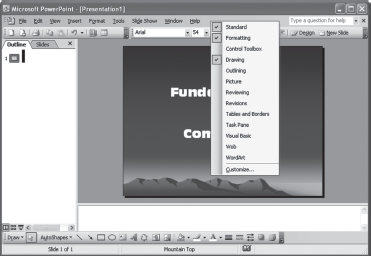
Figure 15.3 Various Toolbars
Outline/Slides Tabs: Below the toolbars, on the left side Outline/Slides tabs are located. They are used to organize and develop content for the presentation, move slides from one position to another, and edit titles and body text.
Screen Views: PowerPoint provides a range of screen views for creating a presentation. The different screen views available are Normal, Slide Sorter, and Slide Show. These views give you the opportunity to modify and develop your presentation as desired. You can select the desired view by clicking the button at the bottom of the page (Figure 15.4).

Figure 15.4 Different view Buttons
Slide Pane: In this pane, you can see the way the slide appears, with text, design elements, and graphics. You can also add or edit text, hyperlinks, graphics, movies, sounds, and animations to individual slides in this pane.
Notes Pane: Below the Slide pane is the Notes pane. This pane lets you add Speaker Notes to your presentation. These notes are kept by speaker for reference. These are typically a smaller version of the slides along with some notes.
15.3 WORKING WITH POWERPOINT 2003
In this section, you will learn the steps required to produce a PowerPoint presentation from scratch. These include:
- Creating a new presentation
- Opening an existing presentation
- Saving a presentation
- Closing a presentation
15.3.1 Creating a New Presentation
Whenever you start PowerPoint, it opens a new blank presentation and the Getting Started task pane, which enables to access online help and content, open existing presentations and create a new presentation. To create a new presentation, click Create a new presentation on the Getting Started task pane, to display New Presentation task pane (see Figure 15.5). A new presentation can be created using the AutoContent wizard, Design Template, and Blank presentation.
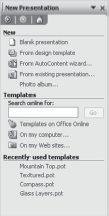
Figure 15.5 Creating a New Presentation
Using the AutoContent Wizard: The AutoContent Wizard helps you to create and structure the content of presentation in a clear and logical way. It helps in creating a presentation by leading you through some basic steps. The wizard then uses answers to automatically layout and format the presentation. PowerPoint 2003 then selects the best style and built-in outline to suit the presentation. This wizard helps to create a presentation quickly and easily and is very helpful for new users. To create a presentation using this wizard, follow the steps given below:
- Select From AutoContent wizard from the New Presentation task pane to display the AutoContent Wizard dialog box. Click Next to continue to the next step (Figure 15.6).
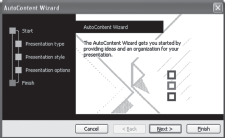
Figure 15.6 Step 1: of AutoContent Wizar
- The Wizard displays various categories of presentations, such as All, General, Corporate, Projects, and Sales/Marketing. The box adjacent to these categories displays the available presentations for the category selected. Select the desired presentation and click Next (Figure 15.7).
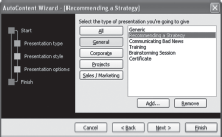
Figure 15.7 Step 2: of AutoContent Wizard
- The next decision is to select the output type. You can present the slide show on an overhead projector, computer screen, and so on. Select the desired output type and click Next (Figure 15.8).
- Enter the presentation title, which you want to display in each slide inside the Presentation title box. You can also include information such as the company name or the name of your department in the Footer box. There are two checkboxes as well. One includes a date on which the presentation was last updated and the other adds the slide number. Select the desired option and click Next (Figure 15.9).
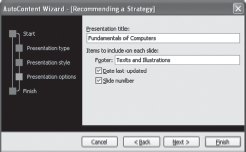
Figure 15.9 Step 4: of AutoContent Wizard
- Click Finish to create the presentation (Figure 15.10).
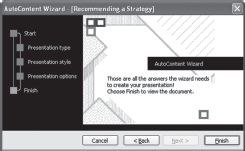
Figure 15.10 Step 5: of AutoContent Wizard
- A presentation is created as shown in Figure 15.11.
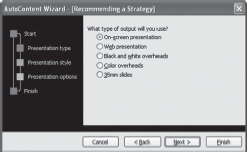
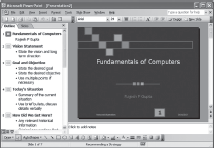
Figure 15.11 A Sample Presentation
Using Design Template: PowerPoint provides many built-in slide sets (templates) with different backgrounds and text formatting to create a presentation. A design template includes pre-formatted layouts, fonts, and colours, which blend together to give a consistent look to the presentation.
If you choose Design Template, a new presentation is displayed using the design selected by the user,consisting of a single slide. This option allows you to create a presentation, maintaining a consistent design scheme like layouts, colours, fonts, and so on. To use the Design Template, follow the steps given below:
- Select From design template from the New Presentation task pane to display Slide Design task pane, which shows various design templates (Figure 15.12).
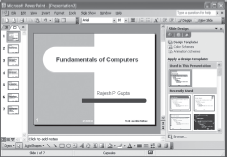
Figure 15.12 Design Templates
- Choose the template for the slide from Apply a design template section. Note that Microsoft PowerPoint 2003 contains readymade design templates each having its own layout, font styles, and font colours, and so on. Figure 15.13 illustrates the slide with the selected design template.
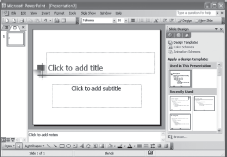
Figure 15.13 A Sample Slide
Using Blank Presentation: The most basic method of creating a slide show presentation is by using Blank Presentation. This method is used to start the whole process of creating presentation from scratch. In other words, it includes no preset design, colour, or content suggestion. To use the Blank Presentation, follow the steps given below:
- Select Blank presentation from the New Presentation task pane to display a new blank slide and a Slide Layout task pane (see Figure 15.14).
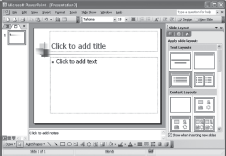
Figure 15.14 A Blank Presentation
- Choose the layout of the slide. Note that PowerPoint 2003 includes 27 different types of layouts, known as AutoLayouts. Figure 15.15 illustrates the slide with selected layout.
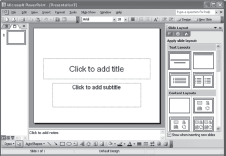
Figure 15.15 A Blank Presentation
15.3.2 Opening a Presentation
To open an existing presentation, follow any of the steps given below:
- Select Open from the File menu to display the Open dialog box. You can also open a presentation by clicking on the Open button (
 ) on the Standard toolbar. The Open dialog box allows you to specify the name of the desired file in the File name list box. If the desired file is not in the current location, you can locate it by navigating through Look in list box. Once the file is found, select the file and click the Open button.
 - PowerPoint presentation can also be opened by double-clicking the presentation file icon, if it exists (Figure 15.16).
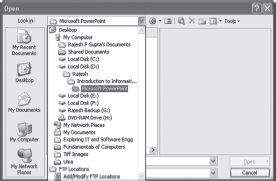
Figure 15.16 Open Dialog Box
15.3.3 Saving a Presentation
Once a presentation is created, you can start typing the text, inserting graphics, animations, charts, and so on. When finished, you must save the presentation for future references. To save the presentation, Microsoft PowerPoint provides two menu options, namely Save and Save As. If you are working on an untitled presentation which has never been saved, then using any of the options (Save and Save As ) will have the same effect, that is, it displays a Save As dialog box using which you can save the PowerPoint file at the desired location (Figure 15.17).
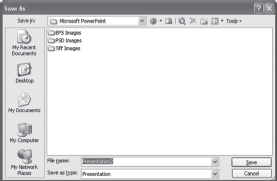
Figure 15.17 Save As Dialog Box
Once you have saved the new presentation, you can use the Save option to update changes made to a file, while the Save As option can be used to make the multiple copies of the same file.
Note: By default, Microsoft PowerPoint presentation file is saved with .PPT extension. Although it can also be saved in other file formats like .PPS, .BMP, .GIF, and .HTML.
Setting the Default Directory and AutoSave Property: PowerPoint 2003 allows to change the default location for saving the files as well as to save your files automatically. The files are saved automatically by enabling the AutoRecover feature. This feature helps in protecting your work even after power failure or when you have forgotten to save your file. To change the default location of your file and save your file using AutoRecover feature, follow the steps given below:
- Select Options from the Tools menu to display the Options dialog box (Figure 15.18).
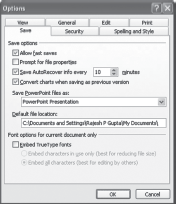
Figure 15.18 Options Dialog Box
- Select Save tab and specify the location of default directory in the Default file location text box.
- Click on the Save AutoRecover info checkbox and specify the time interval after which the file will be automatically saved. Click OK.
15.3.4 Closing a Presentation
After finishing all the work in PowerPoint, you may want to close the presentation. For this, follow any of the steps given below:
- Select Close from File menu.
- Click on the Close Window button at the upper-right corner of the PowerPoint window to close the current presentation. Note that there are two close buttons. One is located at the top of the application window, which closes the PowerPoint application, while the second (lower) one is present on the presentation which closes only the current file (Figure 15.19).
Figure 15.19 Closing a Presentation
Note: If a user makes changes to a file and has not saved those changes, PowerPoint will ask whether to save the changes before closing the file.
15.4 WORKING WITH DIFFERENT VIEWS
PowerPoint provides different types of screen layouts for constructing presentation in addition to the Slide Show. View is a way in which one can see and work with the presentation and slides. User can select the page view by clicking the screen view buttons on the left-hand side at the bottom of the window.
The three PowerPoint views are: Normal View, Slide Sorter View, and Slide Show View.
Normal View: The default view in PowerPoint 2003 is the Normal View, which makes the most commonly used components of a presentation easily accessible to the user. This view contains three working areas: slide and outline tabs on the left, the slide pane on the right, and notes pane at the bottom.
Normal view enables to see various aspects of the presentation simultaneously in two different tabs namely, Outline tab and Slides tab.
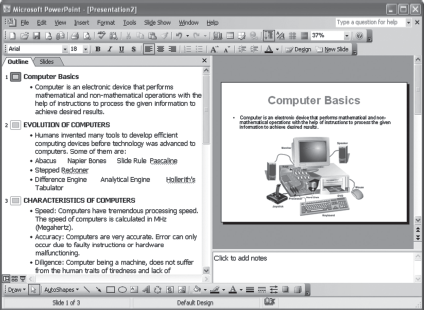
- Outline Tab: This tab enables a user to write and edit the content of presentation. When the text is selected in the outline tab, the buttons for working with outline become available on the Standard and Formatting toolbars. One can use these buttons to organize the presentation like increasing and decreasing the text indents, expanding and reducing the content, etc (Figure 15.20).
- Slides Tab: This tab displays the slides as thumbnail-sized images. This tab is helpful for navigating through presentation, seeing the effects of design changes, adding, deleting, or rearranging slides (Figure 15.21).
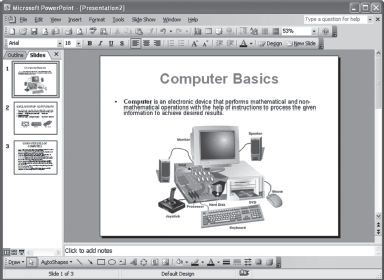
Figure 15.21 Slides Tab
Slide Sorter View: This view option displays all the slides in a presentation as thumbnails. In simple terms, all the slides in the presentation are displayed on the screen at the same time in a miniature form. This view helps user to add, delete, and rearrange the slides. Also, transition effects can be added for moving from one slide to another in a convenient manner. Thus, this view acts like a preview tool (Figure 15.22).
Figure 15.22 Slide Sorter View
Slide Show View: Generally, this view is used when you want to deliver a presentation. This view option allows you to view the slides (full screen), as they would appear in a slide show (Figure 15.23).
Figure 15.23 Slide Show View
15.5 DESIGNING PRESENTATION
A presentation is created using the slides, which contains text, graphics, animations,and so on. The slides are automatically created when a presentation is designed through the AutoContent Wizard or Blank Presentation. Slides can also be inserted in a presentation, if required.
THINGS TO REMEMBER
Template
A template is a presentation containing Power-Point masters with custom formatting, fonts, a colour scheme, placeholder for text, graphics, animations, and so on. PowerPoint offers various pre-designed templates to helpyou develop powerful yet simple presentations. With custom template, presentations will have a consistent look and feel, and you won’t have to customize each presentation layout separately.
PowerPoint is designed in a way to give a consistent appearance to your slides. There are two ways in PowerPoint, which help you to choose the look of your slides: design template and masters.
15.5.1 Choosing Design Template
Design templates contain colour schemes, slide and notes masters with custom formatting, and fonts, all designed to create a desired look for your presentation. When you apply a design template to your presentation, the slide master and colour scheme of the new template replaces the slide master and colour scheme of the original presentation. After you apply a design template, each slide that you add has the same custom look. PowerPoint comes with a wide variety of professionally designed templates. In addition, you can create your own templates. If you create a special look for one of your presentations, you can save it as a template. To apply a different design to a presentation, open the presentation and follow the steps given below:
- Select Slide Design from the Format menu or click Design button on the Formatting toolbar, to display the Slide Design task pane (Figure 15.24)
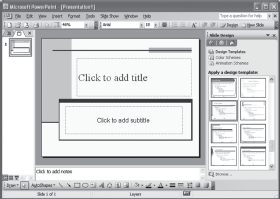
Figure 15.24 Apply Design Template Dialog Box
- Click the design template that best suits your presentation. Note that the selected design template can be applied to all slides or the selected slides in a presentation.
15.5.2 Using Masters
Masters in PowerPoint are used to control many facets of the slides such as backgrounds, font typeface,font size, colours, bullets and locations for all main components, tabs, and indents. PowerPoint has three masters, namely, Slide Master, Notes Master, and Handout Master.
Slide Master: PowerPoint automatically assigns a slide master to every presentation. The slide master allows you to customize the look of each slide and also ensures consistency across your presentation. In the slide master, you can change fonts, bullets, and header and footer information. Use the slide master to add a picture, change the background, adjust the size of the placeholders, and change the font style, size, and colour (Figure 15.25).
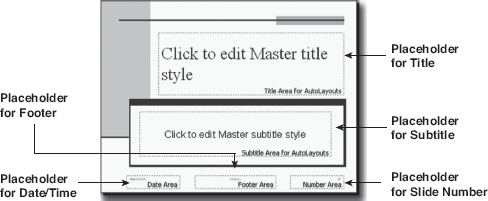
Figure 15.25 Slide Master
To change the formatting in the slide master, select Master from the View menu and choose Slide Master.
Click the appropriate placeholder to edit Master text styles and apply formatting from the Formatting toolbar. For example, if you want all first-level bullet styles in the presentation to appear in 28-point Tahoma, click the text Click to edit Master text style and set the font to Tahoma, 28-point. Using the Format AutoShape dialog box, you can draw a thick line around the box, change the line colour, fill colour in the box, set the line thickness and style, position the box in the slide, etc. To display the Format AutoShape dialog box, select the placeholder and double-click it (Figure 15.26).
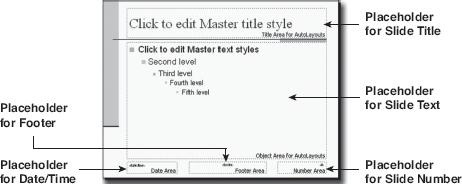
Figure 15.26 Using Format Text Box
Notes Master: PowerPoint helps to create notes that will stay with the presentation. This feature provides an area for the speaker notes, along with a reduced picture of the slide. To view the notes master, select Master from the View menu and choose Notes Master. In Notes Master, you can add bullets and page numbers, resize slides or the text placeholders on slides, or change fonts. You can also modify the style of the text that will appear in the printouts of your notes (Figure 15.27).
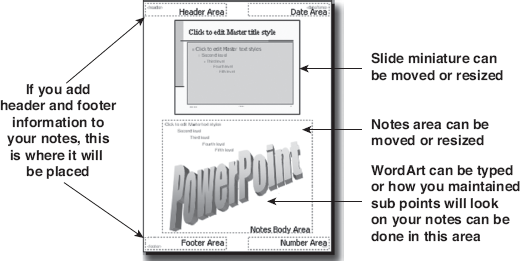
Figure 15.27 Notes Master
Handout Master: In handout master, you can add images, text, and colour to your handouts. In addition, you can add header and footer to the slides and also view these slides in different ways, such as one, two, three, four, six, nine, the outline, and the layout view (see Figure 15.28). To view the handout master, select Master from the View menu and choose Handout Master. The information added in the handout master is not visible while working with the presentation, but will be available when it is printed (Figure 15.28).
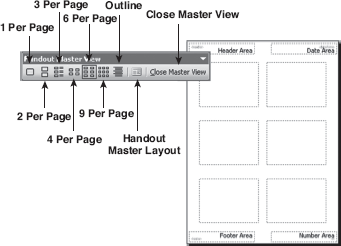
Figure 15.28 Handout Master
15.5.3 Working with Slides
In the previous section, we discussed how to create and save a PowerPoint presentation. Now let us learn how to insert, copy, delete, and navigate between slides. Apart from these activities, you will also learn how to work with text, format text, perform undo and redo operations, make lists, and insert headers and footers.
Inserting and Deleting Slides: Sometimes you may want to add new slides to your presentation. Slides can be added in all views except the Slide Show view. To insert slide, select New Slide from the Insert menu, or click the New Slide button on the Formatting toolbar. This displays the Slide Layout task pane from which you can choose the desired layout.
You can also remove a slide from the presentation. To delete slide, select the slide and follow any of the steps given below:
- Select Delete Slide from the Edit menu. To delete multiple slides, choose Slide Sorter view, hold down the Ctrl key to select multiple slides, and then click Delete Slide
- Right-click on the slide and perform the cut option. This option works only in case of Slide Sorter view.
Duplicating Slides: PowerPoint 2003 allows you to easily make copies of one slide. This may be required if you want to use the same data in more than one slide. Note that when duplication is done, the layout is also copied. To duplicate slide, follow the steps given below:
- Select the slide or slides that you want to duplicate.
- Select Duplicate Slide from the Insert menu. To duplicate multiple slides, click on one slide and press Shift (for selecting contiguous slides) or Ctrl (for selecting non-continuous slides) to select multiple slides.
Navigating between Slides: In PowerPoint, you can navigate to the next and previous slides by following any of the three view options: Normal, Slide Sorter, and Slide Show. To navigate to the next slide in the Normal view, follow any of the steps given below:
- Click the Next Slide icon (
 ) on the vertical scrollbar.
 - Click the next slide number.
To view the next slide in Slide Show view, right-click on the slide and select Next from the pop-up menu that appears (Figure 15.29).
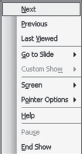
Figure 15.29 Pop-up Menu
To navigate to previous slide in Normal view, follow any of the steps given below:
- Click the Previous Slide (
 ) icon on the vertical scrollbar.
 - Click the previous slide number.
To view the previous slide in the Slide Show view, right-click on the slide and select Previous from the pop-up menu. Note that to move to a specific slide in Slide Sorter view, double-click the desired slide number, which displays the slide in the Normal view.
Numbering Slides: In PowerPoint, you can easily add numbers to the slides. Numbering the slides enables to locate or reference a particular slide quickly. You can insert slide numbers in a particular slide or in all slides of a presentation. To insert slide numbers, follow the steps given below:
- Select Slide Number from the Insert menu to display the Header and Footer dialog box (Figure 15.30).
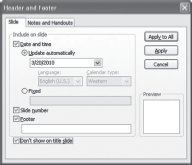
Figure 15.30 Header and Footer Dialog Box
- Select the Slide number checkbox to display the slide numbers on the slides.
- Select Apply to insert slide number in the current slide, or Apply to All to insert the numbering in all slides.
Changing Background: You can change the appearance of your slide background by changing its colour, shade, pattern, or texture. PowerPoint contains a number of pre-defined backgrounds or, if needed, you can create your own background. Note that backgrounds can be applied to individual slides or to the whole presentation. To change the background, select Background from the Format menu, .to display the Background dialog box (Figure 15.31).
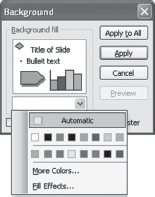
Figure 15.31 Bakcground Dialog Box
Click on the colour drop-down box, which contains following options:
- Colour scheme, which contains eight colours below Automatic to change the colour of the slide(s).
- More Colors option to select colour from a range of colours.
- Fill Effects to provide Gradient, Texture, Pattern, or Picture effects to the slide(s) (Figure 15.32).

Figure 15.32 Fill Effects
After you have made your selection, select Apply to apply the changes to the current slide, or click Apply to All to apply the changes to all slides.
15.5.4 Working with Text
There are a number of ways in which text can be added into the slides. Text can be added using text placeholder, text box, an AutoShape, and WordArt.
Adding Text using Placeholder: As stated earlier, PowerPoint includes 27 types of AutoLayouts for creating slides. Many of these layouts contain text placeholders for titles, body text, and bulleted lists. To add text in placeholder, click in the placeholder and type the text. You can change the size and position of a text placeholder or apply a different AutoLayout to an existing slide, at any time while creating a presentation (Figure 15.33).

Figure 15.33 Inserting Text using Placeholder
Adding Text using Text Box: Text in slides can also be added through the use of text box. The text box is available on the Drawing toolbar. Note that if the Drawing toolbar is not visible, then right-click anywhere on the menu bar and select Drawing from the pop-up menu. To add text in the slide using text box, follow the steps given below:
- Select the slide where you want to add a text box.
- Click Text Box button (
 ) on the Drawing toolbar.
 - Select the area in the slide where you want to place the text box and start writing the text in the text box (Figure 15.34).
Figure 15.34 Inserting Text using Text Box
Adding Text to an AutoShape: Text can also be added in the AutoShape. AutoShapes contain several categories of shapes, including lines, basic shapes, flowchart elements, stars and banners, and callouts that you can use in your presentation. To add text in AutoShape, follow the steps given below:
- Select the AutoShapes option from the Drawing toolbar.
- Choose a shape from the list of options available. Note that the chosen shape has a background colour, which makes it invisible.
- To add text, right-click the shape and click Add Text(Figure 15.35).
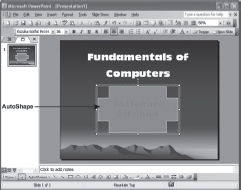
Figure 15.35 Inserting Text into AutoShape
15.5.5 Formatting the Text
As you enter and edit text, you can change its appearance to add emphasis and make the presentation easier to read. This is known as formatting.
It is the process of determining how the typed text will appear on a printed page. Formatting is applied by altering the appearance of text by setting the typeface (font), size, line spacing, and colour. Formatting can be done by using the Formatting toolbar or by using the Format menu. To format text, follow the steps given below:
- Select the text to be formatted.
- Use buttons on the Formatting toolbar to format the selected text. Some of the buttons used in formatting text are given in Table 15.1.
Table 15.1 Formatting Text
| Command | Button | Description |
|---|---|---|
| Font | Changes the font of the selected text | |
| Font Size | Changes the size of the selected text | |
| Bold | Bolds the selected text | |
| Italics | Italicizes the selected text | |
| Underline | Underlines the selected text | |
| Font Color | Changes font colour of the selected text |
Text can also be formatted using the Font dialog box. For doing this, follow the steps given below:
- Select the text to be formatted.
- Select Font from the Format menu to display the Font dialog box (Figure 15.36).
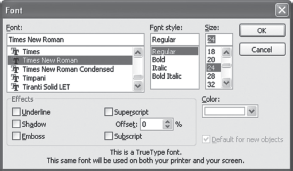
Figure 15.36 Font Dialog Box
- In this dialog box, the font, font style, and text size can be specified. This dialog box also allows you to apply underline, colour, and other effects to the selected text.
- Once formatting is complete, click OK to apply the formatting changes to the selected text.
Aligning Text and Paragraph Indenting: Alignment and indentation operations are a part of paragraph formatting. These operations are performed to give a well-defined structure to the presentation. This gives the slide a professional look. To align or indent a paragraph, follow the steps given below:
- Select the paragraph to be aligned or indented.
- Use buttons on the Formatting toolbar to align or indent the paragraph. Some of the buttons used in aligning or indenting paragraph are given in Table 15.2.
Table 15.2 Paragraph Formatting
| Command | Button | Description |
|---|---|---|
| Align Left | Left aligns the paragraph or selected text | |
| Center | Centre aligns the paragraph or selected text | |
| Align Right | Right aligns the paragraph or the selected text | |
| Decrease Indent | Decreases the indent of the selected paragraph | |
| Increase Indent | Increases the indent of the selected paragraph |
Note: Various other options for formatting the text and paragraph are available in the Format menu.
15.5.6 Working with Graphics
In PowerPoint 2003, graphical elements can help you create eye-catching slides for a presentation. Graphics are frequently used with text to add emphasis and visual impact. PowerPoint 2003 provides you the option of adding AutoShapes, WordArt, and Clip Art.
AutoShapes: Microsoft PowerPoint comes with a set of readymade AutoShapes containing several categories of shapes, including lines, basic shapes, flowchart elements, stars and banners, and callouts that you can use in your presentations. They allow you to draw more complicated shapes in your slides quickly and more accurately. You can resize, rotate, flip, colour, and combine the shapes also. To use AutoShapes, follow any of the steps given below:
- Select Picture from the Insert menu and click AutoShapes to display AutoShapes toolbar.
- Select Toolbars from the View menu and click Drawing to display the Drawing toolbar that contains the AutoShapes menu (Figure 15.37).
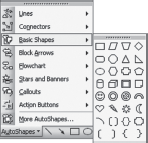
Figure 15.37 Autoshapes
Table 15.3 lists all the available buttons on the AutoShapes toolbar.
Table 15.3 AutoShapes Toolbar Options
| Command | Button | Description |
|---|---|---|
| Lines | Draws a straight line, arrow, double arrow, curve, freeform, or scribble | |
| Connectors | Draws connector lines to connect objects. There are three connector lines: straight, elbow, and curved | |
| Basic Shapes | Draws two- and three-dimensional shapes, icons, braces, and brackets | |
| Block Arrows | Draws block arrows from many types of two- and three-dimensional arrows | |
| Flowchart | Draws flowchart symbols | |
| Stars and Banners | Draws stars, bursts, banners, and scrolls | |
| Callouts | Draws callouts, which are used to label some text on the document | |
| Action Buttons | Readymade buttons that appear pressed in when you click them during a slide show | |
| More AutoShapes | Used to choose more available AutoShapes |
Now, to draw AutoShapes in the presentation, follow the steps given below:
- Select the required shape on the toolbar. Use the drag-and-drop method to draw the shape in a slide (Figure 15.38).
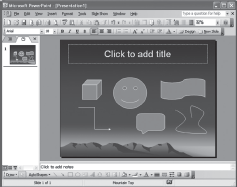
Figure 15.38 Inserting AutoShaps
- When the shape has been created, you can resize it to fit your requirement. To resize AutoShape, use the sizing handle and other adjustments, which are specific to each shape. AutoShape can also be rotated. It is same as discussed in Microsoft Word.
Formatting Shapes: PowerPoint allows you to quickly and efficiently change the look of the AutoShape. There are several options available, which can be used to change the AutoShape appearance. To format the AutoShape, right-click on the AutoShape and select Format AutoShape from the shortcut menu. This displays the Format AutoShape dialog box, which contains six tabs to format the AutoShape. The options available under these tabs are listed in Table 15.4.
Table 15.4 Formatting Shapes
| Tabs | Description |
|---|---|
| Colors and Lines | Allows you to choose the fill colour, line colour, and style for the shape |
| Size | Allows you to determine the size and scale of the image |
| Position | Allows you to control the position of the AutoShape on the slide |
| Picture | Allows you to crop and adjust the colour of the AutoShape |
| Text Box | Allows you to set the text alignment and internal margin of the text inside the AutoShape |
| Web | Allows you to enter text that will be displayed in place of graphics while the graphics is being loaded by the browser |
Word Art: PowerPoint 2003's WordArt lets you take plain text and add some vigour to a presentation. Using WordArt you can create shadowed, skewed, rotated, and stretched text, as well as text that can be integrated into pre-defined shapes. It helps you to easily create banners, seals, and logos. To insert a WordArt, follow the steps given below:
- Click Insert WordArt button (
 ) on the Drawing toolbar. Alternatively, select Picture from the Insert menu, and then select WordArt. When you perform any of these actions, the WordArt Gallery dialog box is displayed (Figure 15.39).
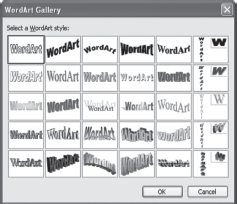
Figure 15.39 WordArt Gallery Dialog Box
- Select a WordArt style to apply to the slide and click OK to close the dialog box. This opens Edit WordArt Text dialog box, where text is entered for the chosen style (Figure 15.40).
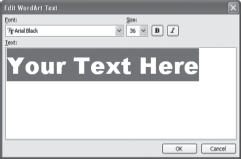
Figure 15.40 Edit WordArt Text Dialog Box
- Select a font by clicking the down arrow next to the Font list. The font size can also be selected by clicking the down arrow next to the Size box. To make the text bold, click the (
 ) button, and to make the text italics, click the (
 ) button.
 - When text has been entered and font selection made, click OK. The WordArt now appears in the slide with the selection handles visible on it. You can resize, move, and rotate the WordArt by using these selection handles (Figure 15.41).
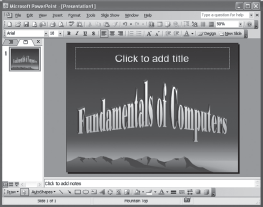
Figure 15.41 WordArt in a Slide
To add or change effects to the text, use the buttons on the WordArt and Drawing toolbars. The WordArt toolbar appears when you click the WordArt special text. The options available under the WordArt toolbar are the same as discussed in Chapter 13.
Drawing Toolbar: The Drawing toolbar is used to change and enhance the drawing objects with colours, patterns, borders, and other effects. The options included in the Drawing toolbar have also been discussed in Chapter 13.
Pictures: Pictures are used in slides to enhance its readability and understandability of the presentation. These are bitmaps, scanned pictures, photographs, and Clip Art. You can use any image-editing software to create photographs, line drawings, and other graphics, as long as you can save the file in a format that PowerPoint 2003 supports. You can insert a picture from a file or Clip Art in the same manner as discussed in Chapter 13.
15.5.7 Adding Multimedia
A presentation can be made interactive and interesting by adding multimedia effects, which helps in capturing audience's attention, as multimedia content can often communicate more information than a slide, which contains only few sentences. You can add multimedia effects such as animations, video, and sound effects to the slides.
Adding Animations: Animation effects are added to grab the audience's attention as well as to reinforce some important point that needs to be highlighted. Animation can be in terms of special sound or visual effects, which are added to the text or other objects such as a chart or picture. To add animation effects to a slide or entire presentation, follow the steps given below:
- Click on the placeholder that contains the text or graphic that you wish to animate.
- Select Animation Schemes from the Slide Show menu to display Slide Design task pane.
- Select the desired animation scheme from the Apply to selected slides section. The selected animation scheme is applied to the current slide.
- To apply the selected animation scheme to all slides, select Apply to All Slides.
Custom animations offer more control over the animation. You can choose the order of the slides on which animation is applied as well as decide the direction the animation should travel in, apply a sound to the animation, and decide how the text appears in the slides. To add custom animation, follow the steps given below:
- Select the text or graphic to animate.
- Right-click text or graphic and select Custom Animation from the shortcut menu, or select Custom Animation from the Slide Show menu. This displays the Custom Animation task pane (Figure 15.42).
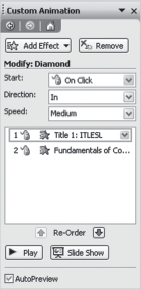
Figure 15.42 Custom Animation Dialog Box
- Select various effects from Add Effect to assign animation to the objects.
- Once the effects have been applied, they can also be modified by setting various options in the Modify section.
Adding Transition: Transition effects are used to insert effects between slides. They are also used to indicate a new section of a presentation or to emphasize a certain slide. You can choose from a variety of transitions, which are present in PowerPoint 2003. Transition effects can be added in the Slide or Slide Sorter view. To add transition effects, follow the steps given below:
- Select Slide Transition from the Slide Show menu to display the Slide Transition task pane (Figure 15.43).
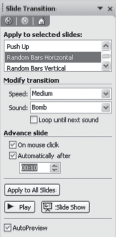
Figure 15.43 Slide Transition Task Pane
- Select the desired transition from the Apply to selected slides section, to apply the transition to the displayed slide (Figure 15.44).
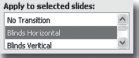
Figure 15.44 Selecting Trabsition
- Select various options under Modify transition section to change the speed and sound of the transition.
Note: Transition effects are the style of moving from one slide to the next, while animation effects are the style used to display the information on each slide.
15.5.8 Running Slides
After creating slides, working with text and graphics, and adding transition and animation effects to the slides, the next thing is to view all the slides collectively as a presentation. PowerPoint 2003 provides a number of ways to view and deliver presentations so that they are well designed and look professional. You can use the Slide Show to review a presentation before printing it or to prepare to show it electronically. To view the slide show, perform any of the steps given below:
- Select Slide Show from the View menu.
- Select View Show from the Slide Show menu.
- Click on the Slide Show view button (
 ) at the bottom-left of the screen (Figure 15.45).
Figure 15.45 Running Slide Show
While in the slide show, right-click anywhere on the screen to display a pop-up menu containing number of options. Some of the important options are listed in Table 15.5.
Table 15.5 Slide Show Buttons
| Options | Description |
|---|---|
| Next | Used to move to the nest side |
| Previous | Used to move to the previous side |
| Last Viewed | Used to move to the last viewed slide in the presentation |
| Go to Slide | Used to move to spicific slide in the presentation |
| Pointer Options | Used to add information using pen |
| Help | Used to move to the Slide Show Help |
| End Show | Used to move to the slide show |
Highlighting Parts of the Slide Show: You can use the highlighting option while you are giving the presentation to add emphasis to important information. To highlight a slide during a slide show, follow the steps given below:
- Select View Show from the Slide Show menu.
- Right-click in the slide and select Highlighter from the Pointer Options.
- Click and hold the highlighter on the slide. Drag the highlighter around the area on the slide you want to highlight until a line encircles the text.
- Right-click in the slide and select Arrow from the Pointer Options to change the highlighter back to the mouse pointer (Figure 15.46).
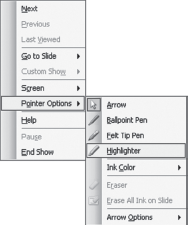
Figure 15.46 Pointer Options
Setting Time between Slides: You can insert time between the slides in the slide show. This is required when there is some narration over the slides, or there is some graphical representation, which needs proper explanation.
If you do not want to manually move through a slide show, there are two ways you can set the length of time for which the slide appears on the screen.
- You can set a time manually for each slide, and then run the slide show and view the timings you set.
- You can use the rehearsal feature. Here you can record timings automatically as you rehearse. You can also adjust the timings you have already set and then rehearse the new ones. To add time using this feature, follow the steps given below:
- Select Rehearse Timings from the Slide Show menu. This starts the slide show with a Rehearsal toolbar that appears at the corner of the screen, as shown in Figure 15.47.
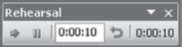
Figure 15.47 Rehearsal Toolbar
- The timer appears in the upperleft-hand corner of the slide and begins to count down the seconds. The white box refers to the timing for each slide. The other timer refers to the total length of the slide show.
- If you want to repeat the rehearsal of a slide, click the Repeat button (
 ) on the Rehearsal toolbar. The current slide repeats and the timing for it starts again.
 - Rehearse your presentation until it is finished. After the presentation is complete, a message box appears. It displays the final running time and presents a message, as shown in Figure 15.48.

Figure 15.48 Message Box
- Click Yes to record the new slide timings or No to return to the PowerPoint window.
15.5.9 Package for CD
Presentation can be created both for business and for professional use. For example, you may create a presentation, which is to be delivered at some conference. To deliver a presentation only the presentation file is needed. In case of a small presentation, you can easily carry the file in one floppy. However, this approach may not work well for larger presentations especially one with lots of graphics. PowerPoint contains a useful feature called Package for CD, which solves the above problem and also allows you to view the presentation file on a computer that does not have the PowerPoint installed. To use this feature, follow the steps given below:
- Select Package for CD from the File menu to display the Package for CD dialog box (Figure 15.49).

Figure 15.49 Package for CD Dialog Box
- Type the name for your folder or CD in Name the CD text box.
- Select Add Files to include more than one file from your computer.
- Select Options to display Options dialog box. This dialog box has the following options (Figure 15.50):
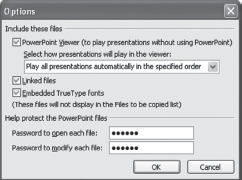
Figure 15.50 Options Dialog Box
- PowerPoint Viewer: Select this checkbox to play the presentation, even if the destination computer does not have PowerPoint 2003 installed.
- Linked Files: Select this checkbox to include all linked files.
- Embedded TrueType Fonts: Select this checkbox to display the font correctly, even if the destination computer does not have particular font installed.
- Password to Open Each File: Provide password to open the PowerPoint presentation.
- Password to Modify Each File: Provide password to modify the PowerPoint presentation.
- Click OK to close the Options dialog box and return to the Package for CD dialog box.
- Finally, to copy the files to a folder or to a CD, click the corresponding button.
15.6 PRINTING IN POWERPOINT
Printing in Microsoft PowerPoint is similar to printing in other Windows-based applications. However, several options, particularly those concerned with arranging the page, are specific to the application. PowerPoint provides a number of choices for you to take printouts; colour or black and white, single slides, or several slides per page.
15.6.1 Setting Page Layout
The Page Layout option is used to view the existing page layout or to set a new layout. To set a new layout, select Page Setup from the File menu to display the Page Setup dialog box (Figure 15.51).
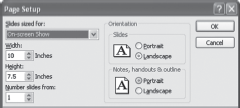
Figure 15.51 Page Setup Dialog Box
This dialog box contains options, which allows you to customize the page layout as desired. These options are:
Slide Size: PowerPoint allows you to determine the size of the slide by choosing from the number of options, which are listed below:
- On-screen Show (default)
- Letter Paper (8.5 × 11 in)
- A4 Paper (210 × 297 mm)
- 35 mm Slides
- Overhead
- Banner
- Custom
Slide Width and Height: You can adjust the width and height of the slide by adjusting the values in the Width and Height box, respectively.
Orientation: Orientation is the basic layout of the slides in the presentation. The default orientation is Landscape. To choose different orientation, click the radio button in front of the type of orientation and the change will be reflected in the slide.
15.6.2 Printing Presentation
Once you are ready with all the formatting and editing, you can print the presentation. To print a presentation, click the Print button (![]() ) on the Standard toolbar or select Print from the File menu to display the Print dialog box. This dialog box allows you to select the number of copies and how many pages of the document you want to print. It contains Print what box where you can choose the printing area (Figure 15.52). The options available for printing in Print what box are listed in Table 15.6.
) on the Standard toolbar or select Print from the File menu to display the Print dialog box. This dialog box allows you to select the number of copies and how many pages of the document you want to print. It contains Print what box where you can choose the printing area (Figure 15.52). The options available for printing in Print what box are listed in Table 15.6.
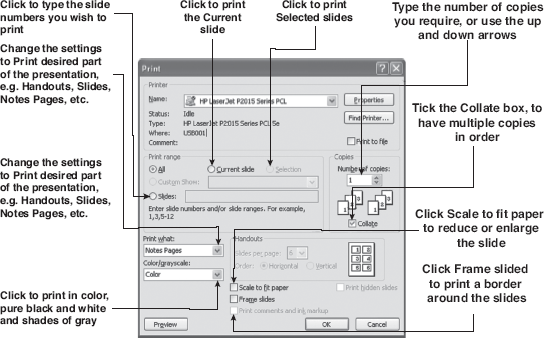
Figure 15.52 Print Dialog Box
Table 15.6 Printing Options
| Options | Description |
|---|---|
| Slides | Prints all slides in the presentation |
| Handouts | Prints handouts |
| Notes Pages | Prints notes pages. In the printout, slide appears at the top of the page and the presentation notes at the bottom of the page |
| Outline View | Prints the outline text of your presentation (as it appears in the outline pane) |
Printing Handouts: Power-Point 2003 allows you to print the handouts prepared in presentation. Using handouts as an option lets you print two, three, four, six, or nine slides per page. It also provides space for the audience to add notes as you give the presentation. To print handouts, select the Handouts option in the Print what box (Figure 15.53).
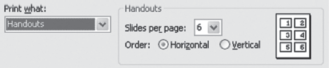
Figure 15.53 Printing Handouts
- Select the number of slides you want on the handouts in the Slides per page box.
- Select Horizontal or Vertical to specify the order in which you want the slides to appear on the page. After selecting appropriate options, click OK to print the handouts.
Let Us Summarize
- Microsoft PowerPoint 2003 is powerful, yet easy-to-use presentation software. Its primary purpose is to help you design professional-style presentations quickly and easily.
- Click Start, point to All Programs, then point to Microsoft Office, and then select Microsoft Office PowerPoint 2003.
- A new presentation can be created using the AutoContent wizard, Design Template, and Blank presentation.
- To open an existing presentation, click on the Open button (
 ) on the Standard toolbar. Alternatively, select Open from the File menu.
 - To save a presentation, Microsoft PowerPoint provides two menu options, namely Save and Save As. By default, Microsoft PowerPoint files are saved with .PPT extension.
- To close the presentation, select Close from the File menu.
- PowerPoint provides different types of screen layouts for constructing presentation in addition to the Slide Show. View is a way in which one can see and work with the presentation and slides.
- A presentation is created using the slides, which contains text, graphics, animations, and so on. PowerPoint is designed in a way to give a consistent appearance to your slides. There are two ways in PowerPoint, which help you to choose the look of your slides: design template and masters.
- Design templates contain colour schemes, slide and notes masters with custom formatting, and fonts, all designed to create a desired look.
- Masters in PowerPoint are used to control many facets of the slides such as backgrounds, font typeface, font size, colours, bullets and locations for all the main components, tab, and indent. PowerPoint has three masters, namely Slide Master, Notes Master, and Handouts Master.
- Slides can be added in the outline view or in the slide view. To insert slide, select New Slide from the Insert menu, or click the New Slide (
 ) button on the Standard toolbar. This displays New Slide dialog box from which you can choose the desired layout.
 - In PowerPoint, you can navigate to the next and previous slides by following any of the five view options, that is, Normal, Outline, Slide View, Slide Sorter, and Slide Show.
- You can change the appearance of your slide background by changing its colour, shade, pattern, or texture. PowerPoint contains a number of pre-defined backgrounds or, if needed, you can create your own background.
- There are a number of ways in which the text can be added into the slides. Text can be added using text placeholder, text box, an AutoShape, and WordArt.
- Formatting is the process of determining how the typed text will appear on a printed page. It is applied by altering the appearance of text by setting the font type and font size, line spacing, and colour. To format the text, first select the text to be formatted, and then use various buttons on the Formatting toolbar. Text can also be formatted by using the Format menu.
- In PowerPoint 2003, graphical elements can help you create eye-catching slides for a presentation. Graphics are frequently used with text to add emphasis and visual impact. PowerPoint 2003 gives you the option of adding AutoShapes, WordArt, and ClipArt.
- A presentation can be made more interactive and interesting by adding multimedia effects such as animations, video, and sound effects to the slides. This helps in capturing audience's attention as multimedia content can often communicate more information than a slide, which contains only few sentences.
- Animation effects are added to grab the audience's attention as well as to reinforce the point that needs to be highlighted. Animation can be special sound or visual effects which can be added to the text or other objects such as a chart or picture.
- Transition effects are used to insert effects between slides. They are also used to indicate a new section of a presentation or to emphasize a certain slide. You can choose from a variety of transitions, which are present in PowerPoint 2003.
- After you have finished with creating slides, working with text and graphics, adding transition and animation effects to the slides, the next thing is to view all the slides collectively as a presentation. PowerPoint 2003 provides a number of ways to review and deliver presentations so that they are well designed and look professional. You can view the presentation as a slide show in the Slide view.
- You can add time between the slides in the slide show. This may be required when there is some narration over the slides, or there is some graphical representation, which requires a proper explanation.
- Sometimes, presentation may be created for business or professional use. For example, you may create a presentation, which is to be delivered at some conference. To give a presentation all you have to do is bring your presentation file with you. This approach is suited for small presentations, but it may not work that well for larger presentations especially one with lots of graphics. PowerPoint contains a useful feature called Package for CD, which solves the above problem.
- To print a presentation, click the Print button (
 ) on the Standard toolbar. Alternatively, use the Print dialog box, which can be displayed by selecting Print from the File menu.
 - PowerPoint provides four options while printing—Slides, Handouts, Note Pages, and Outline View.
Exercises
Fill in the Blanks
- By default, .................. and .................. toolbars are displayed in the PowerPoint environment.
- .................. helps to create a presentation using a series of some basic steps.
- .................. option helps to update changes made to a file while option is used to make multiple copies of the same file.
- .................. is a way in which one can see and work with the presentation and slides.
- .................. view option allows you to view the slides (full screen), as they would appear in a slide show.
- .................. is a presentation containing PowerPoint masters with custom formatting, fonts, colour schemes, etc.
- PowerPoint provides .................. types of AutoLayouts for creating slides.
- .................. is the process of changing the appearance of text and making presentation easier to read.
- To insert time between the slides in the slide show, feature is used.
- .................. feature is used to run a presentation even if PowerPoint is not installed on a computer.
Multiple-choice Questions
- AutoShapes contain several categories of shapes, including ..................
- Lines
- Basic shapes
- Flowchart elements
- All of these
- Using WordArt you can easily create ..................
- Banners
- Seals
- Logos
- All of these
- .................. are added to grab the audience's attention as well as to reinforce the point that needs to be highlighted.
- Animation effects
- Transition effects
- Screen views
- Package for CD
- .................. are used to insert effects between slides. They are also used to indicate a new section of a presentation or to emphasize a certain slide.
- Drawing toolbar
- Transition effects
- Logos
- None of these
- .................. In master, you can add images, text, and colour to your handouts.
- Slide
- Notes
- Handout
- Title
- Orientation is the basic layout of the slides in the presentation. The default orientation is the ..................
- Landscape
- Animation effects
- Portrait
- Page Size
- Blank Presentation does not include ..................
- Preset design
- Colour
- Content suggestion
- All of these
- .................. wizard helps to create a presentation in a quick way and is very helpful for new users.
- AutoContent
- Design Template
- Blank Presentation
- None of these
- .................. view option displays all the slides in a presentation as thumbnails.
- Normal view
- Slide Show view
- Slide Sorter view
- None of these
- A presentation is created using the .................., which contains text, graphics, and animations.
- Page Setup
- Slides
- Animation
- Transition
State True or False
- A new presentation is created using AutoContent wizard, Design template, and Blank presentation.
- Design template includes no pre-formatted layouts, fonts, and colours.
- By default, Microsoft PowerPoint presentation files are saved with .PPT extension.
- Slide Show displays all the slides in a presentation as thumbnails.
- In Notes master, you can add header and footer to the slides.
- While duplicating the slides, their layout is also copied.
- To insert AutoShapes, select Picture from the Insert menu and click WordArt.
- To highlight some parts of the slide show, highlighter is used.
- Transition effects are the style of moving from one slide to the next.
- The default orientation in PowerPoint is Landscape.
Descriptive Questions
- Describe the steps involved in creating a new presentation using AutoContent Wizard.
- What views are available in PowerPoint 2003? How is Slide Sorter view different from Slide Show view?
- What is the role played by Masters in PowerPoint? Differentiate between Slide Master and Handout Master.
- How are slides inserted and deleted in PowerPoint?
- Explain Formatting in PowerPoint.
- What is the role played by multimedia in presentation? Give the steps involved in adding animations.
- Why is timing required between slides in PowerPoint?
- Explain the benefit of using Package for CD. Give the steps involved in it.
- Explain the options available in Page Setup dialog box.
- Is it possible to take printouts of the handouts in PowerPoint? If yes, explain how.
ANSWERS
Fill in the Blanks
- Standard, Formatting
- AutoContent wizard
- Save, Save As
- View
- Slide Show
- Template
- 27
- Formatting
- Rehearsal
- Package for CD
Multiple-choice Questions
- (d)
- (d)
- (a)
- (b)
- (c)
- (a)
- (d)
- (a)
- (c)
- (b)
State True or False
- True
- False
- True
- False
- False
- True
- False
- True
- True
- True