
Now that we have the credentials in place, we need to recreate the content of the inventory file called production within Ansible Tower. As a reminder, the file looks like the following:
# Register all of the host groups we will be creating in the playbooks
[ec2_instance]
[already_running]

# Put all the groups into into a single group so we can easily apply one config to it for overriding things like the ssh user and key location
[aws:children]
ec2_instance
already_running

# Finally, configure some bits to allow us access to the instances before we deploy our credentials using Ansible
[aws:vars]
ansible_ssh_user=centos
ansible_ssh_private_key_file=~/.ssh/id_rsa
host_key_checking=False
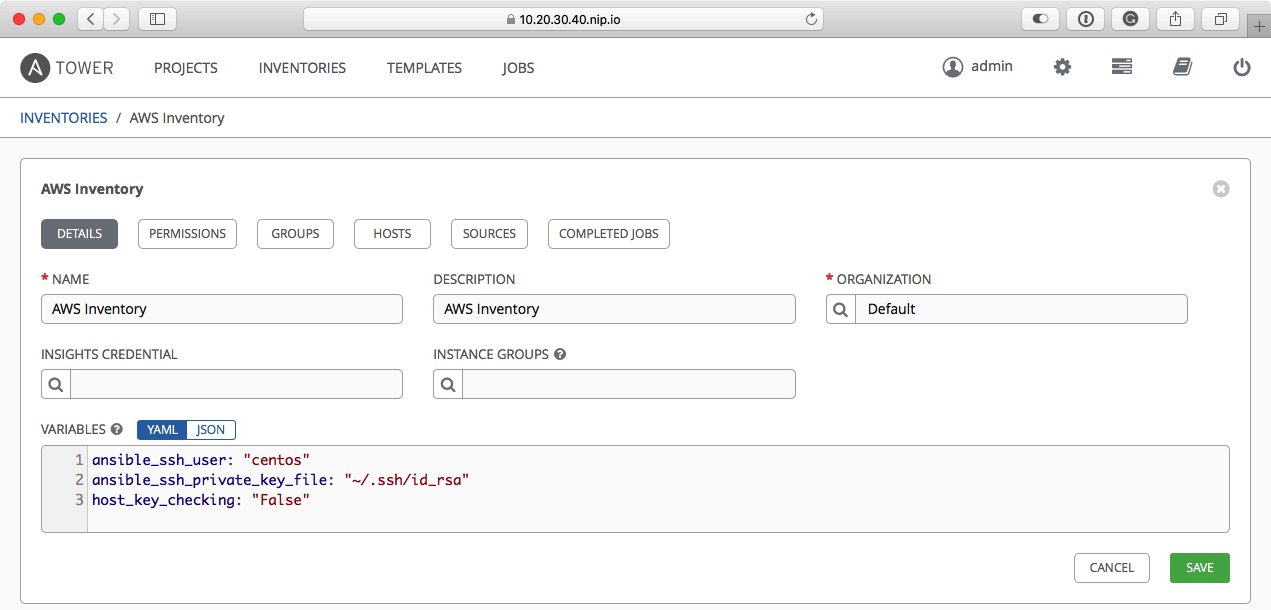
To add the inventory, click on INVENTORIES in the top menu and then the +ADD button. You will notice that the +ADD button now brings up a drop-down list; from that list, we want to add an Inventory.
In the form that opens, enter the following:
- NAME: AWS Inventory
- DESCRIPTION: AWS Inventory
- ORGANIZATION: Default
- INSIGHTS CREDENTIALS: Leave blank
- INSIGHTS GROUPS: Leave blank
- VARIABLES: Enter the values listed as follows:
ansible_ssh_user: "centos"
ansible_ssh_private_key_file: "~/.ssh/id_rsa"
host_key_checking: "False"
Once entered, click on SAVE; this will create the Inventory, and we can now add the two groups we need. To do this, click on GROUPS, which can be found in the row on the buttons above the form:
Click on +ADD GROUP and then enter the following details:
- NAME: ec2_instance
- DESCRIPTION: ec2_instance
- VARIABLES: Leave blank
Then click on SAVE, repeat the process, and add a second group using the following details:
- NAME: already_running
- DESCRIPTION: already_running
- VARIABLES: Leave blank
Again, click on SAVE; you should now have two groups listed:

Now that we have our project, inventory, and some credentials for accessing our AWS, we just need to add the templates, one to launch and configure the cluster, and another to terminate it.