
To schedule a refresh for a dataset, log in to the Service and do the following:
- From the Service, expand your Workspaces in the Navigation pane. Then, under DATASETS, click the ellipses (...) menu. You will see a fly-out menu like the one shown in the following screenshot:

- Choose SCHEDULE REFRESH from the menu to display the Datasets settings page, as shown in the following screenshot:

- Expand the Gateway connection section. Refer to the following screenshot:

Note that any installed Personal Gateway, as well as any standard mode gateways to which you have access, will appear under this section. If your personal mode gateway is installed and running, the Status will display green text and indicate that the gateway is running. However, the standard mode gateway displays red text and indicates that the gateway is Not configured correctly. This is because the data sources that are used by the dataset haven't been added to the gateway. This is an important distinction between the different modes of the gateway. Gateways that are installed in personal mode do not require data sources to be added to the gateway and managed, but gateways that are installed in standard mode require additional steps in order to be used. If you're using the Personal Gateway, skip to step 10; otherwise, continue with step 4.
- Standard Mode Only: To add the data sources to our standard mode data gateway, click the right arrow icon beneath actions. This displays a list of the Data sources included in this dataset, as shown in the following screenshot:

- Standard Mode Only: To add data sources to the data gateway, simply click the Add to gateway link next to the data source. This transports you to the Data Source Settings page for the gateway, as shown in the following screenshot:

Again, this page will vary, depending on the type of data source but, by default, the Data Source Type and some other information will already be filled in on the page. Complete any other required information; in this case, provide a more descriptive Data Source Name than New data source, as well as your Windows username and Windows password. When finished, click the Add button.
- Standard Mode Only: After clicking the Add button, if the data source has been set up and tested successfully, you will be transported back to the Datasets settings page. Expand the Gateway connection section and click the right arrow icon in the Actions area for the standard mode gateway, as shown in the following screenshot:

- Standard Mode Only: This time, you should have a green checkmark instead of a red x next to your first data source. In addition, instead of an Add to gateway link, there should be a Maps to drop-down box. Click the drop-down box and note that the name of your newly created gateway data source definition appears, which, in this case, is People and Tasks. This is why it is important to provide good, descriptive names when defining data sources for a gateway!
- Standard Mode Only: Repeat step 5 and step 7 for the additional two data sources. When you are finished, your standard mode gateway should show green text and a status of running.... In addition, your data sources should display green checkmarks and have Maps to drop-down boxes, as shown in the following screenshot:
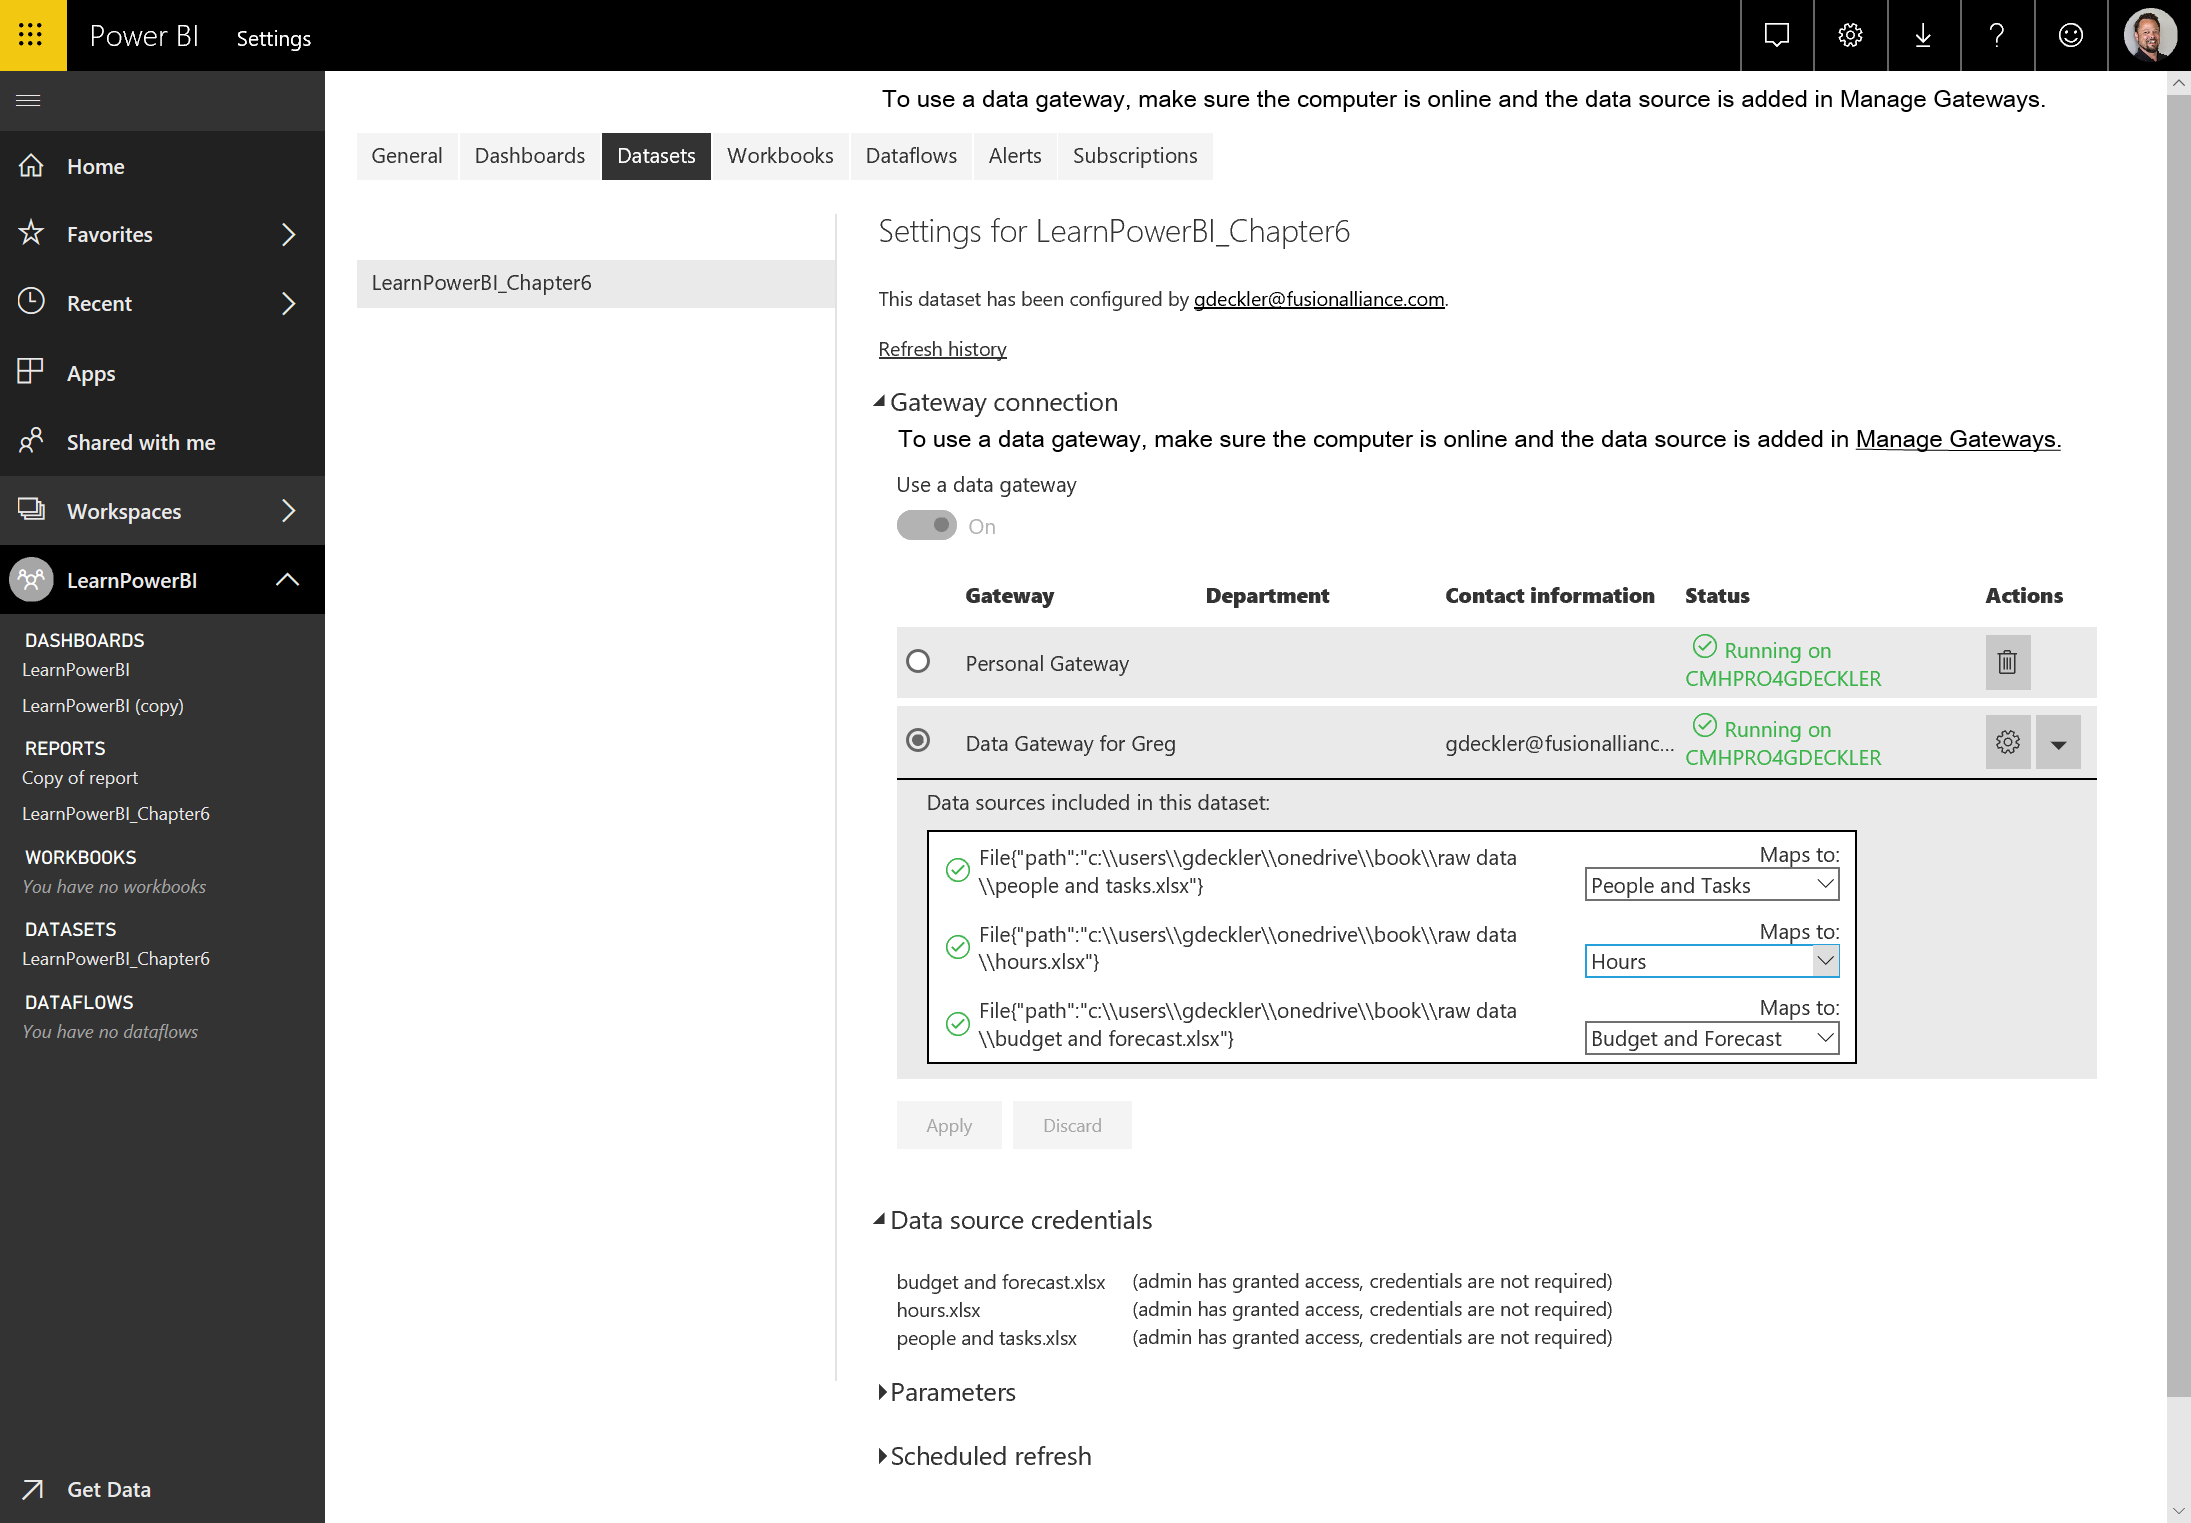
- Standard Mode Only: Map each of the data sources to their corresponding gateway data source definitions using the Maps to drop-down menu and then click the Apply button. Note that, in the Data source credentials section, the yellow warning banner goes away and you are no longer required to enter your credentials. This is because the credentials have been defined as part of the gateway data source definition. Skip to step 11.
- Personal Mode Only: If you're using a gateway in personal mode, you must enter the authentication credentials that will be used to access the data in the Data source credentials section. Any data source that has an X icon next to the Edit credentials link must have credentials entered for it. To do this, click the Edit credentials link next to a data source and sign in. Repeat this for each data source and note that the X icon disappears once the data source has been correctly configured. Once all of the data sources have been correctly configured, the yellow warning banner disappears. Refer to the following screenshot:

- Now that the appropriate gateway and credentials have been configured, it is time to configure the refresh schedule. Expand the Scheduled refresh section, as shown in the following screenshot:

- Toggle Keep your data up to date to On. You can set the Refresh frequency to either Daily or Weekly, as well as set your Time zone. If you're using a Daily refresh, click Add another time under the Time area, as shown in the following screenshot:

- Use the drop-down boxes to set the desired Time for the refresh. Multiple times can be added to keep a dataset refreshed throughout the day by clicking the Add another time link. Up to eight scheduled refreshes can be configured per day with Power BI Pro and up to 48 refreshes per day with Power BI Premium.
- When you're finished adding the specified refresh times, enter an email address to which notifications will be sent if there is a problem with the data refresh and then click the Apply button.