Building the Inside of the Mouth
In this section, you’ll add the final details to Jim’s head. The face is looking good, but you need to create the interior of the mouth, so when Jim opens his mouth, you won’t see empty space or the back of his head! Look at Figure 7.12 to see the last steps.
37. Select the inner lips’ loop and extrude it into the head. In these images, the rest of the head has been hidden so you can clearly see what’s going on.
Tip
Sometimes it’s easier to select what you don’t want to hide, then press Ctrl + I to invert the selection and finally press H to hide it.
38. Add some loops to better define a rounded area inside the mouth. Most importantly, add a loop near the inner lips; otherwise, they’ll lose some shape when subdivided. Don’t worry if the geometry overlaps in the inner lips area.
39. Close the back of the hole and refine the shapes a little. You can also add another loop near the inner lips so the inside of the mouth in that area is more vertical: this will create some space for the teeth later on.
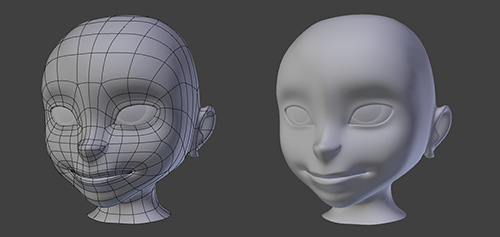
You’re done modeling Jim’s face! In Figure 7.13, you can see the result. The face is often one of the trickiest parts when modeling a character. You get used to seeing faces and it will immediately look wrong if something is out of place, so it can be difficult to achieve a pleasing result.


