

tive is generally not
abrasive, but other
filament additives may
be. If you buy marble
PLA filament, check
to see if the manufac-
turer warns that it will
abrade your nozzle. If
so, be sure your printer
has a hardened nozzle
that can handle it.
TESTING YOUR ARCHES
Print and assemble
(with some putty) two
arches with all the vari-
ables the same, except
that one should be a
Gothic arch (gothic =
true), and one circular
(gothic = false).
Now, set your arches
up vertically (Figure
13-6).
Press your hand down
on the top of each arch.
What happens? (Figure
13-7) Most likely the
circular arch collapsed
with far less force
than the Gothic one.
The circular arch is an
older invention, and the
Gothic is an improve-
ment. More force is
transmitted straight
down in a Gothic arch
compared to a circular
one.
FIGURE 135: Putting a bit of putty between the pieces
FIGURE 137: How arches collapse (or not)
FIGURE 136: The two arches
Make: Geometry 259
Geometry_Chapter10_v15.indd 259Geometry_Chapter10_v15.indd 259 6/23/2021 9:11:36 AM6/23/2021 9:11:36 AM
A circular arch requires more support from the sides, and if you do this
experiment several times, you will probably see stones get squeezed out to
one side or the other as the arch fails. The design of a Gothic arch keystone
is particularly clever. As the weight of the building above pushes down on the
keystone, the stones on either side want to push upward and out, counteract-
ing some of the downward forces. Of course, those stones are supporting a
lot of weight themselves, which gets extremely complex very fast.
As a side note, “Gothic” was a name applied by architects at the time who felt
the style was barbaric, so they named it after the marauding Goths. If only
they could see which buildings have lasted for a thousand years!
Light and slippery plastic pieces with elastic putty for mortar aren’t a perfect
simulation of the physics in the real cathedrals. There, the mortar would be
rigid as well. You can definitely see why that long-lost person who perhaps
did an equilateral triangle construction in their geometry class probably got
pretty excited when they created a small prototype, though.
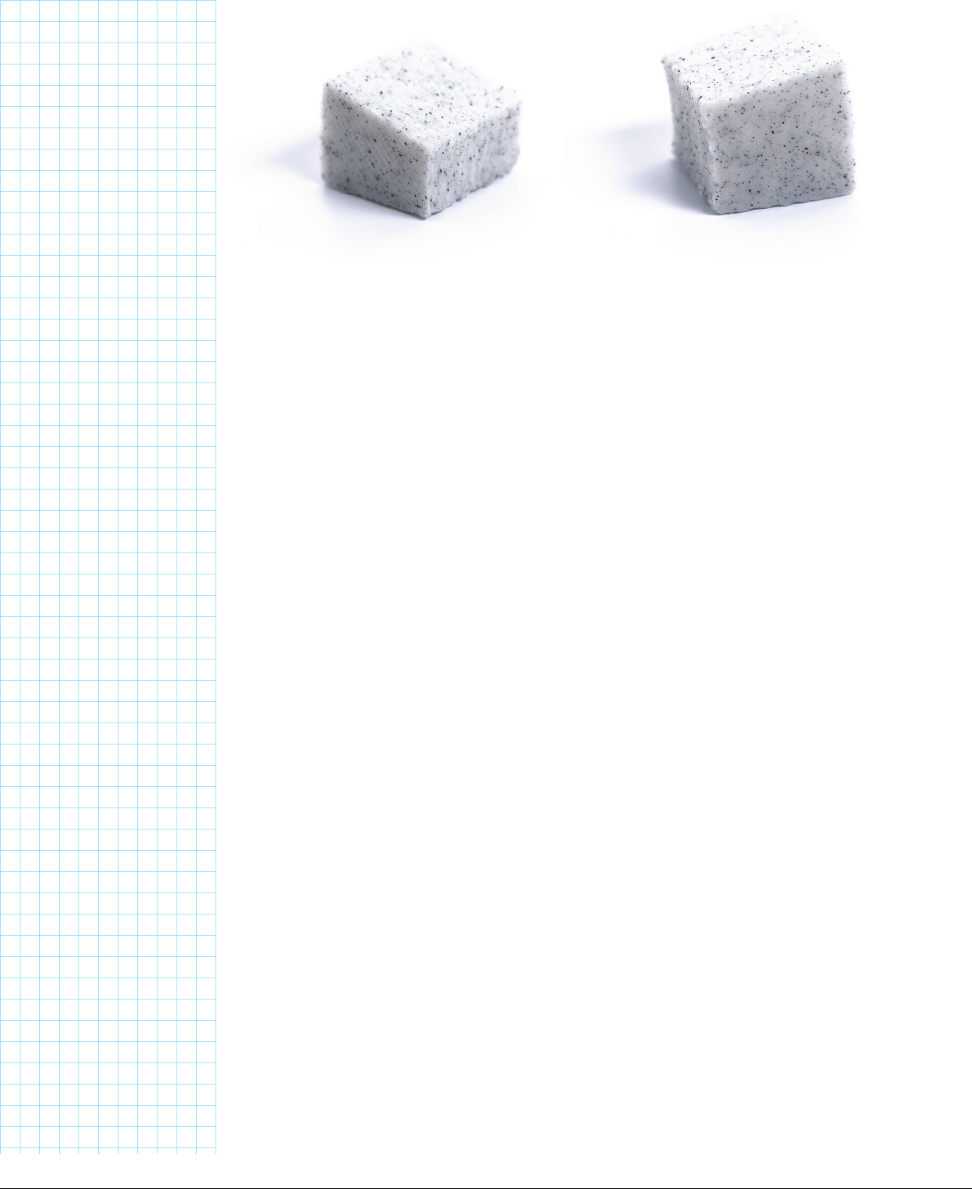
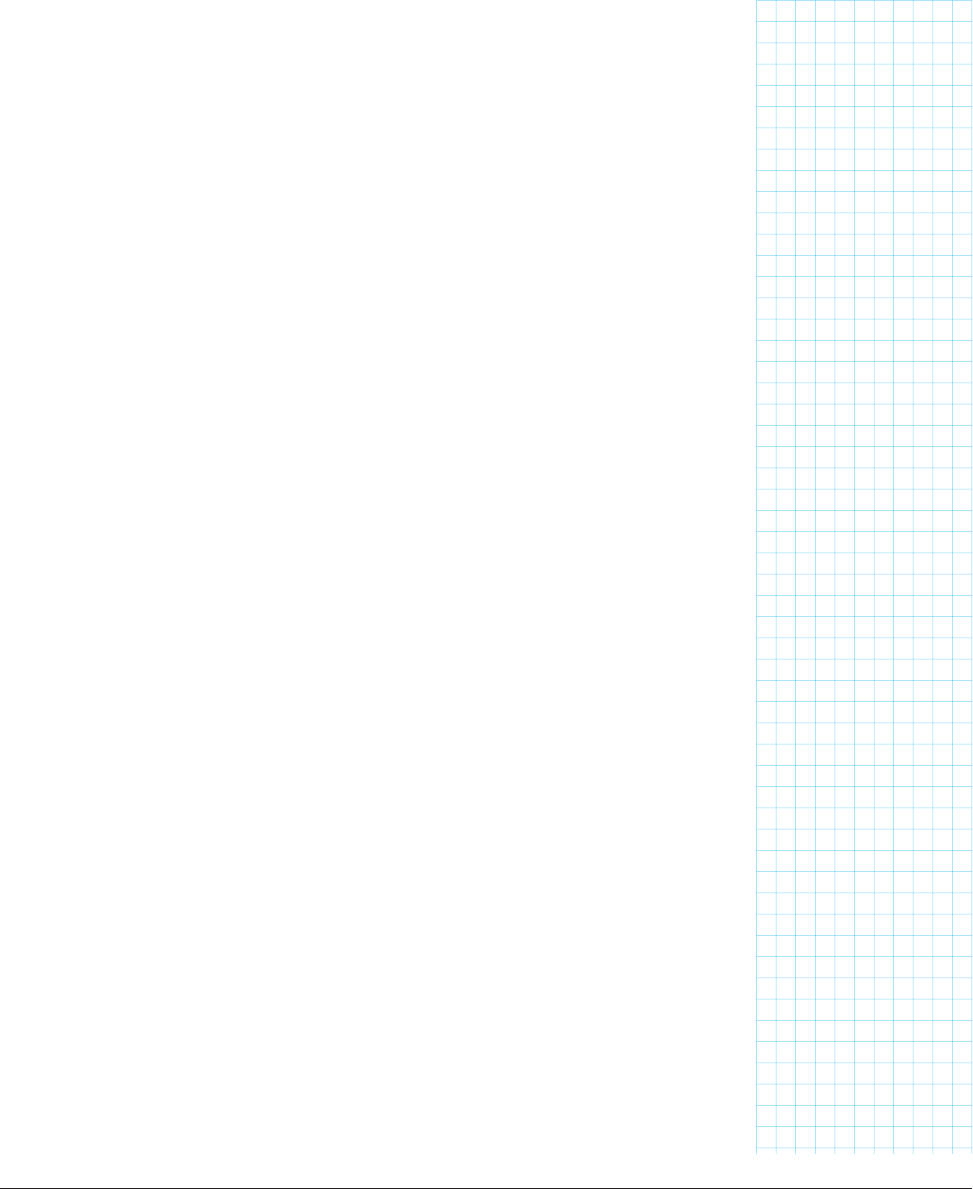
One thing to notice is the shape of the pieces (Figure 13-8). They are wider
on the outside than on the inside of the arch. That means that a force from
above will want to wedge the pieces in tighter. For the circular arch in partic-
ular, if a piece had parallel sides it would want to just fall out.
Arches do experience some sideways outward force. That is why the base of
this model has a small ridge to hold the arch in place. More elaborate struc-
tures were used in medieval times. Sometimes these were enormous stone
piers, but sometimes these were also arches, called flying buttresses, which
were engineering marvels themselves.
Also, we have talked about how 3D printers can only create overhangs of 45
FIGURE 138: Closeup of one stone from circular and from Gothic arch models
Make: Geometry 261
260 Chapter 13: The Geometry Museum
Geometry_Chapter10_v15.indd 260Geometry_Chapter10_v15.indd 260 6/23/2021 9:11:36 AM6/23/2021 9:11:36 AM
degrees or so. Steeper than that, and the plastic may sag down. If you look
at the overhang angles of the Gothic and circular arches, you can see that
the overhangs on the Gothic arch never get as steep as those on the top of a
circular arch.
PAPER
(
OR CUT-OUT
)
ALTERNATIVES
If you set thick = 0, you can export a .dxf or .svg 2D file from Open-
SCAD instead of an STL. As we described in Chapter 9 when we did this for
nets, you can then print this on paper. You won’t be able to do the tests we
described with paper, but you could use it as a pattern overlaid on other
materials. For example, you could glue the paper onto heavy foamcore, cut
out the pieces, and play around with that. Or you can adapt the other param-
eters a little so that they will work on your laser cutter (for instance, you
might want to use a nonzero value of separate to spread the pieces out a
little). This pattern is not intended for anything structural, but you can have
fun with it for scale models!
RENOVATING THE CASTLE
At the end of Chapter 3, we drew a windowless and entry-less castle, which
obviously is of limited utility unless you are a dragon that can fly in and out.
Now, we will add those features in the form of windows with a rectangular
bottom and arched top. This version is in the file castle_advanced.scad. The
doors and windows are going to be created with a module called arch.
Modules are pieces of code that you want to use over and over. You can use
different values of parameters each time you use the modules. We say that
we are passing values to the module. This module takes in a three-dimen-
sional set of numbers (a vector—see Chapter 2) and a parameter to tell it
whether we are making a Gothic or circular arch.
Let’s walk through how it works. These values are passed to the module:
• size ([x, y, z])
• the x, y, and z dimensions of the arch, where z is the thick-
ness of the arch (it is generated in 2D in the x-y plane) and x
and y are the dimensions of the rectangle below the arched
part. The arch is generated with a base diameter of the x
value. size[0] is the x value, size[1] is the y value, and
size[2] is z.
• gothic = true (or false).
• Whether it is a Gothic (true) or circular (false) arch-topped
window.
Make: Geometry 261
Geometry_Chapter10_v15.indd 261Geometry_Chapter10_v15.indd 261 6/23/2021 9:11:36 AM6/23/2021 9:11:36 AM
The arch module is tricky. It exploits the fact that OpenSCAD models in 2D are often faster to create
than 3D models. First, the code checks the z value (size[2]) to see if you are trying to produce a 2D or
3D shape. If you provide a non-zero value, it uses linear_extrude() to extrude the arch shape to the
specified thickness. When you do this, the module gets the arch shape by calling itself, a process known
as recursion (discussed in Chapter 2). It passes along all of the values that were passed to it, except that
this time it sets the thickness to zero.
When the z value is zero (or if you only provided x and y values, and there is no size[2]), the code follows
the other branch, which generates the 2D arch shape. This code will generate either a Gothic or circular
arch, with a base width equal to the x value (size[0]), with a rectangular section below it equal to the y
value (size[1]). The rectangular section overlaps the circle used to make the circular arch, or the two
intersected circles for the Gothic one, and an intersection() is used to trim off anything that extends
below the rectangle. Here is the module:
module arch(size, gothic = true) {
if(size[2]) {
linear_extrude(size[2]) arch([size[0], size[1], 0], gothic);
} else intersection() {
union() {
if(gothic) intersection_for(i = [-1, 1])
translate([i * size[0] / 2 , 0, 0]) circle(size[0]);
else circle(size[0] / 2);
if(height > 0) translate([-size[0] / 2, -size[1], 0])
square([size[0], size[1]]);
}
translate([-size[0] / 2, -size[1], 0]) square([size[0], size[0] + size[1]]);
}
}
To add doors and windows to the Chapter 3 castle, we will need to add a row of windows to the side
and back walls, and one door and flanking windows to the front. We have to rotate and translate these
appropriately, too, so they appear in the various walls of the castle. (Remember that they started out in
the x-y plane, but the castle walls are in the y-z or x-z planes.)
Finally, we will need to subtract these from the original castle using dierence() to make it negative
space. Here is the entire model, including those additions (available as castle_advanced.scad). When
all is said and done, you will have the castle shown in Figure 13-9.
Make: Geometry 263
262 Chapter 13: The Geometry Museum
Geometry_Chapter10_v15.indd 262Geometry_Chapter10_v15.indd 262 6/23/2021 9:11:36 AM6/23/2021 9:11:36 AM
wall = 100;
height = 40;
thick = 4;
$fs = .2;
$fa = 2;
dierence() {
for(side = [0:1:3]) {
rotate(90 * side) {
translate([-wall / 2, wall / 2, 0]) {
translate([0, -thick / 2, 0]) {
cube([wall, thick, height]);
for(crenellation = [0:thick * 2:wall - thick]) {
translate([crenellation, 0, 0]) {
cube([thick, thick, height + thick]);
} //end translate
} //end for
} //end translate
cylinder(h = height + thick, r = 1.5 * thick);
translate([0, 0, height + thick]) {
cylinder(h = 3 * thick, r1 = 1.5 * thick, r2 = 0);
} //end translate
} //end translate
} //end rotate
} //end for
// All of what follows will be subtracted from the castle
// Now create the rows of windows on sides and back
for (a = [1:1:3]) rotate([90, 0, a * 90])
for(i = [-2:1:2]) translate([i * wall / 6, 20, 0]) arch([5, 10, wall], true);
// Next create the front door and a window on each side of the door
rotate([90, 0, 0]) {
for(i = [-2, 2]) translate([i * wall / 6, 20, 0]) arch([5, 10, wall], true);
translate([0, 20, 0]) arch([25, 25, wall], false);
}
}
Make: Geometry 263
Geometry_Chapter10_v15.indd 263Geometry_Chapter10_v15.indd 263 6/23/2021 9:11:36 AM6/23/2021 9:11:36 AM
..................Content has been hidden....................
You can't read the all page of ebook, please click here login for view all page.