In our setup, we will be using VirtualBox, which can be downloaded from https://www.virtualbox.org/. The Windows OS we will be using is Windows 7 32-bit, which can be downloaded from https://developer.microsoft.com/en-us/microsoft-edge/tools/vms/. In the following diagram, the system, which has an internet connection, is installed with two virtual machines, a guest sandbox and guest MITM:

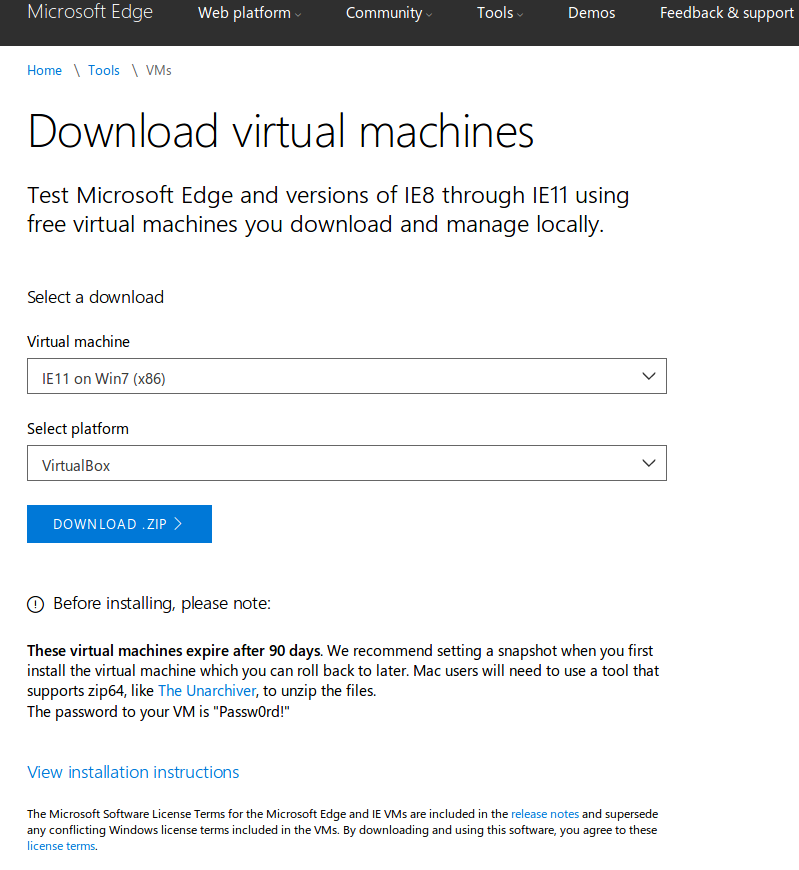
- Download and install VirtualBox and run it. VirtualBox has installers for both Windows and Linux. Download the Windows 7 32-bit image, as shown here:

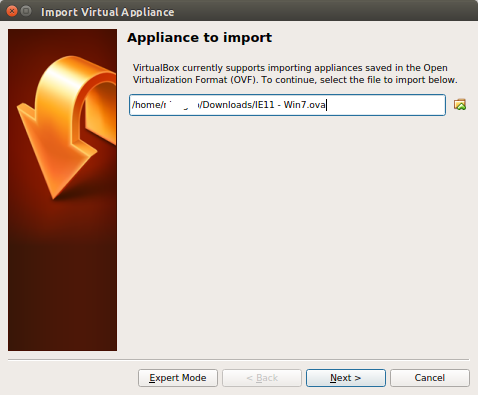
- The image downloaded from the Microsoft website is zipped and should be extracted. In VirtualBox, click on File|Import Appliance. You should be shown a dialog where we can import the Windows 7 32-bit image.
- Simply browse and select the OVA file that was extracted from the ZIP archive, then click on Next, as shown here:

- Before continuing, the settings can be changed. The default RAM is set to 4096 MB. The more RAM allocated and the higher the number of CPU cores set, the better performance will be noticed when running or debugging. However, the more RAM added, the same amount of disk space gets consumed when storing snapshots of the image. This means that if we allocated 1 GB of RAM, creating a snapshot will also consume at least 1GB of disk space. We set our RAM to 2048 MB, which would be a reasonable amount for us to work on:

- Click on Import and it should start generating the virtual disk image. Once it has completed, we need to create our first snapshot. It is recommended to create a snapshot in a powered-off state, since the amount of disk space consumed is minimal. Look for the SnapShots tab, then click on Take. Fill out the Snapshot Name and Snapshot Description fields, then click on the OK button. This quickly creates your first snapshot.
- Click on Start to begin running the Windows 7 image. You should end up with the following window. In case it asks for a password, the default password is Passw0rd!:

At this point, the network setup is set to NAT. This means that any network resources required by the virtual machine will use the host computer's IP address. The IP address of the virtual machine is taken from the VirtualBox's virtual DHCP service. Remember that any network communication in the virtual machine makes use of the host computer's IP address.
Since we can't prevent a certain malware from sending out information to the web in order to return information back to our virtual machine, it is important to note that some ISPs may monitor common malware behavior. It would be best to review your contract with them and make a call if needed.
Most of our reverse engineering deals with malware and, as of the time of writing, attackers usually target Windows systems. Our setup uses Microsoft Windows 7 32-bit. Feel free to use other versions. We recommend installing the 32-bit version of Microsoft Windows, as it will be easier to track virtual and physical addresses later on during low-level debugging.
