Now that we have a DC up and running, we need a device upon which we will apply settings to start testing Group Policy. For this lab, I am going to start with a Windows 10 client computer. You could implement additional devices for testing by following these instructions, whether working with Windows 10 or just about any other Windows operating system, the procedure is going to be the same:
- Install Windows 10 Enterprise on to a computer. In my case, this is another virtual machine that I am plugging into the same network so that it can communicate with DC1.
- Assign an IP address to this client. As of this moment, my lab does not contain a DHCP server, and so my client computer will not automatically receive an IP address. Instead of building a DHCP, I am going to simply assign another static IP address to my Windows 10 computer's NIC, as we did with DC1. Since DC1 is hosting DNS for my new domain, I will specify DC1's IP address as the Preferred DNS server on my client computer:

- Define a hostname for this new device. The process has changed a little bit in the newest versions of Windows 10. As we did on the DC1 server, start by right-clicking on the Start flag, and choosing System. Once inside the System properties, scroll down until you see the button that says Rename this PC, and click on that button.
- Enter the new name; I am going to call this machine LAPTOP1:

- Restart when prompted.
In the latest builds of Windows 10, there are now many different ways that you could rename a computer and join it to a domain, as we are about to do. One option that we will not cover here is via PowerShell.
- We need to join LAPTOP1 to our domain for it to really communicate with DC1 and be able to pull its Group Policy information (as well as everything else from Active Directory). Microsoft has done some revamping of the settings screens in the newest versions of Windows 10, as they migrate settings from the old Control Panel over to the new Settings interface. This makes the domain-join task a little bit more confusing than it used to be. You will find that you cannot join a Windows 10 computer to the domain from the Rename this PC screen inside the Settings menu. Thankfully, the fix for this is quite simple. If you open the old Control Panel-based System properties, you can still rename and join the domain, just as you have been able to do in the past. Let's walk through that together, because getting into the old Control Panel is not very straightforward.
- Click on the Start button, and type Control Panel. You will see it appear in the search results. Then simply press Enter.
- Inside the legacy Control Panel, click on System and Security, and then click on System. This will get you into the old System properties screen, where you can then click on the Change settings link to change the name of the computer, or to join it to a domain, which is what we are going to do:

- Click the Change... button.
- Select the radio button for Domain, and then type the name of your domain. If you remember from a few pages ago, I called mine mydomain.local:

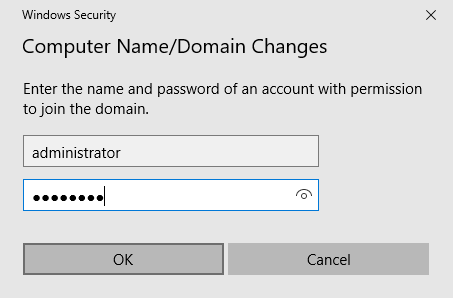
- You will be prompted to enter a username and password of a domain user account that has permissions to join this computer to the domain. Enter those credentials, and press OK. You will now be asked to restart the computer again, and LAPTOP1 is now fully joined to my domain:

We now have a Domain Controller server and a Windows 10 workstation that are fully prepared to communicate with each other. Very soon, we will begin using DC1 to create some Group Policy settings, and then jump over to LAPTOP1 to take a look and see whether our settings were applied without even having to touch that workstation.
