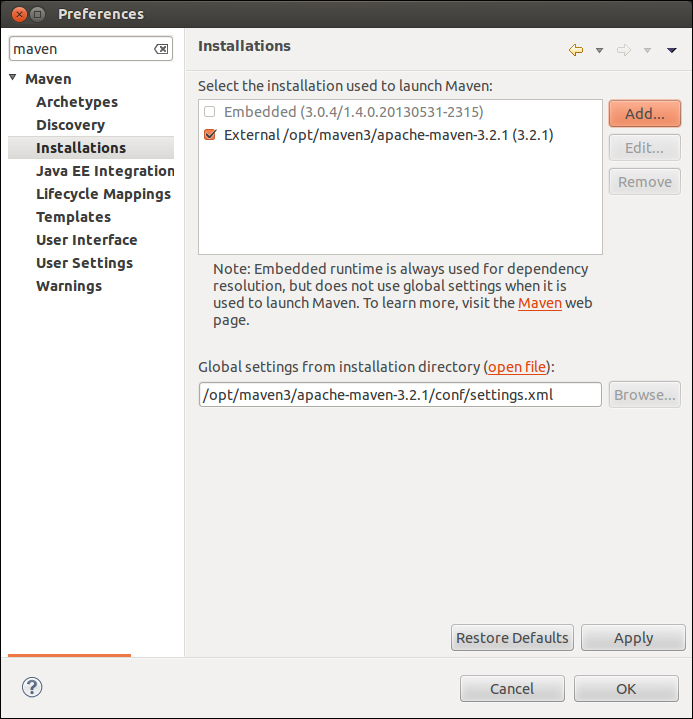
m2eclipse comes with an embedded Maven component in it, so the external Maven installation discussed in Chapter 1, Apache Maven – Introduction and Installation, is optional. However, to use the latest version of Maven, we are required to install Maven externally, as discussed in the previous chapter. We also need to make sure our m2eclipse plugin uses it. Also, the use of continuous integration servers nowadays requires us to have a common Maven version across servers, thus making use of the externally installed Maven.
To make m2eclipse use the external Maven version, navigate to Window | Preference in Eclipse and the Preference window appears. Search for maven in the search box in the left pane and click on Installations as shown in the following screenshot:

Click on the Add... button and select the location of the Maven directory. From the previous chapter, our location was /opt/maven3/apache-maven-3.2.1. Check the corresponding external Maven checkbox, as shown in the following screenshot, and click on Apply followed by OK:

