
The webapp module has a JSP file that has a form to accept the input. It also has a servlet that accepts the request parameters and performs the conversion using a core module and provides the response. Now let's see how to get the webapp module in place by performing the following steps:
- Navigate to File | New and click on Other...; in the Select a wizard screen, search for
mavenvia the search box, select Maven Module, and click on the Next button as shown in the following screenshot: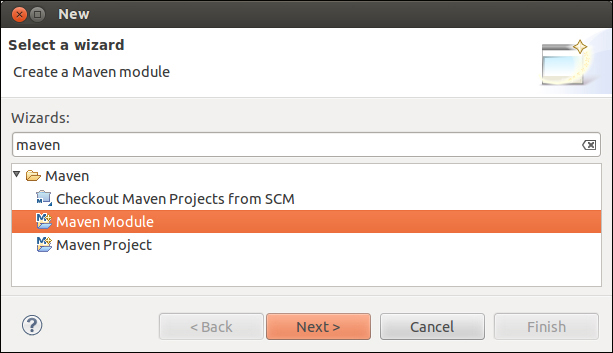
- In the New Maven Module window that will follow, provide the module name as
distance-webappand browse to select the parent asDistance-main.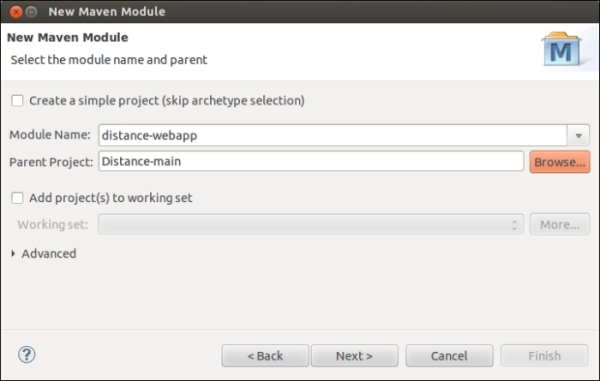
- In the Select an Archetype window, search for
webappvia the search box, select maven-archetype-webapp, and click on Next to proceed, as shown in the following screenshot: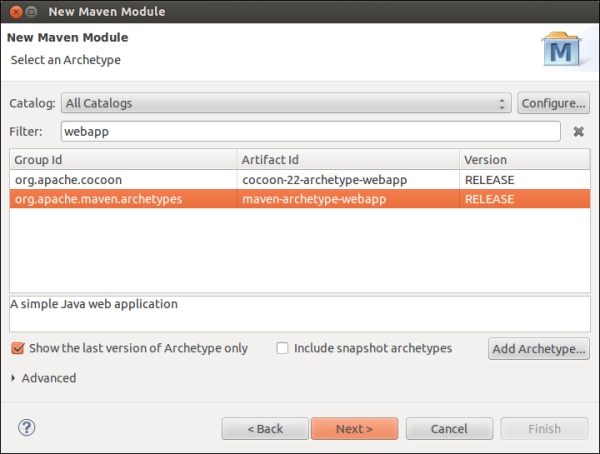
- In the New Maven module window, fill in the details provided in the following table and click on Finish as shown in the screenshot that follows this table:
Field
Value
Group Id
com.packt.mvneclipseVersion
0.0.1-SNAPSHOTPackage
com.packt.chpt6.mydistance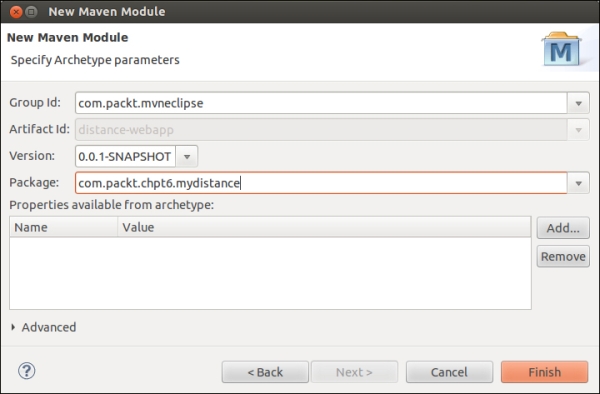
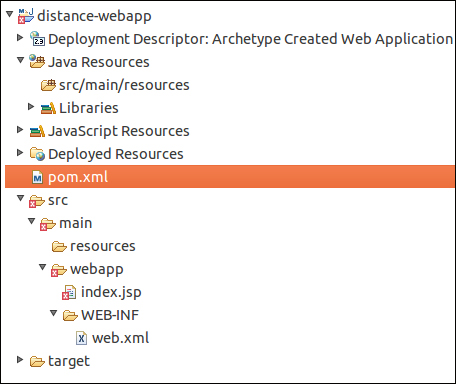
- The webapp module will be created, and the resulting structure will look like the following screenshot:
- Now if we look at the parent project's structure, we might notice that it has a reference to each of the modules, as shown in the following screenshot:
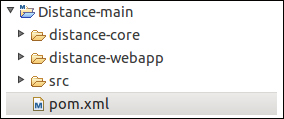
- Also, if we take note of the
pom.xmlfile of the parent project, we will see how modules are being added to the<module>tag as follows:<modules> <module>distance-core</module> <module>distance-webapp</module> </modules>
- Open the webapp module's
pom.xmlfile and add the dependencies forlog4j, servlet, and Tomcat, as shown in the following code; this is also discussed in Chapter 5, Spicing Up a Maven Project, in more detail:<!-- Include servlet API --> <dependency> <groupId>javax.servlet</groupId> <artifactId>javax.servlet-api</artifactId> <version>3.1.0</version> <scope>provided</scope> </dependency> <!-- For logging purpose could be put in parent POM for modules to inherit --> <dependency> <groupId>log4j</groupId> <artifactId>log4j</artifactId> <version>1.2.17</version> </dependency> <!-- For tomcat <plugins> <plugin> <groupId>org.apache.tomcat.maven</groupId> <artifactId>tomcat7-maven-plugin</artifactId> <version>2.1</version> </plugin> </plugins> - Also, add
distance-coreas a dependency since it is used by the webapp to perform the conversion, as shown in the following code:<dependency> <groupId>com.packt.mvneclipse</groupId> <artifactId>distance-core</artifactId> <version>0.0.1-SNAPSHOT</version> <scope>compile</scope> </dependency> - Add the
log4j.propertiesfile to theresourcesfolder. Refer to the Adding Resources section in Chapter 5, Spicing Up a Maven Project. - Add the form to get input and add servlets (refer to sections Adding a form for getting input and Adding Servlet of Chapter 5, Spicing Up a Maven Project).
..................Content has been hidden....................
You can't read the all page of ebook, please click here login for view all page.