m2eclipse makes the creation of Maven projects simple. Maven projects can be created in the following two ways:
- Using an archetype
- Without using an archetype
Now, we will discuss how to go about creating projects using these methods.
An archetype is a plugin that allows a user to create Maven projects using a defined template known as archetype. There are different archetypes for different types of projects.
Archetypes are primarily available to create the following:
- Maven plugins
- Simple web applications
- Simple projects
We will now see how to create a simple Hello World! project using an archetype:
- Navigate to File | New and click on Other. The project wizard appears and expands the
Mavenfolder. Select Maven Project as shown in the following screenshot and click on Next: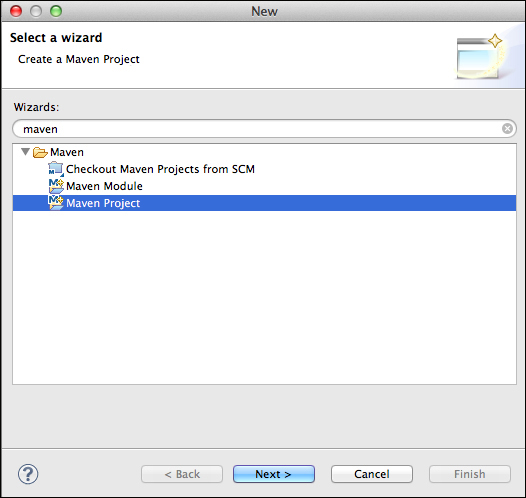
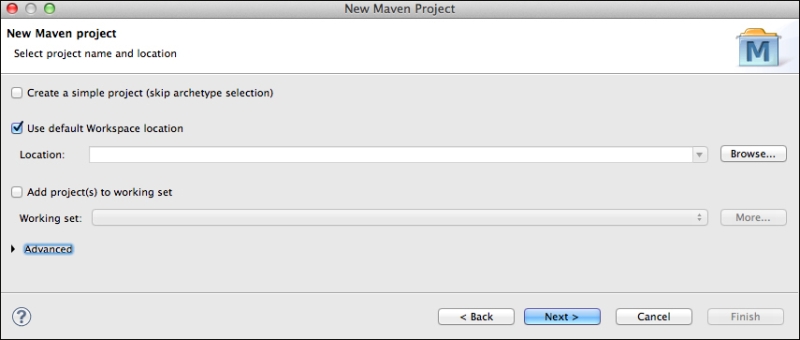
- The New Maven Project wizard appears. Use the default workspace and click on Next as shown in the following screenshot:
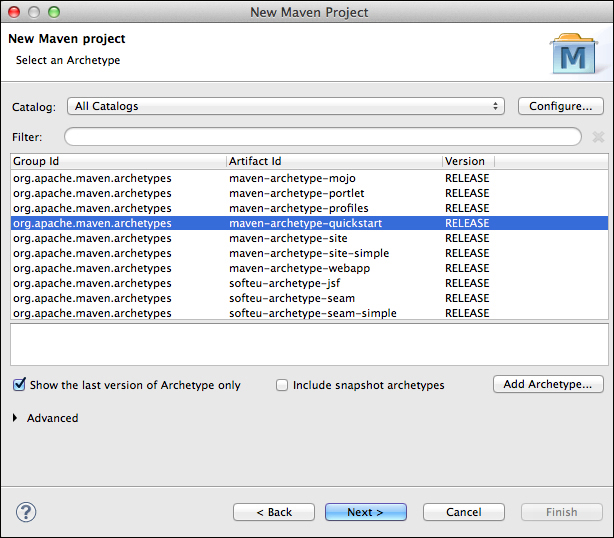
- The Select an Archetype wizard appears. This shows a list of archetypes available in the Maven repository. New archetypes can be added using the Add Archetypes button. For our case here, let's choose maven-archetype-quickstart as shown in the following screenshot and click on Next:
- A wizard to specify the Maven coordinates appears. Please fill in the details given in the following table in the screenshot that follows the table and click on Finish:
Field
Value
Group Id
com.packt.mvneclipseArtifact Id
hello-projectVersion
Default – 0.0.1-SNAPSHOT
Package
com.packt.mvneclipse.hello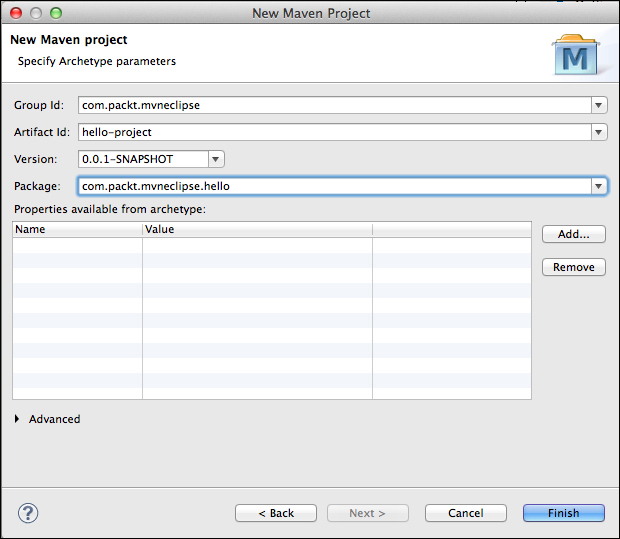
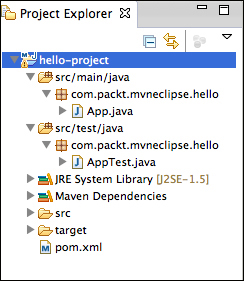
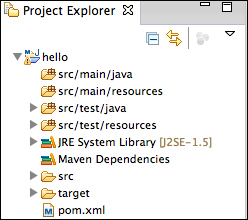
A sample Maven project has now been created, and it contains a Java file that prints Hello World!. The project has the following structure:
You can create a Maven project without archetypes using the following steps:
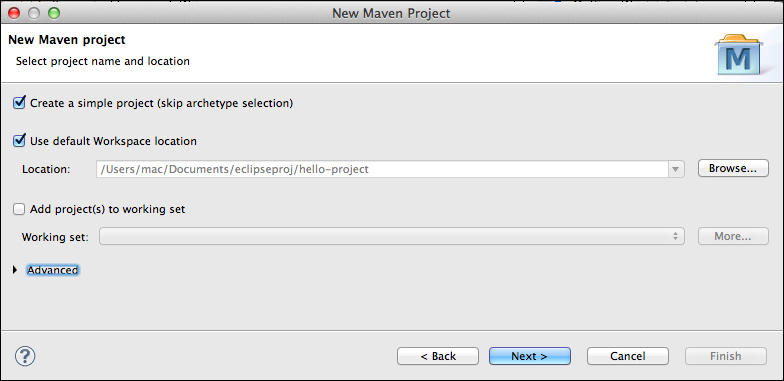
- Navigate to File | New and click on Other. The project wizard appears and expands the
Mavenfolder. Select Maven Project and click on Next. - The New Maven Project wizard appears. Use the default workspace and check the Skip archetype checkbox as shown in the following screenshot and click on Next:
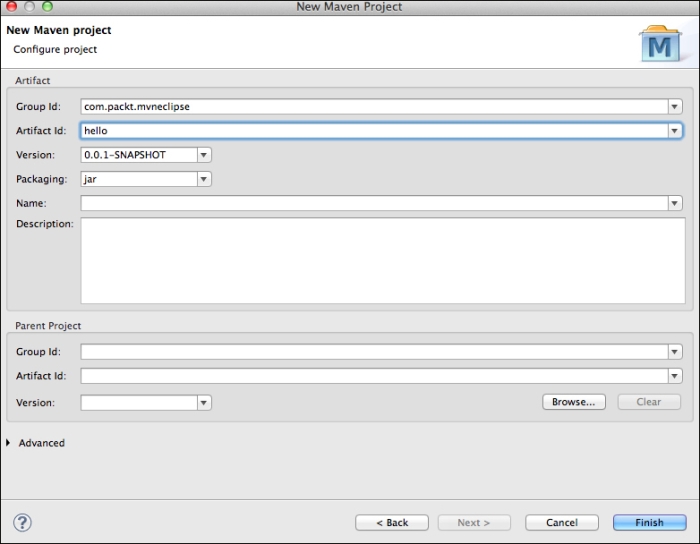
- The wizard to specify the Maven coordinates appears. Please fill in the details, as shown in the following screenshot, and click on Finish:
- A skeleton structure, as shown in the following screenshot, will be created, and we have customized it according to the type of application we are building:
Checking out a Maven project means checking out from the source code versioning system. Before we process this, we need to make sure we have the Maven connector installed for the corresponding SCM we plan to use. Use the following steps to check out a Maven project:
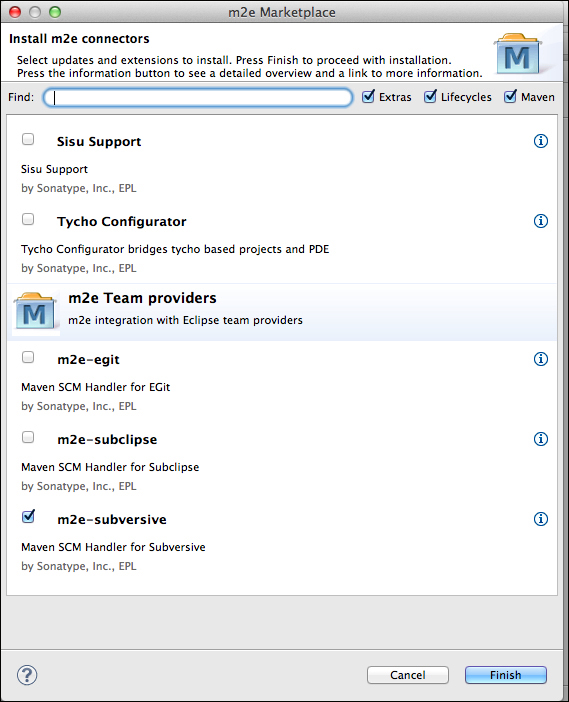
- Navigate to Eclipse | Preferences in Mac, else Windows | Preference search in other OS, and search for
Maven, expand it, and click on Discovery. - Then, click on Open Catalog. This lists all the m2connectors available in the marketplace. In our case, we are going to use SVN, so choose m2-Subversive, as shown in the following screenshot, and click on Finish. In the screens to follow, click on Next, accept the license, and finally click on Finish to install it. Similarly, we can choose any connector we intend to use for SCM.
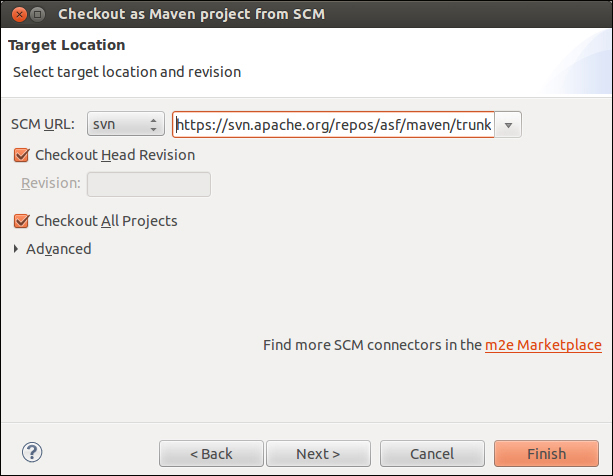
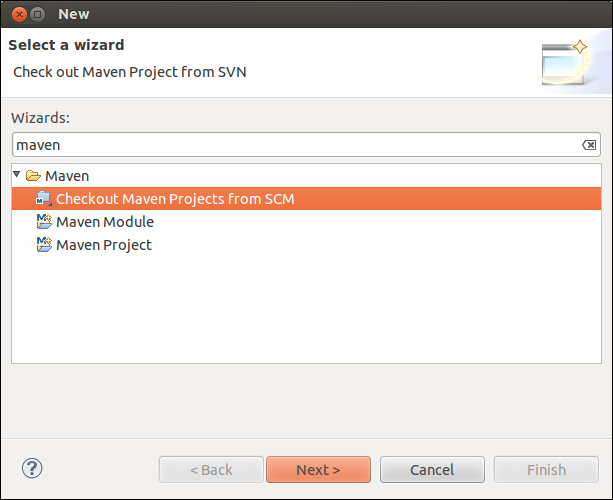
- Like how you create projects, navigate to File | New and click on Other. The project wizard appears. Expand the Maven folder. Click on Checkout Maven Projects from SCM and click on Next.
- In the next screen, choose the SCM connector SVN and provide the corresponding SVN URL, as shown in the following screenshot, and click on Finish. If you click on Next, it will show the repository structure.