
We are toward the end of the journey; now in this chapter, we will look into other additional features in m2eclipse, getting familiar with the form-based POM editor, and learn about repositories.
The topics covered in this chapter are as follows:
- Other features in m2eclipse
- A form-based POM editor
- Analyzing project dependencies
- Working with repositories
- m2eclipse preferences
The following steps have to be performed in order to understand the other features of m2eclipse. Right-click on the Maven project and navigate to the Maven menu item. Then, you can see the available features as shown in the following screenshot:
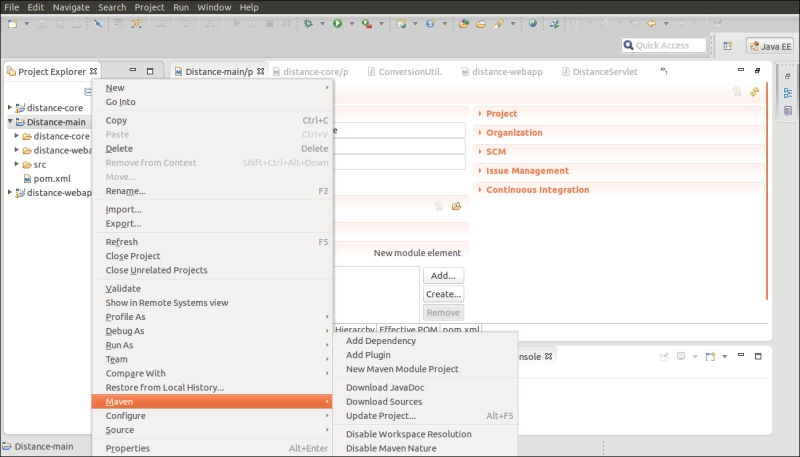
If you see the screenshot, the available features are as follows:
- Add Dependency
- Add Plugin
- New Maven Module Project
- Download JavaDoc
- Download Sources
- Update Project
- Disable Workspace Resolution
- Disable Maven Nature
Similarly, right-click on Maven Dependencies and navigate to the Maven menu item. The available features seen are shown in the following screenshot:

The available features are as follows:
- Download JavaDoc
- Download Sources
- Exclude Maven Artifact
- Open POM
- Open JavaDoc
- Import Project(s) from SCM
In the sections to follow, we will collectively discuss these features.
It allows us to add dependencies to the Maven project. The screenshot for this is shown as follows:

Up until now, we have been editing the pom.xml file and adding dependencies to it. Adding dependencies is another way to achieve the same objective using the graphical interface. When you use this option, the information you need to know is less, that is, knowing artifactId/groupId is enough to search across repositories and select the appropriate one. In the previous method, you need to know complete Maven coordinates to add the dependencies; hence, the latter is a time saver.
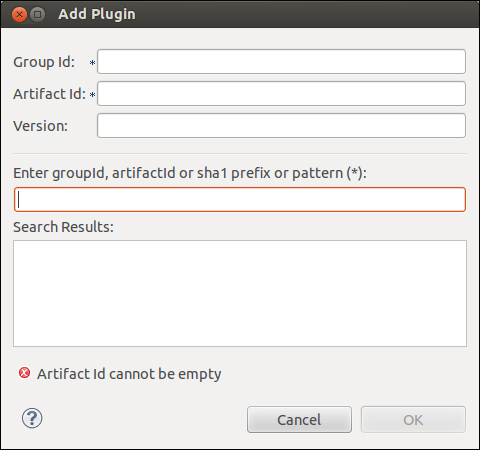
Similar to Add Dependency, Add Plugin allows you to add plugins via the graphical interface. This requires us to have minimal information to search through the repository and add plugins. The screenshot for this is as follows:
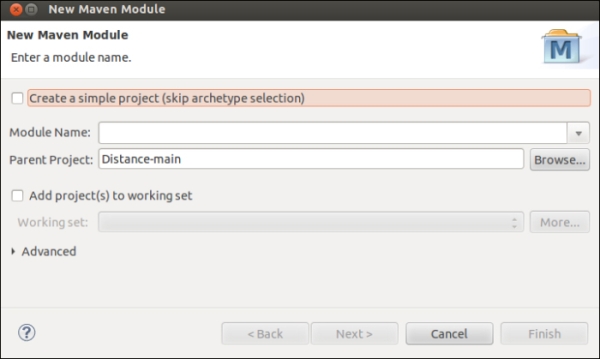
In Chapter 6, Creating a Multimodule Project, we created a multimodule project and learned about creating module projects. This is another way to invoke the same Add module wizard to create modules. The screenshot of the window is shown as follows, which is the same as the screenshot obtained when you navigate to New | Other | Maven Module and right-click on the project (as we saw in the previous chapter):
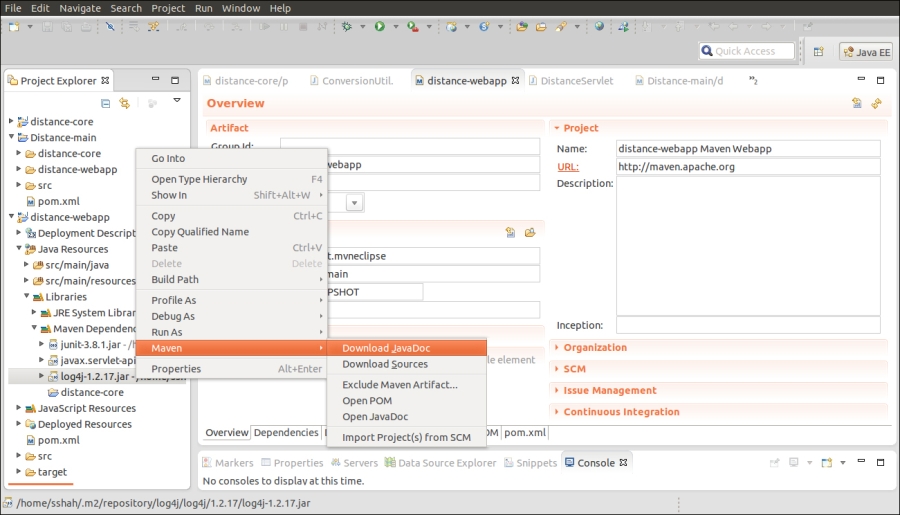
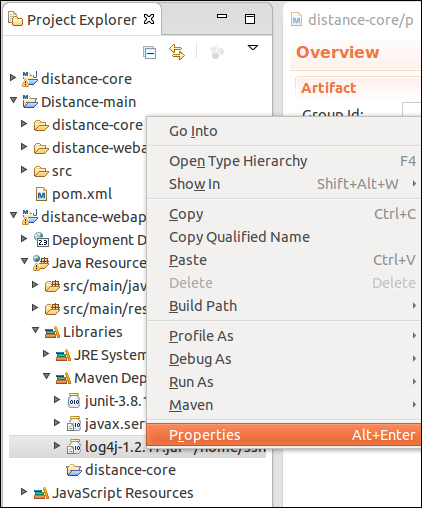
Download JavaDoc is used to download the javadoc of the project if present in the central repository to the local repository. For example, right-click on the log4j-1.2.17.jar file under Maven Dependencies and click on Download JavaDoc, as shown in the following screenshot. The javadoc will be downloaded to the local repository along with other artifacts at the $HOME/.m2/repository/log4j/log4j/1.2.17/ as log4j-1.2.17-javadoc.jar location:
If the central repository has a source artifact for the corresponding project, we can use this option to download it to the local repository and use it with the Eclipse environment. This is a life saver, particularly when we are debugging a complex issue and there is need to drill down the code of dependencies. For example, the source code of log4j will be downloaded at the $HOME/.m2/repository/log4j/log4j/1.2.17/ as log4j-1.2.17-javadoc.jar location. After downloading the source code, right-click on the log4j-1.2.17.jar file and click on Properties, as shown in the following screenshot:
The Properties window appears; the Java Source Attachment navigation button shows the attached source code location, as shown in the following screenshot:
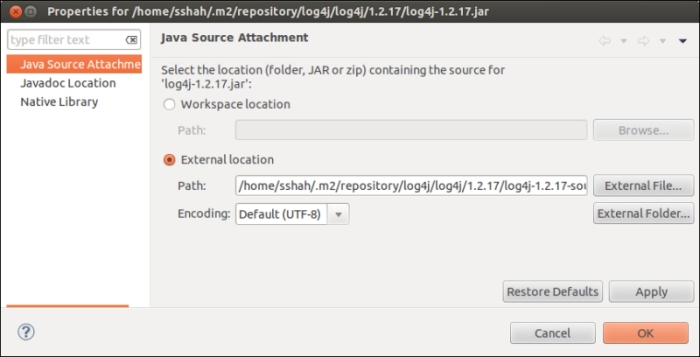
Note that we can also find the javadoc location by clicking on the Javadoc Location navigation button on the left pane.
When we want to browse through the javadoc of the corresponding project, we use this option. The javadoc opens in the editor area as a separate tab as shown in the following screenshot for log4j docs:

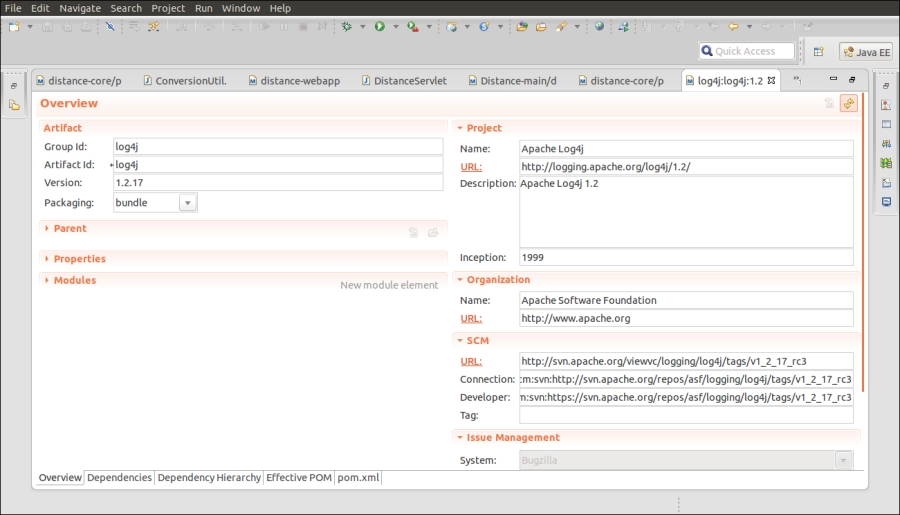
At any point, if there is a need to look at the POM file of the dependencies, we can use this option. The respective POM file of the dependency opens in the editor area of the workspace. The following screenshot depicts the POM file in the editor area for log4j, which has been the dependency in the MyDistance application we built in Chapter 4, Building and Running a Project:
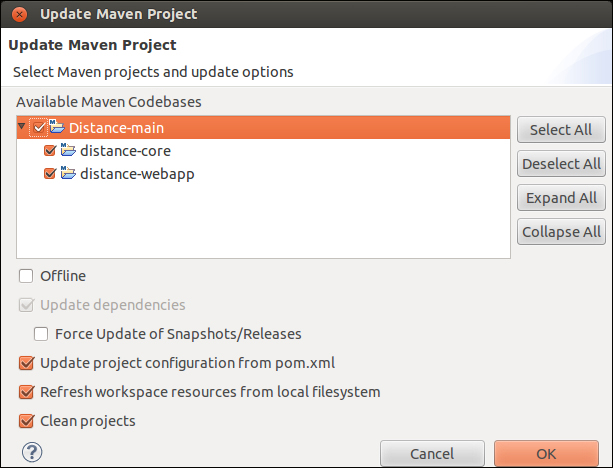
There are instances where we have a Java project and we want to convert it to a Maven project. We can do this by right-clicking on the project, navigating to Configure | Convert to Maven Project, and adding a POM file. Now, Update Project is used to update the project from its dependencies and resources. Update Project is also handy if you have multiple Maven projects in your workspace, and the projects depend on each other. Then, after you build (mvn install) one project, you can perform Update Project on other projects to pick up the new artifact. The update option is shown in the following screenshot:
Imagine a case where a project A depends on project B and they reside in the same workspace, mostly in multimodule projects. Now, if workspace resolution is disabled, to have project A, a successful build and a project B artifact are needed in the local repository. However, if the workspace resolution is enabled, the dependencies are resolved using an Eclipse workspace, and there is no need for an artifact in the local repository.
It disables the Maven aspect of the project, that is, the Maven dependencies are removed from the build path. In that case, we may need to include the JARs manually in the classpath from the build window.
It allows you to pull the source code to your Eclipse workspace for the dependency. In other words, it enables you to create a new Maven project for a dependency based on the sources for that dependency. The sources are pulled from the Source Code Management (SCM) system as defined in the POM for the dependency. If the dependency POM fails to mention the SCM, then this option does nothing. Make sure you have a proper m2e connector installed for the corresponding SCMs. We discussed importing and installing Subversion m2e connector in Chapter 3, Creating and Importing Projects.