9
Adding Service Discovery Using Netflix Eureka
In this chapter, we will learn how to use Netflix Eureka as a discovery service for microservices based on Spring Boot. To allow our microservices to communicate with Netflix Eureka, we will use the Spring Cloud module for Netflix Eureka clients. Before we delve into the details, we will elaborate on why a discovery service is needed and why a DNS server isn't sufficient.
The following topics will be covered in this chapter:
- Introduction to service discovery
- Setting up a Netflix Eureka server
- Connecting microservices to a Netflix Eureka server
- Setting up the configuration for development use
- Trying out Netflix Eureka as a discovery service
Technical requirements
For instructions on how to install tools used in this book and how to access the source code for this book see:
- Chapter 21 for macOS
- Chapter 22 for Windows
The code examples in this chapter all come from the source code in $BOOK_HOME/Chapter09.
If you want to view the changes applied to the source code in this chapter, that is, see what it took to add Netflix Eureka as a discovery service to the microservices landscape, you can compare it with the source code for Chapter 7, Developing Reactive Microservices. You can use your favorite diff tool and compare the two folders, that is, $BOOK_HOME/Chapter07 and $BOOK_HOME/Chapter09.
Introducing service discovery
Service discovery is probably the most important support function required to make a landscape of cooperating microservices production-ready. Netflix Eureka was the first discovery server supported by Spring Cloud.
We are strictly speaking about a service for service discovery, but instead of referring to it as a service discovery service, it will simply be referred to as a discovery service. When referring to an actual implementation of service discovery, like Netflix Eureka, the term discovery server will be used.
We will see how easy it is to register microservices with Netflix Eureka when using Spring Cloud. We will also learn how a client can use Spring Cloud LoadBalancer to send HTTP requests to one of the instances registered in Netflix Eureka. Finally, we will try scaling the microservices up and down, together with running some disruptive tests to see how Netflix Eureka can handle different types of fault scenarios.
Before we jump into the implementation details, we will look at the following topics:
- The problem with DNS-based service discovery
- Challenges with service discovery
- Service discovery with Netflix Eureka in Spring Cloud
The problem with DNS-based service discovery
Why can't we simply start new instances of a microservice and rely on round-robin DNS?
The idea behind round-robin DNS is that each instance of a microservice registers its IP address under the same name in a DNS server. When a client asks for IP addresses for the DNS name, the DNS server will return a list of IP addresses for the registered instances. The client can use this list of IP addresses to send requests to the microservice instances in a round-robin fashion, using the IP addresses one after another.
Let's try it out and see what happens! Follow these steps:
- Assuming that you have followed the instructions from Chapter 7, Developing Reactive Microservices, start the system landscape and insert some test data with the following command:
cd $BOOK_HOME/Chapter07 ./test-em-all.bash start - Scale up the
reviewmicroservice to two instances:docker-compose up -d --scale review=2 - Ask the composite product service for the IP addresses it finds for the
reviewmicroservice:docker-compose exec product-composite getent hosts reviewExpect an answer like the following:

Figure 9.1: Review microservice IP addresses
Great, the composite product service sees two IP addresses – in my case,
172.19.0.8and172.19.0.9– one for each instance of thereviewmicroservice! - If you want to, you can verify that these are the correct IP addresses by using the following commands. The commands ask each instance of the
reviewmicroservice for its IP address:docker-compose exec --index=1 review cat /etc/hosts docker-compose exec --index=2 review cat /etc/hostsThe last line in the output from each command should contain one of the IP addresses, as shown in the preceding code. For example:

Figure 9.2: IP address output
- Now, let's try out a couple of calls to the
product-compositeservice and see whether it uses both instances of thereviewmicroservice:curl localhost:8080/product-composite/1 -s | jq -r .serviceAddresses.revUnfortunately, we will only get responses from one of the microservice instances, as in this example:

Figure 9.3: Response from one review instance only
That was disappointing!
Okay, so what is going on here?
A DNS client asks a DNS server to resolve a DNS name and receives a list of IP addresses. Next, the DNS client tries out the received IP addresses one by one until it finds one that works, in most cases the first one in the list. A DNS client typically holds on to a working IP address; it does not apply a round-robin approach per request. Added to this, neither a typical DNS server implementation nor the DNS protocol itself is well suited for handling volatile microservice instances that come and go all the time. Because of this, even though DNS-based round robin is appealing in theory, it is not very practical to use for service discovery of microservice instances.
Before we move on and learn how to handle service discovery in a better way, let's shut down the system landscape:
docker-compose down
Challenges with service discovery
So, we need something a bit more powerful than a plain DNS to keep track of available microservice instances!
We must take the following into consideration when we're keeping track of many small moving parts, that is, microservice instances:
- New instances can start up at any point in time
- Existing instances can stop responding and eventually crash at any point in time
- Some of the failing instances might be okay after a while and should start to receive traffic again, while others will not and should be removed from the service registry
- Some microservice instances might take some time to start up; that is, just because they can receive HTTP requests doesn't mean that traffic should be routed to them
- Unintended network partitioning and other network-related errors can occur at any time
Building a robust and resilient discovery server is not an easy task, to say the least. Let's see how we can use Netflix Eureka to handle these challenges!
Service discovery with Netflix Eureka in Spring Cloud
Netflix Eureka implements client-side service discovery, meaning that the clients run software that talks to the discovery server, Netflix Eureka, to get information about the available microservice instances. This is illustrated in the following diagram:

Figure 9.4: Discovery server diagram
The process is as follows:
- Whenever a microservice instance starts up – for example, the Review service – it registers itself to one of the Eureka servers.
- On a regular basis, each microservice instance sends a heartbeat message to the Eureka server, telling it that the microservice instance is okay and is ready to receive requests.
- Clients – for example, the Product Composite service – use a client library that regularly asks the Eureka service for information about available services.
- When the client needs to send a request to another microservice, it already has a list of available instances in its client library and can pick one of them without asking the discovery server. Typically, available instances are chosen in a round-robin fashion; that is, they are called one after another before the first one is called once more.
In Chapter 17, Implementing Kubernetes Features to Simplify the System Landscape, we will look at an alternative approach to providing a discovery service using a server-side service concept in Kubernetes.
Spring Cloud comes with an abstraction of how to communicate with a discovery service such as Netflix Eureka and provides an interface called DiscoveryClient. This can be used to interact with a discovery service to get information regarding available services and instances. Implementations of the DiscoveryClient interface are also capable of automatically registering a Spring Boot application with the discovery server.
Spring Boot can find implementations of the DiscoveryClient interface automatically during startup, so we only need to bring in a dependency on the corresponding implementation to connect to a discovery server. In the case of Netflix Eureka, the dependency that's used by our microservices is spring-cloud-starter-netflix-eureka-client.
Spring Cloud also has DiscoveryClient implementations that support the use of either Apache ZooKeeper or HashiCorp Consul as a discovery server.
Spring Cloud also comes with an abstraction – the LoadBalancerClient interface – for clients that want to make requests through a load balancer to registered instances in the discovery service. The standard reactive HTTP client, WebClient, can be configured to use the LoadBalancerClient implementation. By adding the @LoadBalanced annotation to a @Bean declaration that returns a WebClient.Builder object, a LoadBalancerClient implementation will be injected into the Builder instance as an ExchangeFilterFunction. Later in this chapter, in the Connecting microservices to a Netflix Eureka server section, we will look at some source code examples of how this can be used.
In summary, Spring Cloud makes it very easy to use Netflix Eureka as a discovery service. With this introduction to service discovery, and its challenges, and how Netflix Eureka can be used together with Spring Cloud, we are ready to learn how to set up a Netflix Eureka server.
Setting up a Netflix Eureka server
In this section, we will learn how to set up a Netflix Eureka server for service discovery. Setting up a Netflix Eureka server using Spring Cloud is really easy – just follow these steps:
- Create a Spring Boot project using Spring Initializr, as described in Chapter 3, Creating a Set of Cooperating Microservices, in the Using Spring Initializr to generate skeleton code section.
- Add a dependency to
spring-cloud-starter-netflix-eureka-server. - Add the
@EnableEurekaServerannotation to the application class. - Add a Dockerfile, similar to the Dockerfiles that are used for our microservices, with the exception that we export the default Eureka port,
8761, instead of the default port for our microservices,8080. - Add the Eureka server to our three Docker Compose files, that is,
docker-compose.yml,docker-compose-partitions.yml, anddocker-compose-kafka.yml, like this:eureka: build: spring-cloud/eureka-server mem_limit: 512m ports: - "8761:8761" - Finally, add some configuration. Please see the Setting up configuration for development use section in this chapter, where we will go through the configuration for both the Eureka server and our microservices.
That's all it takes!
You can find the source code for the Eureka server in the $BOOK_HOME/Chapter09/spring-cloud/eureka-server folder.
Now we have set up a Netflix Eureka server for service discovery, we are ready to learn how to connect microservices to it.
Connecting microservices to a Netflix Eureka server
In this section, we will learn how to connect microservice instances to a Netflix Eureka server. We will learn both how microservices instances register themselves to the Eureka server during their startup and how clients can use the Eureka server to find the microservice instances they want to call.
To be able to register a microservice instance in the Eureka server, we need to do the following:
- Add a dependency to
spring-cloud-starter-netflix-eureka-clientin the build file,build.gradle:Implementation 'org.springframework.cloud:spring-cloud-starter-netflix-eureka-client' - When running tests on a single microservice, we don't want to depend on having the Eureka server up and running. Therefore, we will disable the use of Netflix Eureka in all Spring Boot tests, that is, JUnit tests annotated with
@SpringBootTest. This can be done by adding theeureka.client.enabledproperty and setting it tofalsein the annotation, like so:@SpringBootTest(webEnvironment=RANDOM_PORT, properties = {"eureka.client.enabled=false"}) - Finally, add some configuration. Please go to the Setting up configuration for development use section, where we will go through the configuration for both the Eureka server and our microservices.
There is one property in the configuration that is extra important: spring.application.name. It is used to give each microservice a virtual hostname, a name used by the Eureka service to identify each microservice. Eureka clients will use this virtual hostname in the URLs that are used to make HTTP calls to the microservice, as we will see as we proceed.
To be able to look up available microservices instances through the Eureka server in the product-composite microservice, we also need to do the following:
- Add a Spring bean in the main application class,
ProductCompositeServiceApplication, that creates a load balancer-awareWebClient-builder:@Bean @LoadBalanced public WebClient.Builder loadBalancedWebClientBuilder() { return WebClient.builder(); }For more information on how to use a
WebClientinstance as a load balancer client, see https://docs.spring.io/spring-cloud-commons/docs/current/reference/html/#webclinet-loadbalancer-client. - The
WebClient-builder bean can be used by the integration class,ProductCompositeIntegration, by injecting it into the constructor:private WebClient webClient; @Autowired public ProductCompositeIntegration( WebClient.Builder webClientBuilder, ... ) { this.webClient = webClientBuilder.build(); ... }The constructor uses the injected builder to create the
webClient.Once a
WebClientis built, it is immutable. This means that it can be reused by concurrent requests without risking them stepping on each other's toes. - We can now get rid of our hardcoded configuration of available microservices in
application.yml. It looks like this:app: product-service: host: localhost port: 7001 recommendation-service: host: localhost port: 7002 review-service: host: localhost port: 7003 - The corresponding code in the integration class,
ProductCompositeIntegration, that handled the hardcoded configuration is simplified and replaced by a declaration of the base URLs to the APIs of the core microservices. This is shown in the following code:private static final String PRODUCT_SERVICE_URL = "http://product"; private static final String RECOMMENDATION_SERVICE_URL = "http://recommendation"; private static final String REVIEW_SERVICE_URL = "http://review";The hostnames in the preceding URLs are not actual DNS names. Instead, they are the virtual hostnames that are used by the microservices when they register themselves to the Eureka server, in other words, the values of the
spring.application.nameproperty.
Now we've seen how to connect microservice instances to a Netflix Eureka server, we can move on and learn how to configure the Eureka server and the microservice instances that connect to it.
Setting up the configuration for development use
Now, it's time for the trickiest part of setting up Netflix Eureka as a discovery service: setting up a working configuration for both the Eureka server and its clients, our microservice instances.
Netflix Eureka is a highly configurable discovery server that can be set up for a number of different use cases, and it provides robust, resilient, and fault-tolerant runtime characteristics. One downside of this flexibility and robustness is that it has an almost overwhelming number of configuration options. Fortunately, Netflix Eureka comes with good default values for most of the configurable parameters – at least when it comes to using them in a production environment.
When it comes to using Netflix Eureka during development, the default values cause long startup times. For example, it can take a long time for a client to make an initial successful call to a microservices instance that is registered in the Eureka server.
Up to two minutes of wait time can be experienced when using the default configuration values. This wait time is added to the time it takes for the Eureka service and the microservices to start up. The reason for this wait time is that the involved processes need to synchronize registration information with each other. The microservices instances need to register with the Eureka server, and the client needs to gather information from the Eureka server. This communication is mainly based on heartbeats, which happen every 30 seconds by default. A couple of caches are also involved, which slows down the propagation of updates.
We will use a configuration that minimizes this wait time, which is useful during development. For use in production environments, the default values should be used as a starting point!
We will only use one Netflix Eureka server instance, which is okay in a development environment. In a production environment, you should always use two or more instances to ensure high availability for the Netflix Eureka server.
Let's start to learn what types of configuration parameters we need to know about.
Eureka configuration parameters
The configuration parameters for Eureka are divided into three groups:
- Parameters for the Eureka server, prefixed with
eureka.server. - Parameters for Eureka clients, prefixed with
eureka.client. This is for clients who want to communicate with a Eureka server. - Parameters for Eureka instances, prefixed with
eureka.instance. This is for the microservices instances that want to register themselves in the Eureka server.
Some of the available parameters are described in the Spring Cloud Netflix documentation: https://docs.spring.io/spring-cloud-netflix/docs/current/reference/html/.
For an extensive list of available parameters, I recommend reading the source code:
- For Eureka server parameters, look at the
org.springframework.cloud.netflix.eureka.server.EurekaServerConfigBeanclass for default values and thecom.netflix.eureka.EurekaServerConfiginterface for the relevant documentation - For Eureka client parameters, look at the
org.springframework.cloud.netflix.eureka.EurekaClientConfigBeanclass for the default values and documentation - For Eureka instance parameters, look at the
org.springframework.cloud.netflix.eureka.EurekaInstanceConfigBeanclass for default values and documentation
Let's start to learn about configuration parameters for the Eureka server.
Configuring the Eureka server
To configure the Eureka server for use in a development environment, the following configuration can be used:
server:
  port: 8761

eureka:
  instance:
    hostname: localhost
  client:
    registerWithEureka: false
    fetchRegistry: false
    serviceUrl:
      defaultZone: http://${eureka.instance.hostname}:${server.port}/eureka/

  server:
    waitTimeInMsWhenSyncEmpty: 0
    response-cache-update-interval-ms: 5000
The first part of the configuration, for a Eureka instance and client, is a standard configuration for a standalone Eureka server. For details, see the Spring Cloud documentation that we referred to previously. The last two parameters used for the Eureka server, waitTimeInMsWhenSyncEmpty and response-cache-update-interval-ms, are used to minimize the startup time.
With the Eureka server configured, we are ready to see how clients to the Eureka server, that is, the microservice instances, can be configured.
Configuring clients to the Eureka server
To be able to connect to the Eureka server, the microservices have the following configuration:
eureka:
  client:
    serviceUrl:
      defaultZone: http://localhost:8761/eureka/
    initialInstanceInfoReplicationIntervalSeconds: 5
    registryFetchIntervalSeconds: 5
  instance:
    leaseRenewalIntervalInSeconds: 5
    leaseExpirationDurationInSeconds: 5

---
spring.config.activate.on-profile: docker

eureka.client.serviceUrl.defaultZone: http://eureka:8761/eureka/
The eureka.client.serviceUrl.defaultZone parameter is used to find the Eureka server, using the hostname localhost when running without Docker and the hostname eureka when running as containers in Docker. The other parameters are used to minimize the startup time and the time it takes to deregister a microservice instance that is stopped.
Now, we have everything in place that's required to actually try out the discovery service using the Netflix Eureka server together with our microservices.
Trying out the discovery service
With all of the details in place, we are ready to try out Netflix Eureka:
- First, build the Docker images with the following commands:
cd $BOOK_HOME/Chapter09 ./gradlew build && docker-compose build - Next, start the system landscape and run the usual tests with the following command:
./test-em-all.bash startExpect output similar to what we have seen in previous chapters:

Figure 9.5: Successful test output
With the system landscape up and running, we can start by testing how to scale up the number of instances for one of the microservices.
Scaling up
Run the following commands to try out scaling up a service:
- Launch two extra
reviewmicroservice instances:docker-compose up -d --scale review=3With the preceding command, we ask Docker Compose to run three instances of the
reviewservice. Since one instance is already running, two new instances will be started up. - Once the new instances are up and running, browse to
http://localhost:8761/and expect something like the following:
Figure 9.6: Viewing instances registered with Eureka
Verify that you can see three
reviewinstances in the Netflix Eureka web UI, as shown in the preceding screenshot. - One way of knowing when the new instances are up and running is to run this command:
docker-compose logs review | grep StartedExpect output that looks as follows:

Figure 9.7: New review instances
- We can also use a REST API that the Eureka service exposes. To get a list of instance IDs, we can issue a
curlcommand, like this:curl -H "accept:application/json" localhost:8761/eureka/apps -s | jq -r .applications.application[].instance[].instanceIdExpect a response that looks similar to the following:

Figure 9.8: List of microservice instance IDs
- If you look into the test script,
test-em-all.bash, you will find new tests that verify that we can reach Eureka's REST API and that it reports 4 instances:# Verify access to Eureka and that all four microservices are # registered in Eureka assertCurl 200 "curl -H "accept:application/json" $HOST:8761/eureka/apps -s" assertEqual 4 $(echo $RESPONSE | jq ".applications.application | length") - Now that we have all of the instances up and running, let's try out the client-side load balancer by making some requests and focusing on the address of the
reviewservice in the responses, as follows:curl localhost:8080/product-composite/1 -s | jq -r .serviceAddresses.revExpect responses similar to the following:

Figure 9.9: Review service addresses
Note that the address of the
reviewservice changes in each response; the load balancer uses round-robin logic to call the availablereviewinstances, one at a time! - We can also take a look into the
reviewinstance's log records with the following command:docker-compose logs review | grep getReviewsYou will see output that looks similar to the following:

Figure 9.10: Review instance log records
In the preceding output, we can see how the three review microservice instances, review_1, review_2, and review_3, in turn, have responded to the requests.
We can also try to scale down the instances, which we will do next.
Scaling down
Let's also see what happens if we lose one instance of the review microservice. Run the following commands:
- We can simulate one instance stopping unexpectedly by running the following command:
docker-compose up -d --scale review=2 - After the shutdown of the
reviewinstance, there is a short time period during which calls to the API might fail. This is caused by the time it takes for information regarding the lost instance to propagate to the client, theproduct-compositeservice. During this time frame, the client-side load balancer might choose the instance that no longer exists. To prevent this from occurring, resilience mechanisms such as timeouts and retries can be used. In Chapter 13, Improving Resilience Using Resilience4j, we will see how this can be applied. For now, let's specify a timeout on ourcurlcommand, using the-m 2option to specify that we will wait no longer than 2 seconds for a response:curl localhost:8080/product-composite/1 -m 2If a timeout occurs, that is, the client-side load balancer tries to call an instance that no longer exists, the following response is expected from
curl:
Figure 9.11: Response from curl if a timeout occurs
- Besides that, we should expect normal responses from the two remaining instances; that is, the
serviceAddresses.revfield should contain the addresses of the two instances, as in the following:
Figure 9.12: Normal responses from remaining instances
In the preceding sample output, we can see that two different container names and IP addresses are reported. This means that the requests have been served by the two remaining microservice instances.
After trying out the scaling down of microservice instances, we can try out something that is a bit more disruptive: stopping the Eureka server and seeing what happens when the discovery server is temporarily unavailable.
Disruptive tests with the Eureka server
Let's bring some disorder to our Eureka server and see how the system landscape manages it!
To start with, what happens if we crash the Eureka server?
As long as clients have read the information regarding available microservice instances from the Eureka server before it is stopped, the clients will be fine since they cache the information locally. However, new instances will not be made available to clients, and they will not be notified if any running instances are terminated. So, calls to instances that are no longer running will cause failures.
Let's try this out!
Stopping the Eureka server
To simulate a Eureka server crash, follow these steps:
- First, stop the Eureka server and keep the two
reviewinstances up and running:docker-compose up -d --scale review=2 --scale eureka=0 - Try a couple of calls to the API and extract the service address of the
reviewservice:curl localhost:8080/product-composite/1 -s | jq -r .serviceAddresses.rev - The response will – just like before we stopped the Eureka server – contain the addresses of the two
reviewinstances, like so: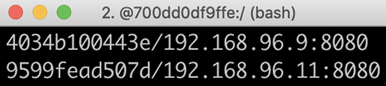
Figure 9.13: Response with two review instance addresses
This shows that the client can make calls to existing instances, even though the Eureka server is no longer running.
Stopping a review instance
To further investigate what the effects are of a crashed Eureka server, let's also simulate the crash of one of the remaining review microservice instances:
- Terminate one of the two
reviewinstances with the following command:docker-compose up -d --scale review=1 --scale eureka=0The client, that is, the
product-compositeservice, will not be notified that one of thereviewinstances has disappeared since no Eureka server is running. Due to this, it still thinks that there are two instances up and running. Every second call to the client will cause it to call areviewinstance that no longer exists, resulting in the response from the client not containing any information from thereviewservice. The service address of thereviewservice will be empty. - Try out the same
curlcommand as before to verify that the service address of thereviewservice will be empty every second time:curl localhost:8080/product-composite/1 -s | jq -r .serviceAddresses.revThis can be prevented, as described previously, by using resilience mechanisms such as timeouts and retries.
Starting up an extra instance of the product service
As a final test of the effects of a crashed Eureka server, let's see what happens if we start up a new instance of the product microservice. Perform the following steps:
- Let's try starting a new instance of the
productservice:docker-compose up -d --scale review=1 --scale eureka=0 --scale product=2 - Call the API a couple of times and extract the address of the
productservice with the following command:curl localhost:8080/product-composite/1 -s | jq -r .serviceAddresses.proSince no Eureka server is running, the client will not be notified of the new
productinstance, and so all calls will go to the first instance, as in the following example:
Figure 9.14: Address of the first product instance only
We have seen some of the most important aspects of not having a Netflix Eureka server up and running. Let's conclude the section on disruptive tests by starting up the Netflix Eureka server again and seeing how the system landscape handles self-healing, that is, resilience.
Starting up the Eureka server again
In this section, we will wrap up the disruptive tests by starting up the Eureka server again. We will also verify that the system landscape self-heals, which means the new instance of the product microservice gets registered with the Netflix Eureka server and the client gets updated by the Eureka server. Perform the following steps:
- Start the Eureka server with the following command:
docker-compose up -d --scale review=1 --scale eureka=1 --scale product=2 - Make the following call a couple of times to extract the addresses of the product and the
reviewservice:curl localhost:8080/product-composite/1 -s | jq -r .serviceAddressesVerify that the following happens:
- All calls go to the remaining
reviewinstance, demonstrating that the client has detected that the secondreviewinstance is gone - Calls to the
productservice are load-balanced over the twoproductinstances, demonstrating the client has detected that there are twoproductinstances available
The response should contain the same address for the
reviewinstance and two different addresses for the twoproductinstances, as shown in the following two examples:
Figure 9.15: Product and review addresses
This is the second response:

Figure 9.16: Product and review addresses
The IP addresses
192.168.128.3and192.168.128.7belong to the twoproductinstances.192.168.128.9is the IP address of the single remainingreviewinstance.To summarize, the Eureka server provides a very robust and resilient implementation of a discovery service. If even higher availability is desired, multiple Eureka servers can be launched and configured to communicate with each other. Details on how to set up multiple Eureka servers can be found in the Spring Cloud documentation: https://docs.spring.io/spring-cloud-netflix/docs/current/reference/html/#spring-cloud-eureka-server-peer-awareness.
- All calls go to the remaining
- Finally, shut down the system landscape with this command:
docker-compose down
This completes the tests of the discovery server, Netflix Eureka, where we have learned how to scale up and scale down microservice instances and what happens if a Netflix Eureka server crashes and later on comes back online.
Summary
In this chapter, we learned how to use Netflix Eureka for service discovery. First, we looked into the shortcomings of a simple DNS-based service discovery solution and the challenges that a robust and resilient service discovery solution must be able to handle.
Netflix Eureka is a very capable service discovery solution that provides robust, resilient, and fault-tolerant runtime characteristics. However, it can be challenging to configure correctly, especially for a smooth developer experience. With Spring Cloud, it becomes easy to set up a Netflix Eureka server and adapt Spring Boot-based microservices, both so that they can register themselves to Eureka during startup and, when acting as a client to other microservices, keep track of available microservice instances.
With a discovery server in place, it's time to see how we can handle external traffic using Spring Cloud Gateway as an edge server. Head over to the next chapter to find out how!
Questions
- What is required to turn a Spring Boot application created with Spring Initializr into a fully fledged Netflix Eureka server?
- What is required to make a Spring Boot-based microservice register itself automatically as a startup with Netflix Eureka?
- What is required to make it possible for a Spring Boot-based microservice to call another microservice that is registered in a Netflix Eureka server?
- Let's assume that you have a Netflix Eureka server up and running, along with one instance of microservice A and two instances of microservice B. All microservice instances register themselves with the Netflix Eureka server. Microservice A makes HTTP requests to microservice B based on the information it gets from the Eureka server. What will happen if, in turn, the following happens:
- The Netflix Eureka server crashes
- One of the instances of microservice B crashes
- A new instance of microservice A starts up
- A new instance of microservice B starts up
- The Netflix Eureka server starts up again