22
Installation Instructions for Microsoft Windows with WSL 2 and Ubuntu
In this chapter, we will learn how to set up the tools required to run the commands described in this book on Microsoft Windows. We will also learn how to get access to the source code of the book.
The following topics will be covered in this chapter:
- Technical requirements
- Installing tools
- Accessing the source code
If you are using a Mac, you should follow the instructions in Chapter 21, Installation Instructions for macOS.
Technical requirements
All of the commands described in this book are run on a MacBook Pro using bash as the command shell. In this chapter, we will learn how to set up a development environment in Microsoft Windows where the commands in this book can be run without requiring any changes. In a few cases, the commands have to be modified to run in the Windows environment, for example using another host and port for accessing a local Kubernetes cluster. This is clearly pointed out in each chapter and the alternative command to be used in the Windows environment is also specified.
The development environment is based on Windows Subsystem for Linux v2, or WSL 2 for short, which requires Windows 10, version 1903 or later. We will use WSL 2 to run a Linux server based on Ubuntu 20.04 where we will run all the commands using bash as the command shell.
Microsoft provides integration between Windows and Linux servers that run in WSL 2. Linux files can be accessed from Windows, and vice versa. We will learn how to access files in the Linux server from Visual Studio Code running in Windows. Ports accessible from localhost in a Linux server are also available on localhost in Windows. We will use this integration to access web pages exposed by web applications running in the Linux server from a web browser running in Windows.
For more information on WSL 2, see https://docs.microsoft.com/en-us/windows/wsl/.
Installing tools
In this section, we will learn how to install and configure the tools. Here is a list of the tools we will install, with a link to more information on downloading and installation, if required.
On Windows, we will install the following tools:
- Windows Subsystem for Linux v2 (WSL 2): https://docs.microsoft.com/en-us/windows/wsl/install-win10
- Ubuntu 20.04 in WSL 2: https://www.microsoft.com/en-us/p/ubuntu-2004-lts/9n6svws3rx71
- Windows Terminal: https://www.microsoft.com/en-us/p/windows-terminal/9n0dx20hk701
- Docker Desktop for Windows: https://hub.docker.com/editions/community/docker-ce-desktop-windows/
- Visual Studio Code and its extension for Remote WSL: https://code.visualstudio.com and https://marketplace.visualstudio.com/items?itemName=ms-vscode-remote.remote-wsl
On the Linux server, we will install the following tools:
- Git: https://git-scm.com/downloads
- Java: https://adoptopenjdk.net/installation.html
- curl: https://curl.haxx.se/download.html
- jq: https://stedolan.github.io/jq/download/
- Spring Boot CLI: https://docs.spring.io/spring-boot/docs/2.5.2/reference/html/getting-started.html#getting-started.installing.cli
- Siege: https://github.com/JoeDog/siege#where-is-it
- Helm: https://helm.sh/docs/intro/install/#from-apt-debianubuntu
- kubectl: https://kubernetes.io/docs/tasks/tools/install-kubectl-linux/
- Minikube: https://minikube.sigs.k8s.io/docs/start/
- Istioctl: https://istio.io/latest/docs/setup/getting-started/#download
The following versions have been used when writing this book:
- Windows Terminal: 1.7.1033
- Visual Studio Code: 1.55.0
- Docker Desktop for Windows: v3.3.1
- Git: v2.25.1
- Java: v16
- curl: v7.68.0
- jq: v1.6
- Spring Boot CLI: v2.5.2
- Siege: 4.0.4
- Helm: 3.5.3
- kubectl: 1.20.5
- Minikube: 1.18.1
- Istioctl: 1.9.3
We will start by installing the tools required on Windows and, after that, we will install the required tools on the Linux server running in WSL 2.
Installing tools on Windows
In the Windows environment, we will install WSL 2 together with a Linux server, Windows Terminal, Docker Desktop, and finally Visual Studio Code with an extension for remote access to files in WSL.
Installing WSL 2 – Windows Subsystem for Linux v2
For more recent versions of Windows 10, WSL 2 can be installed with one command: wsl –install. But this description covers older releases back to Windows 10 v1903. These instructions have been tested on a PC with Windows 10 v1909.
Run the following commands to install WSL 2:
- Enable Windows Subsystem for Linux and the Virtual Machine Platform.
Open PowerShell as an administrator and run the following two commands:
dism.exe /online /enable-feature /featurename:Microsoft-Windows-Subsystem-Linux /all /norestart dism.exe /online /enable-feature /featurename:VirtualMachinePlatform /all /norestart - Restart your PC to complete the installation.
- Update the WSL 2 Linux kernel:
- Download it from https://wslstorestorage.blob.core.windows.net/wslblob/wsl_update_x64.msi.
- Execute the downloaded
.msifile.
- Set WSL 2 as the default version by opening PowerShell and running the following command:
wsl --set-default-version 2
Installing Ubuntu 20.04 on WSL 2
With WSL 2 in place, we can now install the Linux server. This book uses Ubuntu 20.04, which can be installed from Microsoft Store:
- To select from available Linux distributions for WSL 2, go to https://aka.ms/wslstore.
- To go directly to Ubuntu 20.04, visit https://www.microsoft.com/store/apps/9n6svws3rx71.
After Ubuntu 20.04 is downloaded, start it to get it installed. A console window will be opened and after a minute or two, you will be asked for a username and password to be used in the Linux server.
Installing Windows Terminal
To simplify access to the Linux server, I strongly recommend installing Windows Terminal. It supports:
- Using multiple tabs
- Using multiple panes within a tab
- Using multiple types of shells, for example: Windows Command Prompt, PowerShell, bash for WSL 2, and Azure CLI
- …and much more; for more information, see https://docs.microsoft.com/en-us/windows/terminal/
Windows Terminal can be installed from Microsoft Store; see https://aka.ms/terminal.
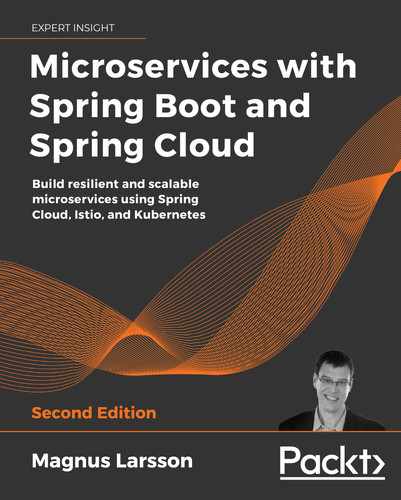
When you start Windows Terminal and click on the down arrow in the menu, you will find that it is already configured for starting a terminal in the Linux server:
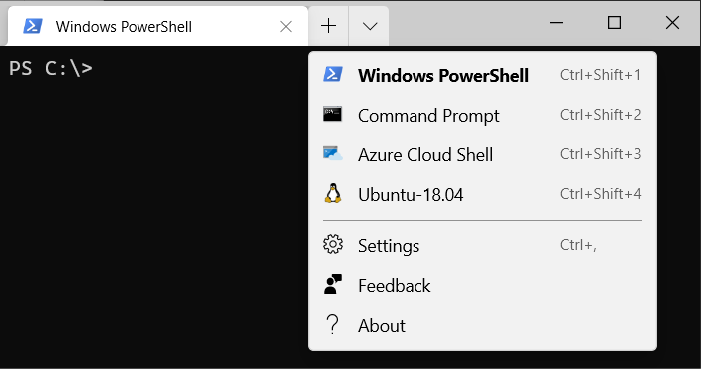
Figure 22.1: Windows Terminal configured for the Linux server in WSL 2
Select Ubuntu-20.04, and a bash shell will be started. By default, your working directory will be set to your home folder in Windows, for example /mnt/c/Users/magnus. To get to your home folder in the Linux server, simply use the cd and pwd commands to verify that you are inside your Linux server's filesystem:
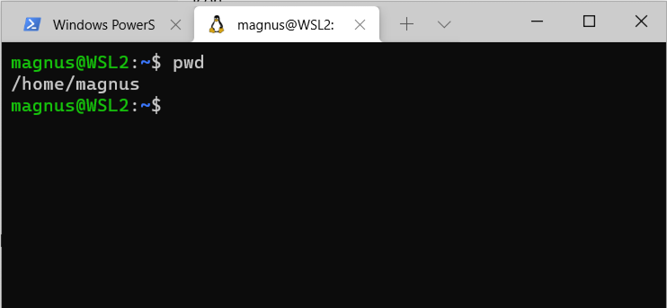
Figure 22.2: Windows Terminal using bash to access files in the Linux server
Installing Docker Desktop for Windows
To install and configure Docker Desktop for Windows, perform the following steps:
- Download and install Docker Desktop for Windows from https://hub.docker.com/editions/community/docker-ce-desktop-windows/.
- If you are asked to enable WSL 2 during installation, answer yes.
- After the installation is complete, launch Docker Desktop from the Start menu.
- From the Docker menu, select Settings, and in the Settings window, select the General tab:
- Ensure that the Use the WSL 2 based engine check box is selected.
- To avoid starting up Docker Desktop manually each time the PC is restarted, I recommend also selecting the Start Docker Desktop when you log in check box.
The General settings should look like the following:
Figure 22.3: Docker Desktop configuration
- Finalize the configuration by clicking on the Apply & Restart button.
Installing Visual Studio Code and its extension for Remote WSL
To simplify editing source code inside the Linux server, I recommend using Visual Studio Code. With its extension for WSL 2, named Remote WSL, you can easily work with source code inside the Linux server using Visual Studio Code running in Windows.
To install and configure Visual Studio Code and its extension for Remote WSL, perform the following steps:
- Visual Studio Code can be downloaded and installed from https://code.visualstudio.com:
- When asked to Select Additional Tasks, select the Add to PATH option. This will make it possible to open a folder in Visual Studio Code from within the Linux server with the
codecommand.
- When asked to Select Additional Tasks, select the Add to PATH option. This will make it possible to open a folder in Visual Studio Code from within the Linux server with the
- After the installation is complete, launch Visual Studio Code from the Start menu.
- Install the extension for Remote WSL using the link https://marketplace.visualstudio.com/items?itemName=ms-vscode-remote.remote-wsl.
If you want to learn more about how Visual Studio Code integrates with WSL 2, see this article: https://code.visualstudio.com/docs/remote/wsl.
Installing tools on the Linux server in WSL 2
Now, it is time to install the tools required in the Linux server in WSL 2.
Launch Windows Terminal from the Start menu and open a terminal in the Linux server as described in the Installing Windows Terminal section.
The git and curl tools are already installed in Ubuntu. The remaining tools will be installed using either apt install, sdk install, or a combination of curl and install.
Installing tools using apt install
In this section, we will install java, jq, siege, helm, and a couple of dependencies required by the other tools.
Install jq, zip, unzip, and siege with the following commands:
sudo apt update
sudo apt install -y jq
sudo apt install -y zip
sudo apt install -y unzip
sudo apt install -y siege
To install Helm, run the following commands:
curl https://baltocdn.com/helm/signing.asc | sudo apt-key add -
sudo apt install -y apt-transport-https
echo "deb https://baltocdn.com/helm/stable/debian/ all main"
  | sudo tee /etc/apt/sources.list.d/helm-stable-debian.list
sudo apt install -y helm
To install OpenJDK 16, we will use a distribution named AdoptOpenJDK. Run the following commands to install AdoptOpenJDK 16:
wget -qO -  https://adoptopenjdk.jfrog.io/adoptopenjdk/api/gpg/key/public
  | sudo apt-key add -
sudo add-apt-repository
  ––yes https://adoptopenjdk.jfrog.io/adoptopenjdk/deb/
sudo apt install -y adoptopenjdk-16-hotspot
Installing the Spring Boot CLI using sdk install
To install the Spring Boot CLI, we will use SDKman (https://sdkman.io). Install SDKman with the following commands:
curl -s "https://get.sdkman.io" | bash
source "$HOME/.sdkman/bin/sdkman-init.sh"
Verify that SDKman was installed correctly with the following command:
sdk version
Expect it to return something like:
SDKMAN5.9.2+613
Finally, install the Spring Boot CLI:
sdk install springboot 2.5.2
Installing the remaining tools using curl and install
Finally, we will install kubectl, minikube, and istioctl using curl to download the executable files. Once downloaded, we will use the install command to copy the files to the proper places in the filesystem, and also ensure that the owner and access rights are configured properly. When it comes to these tools, it is important to install versions that are compatible with each other, specifically when it comes to what versions of Kubernetes they support. Simply installing and upgrading to the latest versions can lead to situations where incompatible versions of Minikube, Kubernetes, and Istio are used.
For supported Kubernetes versions when it comes to Istio, see https://istio.io/latest/about/supported-releases/#support-status-of-istio-releases. For Minikube, see https://minikube.sigs.k8s.io/docs/handbook/config/#selecting-a-kubernetes-version.
To install the kubectl version used in this book, run the following commands:
curl -LO "https://dl.k8s.io/release/v1.20.5/bin/linux/amd64/kubectl"
sudo install -o root -g root -m 0755 kubectl /usr/local/bin/kubectl
rm kubectl
To install the Minikube version used in this book, run the following commands:
curl -LO https://storage.googleapis.com/minikube/releases/v1.18.1/minikube-linux-amd64
sudo install -o root -g root -m 0755 minikube-linux-amd64
  /usr/local/bin/minikube
rm minikube-linux-amd64
To install the Istioctl version used in this book, run the following commands:
curl -L https://istio.io/downloadIstio | ISTIO_VERSION=1.9.3 TARGET_ARCH=x86_64 sh -
sudo install -o root -g root -m 0755 istio-1.9.3/bin/istioctl /usr/local/bin/istioctl
rm -r istio-1.9.3
With the tools now installed, we can verify that they have been installed as expected.
Verifying the installations
To verify the tool installations, run the following commands to print each tool's version:
git version &&
docker version -f json | jq -r .Client.Version &&
java -version 2>&1 | grep "openjdk version" &&
curl --version | grep "curl" &&
jq --version &&
spring --version &&
siege --version 2>&1 | grep SIEGE &&
helm version --short &&
kubectl version --client --short &&
minikube version | grep "minikube" &&
istioctl version --remote=false
Expect version info like the following:

Figure 22.4: Versions used on the Linux server in WSL 2
With the tools installed and verified, let's see how we can access the source code for this book.
Accessing the source code
The source code for this book can be found in the GitHub repository at https://github.com/PacktPublishing/Microservices-with-Spring-Boot-and-Spring-Cloud-2E.
To be able to run the commands in the Linux server in WSL 2 that are described in this book, download the source code to a folder and set up an environment variable, $BOOK_HOME, that points to that folder. Sample commands are as follows:
export BOOK_HOME=~/Microservices-with-Spring-Boot-and-Spring-Cloud-2E
git clone https://github.com/PacktPublishing/Microservices-with-Spring-Boot-and-Spring-Cloud-2E.git $BOOK_HOME
To verify access to source code downloaded to the Linux server in WSL 2 from Visual Studio Code, run the following commands:
cd $BOOK_HOME
code .
Visual Studio Code will open a window from where you can start to inspect the source code. You can also start a Terminal window for running bash commands in the Linux server from the menu selection Terminal → New Terminal. The Visual Studio Code window should look something like the following:

Figure 22.5: Accessing a file in the Linux server from Visual Studio Code
The Java source code is written for Java SE 8 and uses a Java SE 16 JRE when executed in Docker containers. The following versions of Spring are used:
- Spring Framework: 5.3.8
- Spring Boot: 2.5.2
- Spring Cloud: 2020.0.3
The code examples in each chapter all come from the source code in $BOOK_HOME/ChapterNN, where NN is the number of the chapter. The code examples in the book are in many cases edited to remove irrelevant parts of the source code, such as comments, imports, and log statements.
The structure of the code
Each chapter consists of a number of Java projects, one for each microservice and Spring Cloud service, plus a couple of library projects used by the other projects. Chapter 14 contains the largest number of projects; its project structure looks like:
├── api
├── microservices
│   ├── product-composite-service
│   ├── product-service
│   ├── recommendation-service
│   └── review-service
├── spring-cloud
│   ├── authorization-server
│   ├── config-server
│   ├── eureka-server
│   └── gateway
└── util
All projects are built using Gradle and have a file structure according to Gradle standard conventions:
├── build.gradle
├── settings.gradle
└── src
    ├── main
    │   ├── java
    │   └── resources
    └── test
        ├── java
        └── resources
For more information on how to organize a Gradle project, see https://docs.gradle.org/current/userguide/organizing_gradle_projects.html.
With this, we have the required tools installed for WSL 2 and Windows and the source code for the book downloaded. In the next and final chapter, we will learn how to natively compile microservices, reducing their startup time to sub-seconds.