
In the preceding exercises, we put some lists and tables on the page. They definitely serve the purposes for which they were intended: they contain the information they were designed to contain, and they keep it segregated from other information. Semantically, lists and tables are superior to using paragraph tags or one paragraph with line breaks between the relevant blocks. The only problem with them is their appearance.
This is another case of cascading style sheets to the rescue. You will now learn how to maintain the semantic value of these tags for search engines and non-visual browsers, but style them so that they look appealing to visitors.
In this exercise, you will learn to style the presentation of your content by using a class and by styling the base HTML element.
Note
USE the CH4 sample site. This site is located in the DocumentsMicrosoft PressExpression Web SBSSample Sites folder.
OPEN the CH4 site and display the contact page.
On the View menu, click Visual Aids, and then click Margins and Padding.
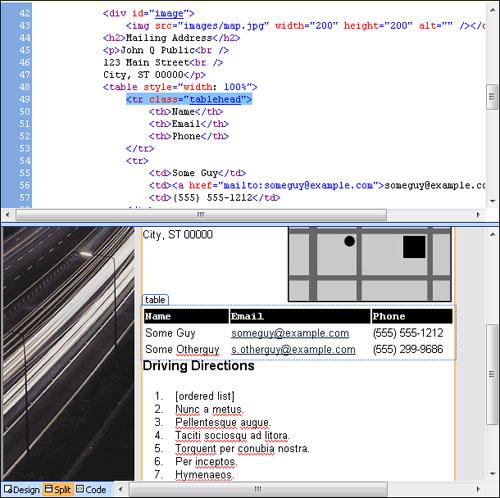
In the Design pane, scroll to the employee contact table, and select the table row that contains the table heads (<th>).
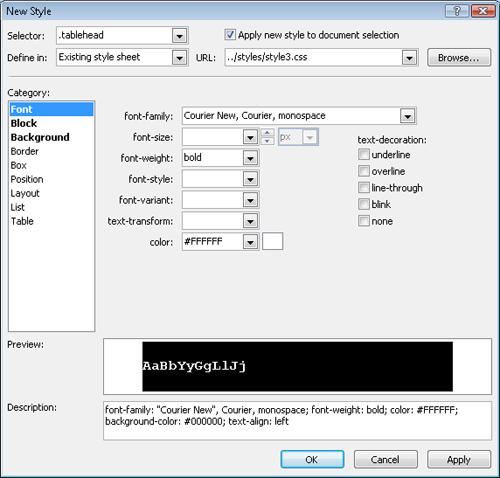
In the Apply Styles task pane, click New Style. In the New Style dialog box, name the style .tablehead. Then select the Apply new style to document selection setting.
In the Define in box, click Existing style sheet (../styles/style3.css).
Under Font, set font-family to Courier New, Courier, monospace; color to #FFFFFF; and font-weight to bold. Under Block, set text-align to left, and under Background, set background-color to #000000.
Click OK to close the dialog box.
Note
In the Style Builder/Modify Style dialog box, when you make a specification within a category, the category title is bold.
You’ve modified the appearance of all of the <th> elements within that row by adding a style class (class="tablehead") to the <tr> tag that contains them.
In the sample site, open the about_me.htm page from the about_me folder, and in the Code pane, select the <ul> tag below Benefits.
In the Apply Styles task pane, click New Style. In the New Style dialog box, name the style .benefitlist. Then select the Apply new style to document selection setting.
In the Define in box, click Existing style sheet (../styles/style3.css).
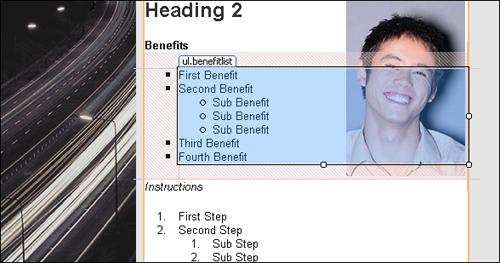
Under List, set list-style-type to square. Then click Apply.
Notice that the outer <li> elements have a square bullet instead of the typical round bullet. Notice also that the inner list items still have a round bullet.
Change the Selector name from .benefitlist to .benefitlist li, and then click Apply.
The dialog box title changes from New Style to Modify Style.
Notice that the inner list items now have a square bullet instead of a round bullet. This is because you classed the <ul> tag as .benefitlist but also added the <li> tag to that style specification in step 5. This procedure will produce an identical effect for both elements.
Click OK to close the Modify Style dialog box.
On the quick tag selector, select the Instructions <ol> tag, and in the Apply Styles task pane, click New Style. In the New Style dialog box, name the style .instructionlist. Then select the Apply new style to document selection setting.
In the Define in box, click Existing style sheet (../styles/style3.css).
Under List, set list-style-type to upper-roman. Then click OK to close the New Style dialog box.
So that the inner list items do not have the same formatting as the parent element, in the Apply Styles task pane, right-click .instructionlist, and then click New Style Copy.
Give the new style the name .instructionlist li li, and under List, change list-style-type to lower-alpha. Then click OK.
Notice that the inner list items now show lowercase alphabetic list items, and the outer list items are uppercase roman numerals. Notice also that the only code that has been added to the page is the containing <ol> tag now has a class (class="instructionlist") applied to it.
Another way to style an element is to style its basic HTML container.
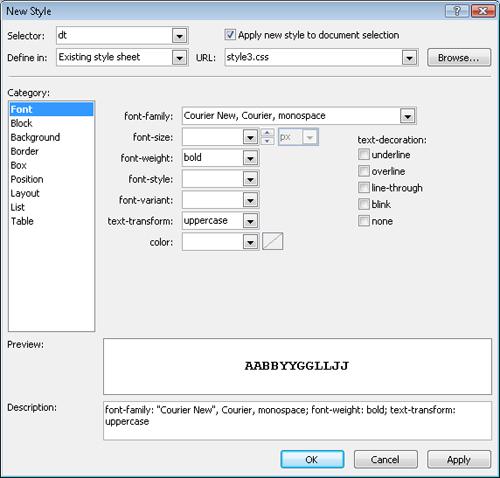
In the Apply Styles task pane, click New Style, and type dt for Selector. Under Font, set font-family to Courier New, Courier, monospace; font-weight to bold; and text-transform to upper case.
Notice that the Definition list terms are now in all capital letters and are in Courier bold font.
In the Apply Styles task pane, click New Style, and add a Selector of dd. Under Font, set font-family to Times New Roman, Times, serif; font-size to small; and color value to #808080. Then click OK.
Notice that the definitions are now smaller and colored grey. These effects will apply to all Definition list terms and definitions in any page that has this style sheet linked to it. Notice also that the code in the page hasn’t changed at all. This style is applied to all Definition list items by default without the need to class them or mark them separately. This feature is a great advantage if you should want to change the appearance of a styled HTML element; all you would need to do is change its entry on the style sheet, and every instance of that element in dozens, hundreds, or even thousands of pages would instantly change!


What is the real value of all this? Well, let’s consider the worst-case scenario: you didn’t use the list elements or the style sheet and classes to create these segments of information. You would have extensive font tags describing the appearance of every line, you would need to resort to paragraph indents and perhaps block quotes where they didn’t even belong, and the file size of your code would be many times greater than it is now.
The best-case scenario: you’ve contained your information in a semantically valid element that adds to the meaning of the text itself, and you’ve given it the appearance that you want by creating styles on an external style sheet. You’ve prevented using a large amount of code, and you’ve given the text additional meaning beyond what can be seen. As a tremendous added bonus, an externally linked style sheet will be downloaded by the browser just once, cached, and used on any page that’s linked to it. So, in addition to being cleaner and leaner, the code is also more efficient. Though this small example isn’t as telling as a large site would be, the fact remains that these techniques can save space on your server, save page-load time for your site visitors, and add to content searchability.