
To start laying out graphics and progressing in the next exercise, you need to get all the graphics and associated files into your site structure. Although there are a number of ways to bring these files into your site structure, many of them can be problematic. It’s important to follow the examples and instructions in the following exercise. The best practices method that is presented in the next exercise will ensure that Expression Web recognizes what you’re bringing in and can keep track of the locations of these files. Expression Web will also recognize the files’ physical size, file size, and date of last modification, among other things.
In this exercise, you will import graphics and use them in an HTML page.
Important
For the following exercise, you need a graphics template. It can be from a commercial site such as one of those mentioned in the beginning of this chapter, or you can have one that you created yourself using your preferred graphics editor. Either way, graphics editors generally export your work under the same paradigm: they output an HTML file and sliced graphics to a folder.
Note
USE the CH7 site that you created in the preceding exercise.
OPEN the CH7 site, if it isn’t already open.
In the Folder List, click the root folder. On the File menu, point to Import, and then click File.
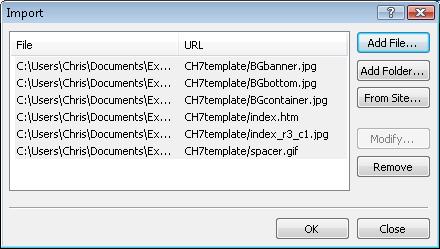
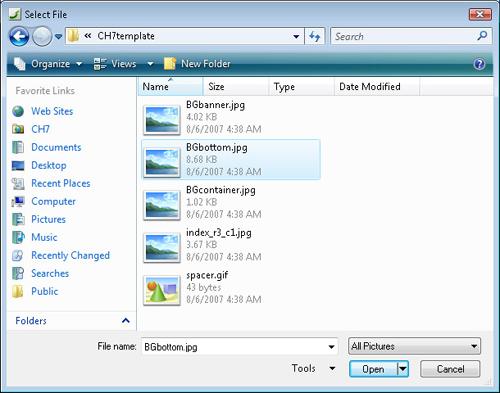
In the Import dialog box that opens, click Add Folder. In the File Open dialog box, navigate to the DocumentsMicrosoft PressExpression Web SBSFilesCH7template folder, and then click Open.
The Import dialog box now displays all of the files inside the CH7template folder.
Click OK to import the folder and all of the files it contains.
In the Folder List, double-click the newly imported CH7template folder to expose the files it contains. Double-click the index.htm file within it and examine the layout.
Open the layout.htm file that you created in the preceding exercise.
The first thing you need to do is appropriately style the #container DIV element.
In the index.htm file, locate BGcontainer.jpg. This graphic is 750 pixels wide and 60 pixels high. Switch to the layout.htm file, and on the quick tag selector bar, click div#container.
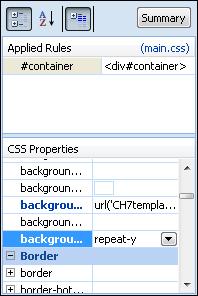
In the CSS Properties task pane, expand the background entry, click background-image, click the ellipsis button (...), and then click the BGcontainer.jpg file in the CH7template folder.
In the CSS Properties task pane, set the background-repeat value to repeat-y.
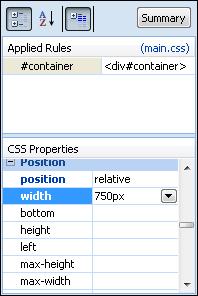
Change the width value to 750px.
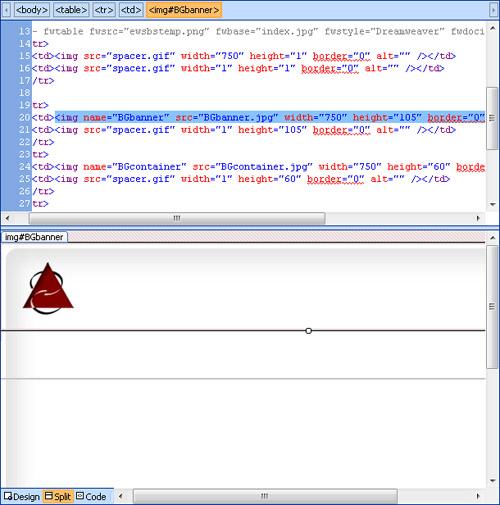
In layout.htm, select the top DIV element, which has the CSS ID masthead.
This DIV element will use the top image on the template page, BGbanner.jpg, which has a width of 750 pixels and a height of 105 pixels.
In the CSS Properties task pane, find the background-image entry, and then select BGbanner.jpg. Set the background-repeat value to no-repeat, the height to 105px, and the width to 750px.
In the Code pane, click the bottom DIV element. In the CSS Properties task pane, click the ellipsis button (...) for the background-image value, and then double-click the BGbottom.jpg file in the CH7template folder.
Set the background-repeat value to no-repeat, the height to 60px, and the width to 750px. Save the page, and preview it in a browser.
The key page areas now have appropriate background images, and what was once an empty page is now beginning to have the appearance of a "real" Web page.
Return to Expression Web, and then click the DIV element with a CSS ID of top_nav. In the CSS Properties task pane, click the ellipsis button (...) for the background-image value, and then double-click BGcontainer.jpg in the CH7template folder.
Set the background-repeat value of this DIV element to no-repeat, the width to 750px, and the height to 20px.
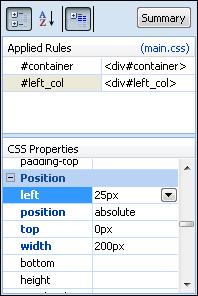
In the Code pane, click the DIV element with a CSS ID of left_col. In the CSS Properties task pane, change the left value from 0px to 25px.
The DIV element moves to the right 25 pixels so that navigation or content in the DIV element will be clear of the shadow area at the edge of the container.
In the Code pane, click the DIV element with a CSS ID of page_content. In the CSS Properties task pane, change the margin-left value from 200px to 225px to make up for the movement of the adjacent left_col DIV element that you modified in step 15.
The previous steps conclude the process of inserting graphics into an HTML template as backgrounds for the DIV elements so that you can place content into them.
Save your page, and preview it in a browser for a final check.


If you were actually creating a site, you’d still have work to do, such as styling the text that falls into the content area, designing and styling the links in the top navigation, and all kinds of other things. Taking you through each individual facet of CSS design is beyond the scope of this book, but you can easily use the lessons in previous chapters to enhance the design of this template. The preceding chapters contain examples of using cascading style sheets for navigation, content, lists, and other page elements.