Forms are a feature that enables you to provide varied levels of user interaction. Forms can be used for anything from the most complex database application to the simplest of e-mail-producing contact forms. Expression Web provides several tools to assist in the creation of forms. All of the tools are available in the Toolbox pane, under the Form Control group.
In this exercise, you will create a simple contact form and configure it to handle the user input.
Note
USE the CH8 sample site you modified in the previous exercise.
OPEN the CH8 site if it isn’t already open, and then display the contact.htm page.
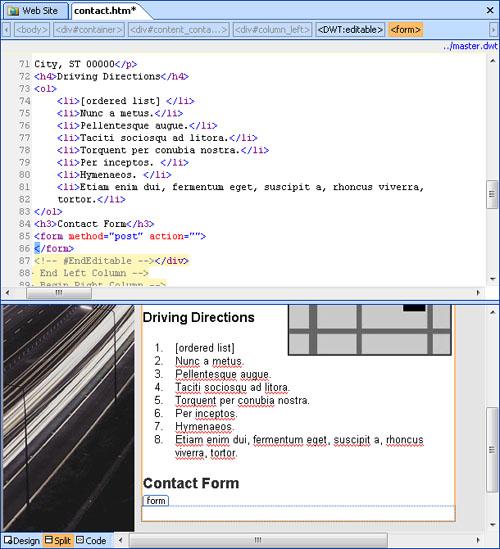
In the Design pane, click after the last numbered item under the heading Driving Directions, and then press
 twice to break out of the ordered list and create a new paragraph.
Type Contact Form, and press
again to start a new paragraph. Select the text you just typed, click the Style arrow on the toolbar, and then click Heading 3 <h3>.Click in the paragraph below the H3 element. If the Toolbox task pane isn’t visible, on the Task Panes menu, click Toolbox. In the Toolbox task pane, expand Form Controls.
These form controls can be added to your page either by dragging them from the toolbox to where you want them or by setting the cursor in the design surface of the page where you want them and double-clicking their entry in the toolbox. You might also find it helpful to use Split view.
In the Design pane, click the P element below the heading you entered. On the quick tag selector bar, click <p> to select the entire element, and then double-click Form in the Toolbox pane.
An empty form is inserted into your page in place of the paragraph.
Type Name, and then press
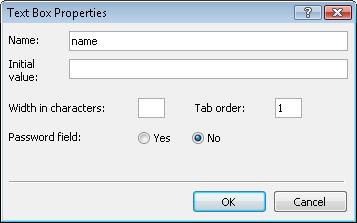
 to insert a line break. In the Toolbox task pane, double-click Input (Text) to insert a text field.
Right-click the text field, and then click Form Field Properties to open the Text Box Properties dialog box. Type name in the Name box, type 1 in the Tab order box, and then click OK to set the changes and close the dialog box.
Click just after the text field, and then press
to insert a line break.Type E-mail and then press
to insert a line break. In the Toolbox task pane, double-click Input (Text) to insert another text field.Right-click the new text field, and then click Form Field Properties. Type email in the Name box, type 2 in the Tab order box, and then click OK to set the changes and close the dialog box. Click just after the text field, and then press
to insert a line break.Type Phone, and then press
to insert a line break. In the Toolbox task pane, double-click Input (Text) to insert another text field.Right-click the new text field, and then click Form Field Properties. Type phone in the Name box, type 3 in the Tab order box, and then click OK to set the changes and close the dialog box. Click just after the text field, and then press
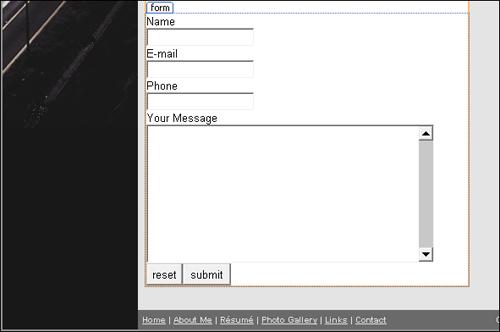
to insert a line break.Type Your Message, and then press
to insert a new line break. In the Toolbox task pane, double-click Text Area to insert a text area field into your form.Right-click the text area field, and then click Form Field Properties to open the TextArea Box Properties dialog box. Type message in the Name box, type 40 in the Width in characters box, type 4 in the Tab order box, type 10 in the Number of lines box, and then click OK to set the changes and close the dialog box.
Click just after the text area field, and then press
to insert a line break. In the Toolbox task pane, double-click Input (Reset), and then double-click Input (Submit).After setting the form field names and tab order, you can configure what happens when a site visitor uses the form by filling in the requested information and clicking the Submit button.
In the Design pane, right-click anywhere inside the form, and then click Form Properties to open the Form Properties dialog box.
Note
There are options on the Form Properties dialog box for features that require Microsoft Office FrontPage server extensions. These options require not only FrontPage server extensions but also require that e-mail transport be enabled in some cases and require FrontPage publishing. FTP publishing will cause them to fail. These FrontPage options are present only to enable an Expression Web user to edit pages that were originally created in FrontPage and that use FrontPage extensions.
The Send To Other option is selected.
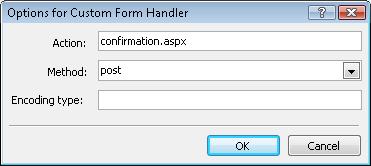
Type Contact in the Form name box, and then click Options. In the Action box of the Options for Custom Form Handler dialog box, type confirmation.aspx, and then click OK to set your changes.
Click OK in the Form Properties dialog box, and then save the page.
Open the confirmation.aspx file from the contact folder. On the Format menu, point to Dynamic Web Template, and then click Update Selected Page.
Note
If confirmation.aspx isn’t in the contact folder you must import the file. See step 9 of the exercise in Using Personal Web Packages, earlier in this chapter.
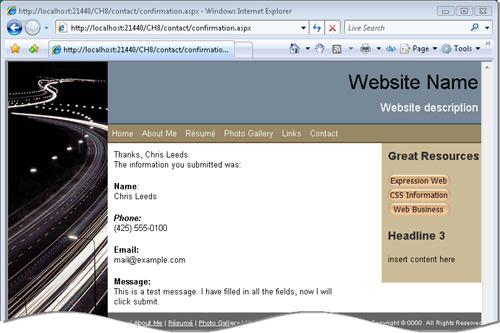
Save and preview confirmation.aspx in a browser. In the browser, click the Contact link, fill out the form, and then click submit.
The confirmation page shows the form input.