
In this chapter, you will learn to: | |
✓ | |
✓ | |
✓ | |
✓ | |
✓ | Take it to the next level. |
Although Microsoft ASP.NET might be new to some users, it’s actually been in use for more than five years. It’s a platform that was developed by Microsoft, and it’s a huge source of capability. What can you do with ASP.NET? Literally, anything that can be done!
Microsoft Expression Web and ASP.NET make a great combination that enables you to insert some rather advanced controls into your pages without writing any programming code.
To facilitate using ASP.NET within Expression Web, there is a group in the Toolbox task pane that has most of the commonly used ASP.NET controls that are used in Web pages.
One great feature that you can install along with Expression Web is the ASP.NET Development Server. This development server is of particular value, because you can build a site in any folder-based location, and Expression Web will preview that page for you through the built-in server. It’s so much more convenient and straight-forward than having to set up a server on your local computer and previewing your pages by browsing them through that server, and it definitely beats having to publish your pages to an external Web server just to preview them.
In addition to providing the Toolbox task pane and the ASP.NET Development Server, Expression Web enables you to modify the properties of ASP.NET controls by using the Tag Properties task pane in much the same way that you can modify cascading style sheet or HTML elements.
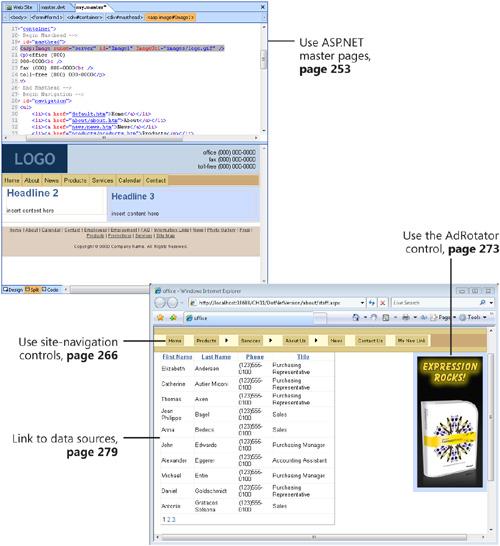
For a designer, some of the most attractive controls that Expression Web provides are Master Pages, Site-Navigation Controls, and Data Access Components.
Expression Web is intended to enable you to work with ASP.NET controls and features; but if you’re interested in full-scale ASP.NET programming, you’re going to need more than this book and a copy of Expression Web. You’ll need Microsoft Visual Web Developer, Microsoft Visual Studio .NET, or another code editor, and you’ll need to learn a whole set of programming skills. You can use books or online resources such as MSDN or one of the many sites dedicated to teaching people ASP.NET. You’ll find information about these resources at the end of this chapter.
In this chapter, you will learn about some of the ASP.NET capabilities, which of those capabilities are available from within Expression Web, and how to use the most designrelated features to assist you in creating Web pages and sites that make use of those features.
Important
Before you can use the practice files in this chapter, you need to install them from the book’s companion CD to their default location. See Using the Book’s CD for more information.
Troubleshooting
Graphics and operating system–related instructions in this book reflect the Windows Vista user interface. If your computer is running Windows XP and you experience trouble following the instructions as written, please refer to the Information for Readers Running Windows XP section at the beginning of this book.
One of the most useful features in ASP.NET 2.0 for designers is master pages. They’re similar to the Dynamic Web Templates that you’ve learned about in previous chapters; but, unlike Dynamic Web Templates, the master page content is not actually saved to the pages that it’s attached to. Instead, the master page content is combined with the pages that it’s attached to by the server just before the combined page is passed off to the browser. Therefore, master pages can save a considerable amount of space on your server and allow programmatic access to the template that you just don’t have with a Dynamic Web Template. However, when you’re ready to publish your site to a public server, you must publish it to a server that has ASP.NET 2.0 at a minimum.
The ASP.NET segment of the Toolbox task pane is divided into the following six groups, each containing controls that you can use in your pages:
Standard. Standard ASP.NET controls such as radio buttons, image controls, content placeholders, and other standard controls that are commonly added to Web pages.
Data. Controls that allow you to easily connect to data sources and to insert data that the controls gather from the data source into a Web page.
Validation. Controls that are designed to enable you to perform validation on your ASP.NET forms.
Navigation. Controls that are designed to enable you to create navigation systems without having to write any programming code.
Login. Controls that are designed to enable you to implement the user interface for membership systems in an ASP.NET site.
WebParts. Controls for creating Web sites that enable end users to modify the content, appearance, and behavior of Web pages directly from a browser.
Note
When you’re adding ASP.NET controls to your page, it will be much easier if you can see a visual representation of them: To do so, point to Visual Aids on the View menu, and then click Empty Containers and ASP.NET Non-visual Controls.
In this exercise, you will create a master page and then create new pages from the master page.
Note
USE the CH11 sample site. This site is located in the DocumentsMicrosoft PressExpression Web SBSSample Sites folder.
BE SURE TO start Expression Web before beginning this exercise.
OPEN the CH11 site.
Note
The Web site for Chapter 11 is based on the Small Business 3 template. The DotNetVersion folder at the root of the site contains ASP.NET example pages and other files that are necessary for the exercises.
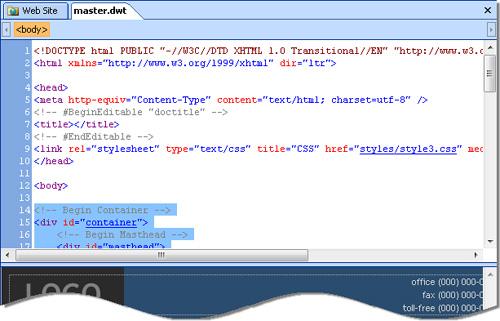
Open the master.dwt file.
This is the default Dynamic Web Template for this site.
Click the <body> arrow on the quick tag selector bar, and then click Select Tag Contents. Right-click the highlighted <body> tag contents in the code pane, and then click Copy.
This Dynamic Web Template will be used as a basis for the ASP.NET master page that you will create in the following steps.
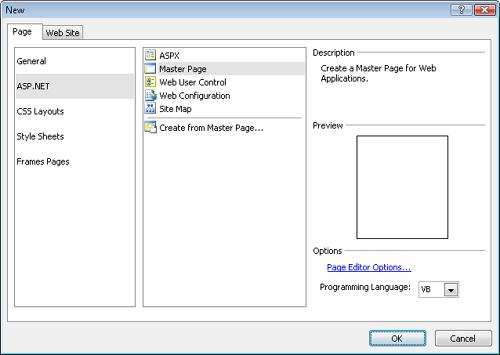
In the New dialog box, click ASP.NET in the left pane, click Master Page in the center pane, and ensure that the Programming Language is set to VB.
Note
Expression Web provides you with three choices for programming language in the New dialog box: VB, C#, and J#. There is very little difference among these languages from a capability perspective. Select the one that you feel most comfortable with. If the master page is to be part of an existing ASP.NET site or application, you should obviously select the programming language that’s already being used.
In the New dialog box, click OK.
Expression Web creates a new file named Untitled_1.master.
Examine Untitled_1.master.
Notice that it’s set up with all of the required elements for an ASP.NET master page. It has the VB language declaration above the HEAD element of the page, and there’s an ASP.NET FORM element and content placeholder in the BODY element.
Note
Because this is an ASP.NET Web page, it requires a FORM element within the BODY element. In fact, if you delete the FORM element, Expression Web will replace it automatically. Notice also that the <form> start tag has the same runat="server" attribute that the <head> tag has, which enables the ASP.NET runtime to have access to the form and its contents before the server passes the file to the browser.
Note
You can design the ASP.NET master page by using the same method that you used to design your own Dynamic Web Template earlier in this book. Instead of inserting editable regions, you would insert content placeholders, which are available from the Toolbox task pane under the ASP.NET Controls/Standard headings.
In the Design pane, click ContentPlaceHolder1, and then on the quick tag selector bar, click <asp:contentplaceh...#ContentPlaceH...>.
Right-click the highlighted content in the code pane, click Paste, and then click anywhere in the Design pane to show the changes in that pane.
On the Format menu, point to CSS Styles, and then click Manage Style Sheet Links. In the Link Style Sheet dialog box, click Add.
In order to differentiate the page you’re creating, choose a different style sheet than the styles/style3.css that the original Dynamic Web Template was linked to.
In the Select Style Sheet dialog box, click style2.css, and click OK. Then click OK in the Link Style Sheet dialog box.
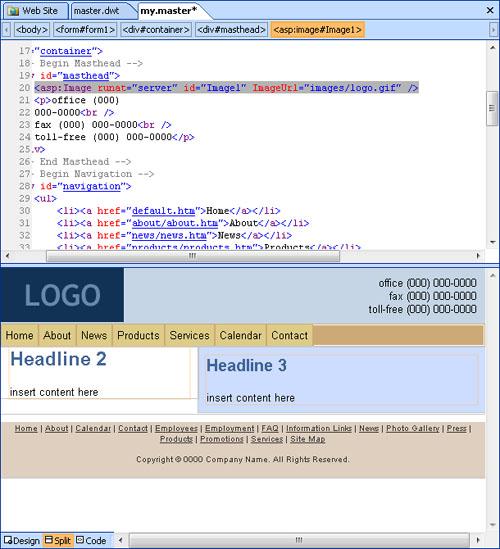
Notice that the logo image at the top of your template isn’t displaying.
Troubleshooting
When you use an image in the HTML code of an ASP.NET master page, you should use the ASP.NET Image control, which is available in the Toolbox task pane. If you use this control, ASP.NET will be able to correctly maintain the path to the image regardless of the folder level of the content page that the master page is attached to.
In the Design pane, click the image to select it, click the <img> arrow on the quick tag selector bar, and then click Select Tag.
In the Toolbox task pane, expand ASP.NET Controls, and then expand Standard. Double-click Image to replace the original image with the ASP.NET Image control.
Your original image is now replaced with an ASP.NET Image control.
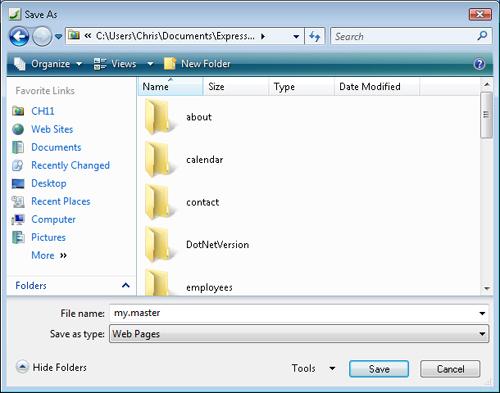
On the toolbar, click Save to open the Save As dialog box. Save the page at the root folder of the site, with the name my.master.
Be sure to save the page in the root folder of this site, and be sure that it has the file extension of .master, which is required for an ASP.NET master page.
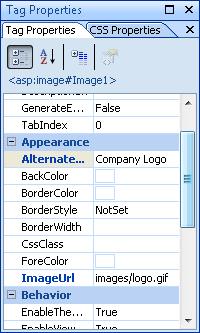
With the newly inserted ASP.NET Image control selected, in the Appearance group of the Tag Properties task pane, click ImageUrl, and then click the ellipsis (...) button that appears to the right. In the Select Image dialog box, browse to the site’s images folder, click logo.gif, and then click Open.
The broken image link is now corrected.
In the Tag Properties pane, in the Appearance group, type Company Logo into the AlternateText box.
In the Design pane, click the editable region that contains Headline 2, and then click <DWT:editable> on the quick tag selector bar. Double-click ContentPlaceHolder in the Toolbox task pane to replace the Dynamic Web Template’s editable region with an ASP.NET content placeholder.
Repeat the preceding step on the editable region on the right to also replace that one.
In the Design pane, click ContentPlaceHolder1 on the left, type Main Content Area, press
 to insert a new paragraph, and then type Content Goes Here.
Click ContentPlaceHolder2 on the right, type Sidebar Area, press
to insert a new paragraph, and then type Content Goes Here.Click Save to save the changes you’ve made so far.
Note
These content placeholders work similarly to the Dynamic Web Template that you used in the previous chapters. The content that is within the placeholders in the master page will be written into the pages they’re attached to. The content can be replaced within the content page. In a production setting, you could put meaningful text in these content placeholders so that users wouldn’t necessarily have to replace the content; but if they chose to do so, the option would be there. For example, if you had a sidebar area that contained a content placeholder, you could insert meaningful text that would be appropriate for any page on the site, such as customer statements, special price deals or announcements. Then, the default text could be replaced on a page-by-page basis or left as is.
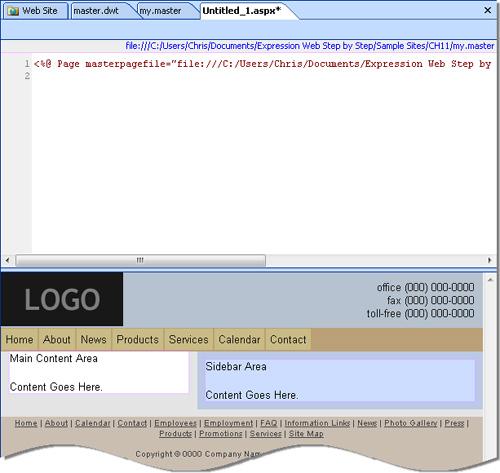
On the File menu, point to New, and then click Create from Master Page to open the Select a Master Page dialog box. Click Browse, locate and click my.master, click Open, and then click OK to create a new page named Untitled_1.aspx.
In the Design pane, click ContentPlaceHolder1 (Master) on the left to select it. Click the small arrow that appears to its right, and then click Create Custom Content.
The content placeholder becomes editable.
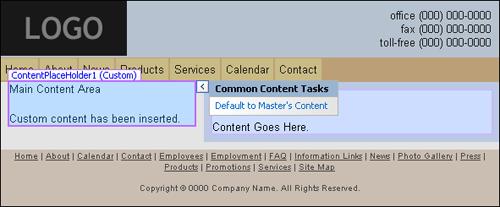
Replace the text Content Goes Here. with Custom content has been inserted. Then click the small arrow to the right of the content placeholder.
Notice that the Create Custom Content option has been replaced with Default To Master’s Content. This option resets any custom content that’s been entered into a content placeholder back to whatever content is in the master page.
Click Save. In the Save As dialog box, name the page text.aspx, and click Save.
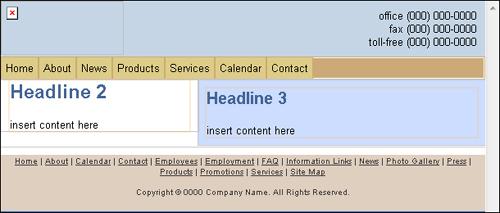
On the toolbar, click Preview to preview the page in a browser. The ASP.NET Development Server starts and your page appears in a browser.
The ASP.NET Development Server makes possible a local preview of your page. Notice how it changes the URL of the page from the disk-based location to http://localhost, and then appends it with a port number. By passing the page to the browser by means of the Development Server, you are able to preview the combination of the master page and the content page in real time. It’s a very helpful feature for developing ASP.NET pages.


Troubleshooting
If you have problems previewing pages through the ASP.NET Development Server, you will need to diagnose why it’s not working and then take steps to correct the issue. Because it’s a development server, it will show you detailed error reports if something goes wrong. Generally, there won’t be a problem and common issues can usually be solved by downloading ASP.NET 2.0 redistributable from Microsoft and running the package on your local computer.
Note
If you switch to text.aspx and look at the Status bar at the bottom of the work area in Expression Web, you will see that the file is approximately 3 KB in size. Look at my.master, and you will see that it is approximately 5.5 KB. If these two pages were combined locally, such as with a Dynamic Web Template, you would have a page of approximately 8.5 KB.
The file size of the template is always combined with the file size of the content page. Not so with a master page—the content page is not combined with the master page until the server prepares it to pass to the browser. In the case of a site with hundreds or even thousands of pages, the savings in file size would be significant.
Note
CLOSE any open Internet Explorer windows.
BE SURE TO leave the CH11 site open for use in the next exercise.
By now, you should be aware of how easily you can keep all the pages in a site uniform by using the master page/content page arrangement, and also aware of how you can save file space on your server by using this ASP.NET 2.0 feature and create your own master page in Expression Web.