

In this chapter, you will learn to: | |
✓ | |
✓ | |
✓ | |
✓ | |
Beyond simply showing text, images, and other media on your pages, you can use the features in Microsoft Expression Web to do more with static pages and provide your site visitors with a more interactive experience. By using these features, you’ll be able to add both visual and functional elements to your pages.
In this chapter, you’ll learn to use interactive buttons, layers, behaviors, Personal Web Packages, and forms to create interesting effects and functionality.
Important
Before you can use the practice files in this chapter, you need to install them from the book’s companion CD to their default location. See Using the Book’s CD for more information.
Troubleshooting
Graphics and operating system–related instructions in this book reflect the Windows Vista user interface. If your computer is running Windows XP and you experience trouble following the instructions as written, please refer to the Information for Readers Running Windows XP section at the beginning of this book.
Link bars, which are made up of a series of buttons, and even individual link buttons have long been a staple of Web site navigation. Previously, you would have to create the images to use for these buttons, often in multiple "states," and then create some JavaScript code to animate them and give them a "roll-over" effect. Even if you used the cascading style sheets–only method from Chapter 5, you’d still need to create the images.
Expression Web provides a nice feature for adding these buttons to a page without the need to create images, JavaScript, or even cascading style sheets (CSS). The feature is called Interactive Buttons. There are more than 220 different styles and colors available for you to insert into your pages.
Here’s a scenario: in your site, you need to add an area that contains links to other "partner" sites that are similar in nature to the one you’re working on. This link area needs to be on every page in your site. You don’t want plain links; instead, you want buttons.
Tip
Because you need these link buttons on every page in this site, you can easily make use of the Dynamic Web Template to provide this functionality and to make maintaining these links very easy.
In this exercise, you will use the Interactive Buttons feature to create a group of links in all of the pages in your site.
Note
USE the CH8 sample site. This site is located in the DocumentsMicrosoft PressExpression Web SBSSample Sites folder.
BE SURE TO start Expression Web before beginning this exercise.
OPEN the CH8 site, and then display the master.dwt file in Split view.
On the View menu, click Visual Aids, and then click Block Selection.
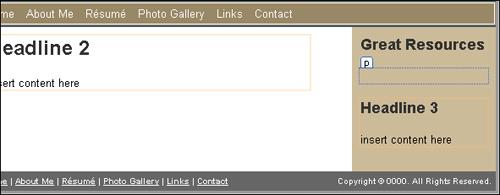
In the Design pane, click Headline 3.
Notice the editable region.
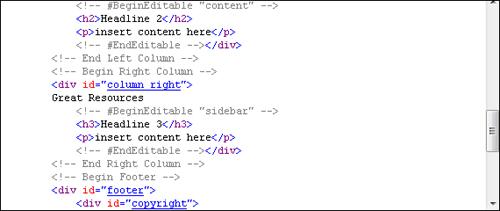
Because you want this group of links to be present on all pages but not editable by other users working on those pages, click in the Code pane just before the following line:
<!-- #BeginEditable "sidebar" -->
and then type Great Resources.
In the Design pane, click the line you just typed. On the toolbar, click the Style arrow, and then click Heading 3 <h3>. Click at the end of the H3 element, and then press
 to insert a new paragraph.
On the Insert menu, click Interactive Button.
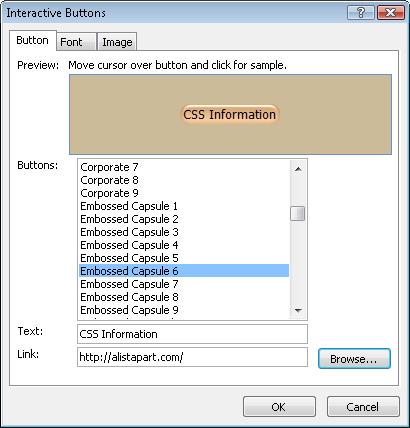
The Interactive Buttons dialog box opens, with the Button tab selected.
In the Buttons list, click Embossed Capsule 6. In the Text box, type Expression Web; in the Link box, type http://by-expression.com.
Click the Font tab, and notice the settings that you can change. For this example, leave the defaults in place, and click the Image tab.
Note
The Image tab contains options to size the button, specify what image states are created, and whether they should be preloaded. Below these options are more, important options to create a JPEG image and specify a background color, or to create a GIF image that has a transparent background.
For the best-looking result, use a JPEG image, click the color list, and then click More Colors to show the More Colors dialog box. Click Select, and then click the Design pane of your page to pick up the background color of the area where you’ll be placing the Interactive Button (Hex={CC,BB,99}).
Click OK in the More Colors dialog box, and then click OK in the Interactive Buttons dialog box to insert the button on the page
Although you could add more buttons by repeating the preceding steps, we will use the much faster method of copying the existing button and pasting it to the page in the Design pane.
Right-click the newly created button, and then click Copy. Click just after the button, press
 to insert a line break, and then paste the copied button into the page. Click just after this second copy, and then press again to create a new line. Paste another copy of the button in this third line.
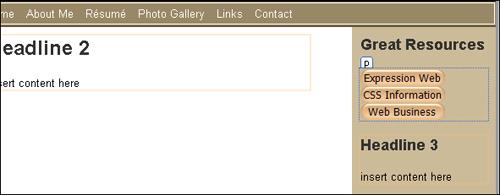
In the Design pane, double-click the second button to open the Interactive Buttons dialog box again, type CSS Information in the Text box, and then type http://alistapart.com/ in the Link box.
Click OK to close the dialog box.
In the Design pane, double-click the third button to open the Interactive Buttons dialog box again, type Web Business in the Text box, and then type http://sitepoint.com in the Link box. Click OK to close the dialog box.
Save your page.
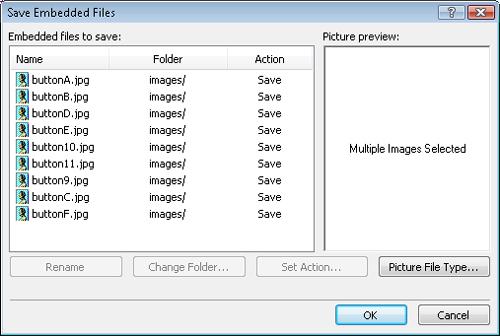
The Save Embedded Files dialog box opens.
In the Save Embedded Files dialog box, click Change Folder, click images, click OK, and then click OK in the Save Embedded Files dialog box. After Expression Web saves the page and the images, update the pages that are attached to this Dynamic Web Template.
Open the default.htm page, and then preview it in a browser.
Note
If you’re using Windows Internet Explorer 7, its default behavior is to block the running of scripts and ActiveX controls. You will see a yellow warning banner above the page you’re previewing. Click the warning, click Allow Blocked Content, and then click Yes in the warning confirmation.
Make sure that the interactive buttons behave as you expected, and browse through the pages of this site template to make sure that the buttons are present on all of the pages. Pay particular attention to the background color of the button and to what happens when the mouse pointer is over the button.
Close your browser, and switch to Expression Web.


Using the Interactive Buttons feature is very easy. If you take full advantage of it, you’ll have a tremendous number of possible visual combinations, and these buttons are flexible enough to be used convincingly in any page area.
Because this sample site is attached to a Dynamic Web Template, inserting the interactive buttons into all of the pages at once was also a snap. Maintaining all of the buttons on all of the pages—that is, adding, changing, or deleting buttons—can be done by editing one single template file, and the update will cascade to all pages that are attached to it.