Almost every type of record in the Microsoft CRM system enables you to post notes and link attachments. Think of a note as information that you manually type into the system. For example, if you find out that your main contact at an account is about to leave, you probably want to document that and create an action plan. Meetings and phone calls deserve this kind of follow-up documentation as well. At our company, every meeting and phone call and almost every kind of activity is documented with notes so we have an audit trail of what we've promised or accomplished.
Attachments include a variety of files that are linked to individual records. These files may be the typical Word documents or Excel spreadsheets, or they may be PowerPoint presentations, digital photos, contracts, images of faxes, and so on — almost anything.
In this chapter, you find out how to create and maintain notes and attachments, processes that have been significantly streamlined in version 4.
Warning
With regard to relating notes and attachments to other records — you can't do it. Notes and attachments are assigned to the one record they're initially attached to — and that's it. Sorry.
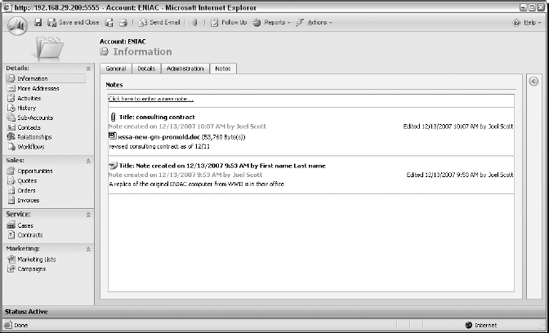
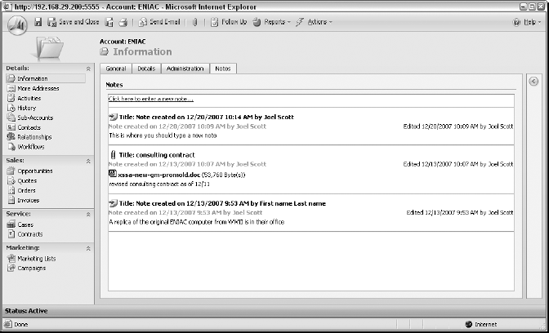
You can associate notes with any kind of existing record, whether it's an account, a contact, or a case, from the Customer Service area. All of these types of records include a Notes tab. For example, Figure 15-1 shows the Notes tab for a typical account record.
To create a new note relating to a particular account, follow these steps:
At the top of the navigation pane, click Accounts.
The system displays the Accounts window. We use accounts here as an example, but remember that what you do here applies equally well to contact, lead, opportunity, and case records. In fact, almost every type of record in CRM has a Notes field.
Select the specific account to which you want to attach a note.
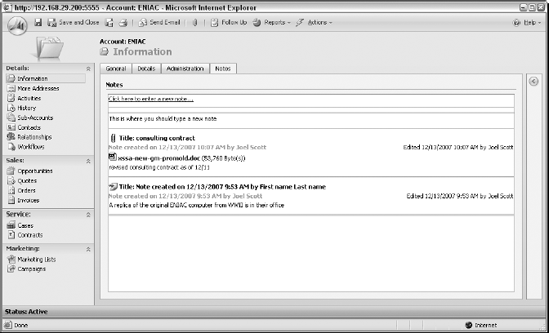
Click the blue hyperlink that reads "Click here to enter a new note."
Type your text in the rectangular area, as shown in Figure 15-2.
When you've finished entering text, click Save and Close.
The next time you return to the Notes tab for this account, you'll see the note you entered, as well as the date and time and your name. This is one of the few areas in Microsoft CRM where you don't have to manually save your work because you simply could have navigated away from your newly entered Note by selecting another option from the navigation pane. You can see the completed note in Figure 15-3.
Tip
Notes don't have spell checking or grammar checking. If you're challenged in this department and think that others may end up reviewing your notes (and they probably will), use Word to create your notes and spell check and grammar check them there. Then either cut and paste the Word text into the notes section or attach the Word file, as explained in the next section.
Attachments are separate files that you may associate with individual records such as accounts, contacts, opportunities, and cases. An attachment can be a Word document, but it can just as well be, say, an electronic set of blueprints, or a series of digital photos, or a spreadsheet.
Tip
You can add a note but not an associated attachment by using the Notes tab at the top of most records. You can add a single attachment, but you can't make notes, by choosing Actions
To add a note as an attachment, follow these steps:
Navigate to the record to which you want to attach a note or a file.
On the menu bar (at the top of the screen), choose Actions
Add a Note.
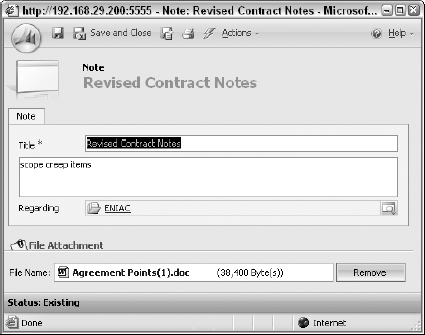
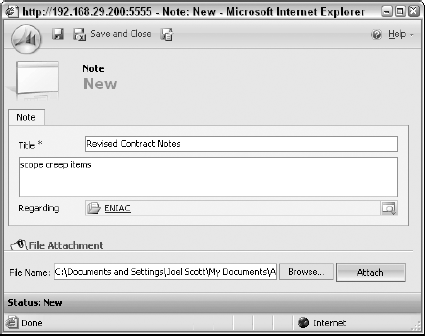
The Note: New window appears, as shown in Figure 15-4. The system automatically fills in the Regarding field.
Enter a title in the Title text box.
Enter a description in the large text box (below the word Title).
Tip
The information you type in the larger field is displayed in the listing of all associated notes — not what you enter in the Title field.
Use the Browse button to locate and select the file you want to attach.
Click the Attach button.
The system uploads your file to the server for storage. This gives other users (with the proper access rights) the ability to see the file and also gives you access to it from any other computer you may be using later.
Note
You can attach only one file per note. All attachments are stored on the server, so when you're first attaching a file or using it in some way, the system needs to move it using your Internet connection. Virtually any kind of file is a candidate for an attachment. The maximum size of the file that you can attach to a record is defined by your system administrator, but if you expect to upload or download attachments from the server frequently, try not to bog the system down with enormous files. (Video clips, fax images, and the like are often pretty big.)
If you need to change the file attached to a record, perhaps because the file itself has changed, you need to delete the original attachment. After an attachment is attached to the note, you can delete the attachment by clicking the Remove button.
To delete a note associated with a record, follow these steps:
Navigate to the record.
If you're deleting a note associated with an account, for example, select Accounts from the upper part of the navigation pane and then select the specific record from the Accounts window.
Click the record's Notes tab.
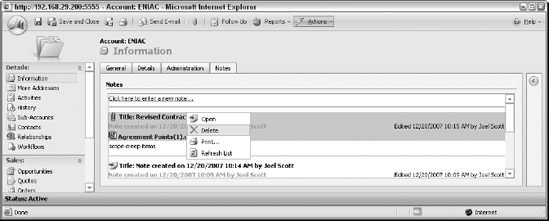
Highlight and then right-click the note you want to delete.
The text of the note appears.
A context menu appears from which you can select the Delete option. See Figure 15-5.
The Confirm Deletion dialog box then appears, telling you that you are about to delete not only this particular note but also any associated attachment.
Click OK to proceed.
Deleting an attachment without deleting the associated note is now much easier than in prior versions of CRM. Follow these steps:
Navigate to the record.
Click the record's Notes tab.
All notes associated with this record appear.
Double-click the note with an attachment that you want to delete.
The text of the note appears.
Click the Remove button in the lower-right corner. See Figure 15-6.
A confirmation screen appears with a warning that when you remove the attachment, it's really gone. However, you can always reattach the same file anytime you want to.
Click OK.
Another confirmation screen appears.
Click Save and Close to complete this action.