Chapter 2
Remixing Air
Light a candle in a bottle to change the composition of air.
Sometimes linguistics can shed light on science. In Tetun, there is no equivalent for the English word “air.” There is a word meaning wind—anin—but it’s clear that this word does not describe the contents of an empty bottle; anin has to be moving. The words meaning smoke (ahi-suar; that’s wood-suar) and steam (bee-suar; that’s water-suar) don’t mean air, because everyone agrees that if you can’t see it, it’s not suar.
Tetun has taken a lot of words from Portuguese over the last 500 years, and so most educated people know both vapór and ár, the Portuguese words for vapor and air. Still, I’m always curious to think about what words the precolonial Timorese of a thousand years ago used to describe, say, what’s in your mouth when you close your lips and puff out your cheeks, or what’s inside bubbles in a frothy soup, or what stands in the way of a leaf fluttering down from a tall tree.
Trying to describe or analyze this ever-present yet invisible substance sets you looking for the tools of science. You can read details about the fascinatingly simple experiments the British scientists Mayow and Black and Priestley used to understand air in the 1600s and 1700s, but you can also be sure scientists around the world and throughout history have stretched their investigation strategies as well as their vocabularies to grasp the gist of air.
In round numbers, the textbooks say air is 78 percent nitrogen, 21 percent oxygen, and 1 percent various other gases. Immediately there is a caveat the textbook may or may not mention: water vapor is also always part of air, and varies from 1 percent to 3 percent. This unavoidable, damp detail skews those other numbers in all cases. So much for that pert little textbook fact so many millions of students are made to memorize. As usual, it’s “right,” but it’s more complicated than that; you can’t not mention that those percentages are for the non-water components of air.
We’ll get a combustion reaction going in a closed space and see what we can deduce about the air that fills that space.
Gather stuff
- Bottles and jars, glass and plastic. Various sizes and shapes will add more insight. Plastic ones may melt or catch fire, but glass ones may drop and break, so either way, beware.
- Candle that fits in the neck of the bottle
- Matches or a lighter
- Fire extinguisher
- Plate or bowl
- Water, with coloring if possible
- Optional:
- Large magnifying glass
- Steel wool
- Thin wire
- Clip leads or thin wires
- Batteries or a battery charger
- Cardboard
- Rubber bands
- Mirror
- Hot water
- Cold water
- Aluminum can
Gather tools
- Scissors to cut hole in bottle
- Optional:
- Wire strippers or a knife
- Burner
- Tongs
- Basin with water
Tinker
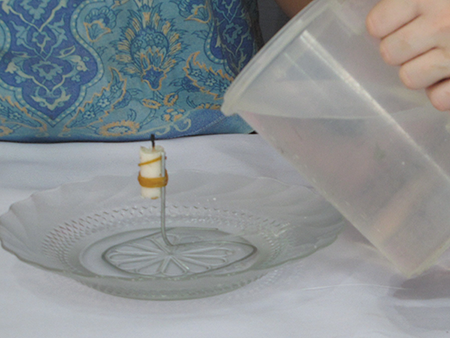
The basic idea here is to light a candle and then put a bottle over it. You can just stick a candle down with a bit of its own wax, or you can make a snazzy wire stand. We do this on a glass plate to reduce the chance of unplanned fire.

Light the candle and then lower the bottle over it.

By golly, it went out. Raise the bottle a bit, light the candle, and try it again.
And again. And again. Keep going if you think you can observe something with more tries. That goes for all the following activities.
Variation #1: Put a Hole in the Top
For this one, you need a plastic bottle. Put a modest-sized hole in it and try it again. Put a smaller hole or a larger hole and try those too. Don’t let it go too long or the plastic will start melting.

Variation #2: Put a Lid on It
Now instead of sitting the candle on the plate, sit it in the upturned lid.

Put the bottle on and twist the lid shut tightly.


What we see is a self-squashing of the bottle as the candle goes out. Hmm.
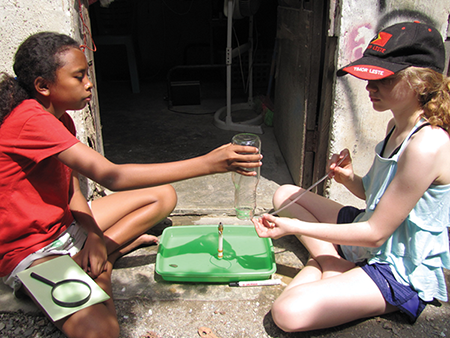
Variation #3: Put it in the drink
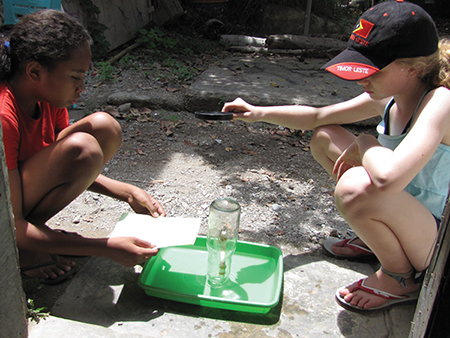
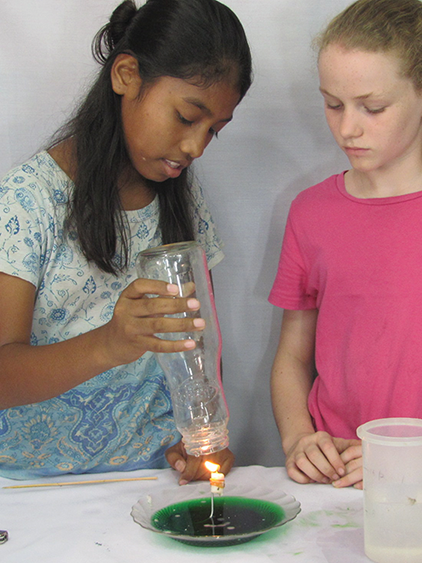
Now for the main event! Stand the candle up again and pour water into the dish.
It’s easier to see what happens if you put some color in the water.

Light the candle and cover it with the jar. Watch very carefully everything that happens.
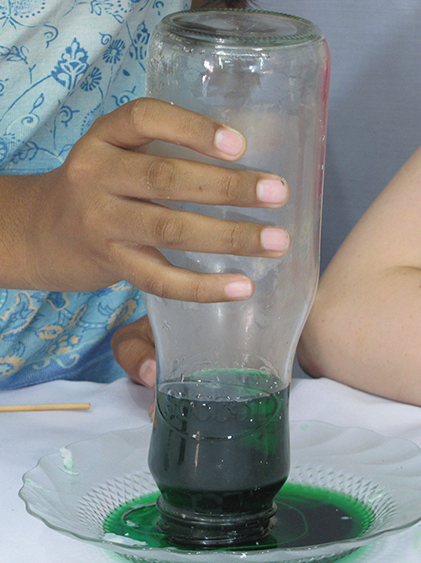
The mysteriousness of water being drawn into an upturned jar when the candle is already out is enough to make my teeth itch.
What’s Going On?
This is a common experiment and many sources wrap it up with the following conclusion: “And thus you have proven that air is around 20 percent oxygen.” Balderdash. What you’ve “proven” here is small and subtle.
It never fails to draw a laugh and a puzzled sigh when a student lays out the balderdash conclusion and I hasten to their experimental setup with a shocked look, saying, “That’s incredible! Where is the oxygen? I’ve never been able to see it before!”
You can’t see it, and darn good thing: it’s all around us, so if you could see it, you couldn’t see much else. You can’t actually see many gases. My local university chemistry department set up a display showing mercury boiling at 357°C for my eighth-grade class—a metal changing from liquid to a gaseous state, which is something you don’t see every day—but we were disappointed because all you could see was the shiny burbling liquid on the side of the strange glassware over the high-powered stove, and then a calm pool of the same silvery stuff slowly condensing on the other side, where it was cooler. This is the consternating characteristic of invisibility that has been such a challenge to scientists in the course of figuring out air.
In fact, it’s been challenging all the way to the present day, when you can still find plenty of sources explaining this experiment incorrectly or incompletely. It’s very tempting to start with and focus on explaining the water variation (#3) because it’s so cool and unexpected to see the water being pulled up into the bottle. But to understand what’s happening, you’d better do and explain the first two first. And then you’d better set up the additional ones I’ll explain in a moment.
With the original activity, covering a candle with a jar, the key to understanding is actually in the attempted repeat of the activity: lifting the bottle, relighting the candle, and lowering the bottle over the candle again. If yours works like ours, the candle goes out the instant it reenters the bottle. Lift, light, and lower again: again, there it’s instantly out. Again and again you can do it, and you’ll never get the same long burn as the first time.
Unless you change the air in the bottle. You can do this by waving it, blowing into it, squashing it a few times if it’s plastic, or blowing into a straw stuck into it. Then when you light and lower it again, you get several pleasant seconds of candle light until it goes out again. Be sure you try this yourself.
So the conclusive result of the basic version is that when you let combustion happen in a closed environment, it won’t last long. Once it stops, the air in there is not the same—specifically, the fire can no longer get what it needs to burn. So the flame is doing something to the air in there, such that after a few seconds, the air in the bottle is no good to support more flames.
That’s all you can conclude! Say any more and your pants are on fire!
Scientists over the last 300 years have worked out that the part of air needed to burn something is called oxygen, and that’s what the candle is consuming until there is not enough of it to support burning. But those masters had better labs and more time. All you’ve got is this junk on the table. So feel free to expound on the scientist’s findings about the composition of air, but make a clear distinction: we can get a feel for the truth of those findings from this experiment, but what we can really conclude with our current setup here is severely limited.
But really, this is pretty cool. The air may look the same in there, but it’s now different. Put more air in, and the candle will burn again. Put a hole in the top of the bottle (variation #1), and the air can keep on circulating through, so the candle gets what it needs to avoid dying.
To explain the other variations, we have to bring in a few other astonishing facts, which can be shown with various other simple demos. I hope I needn’t remind you to actually try these yourself and don’t just take my word for the results.
First, when gas gets hot, it expands. Put a balloon over a bottle mouth and then pour hot water on the bottle. The balloon perks up because the air in the balloon-bottle system is expanding with the heat.

Second, when gas gets cool, it contracts. Take the balloon off the mouth of the bottle that’s sitting in hot water, squeeze the air out, attach it firmly again, and then bathe the bottle in cold water and ice.
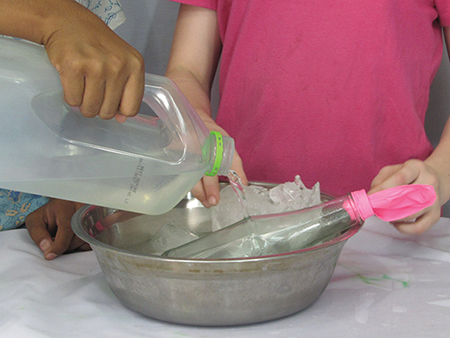
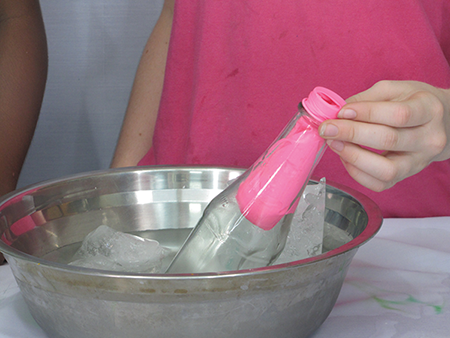
As the air in the bottle contracted, the balloon got sucked into the bottle!
Third, one of the products of combustion is water vapor. Find a small piece of glass, like a pocket mirror, and hold it briefly over the flame of a lighter or candle. (Not too long or you may crack the glass! And make sure you’re not dealing with a plastic mirror!) You can usually see the glass get a small haze of condensation just outside the area hit by the flame.
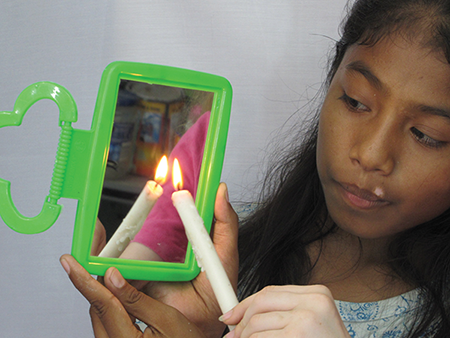
It dries off quickly because it also gets hot, which makes it tend to evaporate again. But this haze is the water being produced by the lighter’s butane or the candle’s paraffin combusting with oxygen in the air, and the important thing is that it is produced as gas and then condenses to liquid on the cooler glass.
Fourth, and most critical to understanding this activity, when water vapor gets cold it condenses into little droplets. When that happens, it decreases in volume 1,000 times. This is the source of some of high school chemistry’s finest demos. Witness the imploding can.
Heat 50 drops of water in an aluminum can over a burner until it’s boiling well.

Invert the can immediately into cold water. Zump! One squashed can.

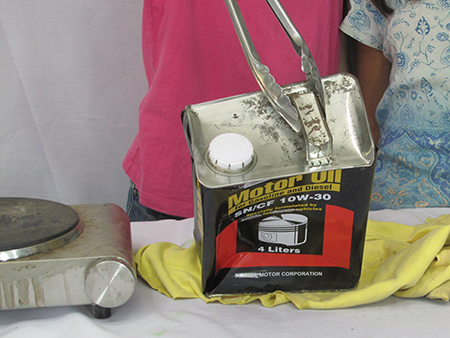
The slow-motion version heats the same 50 drops in a can with a screw top until boiling strong.

Screw on the top and watch the fun begin as it cools.
Paul Doherty used this as metaphor for students who didn’t do their homework, even though it didn’t count for much credit. You’ll be steaming along fine thinking you understand the material, but you’ll begin to feel like this can at exam time.
By the way, it turns out this 1,000× volume quick change with the shift in states of matter is good for more than just wowie-zowie science demos. It also gave force to the Industrial Revolution about 300 years ago. A steam engine takes advantage of the increase in the volume when water turns to gas.
Now put these four facts together to explain variation #2, the capped bottle:
- Candle produces heat and water vapor with its combustion.
- Heat expands the air in the bottle and, together with the produced water vapor, pushes some air out the mouth even before you get the lid screwed on.
- Water condenses on the sides of the bottle (can you see it?) after the candle goes out and the bottle cools, reducing that part of the volume of the bottle’s air 1,000 times.
- Air in the bottle also cools, reducing its volume by a smaller ratio.
- Atmospheric pressure, still pressing away as normal on the outside of the bottle, crushes it a bit to make up for that lost volume on the inside.
Now variation #3, the rising water show:
- Candle produces heat and water vapor with its combustion.
- Heat expands the air in the jar and together with the produced water vapor pushes some air out the mouth, making bubbles in the bowl of water. (Did you see them?)
- Water condenses on the sides of the jar after the candle goes out and the bottle cools, reducing its volume 1,000 times.
- Air in the jar also cools, reducing its volume by a smaller ratio.
- Atmospheric pressure is still pressing away as normal outside the jar and the surface of the water, so the water is pushed up into the jar to make up for that lost volume.
Let’s take a look at the explanation fallacies that pop up so often. A few sources I’ve seen simply say (falsely) that the oxygen is “used up,” dematerializing so to speak, and the water flows in to take its place. The authors (and editors) of these sources need to spend some quality time with Uncle Lavoisier, who said (after completing a great many experiments in the 1700s) that matter is never gained or lost but rather changes form. In other words, that oxygen ain’t gone, my friend; it’s right there in the CO2 and the H2O.
Some sources confidently state that the reason the water rises is because carbon dioxide is produced in combustion (true) and carbon dioxide is more soluble in water than oxygen (also true: 20 to 30 times more soluble). Thus, when extra carbon dioxide is produced, it gets quickly dissolved into the water, which rises to make up for that lost volume.
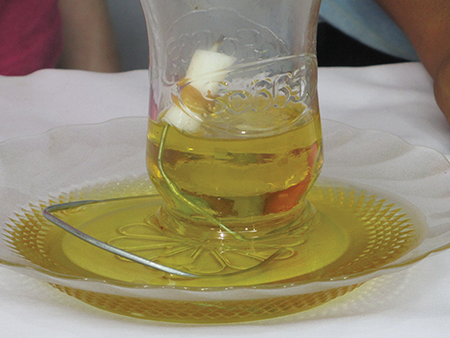
Well, our variation #2 doesn’t involve any water at the base at all, but the bottle still gets squashed. Hmm. Another way to disprove this one is by replacing the water with oil, which should have a different solubility but gives a similar result. Try it!
Finally, a few sources, including big guns like Bill Nye and Steve Spangler, don’t mention the state change at all but blame the water rise on the air heating and cooling. I’m convinced that simple expansion and contraction with temperature can’t explain all the bubbles or the rise. I base that on the balloons’ movement in the earlier demos on the ketchup bottle with hot and cold water. Also, the timing of the surge of water doesn’t seem to follow the temperature change, though it does seem to mimic the imploding can and other state change demos I’ve seen.
But the best way to understand this extraordinary little experiment is to figure out a way to light the candle already inside the bottle!
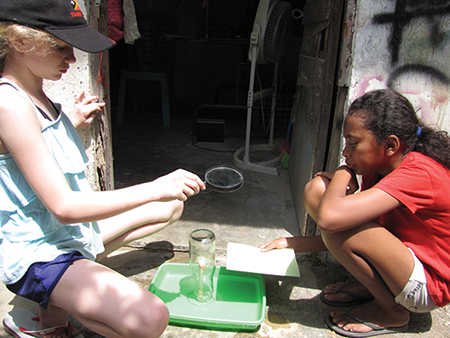
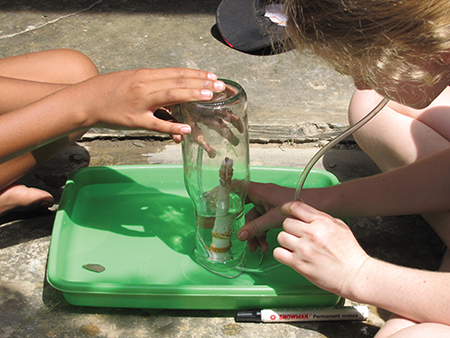
Variation #4: Light the Candle from Outside the Bottle
It helps to arrange a tropical sun to make this happen. If you’ve got a good, powerful sun, you can light the candle at midday with a magnifying glass through the side of the bottle. Wow.
By the way, Mayow used this same technique to heat an enclosed substance in 1664, but I still say I discovered it, because when I thought of it here, while sweating away an afternoon in the lab, I hadn’t read about him yet! It’s amazing how often the same thing can be discovered!
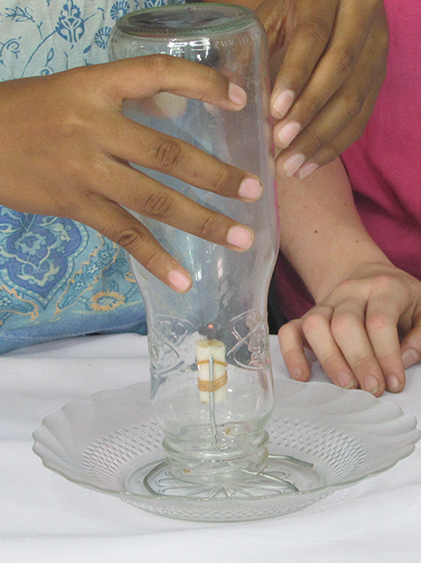
We found it hard to light the candle wick directly, so we learned to mount a match just beside the wick, and then use the magnifying glass to ignite the match head, which then ignites the candle wick.
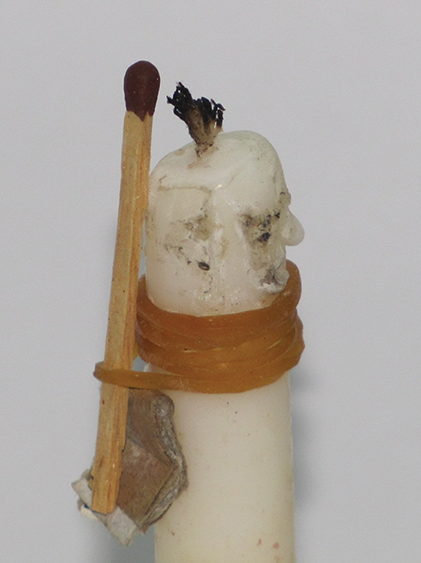
We put the rubber bands on first, and then jammed the match in parallel to the candle. Note the little nub of cardboard at the bottom that gets the match angling over near the wick.
If you hold a piece of paper at the side of the bottle, you can gauge the approximate distance to get the focus right at the match head.

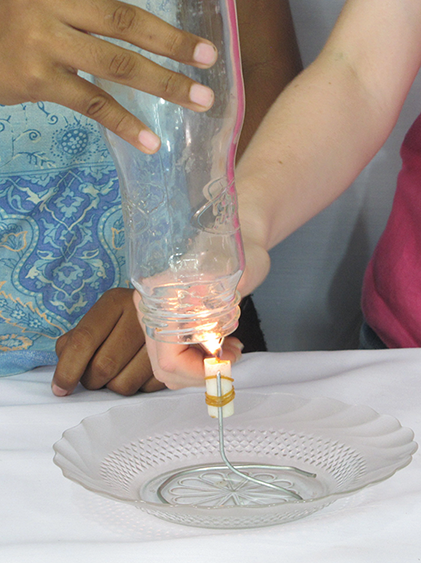
It’s not super easy, because the glass of the bottle also bends the light, making the focus in a slightly different place, and it also absorbs some of the radiation that you are wanting to concentrate in order to light the candle. But with enough sun—and mercy, do we have plenty of sun here—it lights.
If yours works like ours did, you’re sure to see plenty of bubbles upon ignition, and then the water rises to the about same level or higher than it did in variation #3.
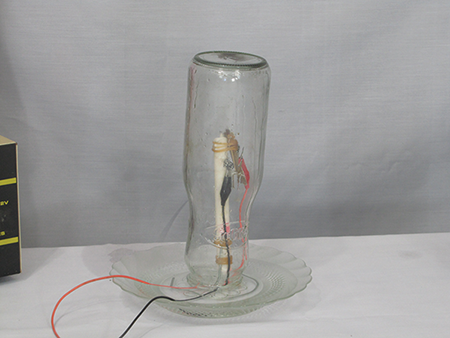
By the way, if you don’t have access to the tropical sun, you can use a model rocket ignitor for your candle, or use steel wool to make your own electric ignitor around a match, like this:

I’ll let you work out the details, but here is a photo of ours, just before ignition.
Variation #5: Suck In Some Water First
This one is the real kicker: air never escapes from the bottle, but you get to watch as the water level changes back and forth. Stick a small tube or long straw up into the bottle as you lower it over the candle.
Now suck out some air from the bottle and watch water move up into the bottle to take its space.
Quickly withdraw the tube, leaving the water level high up the neck.

Then light the candle again and see what happens.

I couldn’t capture the process with a photo, but “inarguable” is the word that comes to my mind. We saw the water go down, then come slowly back up to the same position. As with most paradoxes, once you’ve got the right perspective and enough information, there’s no paradox at all.
If you’re still not tired of this one (as I’ll never be, long as I may live), you can try two more variations:
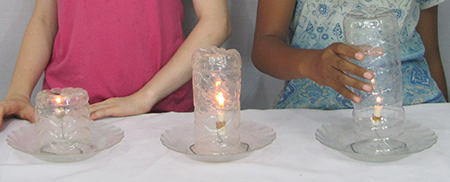
Variation #6: Different Bottles Get You Different Results
Remember your science: to see the influence of one variable, you have to keep all the other variables constant. So make sure you have three candles exactly the same size and try them beneath three different-sized bottles.
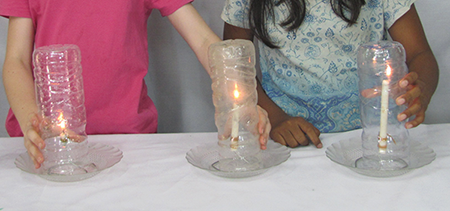
Variation #7: Different Candles Get You Different Results
Now change the variable: get three bottles exactly the same and arrange three candles of different heights.
What did you discover? What other experiments can you think of to shed more light on air (without burning the house down)?